Setting up Auth0 SSO for Bitrise
Add SAML SSO to your Bitrise Workspace using Auth0.
This guide provides instructions on setting up SAML SSO using Auth0.
SAML SSO restrictions
SAML SSO is only available for a Workspace with the Velocity or Enterprise Build plans.
Since the SAML SSO feature is tied to the above plans, if you decide to downgrade, you will lose this feature. All Workspace members will receive an email about the downgrade and you’ll have two weeks to re-upgrade if you wish to use SAML SSO in your Workspace again.
Before connecting SAML SSO to your Workspace:
-
An Auth0 administrator who is logged into Auth0 is at hand.
-
Be aware that only the Workspace owner can set up SAML SSO to a Bitrise Workspace.
-
Your account on Bitrise has a Workspace with the Velocity or Enterprise plan.
You will need to:
Creating Bitrise as a web application on Auth0
-
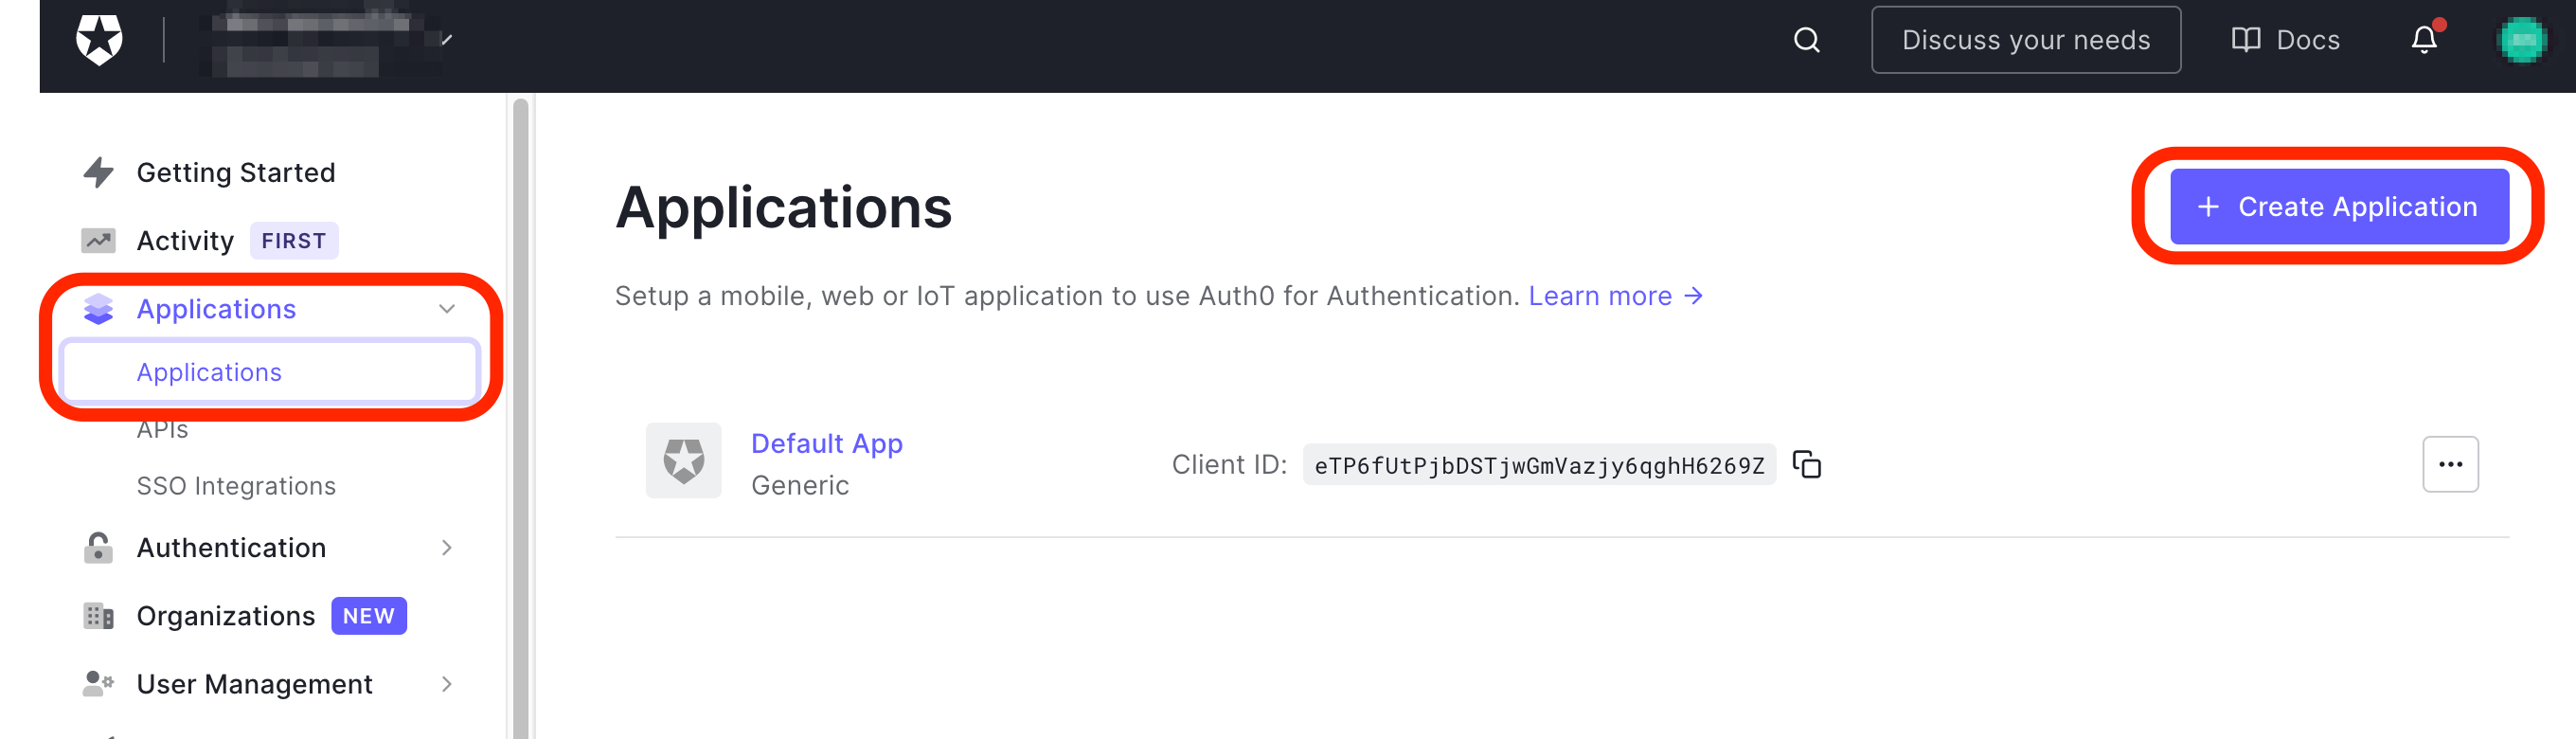
Log into Auth0 as an admin.
-
Click Applications on the left menu bar then click the + Create Application button on the right hand side of the Applications page.
-
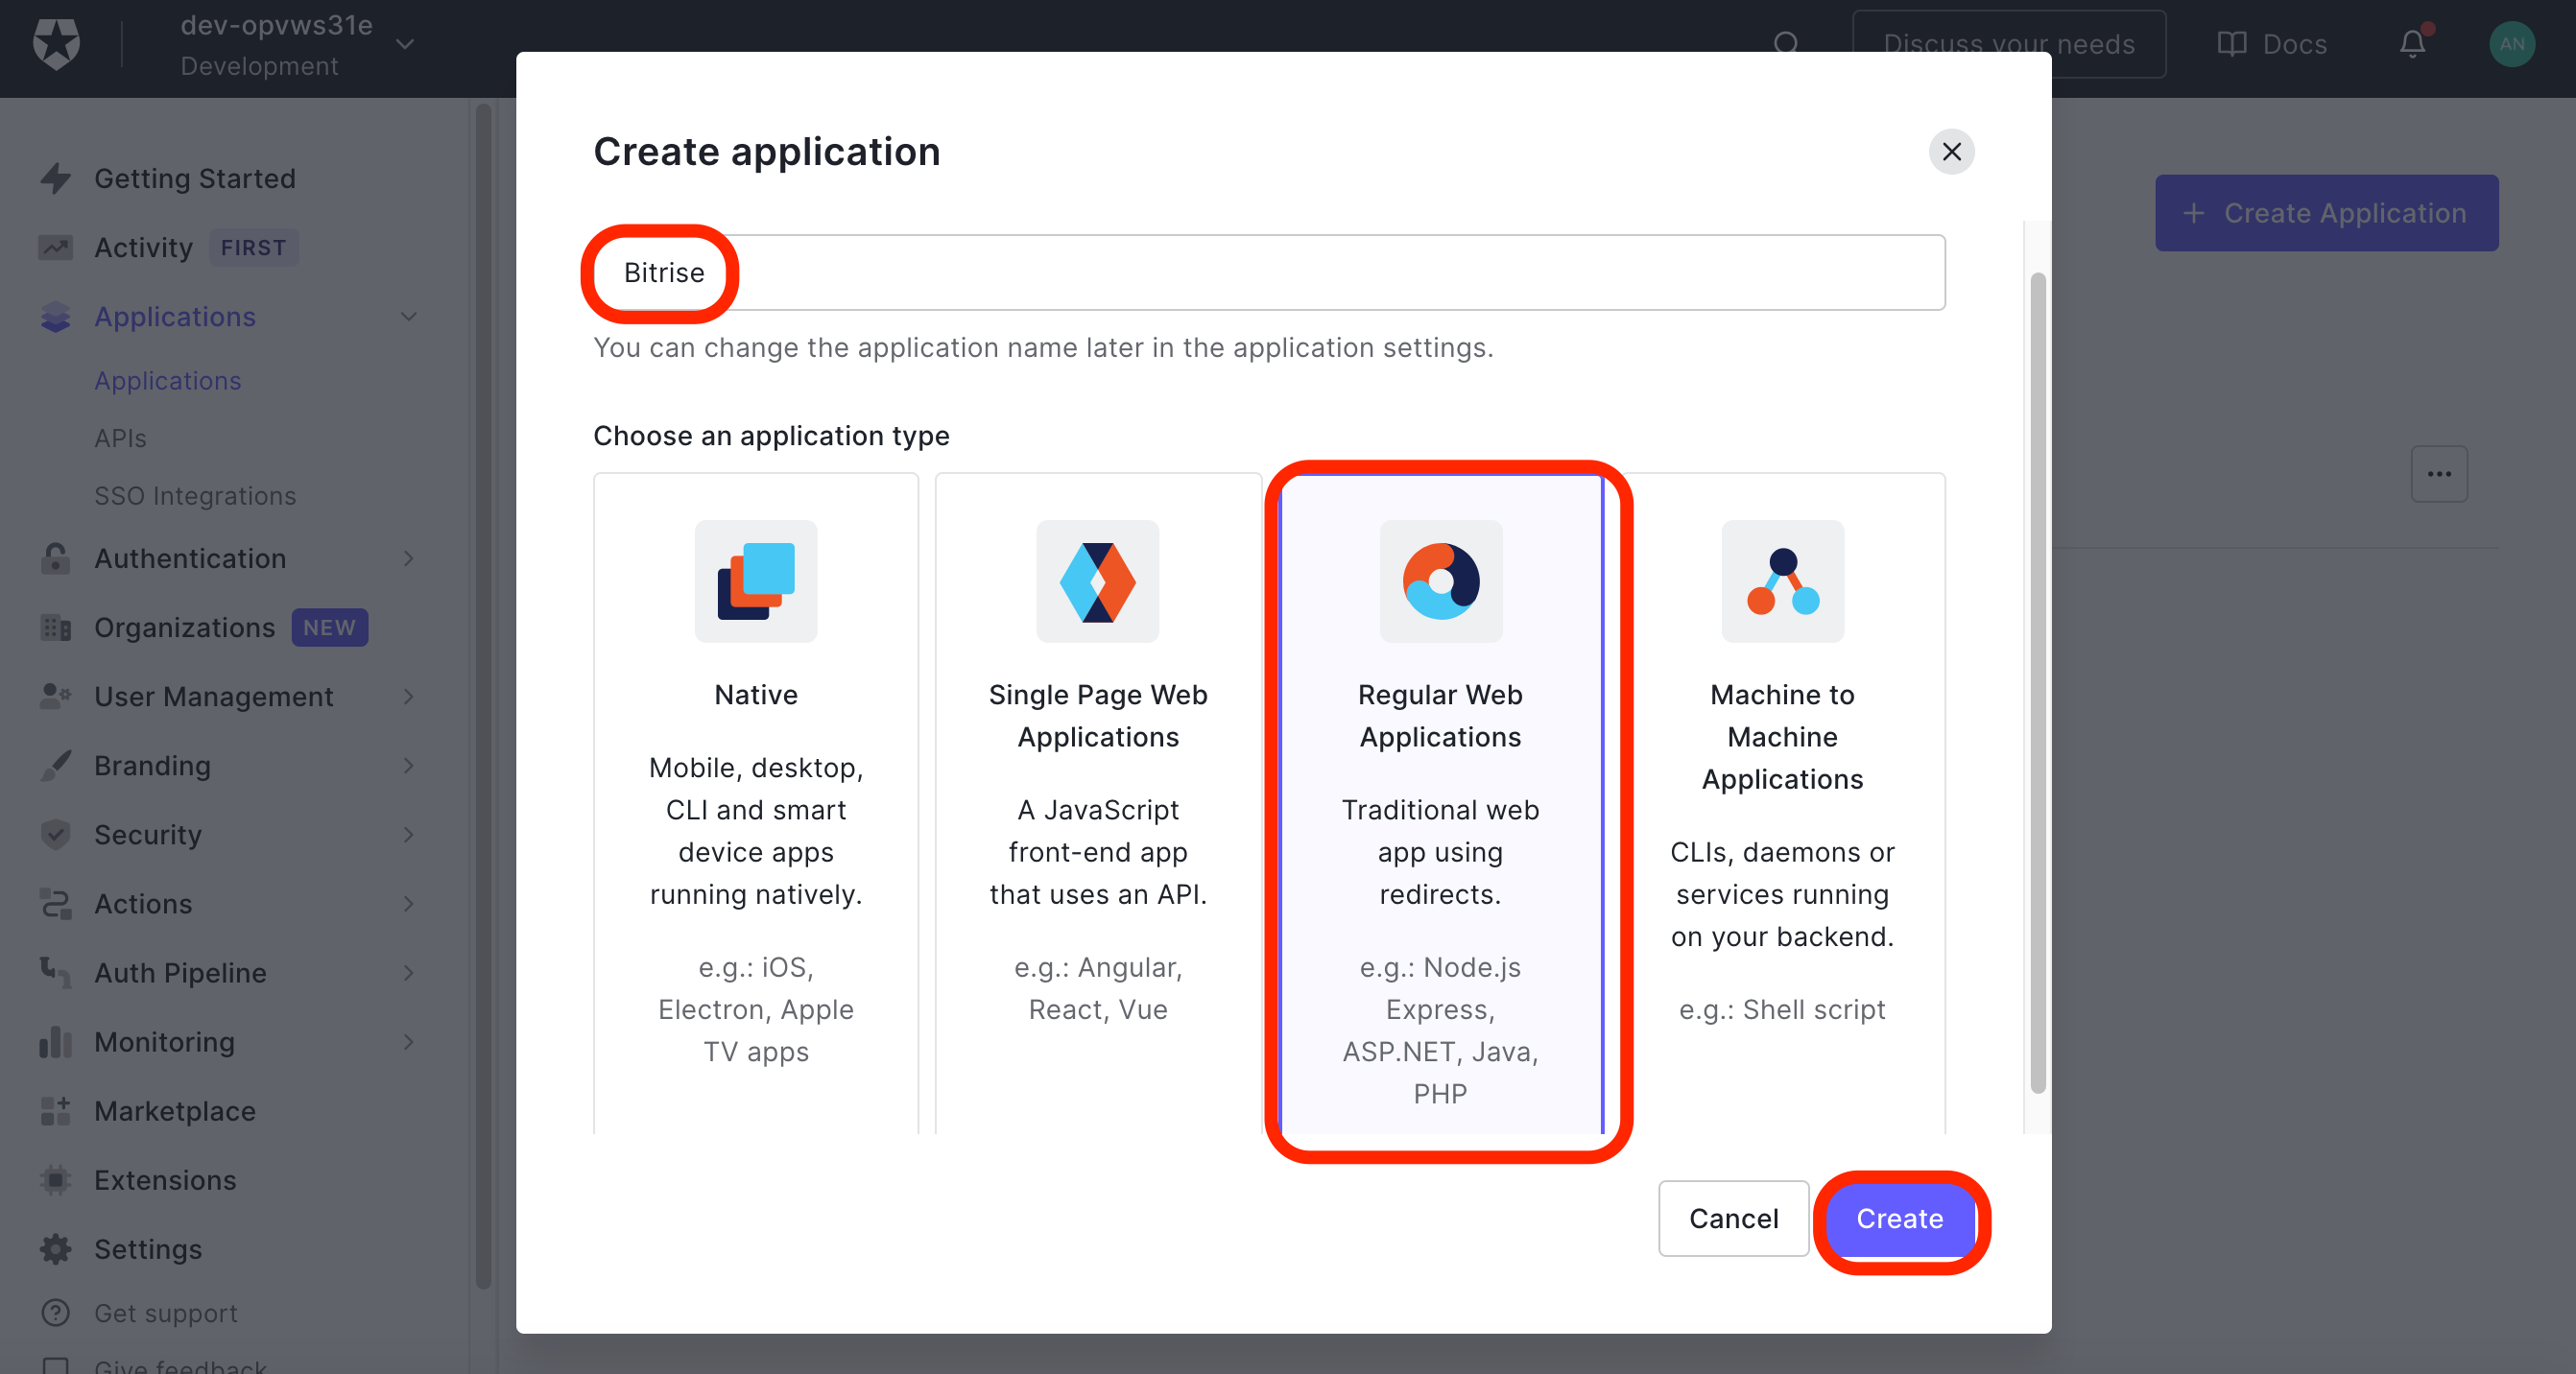
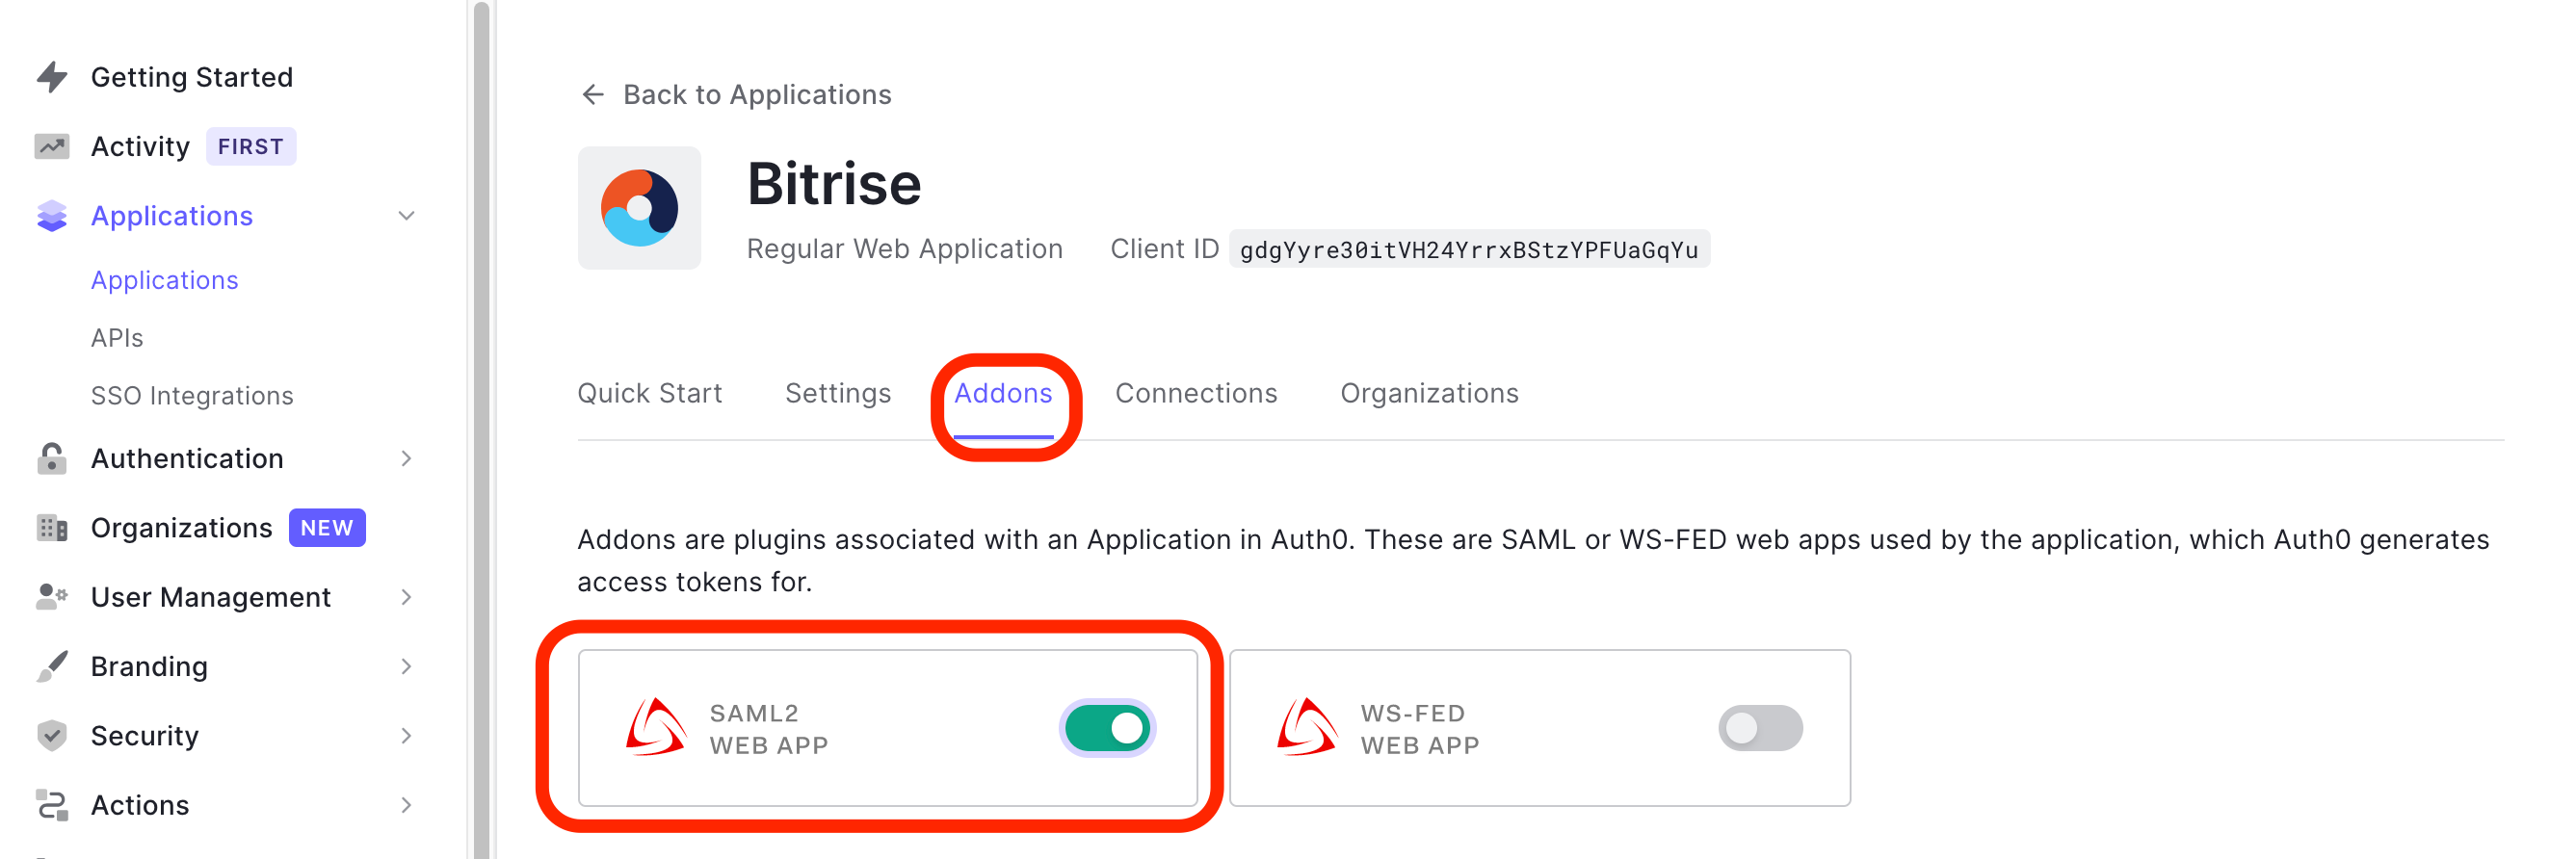
On the Create application window, type Bitrise in the Name field. In the Choose application type select Regular Web Applications, and click the Create button.
-
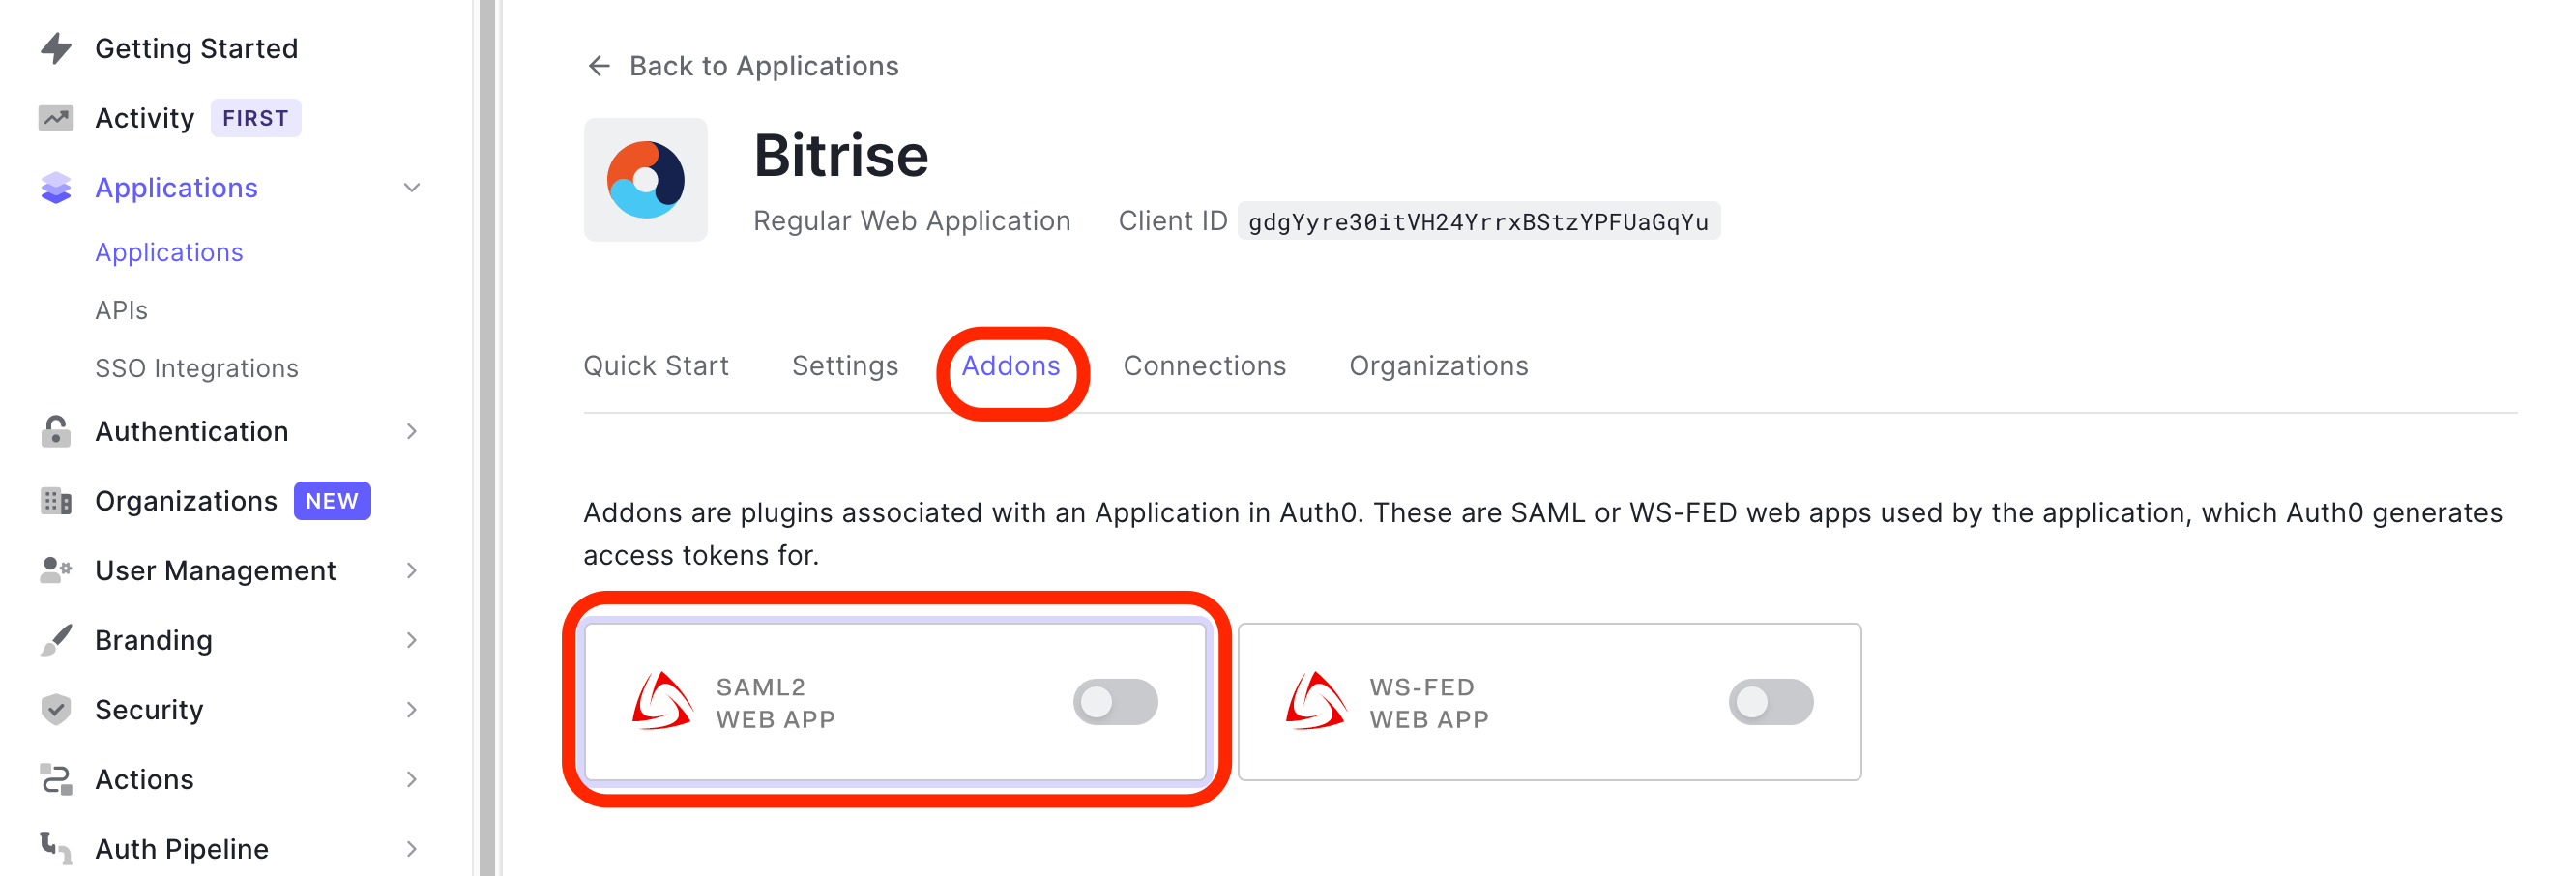
You are landing on your newly created Bitrise app’s Quick Start page. Click the Addons tab. Toggle the SAML2 WEB APP’s switch to the right. This will take to to the Addon: SAML2 WEB APP page automatically.
-
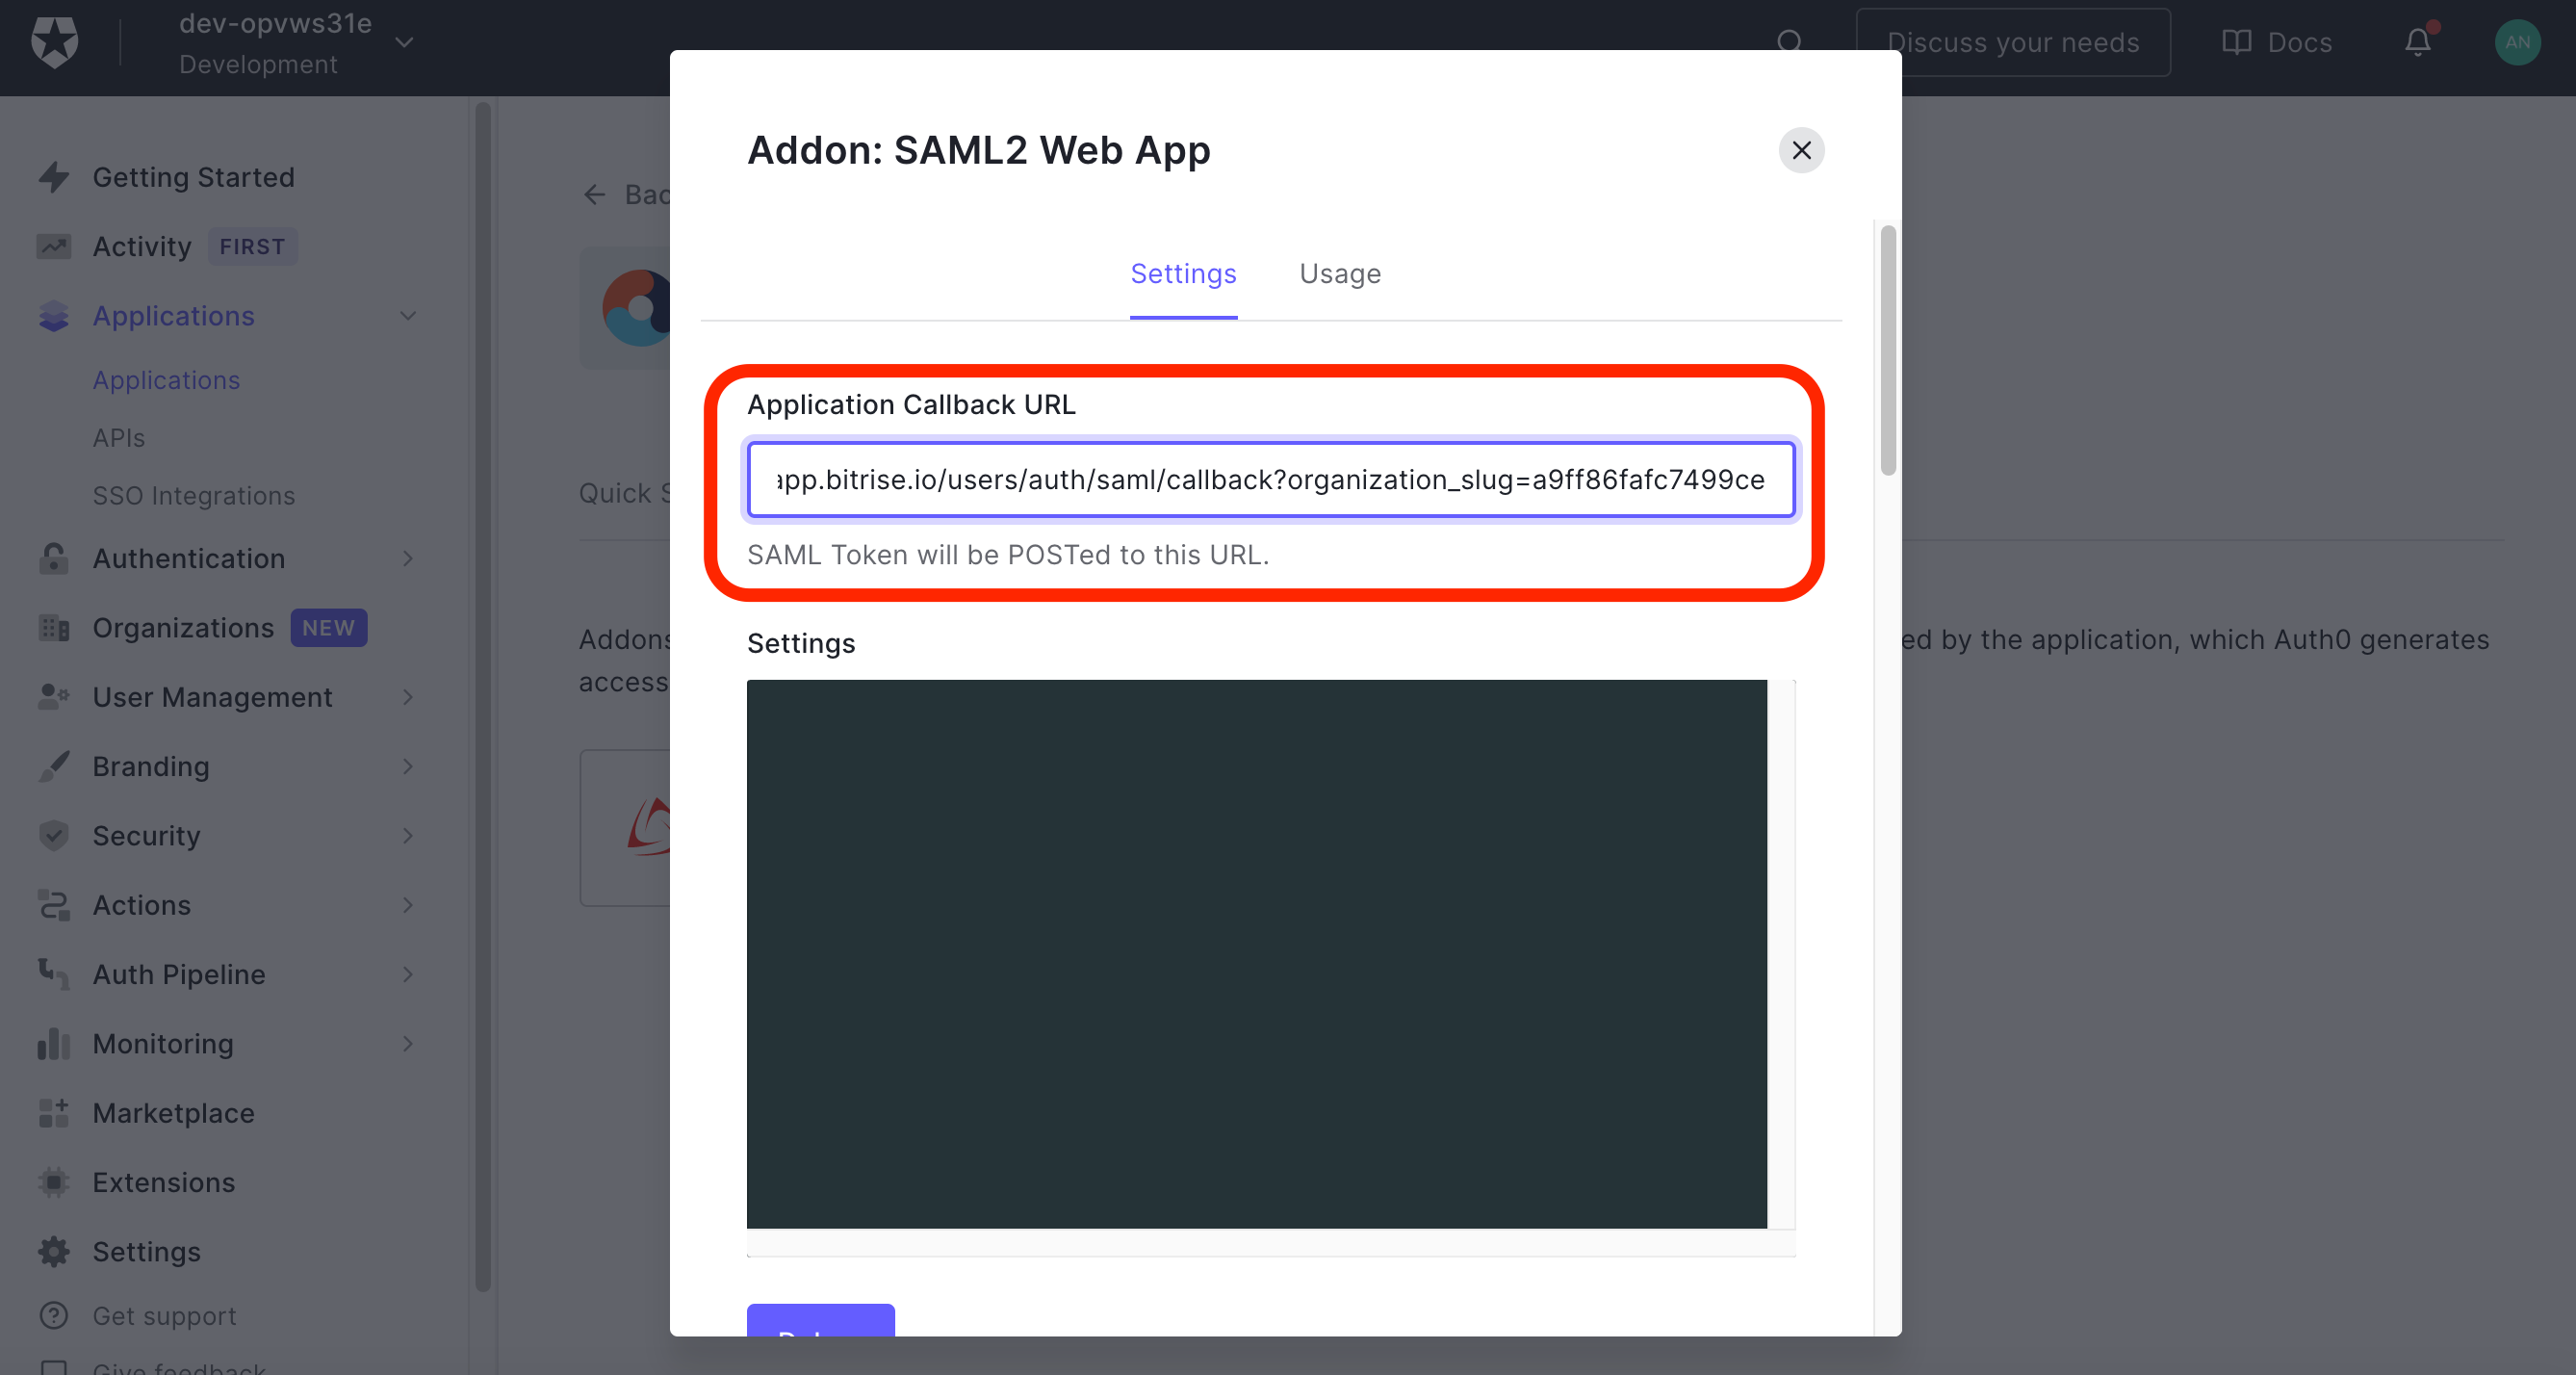
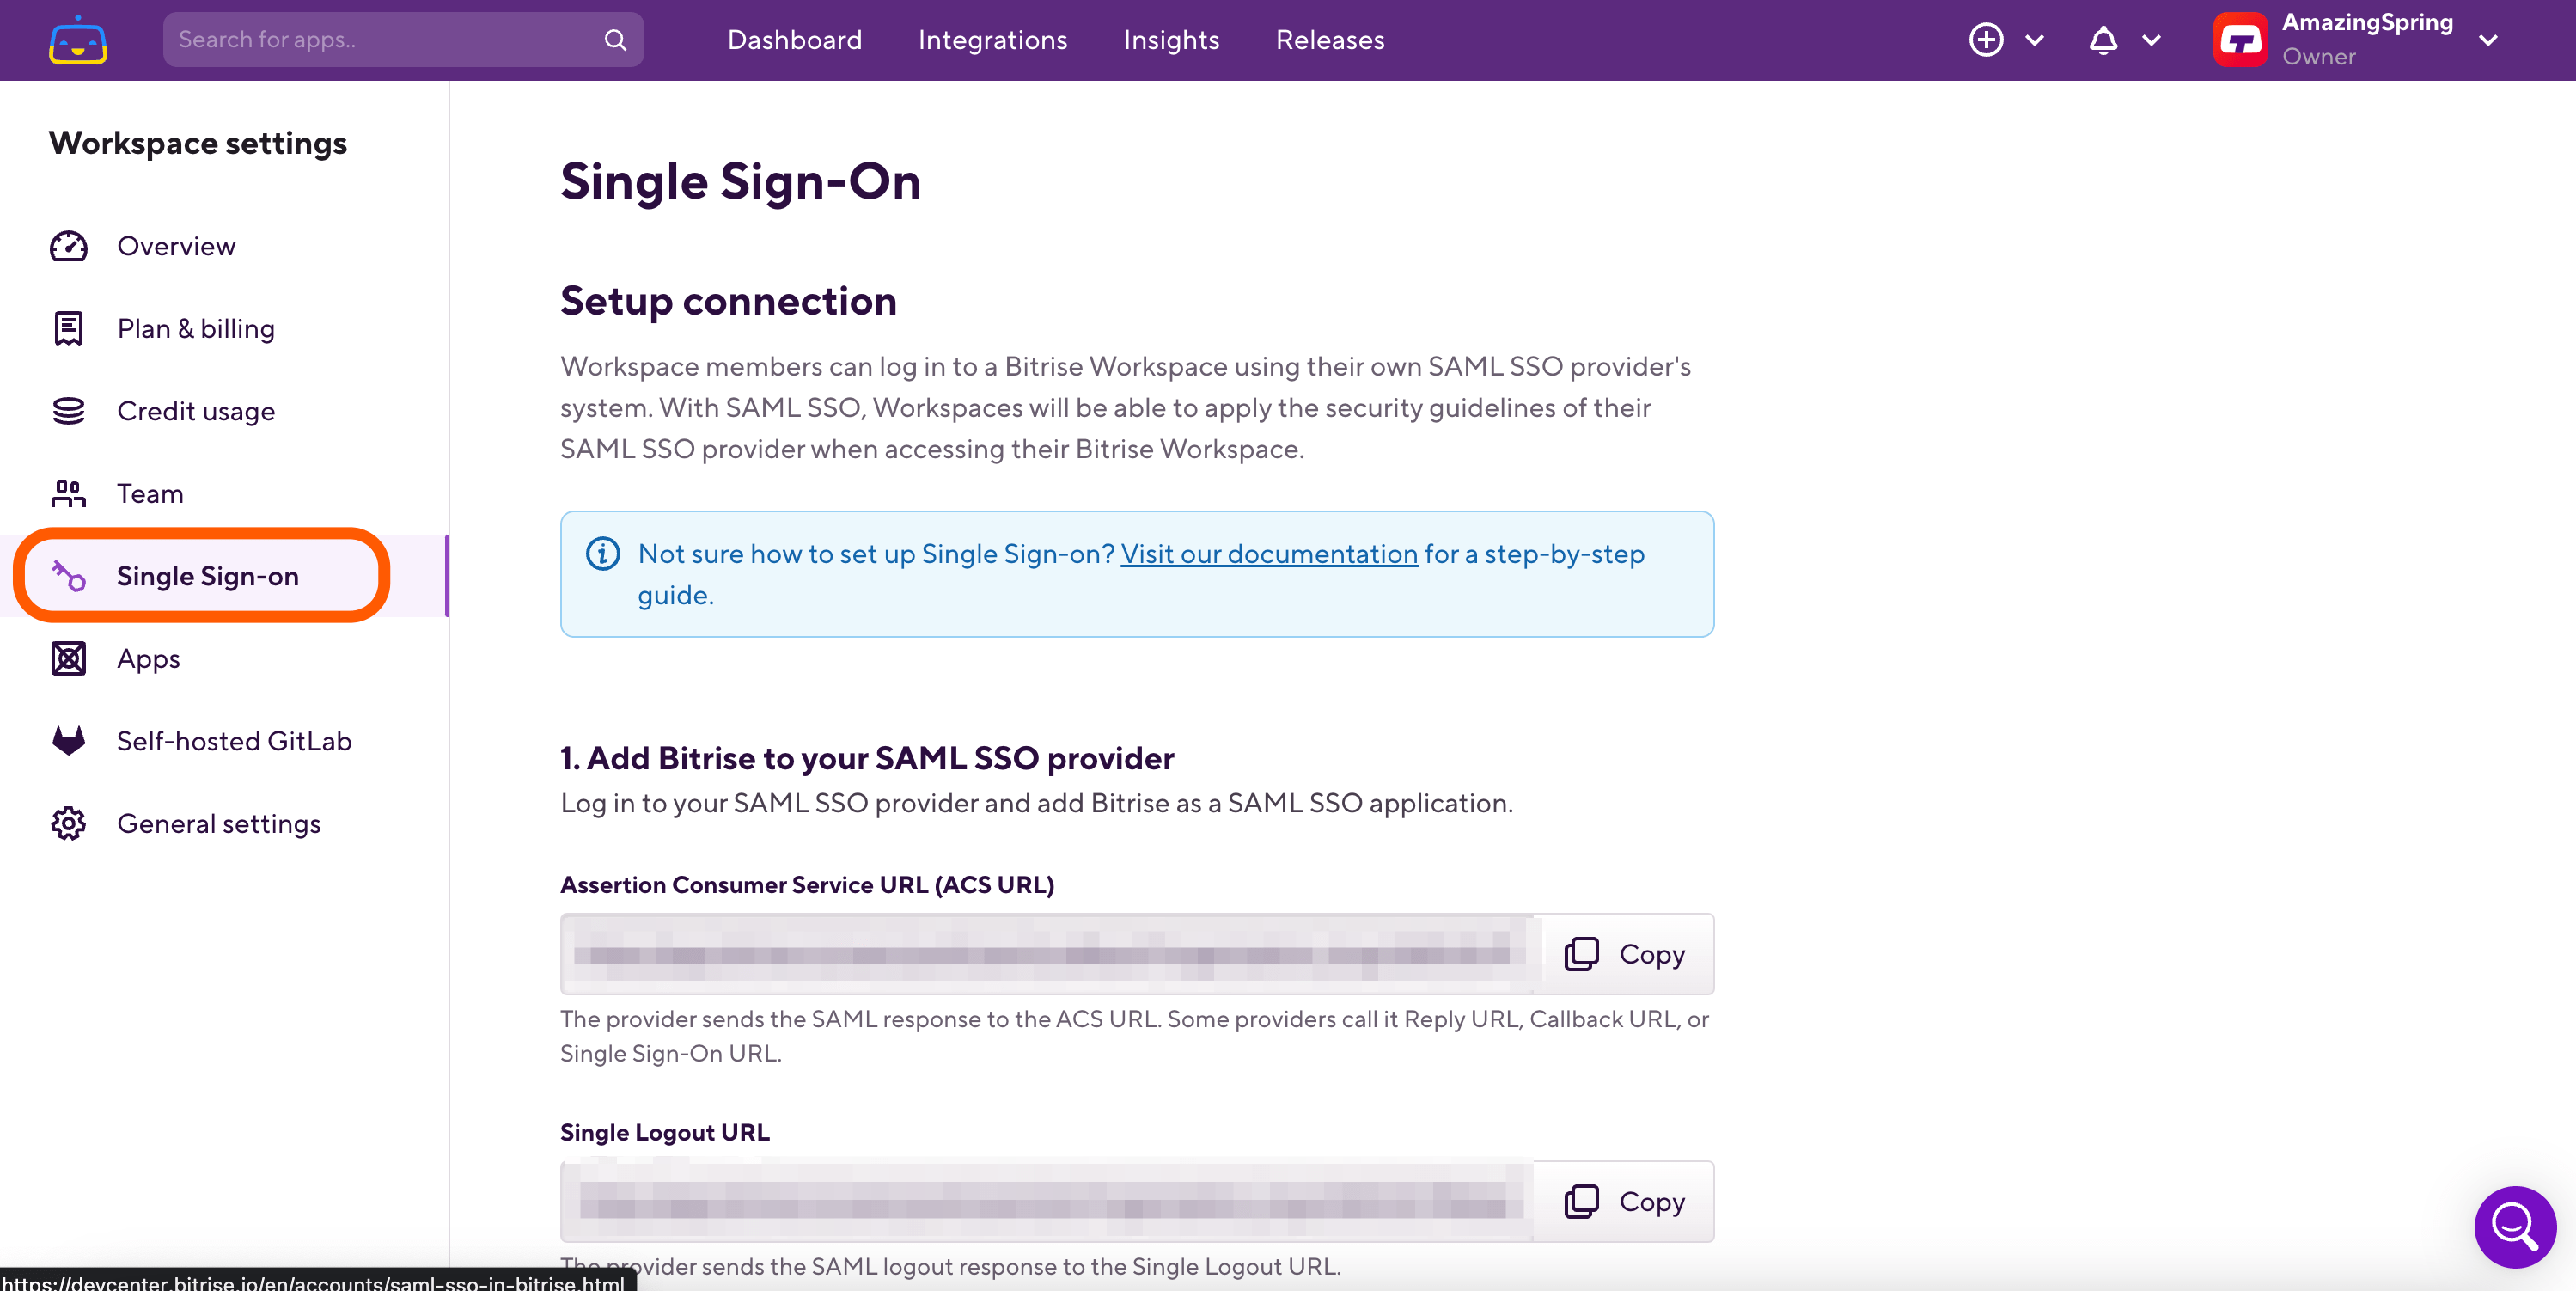
Copy the Assertion Consumer Service URL (ACS URL) from Bitrise and paste it into the Application Callback URL field on the Settings tab of the Addon: SAML2 WEB APP page. Scroll down to the bottom of the Addon: SAML2 WEB APP page and hit SAVE.
-
Go back to the Addons page where you can find the switch turned on.
Retrieving SAML SSO information from Auth0
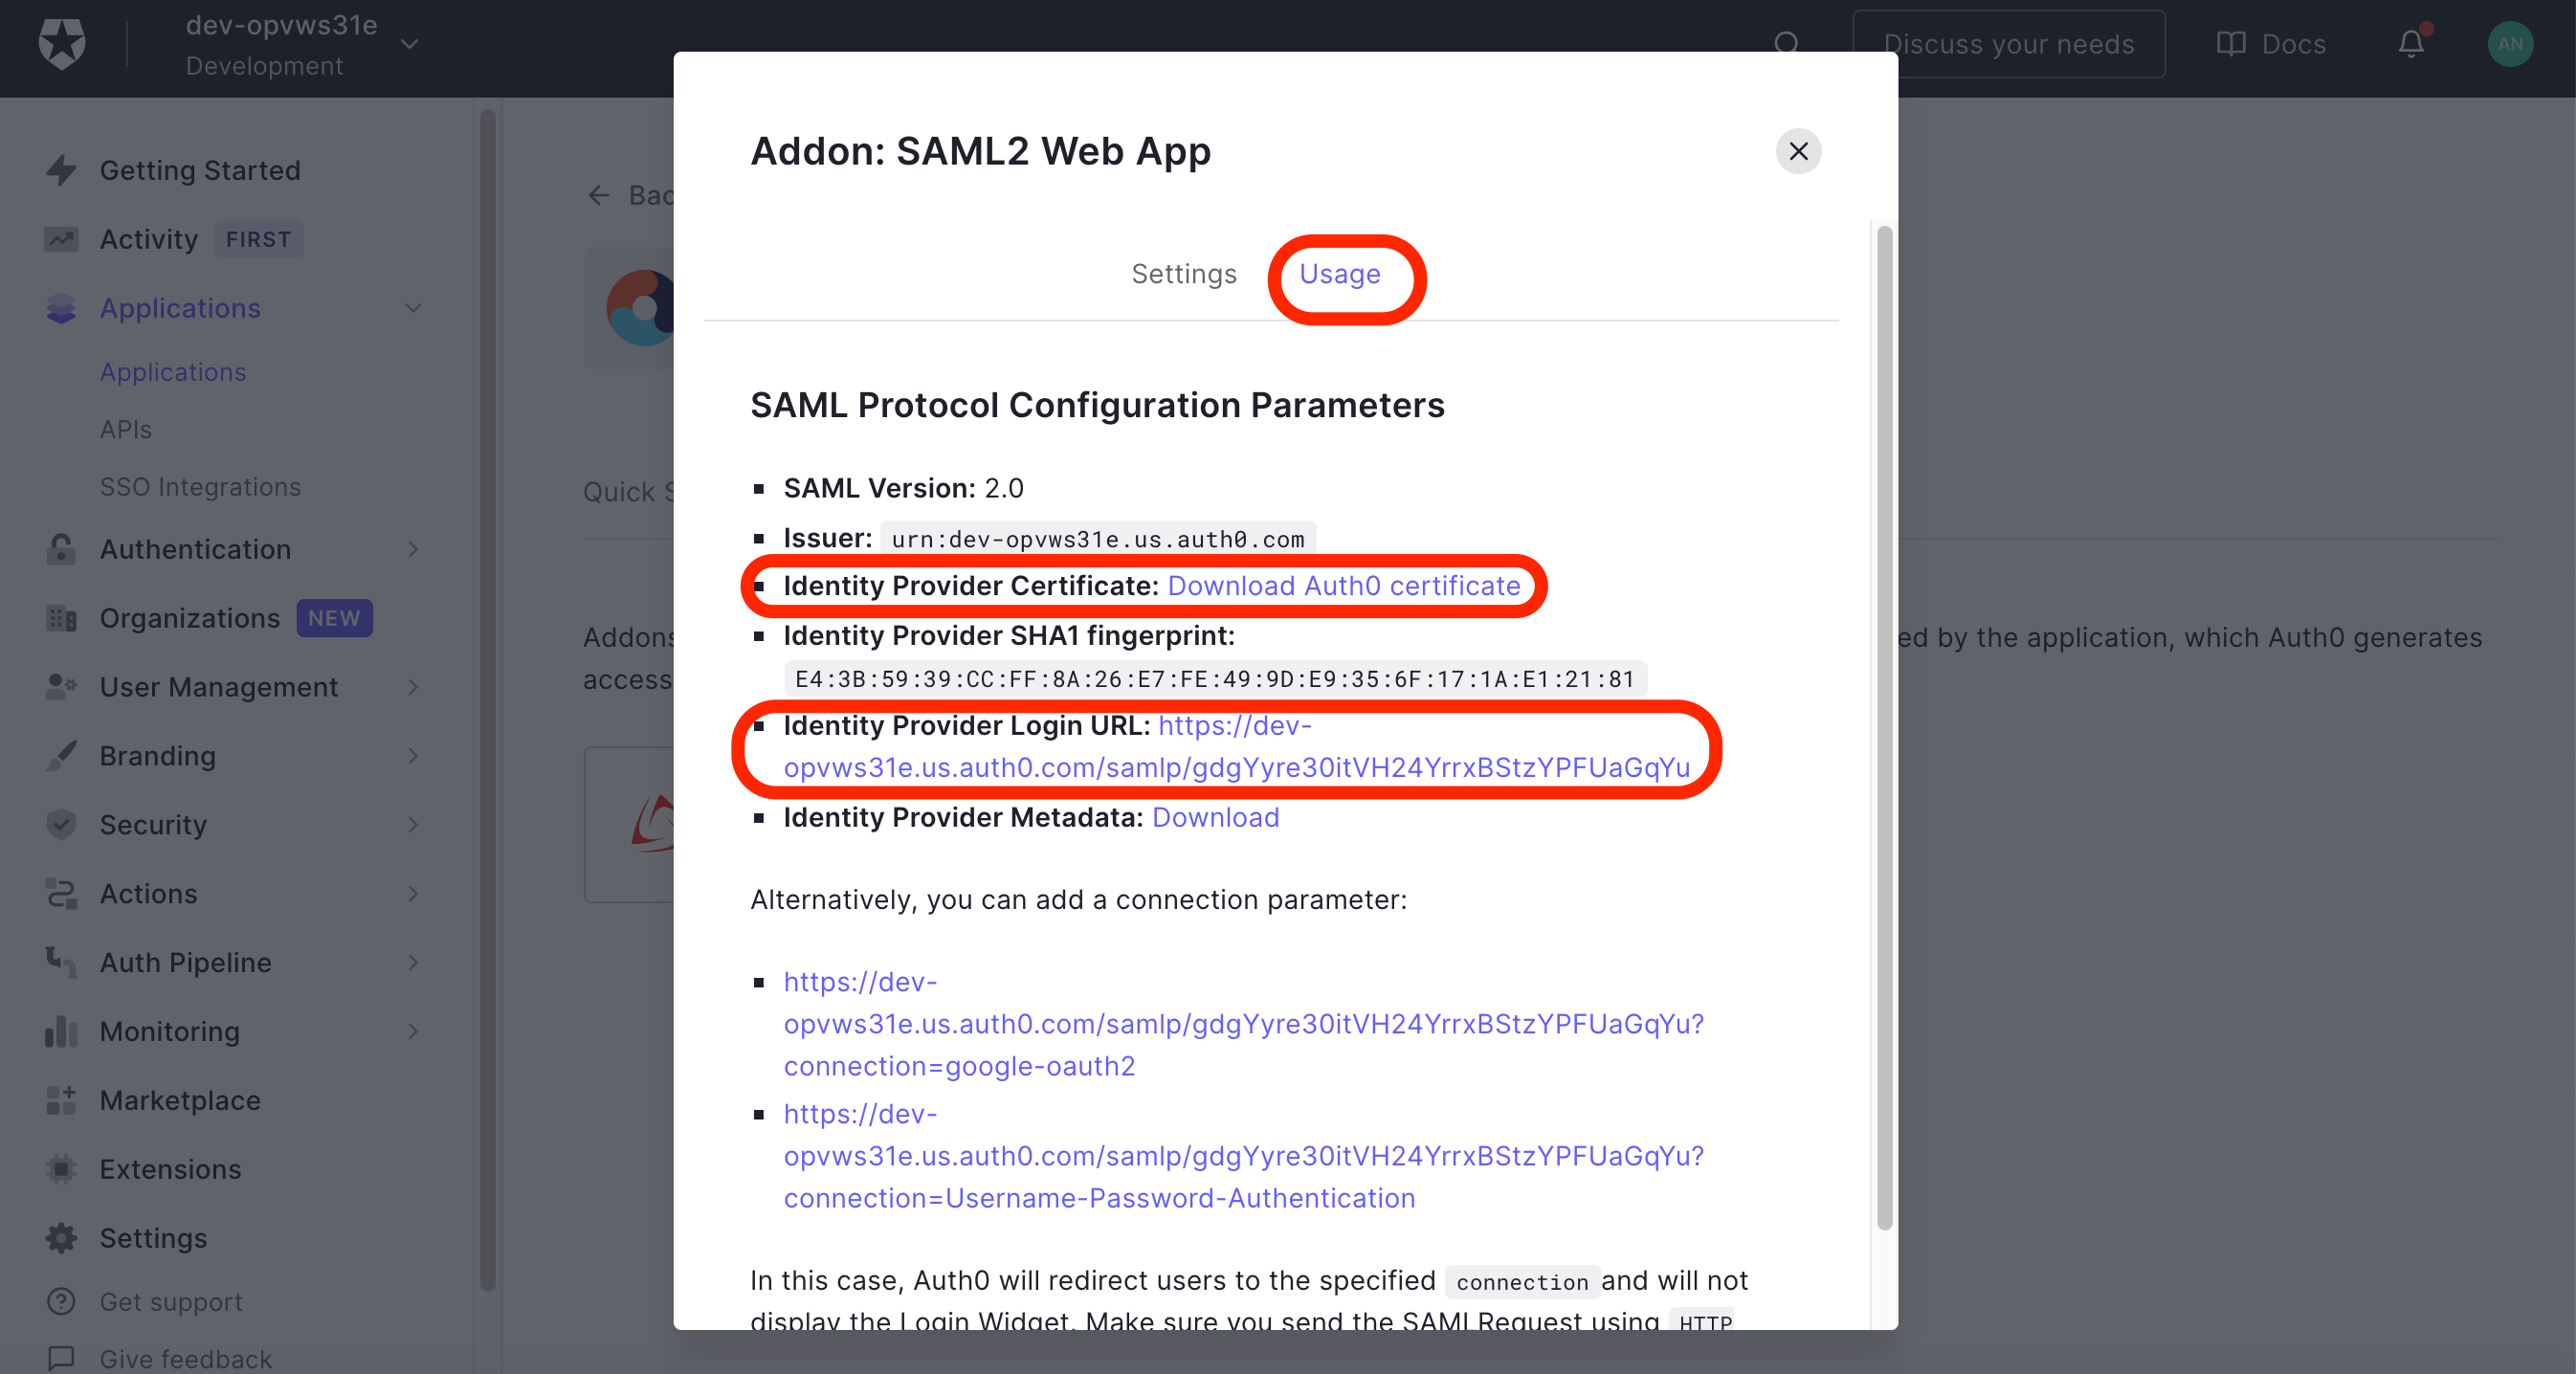
Once you have enabled Bitrise as a web application on Auth0, it’s time to grab the certificate and the Identity provider’s unique login URL to finish up the SAML configuration on Bitrise.
-
On Auth0, go to Application, then select the Addons tab to find your enabled Bitrise app.
-
Click the SAML2 WEB APP web app and select the Usage tab. Click on the Download Auth0 certificate link next to the Identity Provider Certificate label. Open the downloaded certificate file and copy its content into the SAML SSO provider certificate field of Bitrise or upload the file itself from your local computer. Go back to Auth0 and copy paste the Identity Provider Login URL into Bitrise’s SAML SSO provider Single Sign-On URL (SSO URL).
-
Click Configure SSO button on Bitrise.
-
Now you can close the dialog on Auth0.
Setting up a mapping rule for your Bitrise app’s Client ID
Bitrise authenticates SAML SSO users via email address so before you’d test SAML SSO, make sure you create a new mapping rule on Auth0. This way you map Auth0 Client ID to email for successful SAML authentication on Bitrise.
-
On Auth0, click the Auth Pipeline on the left menu bar. Click Rules.
-
Click + Create to set up a new mapping rule.
-
On the Pick a rules template page, click <> Empty rule.
-
Add the following codeblock to the Script box: You will need your new Bitrise app’s Client ID which you can get on the Applications’ page.
function mapSamlAttributes(user, context, callback) { if (context.clientID === '{your app's clientID'}') context.samlConfiguration.mappings = { "http://schemas.xmlsoap.org/ws/2005/05/identity/claims/nameidentifier": "email" }; } callback(null, user, context); } -
Click Save changes.