最初のアプリを追加する
Bitriseにアプリを追加するということは、ビルドを実行できるようにリポジトリへのアクセスを設定することを意味します。プロジェクトスキャナーはプラットフォームタイプを判別し、アプリをビルドしてデプロイするためのデフォルトのワークフローを生成します。
を追加する アプリ Bitrise へのアクセスとは、ビルドを実行できるようにリポジトリへのアクセスを設定することを意味します。プロセス中に、私たちはまた、 プロジェクトスキャナー アプリのプラットフォーム タイプ (iOS など) を検出し、デフォルトを生成します。 ワークフロー 必要なすべてを備えた 手順 アプリをビルドしてデプロイします。
-
CI 設定で新しいプロジェクトを追加し、Git リポジトリをプロジェクトに接続します。
その過程で、私たちも実行します プロジェクトスキャナー プロジェクトのプラットフォームタイプ (iOS など) を検出し、デフォルトを生成します ワークフロー 必要なものがすべて揃っています ステップ アプリをビルドしてデプロイする方法。
-
新しいリリース管理アプリによる新規プロジェクトの追加: Adding a new app to Release Management.
Bitriseの各プロジェクトは、 ワークスペース。
プロジェクトスキャナー
プラットフォーム/フレームワークをサポートするということは、プロジェクトスキャナーがアプリのタイプを検出し、そのタイプに基づいて基本的なBitrise構成をセットアップできることを意味します。ビルド方法に関係なく、他のアプリも追加できますが、手動で構成する必要があります。
このガイドでは、Bitriseに新しいプロジェクトを追加する方法を説明します。
-
で ダッシュボードをクリックし、 ボタン。
-
[選択] ビットライズ CI の設定。
リリース管理
選択できます アプリを追加します。 リリース管理に新しいアプリを追加する手順に進みます。ここからは、次のガイドに従うことができます Adding a new app to Release Management
-
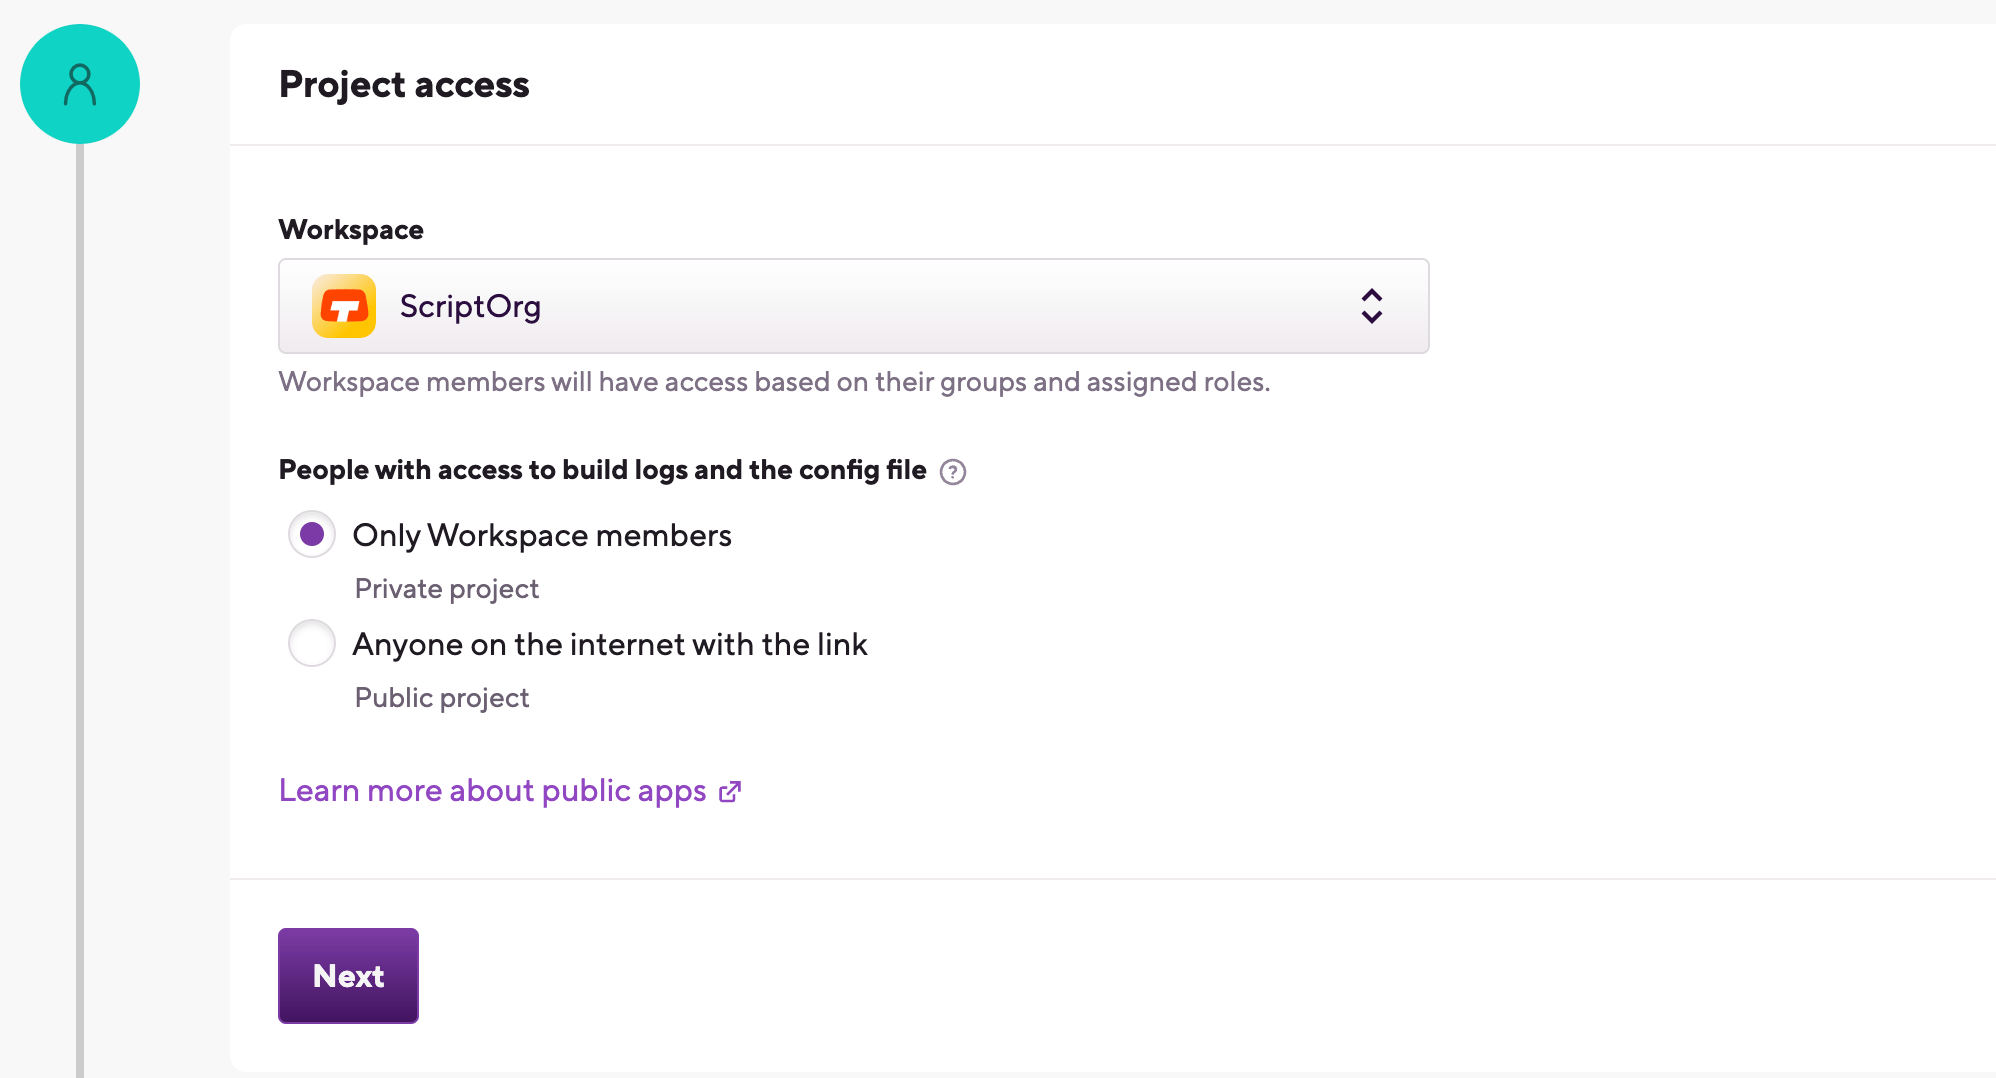
プロジェクトを所有するワークスペースを選択します。
-
プロジェクトをプライベートまたはパブリックに設定します。この設定は後で変更することはできません。
-
プライベートプロジェクトには、ワークスペースメンバーのみがアクセスできます。プロジェクトの詳細を見るには認証が必要です
-
パブリックプロジェクト 設定ファイルとビルドログを、リンクを知っているすべての人に公開してください。
-
-
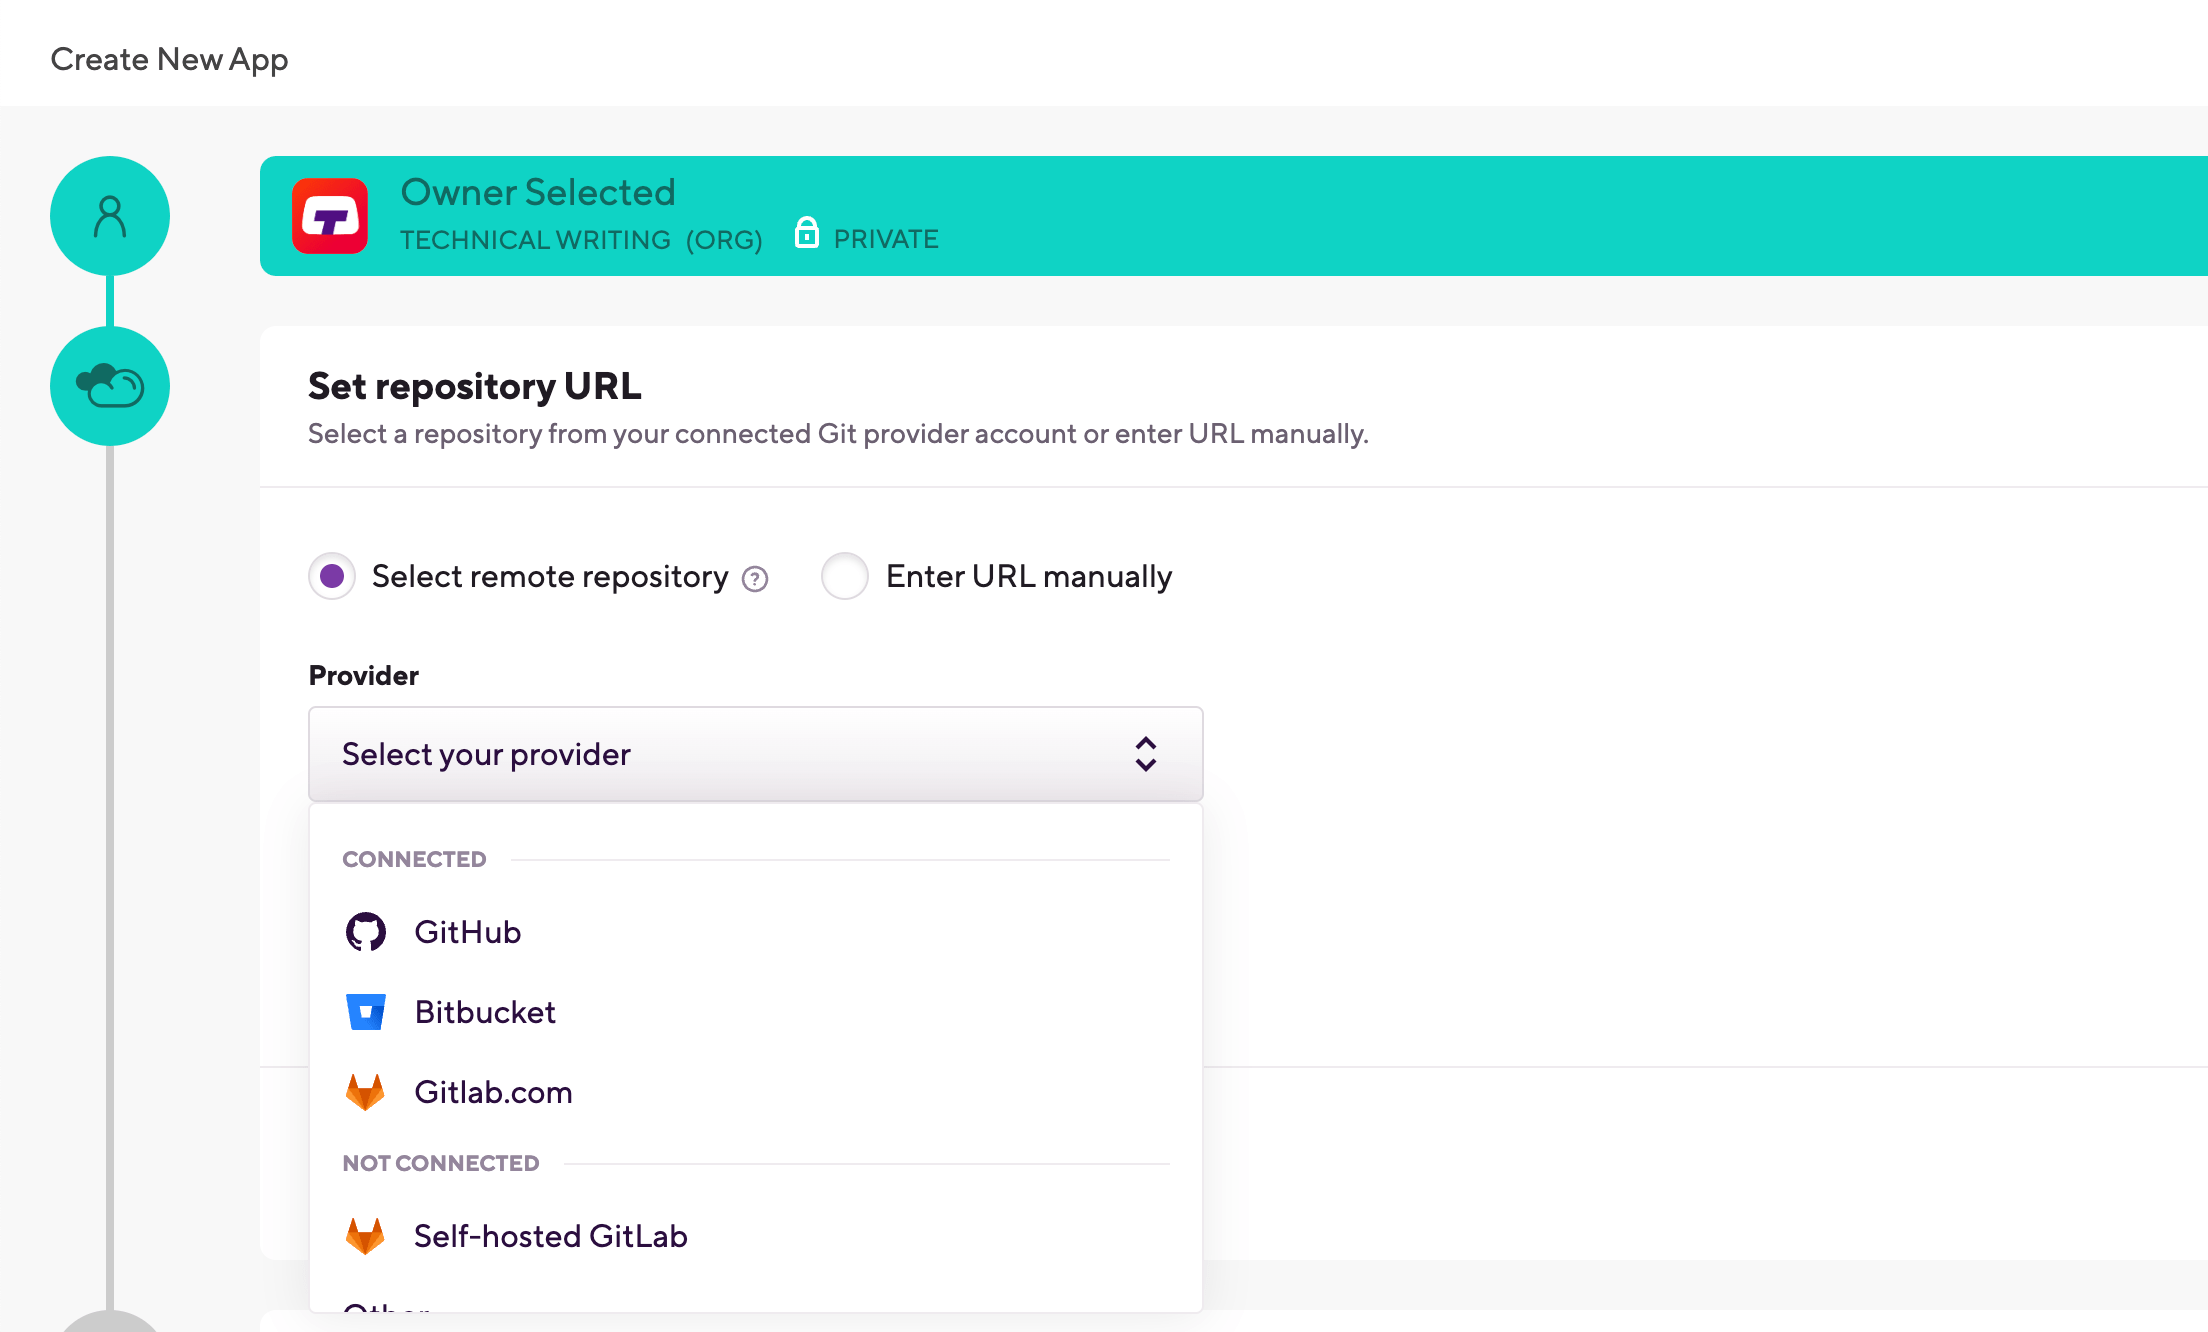
リポジトリを接続します。次のことができます。
-
GitHubアカウントまたは組織を経由してBitriseに接続してください GitHub アプリインテグレーション そして、利用可能なリポジトリを選択します。GitHub リポジトリを使用している場合は、この方法を強くお勧めします
-
GitプロバイダーのアカウントをOAuthアプリケーション経由でBitriseに接続する そして、利用可能なリポジトリを選択します。
-
リポジトリ URL を手動で入力します。
-
-
Bitriseがリポジトリにアクセスできるように認証を設定します。その方法はプロジェクトの種類によって複数あります
-
公共プロジェクトは承認を必要としません。
-
経由でアクセスされるプライベートプロジェクト GitHub アプリケーションインテグレーション 追加の認証は必要ありません。
-
OAuth アプリケーション経由でアクセスする SSH URL を使用するプライベートプロジェクトには、 SSH キーの設定。Bitriseはこれを自動的に行うことも、独自のSSHキーペアを作成して登録することもできます
-
OAuth アプリケーション経由でアクセスする HTTPS URL を使用するプライベートプロジェクトには、 個人アクセストークンによる HTTPS 認証。のみのトークンの使用をお勧めします 読んでください。 アクセス。

-
-
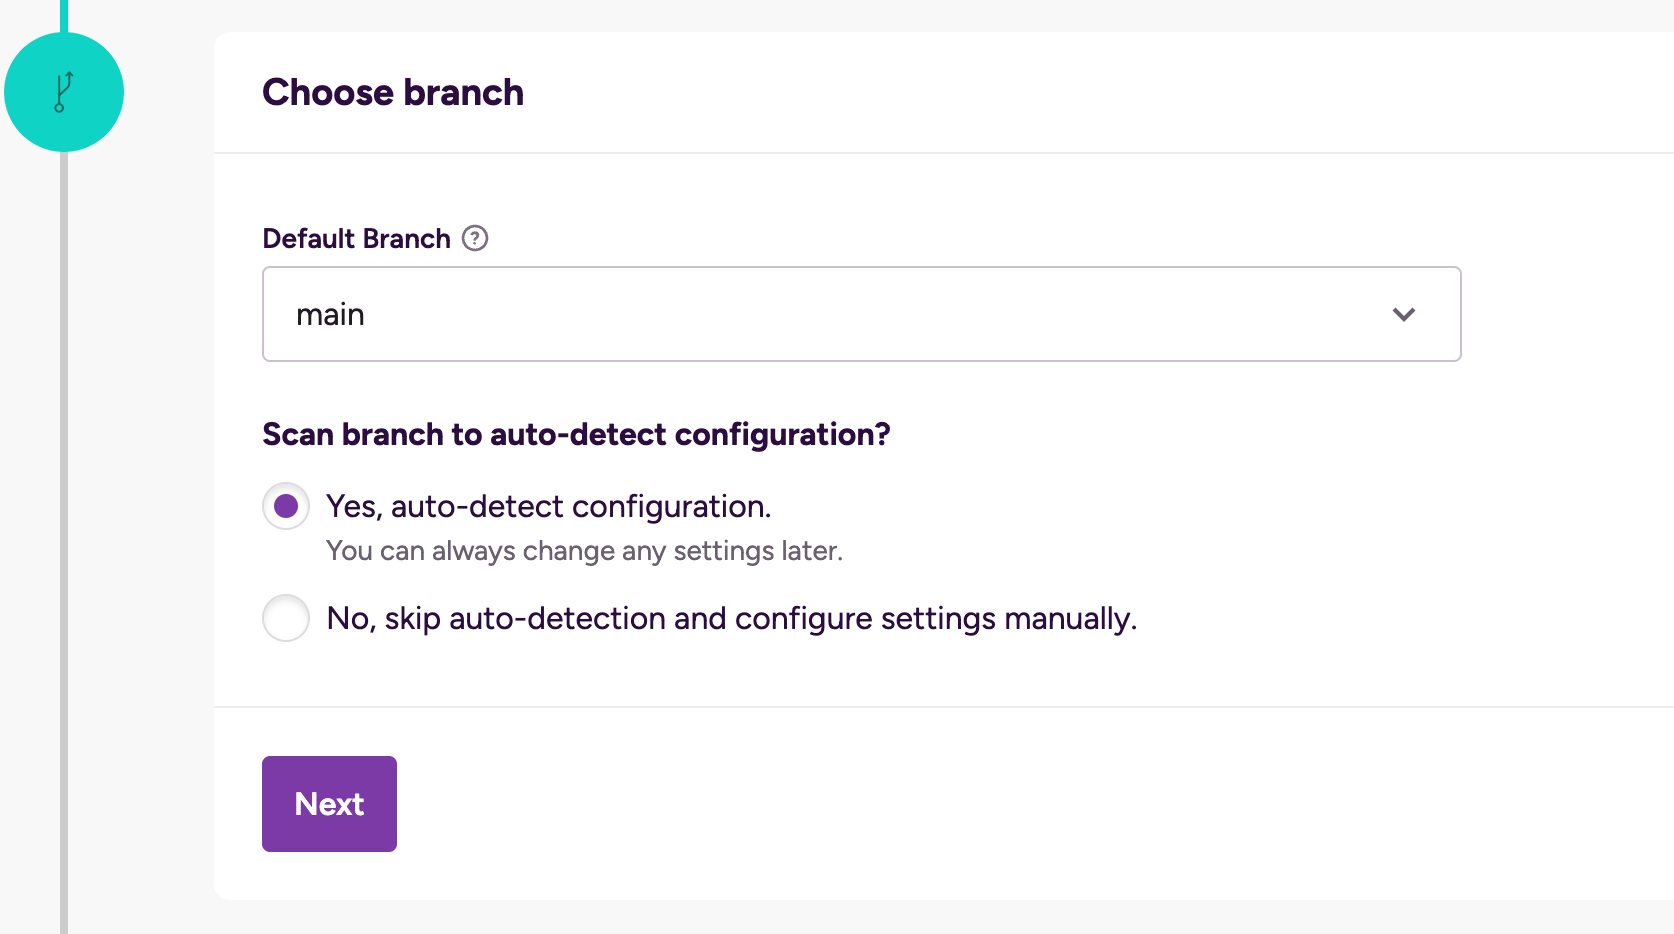
プロジェクトのデフォルトブランチを設定し、私たちのブランチが必要かどうかを決めてください プロジェクトスキャナー 支店のコードをスキャンする
-
リポジトリが接続されている場合は、ドロップダウンメニューから利用可能なブランチを選択できます。
-
リポジトリ URL を手動で入力した場合は、有効なブランチ名を入力する必要があります。
リポジトリの URL
あなたはできるでしょう プロジェクトのリポジトリ URL を変更する 後で。アカウントを Git プロバイダー サービスにいつでも接続または切断することもできます。
-
-
プロジェクト設定を行います。自動的に生成された設定を変更して確認することも、構成を手動で作成することもできます。
構成セット スタック。、 マシンタイプ、プロジェクトルートディレクトリなどもあります。設定する正確なパラメーターは、プロジェクトの種類によって異なります。
-
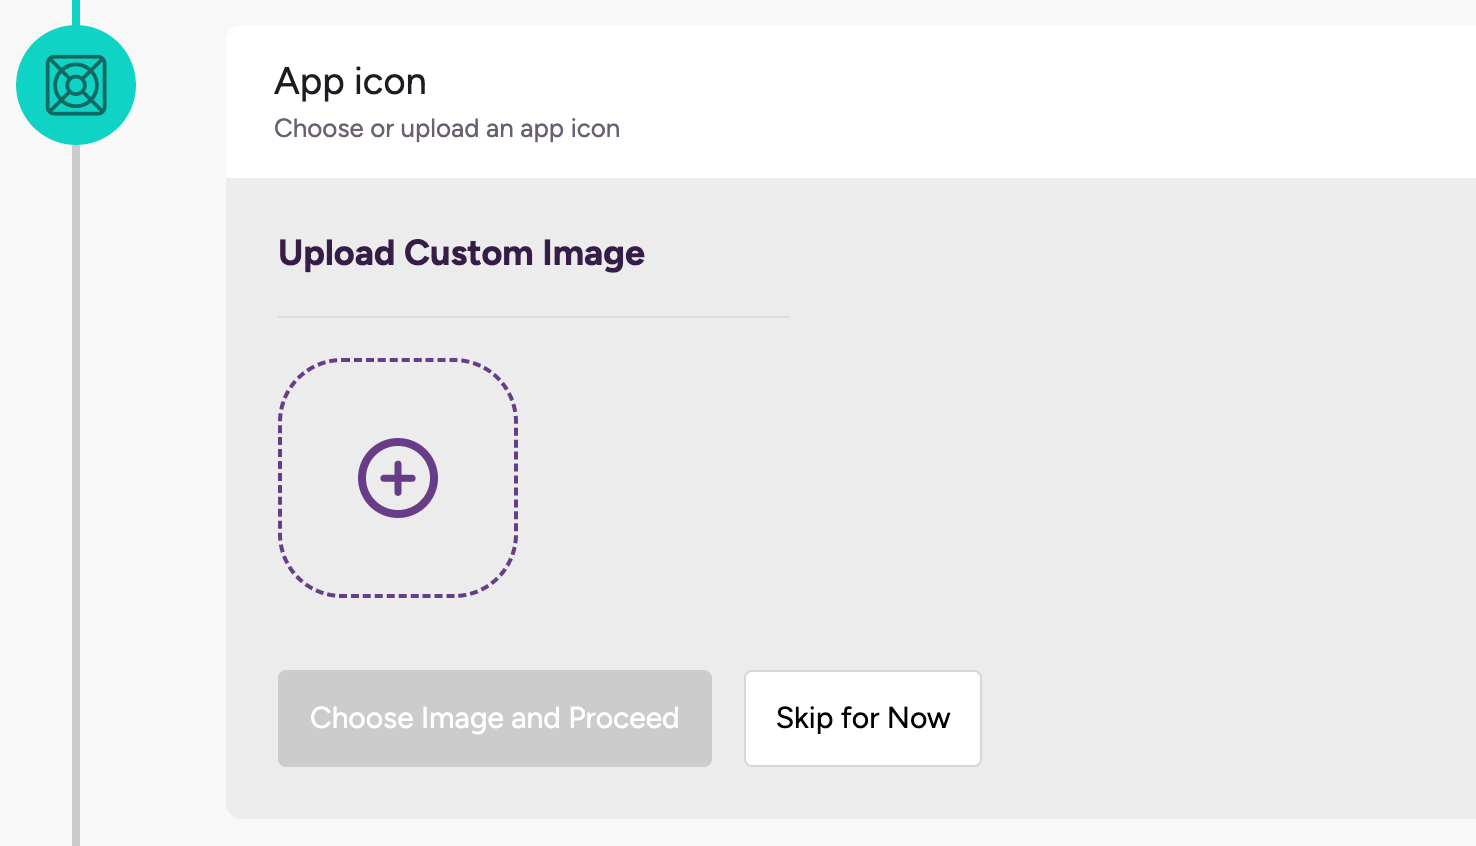
必要に応じて、画像をアップロードしてアプリアイコンを追加します。
-
するには Webhook が必要です ビルドを自動的にトリガーする.アプリの Webhook はいつでも設定できるので、今はスキップしてかまいません。
を使ったプロジェクト GitHub アプリケーションインテグレーション ウェブフックは必要ありません。
-
完了したら、をクリックします 新しく追加されたプロジェクトのホームページに移動します。そこから、始めることができます ワークフローの編集 そして ビルドの実行。