iOS アプリの単体テストと UI テストの実行
Xcodeテストを実行してその結果を表示するには、iOS用のXcodeテストとBitrise.ioへのデプロイの2つのステップが必要です。
専用の Bitrise で iOS アプリの単体テストと UI テストの両方を実行できます。 ステップ.ステップは、 定義したテスト ターゲット を Xcode プロジェクトに追加し、結果を直接ダウンロードするか、 テスト レポート アドオン.
Bitrise で Xcode テストを実行するには、Xcode テストを実行して結果を表示するための 2 つのステップが必要です。
iOS用Xcodeテスト。
にデプロイするBitrise.io。
コード署名ファイル
Xcode テストを実行し、その結果を Bitrise にデプロイするのに、何も必要ありません。 コード署名 ファイル。ですから、まだ心配する必要はありません。
の iOS の Xcode テスト Step はテストを実行し、テスト結果をエクスポートします。 .xcresult ファイル、すべてのテスト添付ファイル、およびログ xcodebuild test 指図。
Xcode test results in HTML
You can also view your Xcode test results in a rich HTML format, using the Generate Xcode test report html Step: Xcode テスト結果をリッチ HTML 形式で表示する.
ステップを使用してテストを実行するには:
Workflow Editor
bitrise.yml
-
確実に アプリの依存関係をすべてインストールすると、 ワークフロー内で。
-
追加 iOS の Xcode テスト ワークフローに進みます。
-
を確認してください プロジェクト パス 入力は正しい場所を指します。
入力はあなたへのパスを要求します
.xcodeproj,.xcworkspace、 またPackage.swiftファイル。ほとんどの場合、この入力を変更する必要はありません。新しいアプリを追加すると、プロジェクト スキャナーは関連するファイルを自動的に検出し、その場所を 環境変数 これが入力のデフォルト値です。
-
を確認してください 図式 input は、アプリのビルドに使用するスキームを指します。
デフォルト値は 環境変数 アプリの初期構成時に設定したスキームを保存します。別のスキームを使用する場合は、その名前を入力フィールドに入力します。
共有スキームのみ
スキームは共有 Xcode スキームでなければなりません!
-
でデバイスの宛先を構成します。 デバイス宛先指定子 入力: 入力はコンマで区切られたキーと値のペアを取ります。たとえば、利用可能な最新の OS を搭載した iPhone 14 でテストするアプリをビルドする場合は、次のようにします。
platform=iOS,name=iPhone 14 Plus,OS=latest
入力は
-destinationのオプション xcodebuild.可能なオプションの詳細については、次を参照してください。 コマンドラインから単体テストを実行するにはどうすればよいですか? -
オプションで、特定の テスト計画 の中に テスト計画 入力。
入力は
-testPlanのオプションtestのアクション xcodebuild.これを空のままにすると、Xcode スキームで指定されたテスト計画が使用されます。 -
追加 Bitrise.io にデプロイする ワークフローの最後まで進み、テスト結果やその他の出力にアクセスできるようにします。 上で アーティファクト タブ または Test Reports アドオンで。
-
確実に アプリの依存関係をすべてインストールすると、 ワークフロー内で。
-
Add the
xcode-testStep to the Workflow.your-workflow: steps: - activate-ssh-key: {} - git-clone: {} - xcode-test: inputs: -
Make sure the
project_pathinput points to the correct location.The input asks for the path to your
.xcodeproj,.xcworkspace, orPackage.swiftfile. In most cases, you don't need to change this input: when adding a new app, the project scanner automatically finds the relevant file and stores its location in the Environment Variable that is the default value of the input.your-workflow: steps: - activate-ssh-key: {} - git-clone: {} - xcode-test: inputs: - project_path: "$BITRISE_PROJECT_PATH" -
Make sure the
schemeinput points to the scheme you want to use to build the app.The default value is the Environment Variable that stores the scheme you set during the initial configuration of the app. If you wish to use a different scheme, type its name to the input field.
your-workflow: steps: - activate-ssh-key: {} - git-clone: {} - xcode-test: inputs: - project_path: "$BITRISE_PROJECT_PATH" - scheme: testShared scheme only
The scheme must be a shared Xcode scheme!
-
Configure the device destination in the
destinationinput: the input takes comma-separated key-value pairs. For example, if you wish to build an app to test on an iPhone 14 with the latest available OS:your-workflow: steps: - activate-ssh-key: {} - git-clone: {} - xcode-test: inputs: - project_path: "$BITRISE_PROJECT_PATH" - scheme: test - destination: platform=iOS Simulator,name=iPhone 14 Plus,OS=latestThe input sets the
-destinationoption of xcodebuild. Read more about the possible options: How do I run unit tests from the command line? -
Optionally, set a specific test plan in the
test_planinput.The input sets the
-testPlanoption of thetestaction of xcodebuild. If you leave this empty, the test plan specified in the Xcode scheme will be used.your-workflow: steps: - activate-ssh-key: {} - git-clone: {} - xcode-test: inputs: - project_path: "$BITRISE_PROJECT_PATH" - scheme: test - destination: platform=iOS Simulator,name=iPhone 11 Plus,OS=latest - test_plan: my_plan -
Add the
deploy-to-bitrise-ioStep to the end of your Workflow to be able to access the test results and other outputs either on the Artifacts tab or in the Test Reports add-on.your-workflow: steps: - activate-ssh-key: {} - git-clone: {} - xcode-test: inputs: - project_path: "$BITRISE_PROJECT_PATH" - scheme: test - destination: platform=iOS Simulator,name=iPhone 11 Plus,OS=latest - test_plan: my_plan - deploy-to-bitrise-io:
ヘッドレスモード
Xcode 9 以降、テストはデフォルトでヘッドレス モードで実行されます。これは、シミュレーターがバックグラウンドでのみ実行されることを意味します。これを変更するには、ステップのデバッグ入力グループに移動し、 シミュレーターをヘッドレス モードで実行する 入力の値 no.ただし、このオプションを使用すると、テストに時間がかかります。
- xcode-test:
    inputs:
      - headless_mode: 'no'
xcprettyの使用
の xcpretty 出力ツールは並列テストをサポートしていません。プロジェクトで並列テストが有効になっている場合は、ステップの xcodebuild ログのフォーマット 入力グループと設定 ログフォーマッター 入力の値 xcodebuild また xcbeautify.
- xcode-test:
    inputs:
      - log_formatter: xcbeautify
失敗したテストの再実行(Xcode 13では使用できません)
の 失敗時にテストを再試行する必要がありますか? (Xcode 13 以降では使用できません) に入力 テストの繰り返し のセクション iOS の Xcode テスト Step を使用すると、失敗したテストだけでなく、すべてのテストを自動的に再実行できます。この入力を yes、ステップが実行されます xcodebuild テストが失敗した場合はもう一度。
Xcode 13 以降では、この機能は使用できなくなりました。使用 テスト繰り返しモード (Xcode 13+ で利用可能) で入力 retry_on_failure オプションが選択されました。これにより、すべてのテストを実行する代わりに、失敗したテストのみを再実行できます。このテスト繰り返し機能は、 iOS の Xcode テスト バージョン 3.0.0 以降からステップアップします。
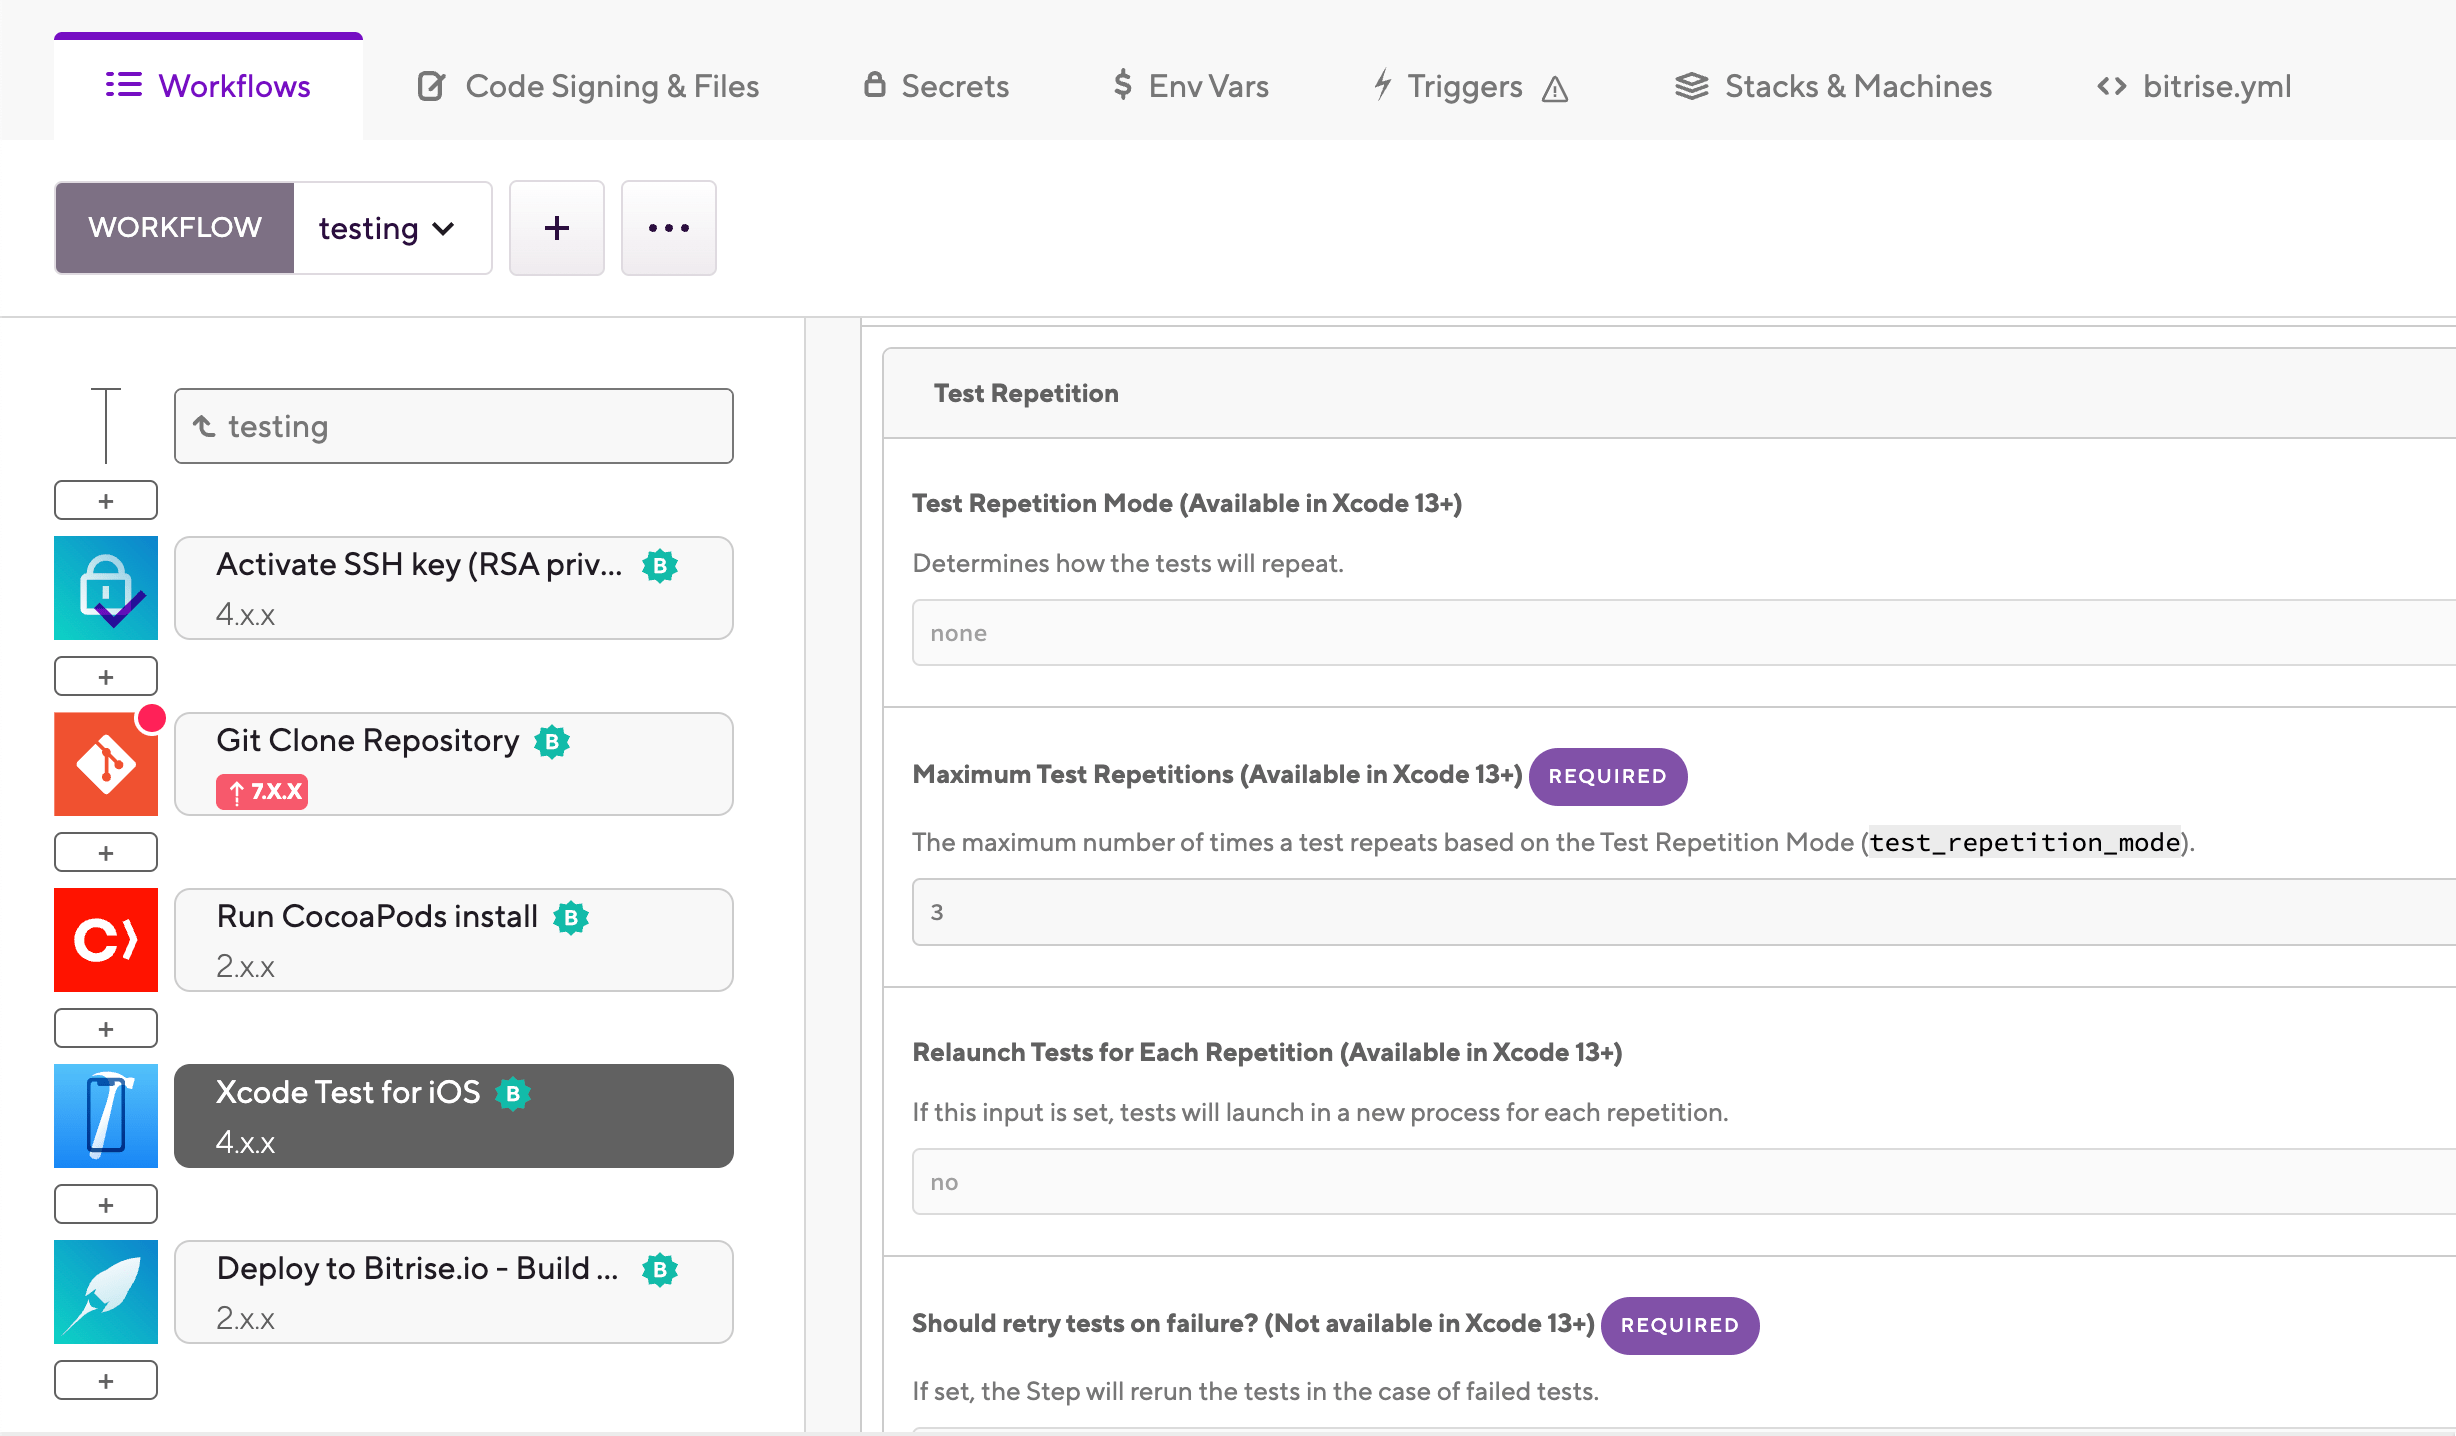
テストの繰り返し
Xcodeのテスト繰り返しモード で利用可能です iOSステップのXcodeテスト BitriseでXcode13以降を実行しているスタック。テストの繰り返しを使用すると、失敗時の再試行、失敗するまで、最大繰り返しまでなど、さまざまな方法で任意のタイプのテストを複数回実行できます。
NS iOS用Xcodeテスト ステップの テスト繰り返しモード(Xcode 13以降で使用可能) inputには、次のオプションがあります。
-
none:テストは繰り返されません。 -
until_failure:テストが失敗するまで、または最大の繰り返しになるまで、テストを繰り返します。デフォルトのテスト実行回数は3回です。 -
retry_on_failure:失敗したテストは、成功するまで、または指定した繰り返し回数になるまで実行されます。テストのデフォルトの繰り返し回数は3回です。 -
up_until_maximum_repetitions:テストの結果に関係なく、最大のテスト繰り返しに達するまで、すべてのテストを再実行します。
これらのオプションはからのみ利用可能であることに注意してください iOS用Xcodeテスト バージョン3.0.0以降。
とともに 最大テスト繰り返し(Xcode 13以降で利用可能) 入力では、テストの最大繰り返し回数を指定できます。次の場合は、1よりも大きい数を追加する必要があることに注意してください。 テスト繰り返しモード(Xcode 13以降で使用可能) 入力が以外に設定されている none。
有効にする 各繰り返しの再起動テスト(Xcode 13以降で利用可能) 繰り返しごとにまったく新しいプロセスでテストを起動するための入力。