ワークフローの管理
複数のワークフローをチェーンしたり、チェーン内のワークフローの順序を並べ替えたり、Bitriseワークフローエディターでいつでもワークフローの名前を変更したりできます。
You can chain multiple Workflows and rearrange the order of Workflows in a chain in the Bitrise Workflow Editor. Take advantage of utility Workflows to reuse components in multiple different contexts.
オフラインワークフローエディター
あなたは オフラインワークフローエディター。
ワークフローを連鎖させる
複数のワークフローを設定して、連続して実行することができます。これらのワークフローの順序を並べ替えたり、新しいワークフローをチェーンに追加したり、既存のワークフローをチェーンからいつでも削除したりできます。
-
でアプリを開きます ビットライズ。
-
クリック メインページのボタン。
-
ワークフローの名前の右側にある省略記号 (...) ボタンをクリックします。
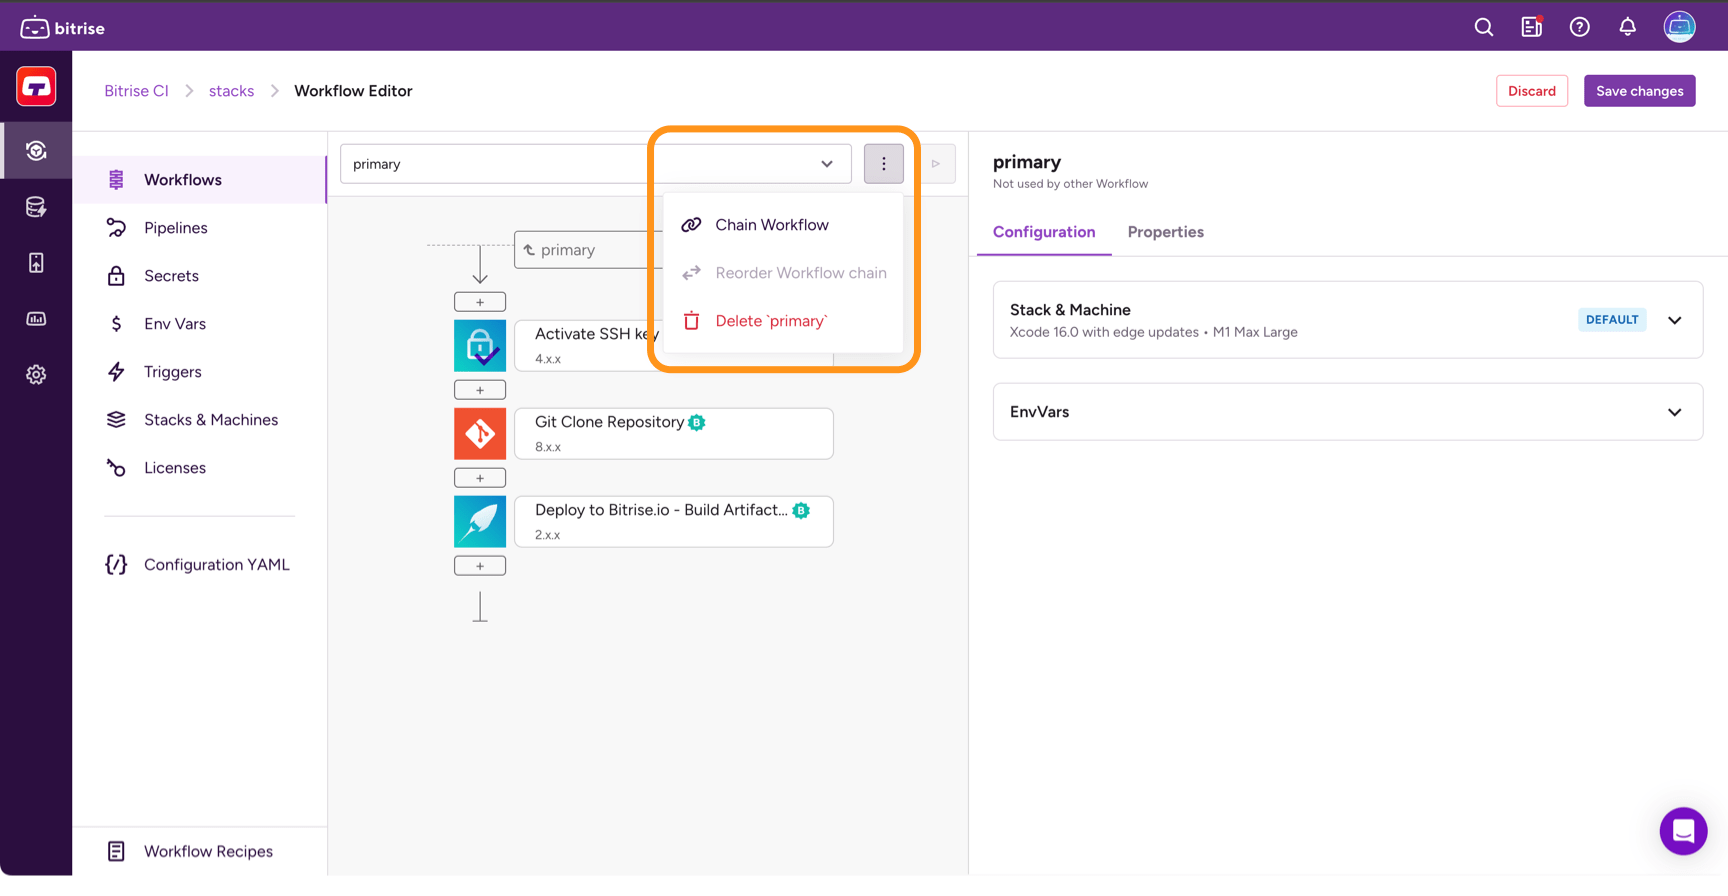
-
ドロップダウンメニューから選択 ワークフローを挿入する 現在選択されているワークフローの前にワークフローを連結するか、 ワークフローを挿入 現在選択されているワークフローの後にワークフローを連鎖します。
-
Select a Workflow from the list and click either Add before or Add after.
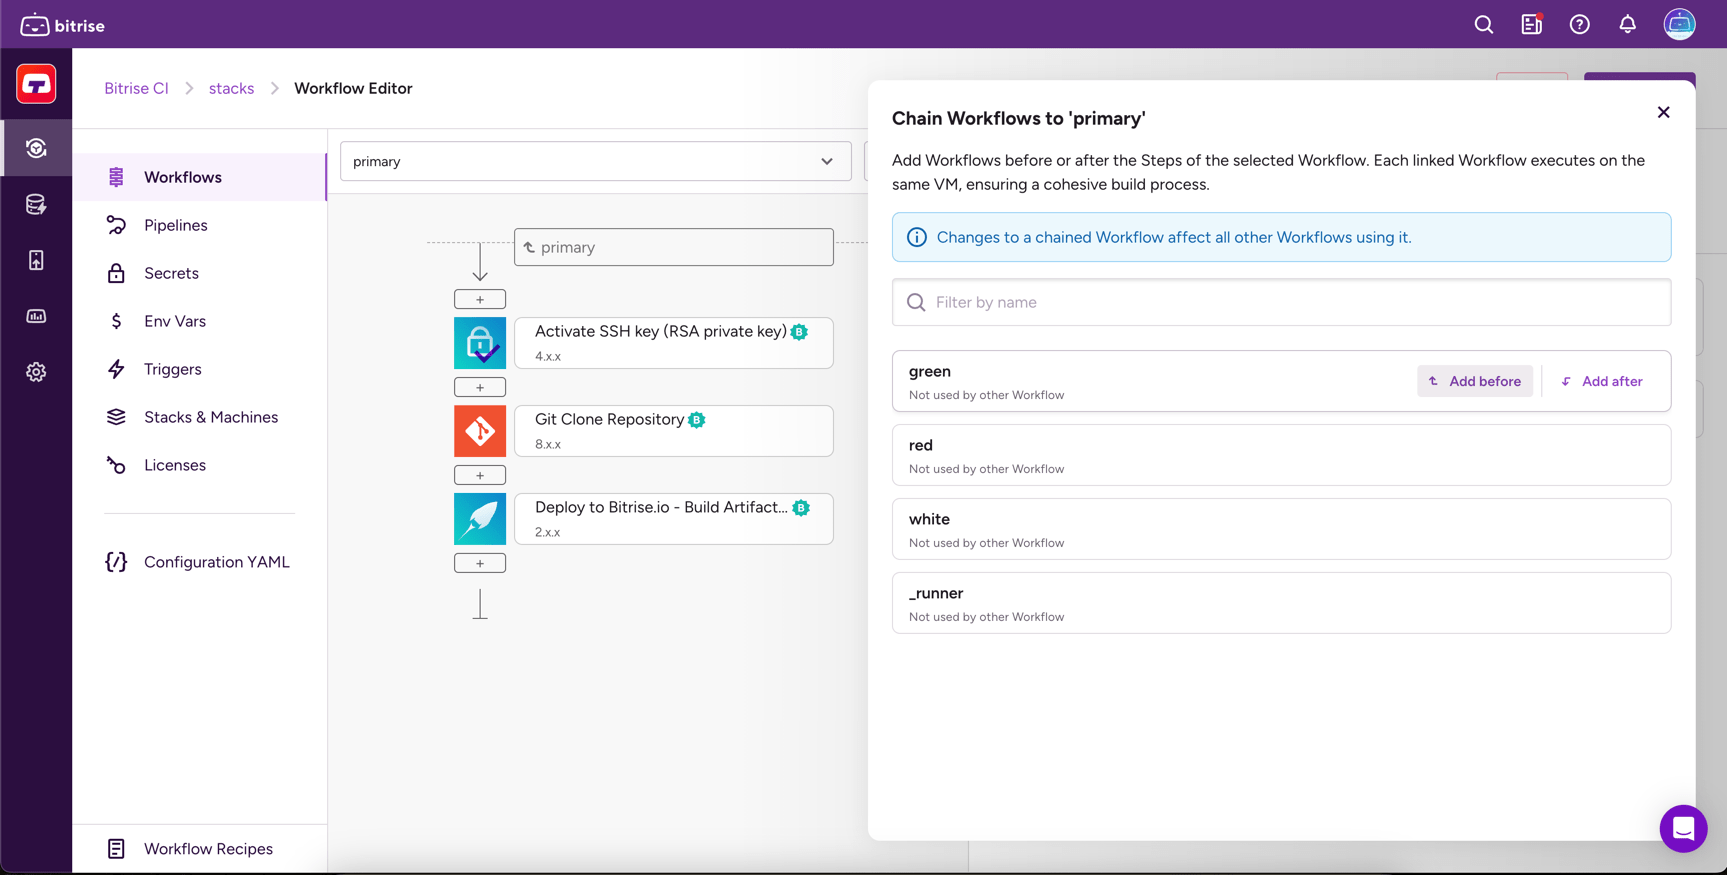
-
クリック 保存する 右上隅にあります。
この例では、3 つのワークフローを連結しています。 test、 deploy、 そして ci、を使用して 実行前 そして 実行後 パラメーター。
workflows:
  test:
    envs:
    - IS_TEST: "true"
    steps:
    # test Steps to run

  deploy:
    before_run:
    - test
    steps:
    # steps to deploy

  ci:
    before_run:
    - test
    after_run:
    - deploy
ワークフローを直接管理する方法の詳細については、 bitrise.yml ファイル、チェック ワークフローリファレンス。
連鎖ワークフローの再配置
チェーンができたら、ドラッグアンドドロップメニューでワークフローの順序を簡単に並べ替えることができます。
-
でアプリを開きます ビットライズ。
-
クリック メインページのボタン。
-
省略記号をクリックします: ... ラベル付けされた ワークフローの管理。
-
ドロップダウンメニューから選択 ワークフローの実行順序を変更するドラッグ アンド ドロップ メニューが表示され、チェーンのワークフローを並べ替えることができます。
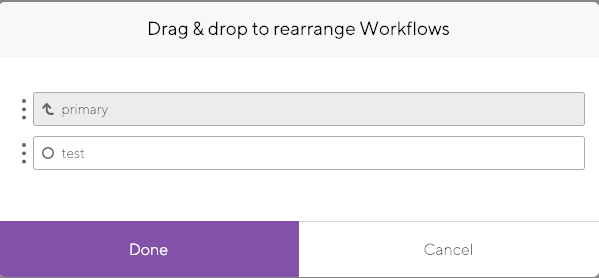
-
クリック 保存する 右上隅にあります。
Workflow priority
You can set a priority for each individual Workflow. The priority setting determines the position of a standalone build of the Workflow in the build queue: the higher the priority, the sooner the Workflow's build will run.
優先度は、ワークフローエディターまたはプロジェクトの設定 YAML ファイルのいずれかで割り当てることができます。優先度は常に -100~100 の間の整数です。数値が大きいほど優先度が高くなります。デフォルトの優先度は 0 です
ビルドの優先順位、およびさまざまなタイプの優先度間の優先順位の詳細については、以下をご覧ください。 ビルドの優先順位。
ユーティリティ ワークフロー
Step bundles
Instead of utility Workflows, we strongly recommend using Step bundles. They allow you to group multiple Steps into a single unit and reuse them at any point of a Workflow.
Bitrise は、ユーティリティワークフローと呼ばれる特別なタイプのワークフローをサポートしています。ユーティリティ ワークフローの ID は常にアンダースコア文字で始まります。たとえば、 _setup.これらは通常、いくつかの異なるワークフローの開始時または終了時に必要なタスクを実行するために使用されます。アプリ。
ユーティリティ ワークフローを作成できます まったく同じように 通常のものを作成するとき。ユーティリティ ワークフローであることを示すには、名前の前にアンダースコアを付けるだけです。
ユーティリティワークフローは単独では実行できない
ユーティリティ ワークフローは、スタンドアロン ワークフローとして実行できません。ワークフローの前または後に、通常のワークフローと一緒にチェーンする必要があります。 ワークフローを連鎖させる.
この例では、2つのユーティリティワークフローがあります。 _setup そして _send-notificationsこれらは2つのワークフローで連結されており、 test そして ci 使用して 実行前 そして 実行後 パラメーター。
workflows:
  _send-notifications:
    steps:
    # send notifications

  _setup:
    steps:
    # setup Steps to run

  test:
    before_run:
    - _setup
    envs:
    - IS_TEST: "true"
    steps:
    # test Steps to run

  ci:
    before_run:
    - test
    after_run:
    - _send-notifications
ワークフローを直接管理する方法の詳細については、 bitrise.yml ファイル、チェック ワークフローリファレンス。