Google Play upload stage
After selecting a release candidate in Bitrise Release Management, you need to upload your candidate to Google Play. You can configure auto-upload or upload the candidate manually.
After selecting a release candidate and creating tasks for approvals, the release process of an Android app reaches the stage where it must access Google Play:
-
Google Play upload: Upload the release candidate to Google Play.
-
Distribute for testing: You can distribute the release candidate to Google Play testing tracks.
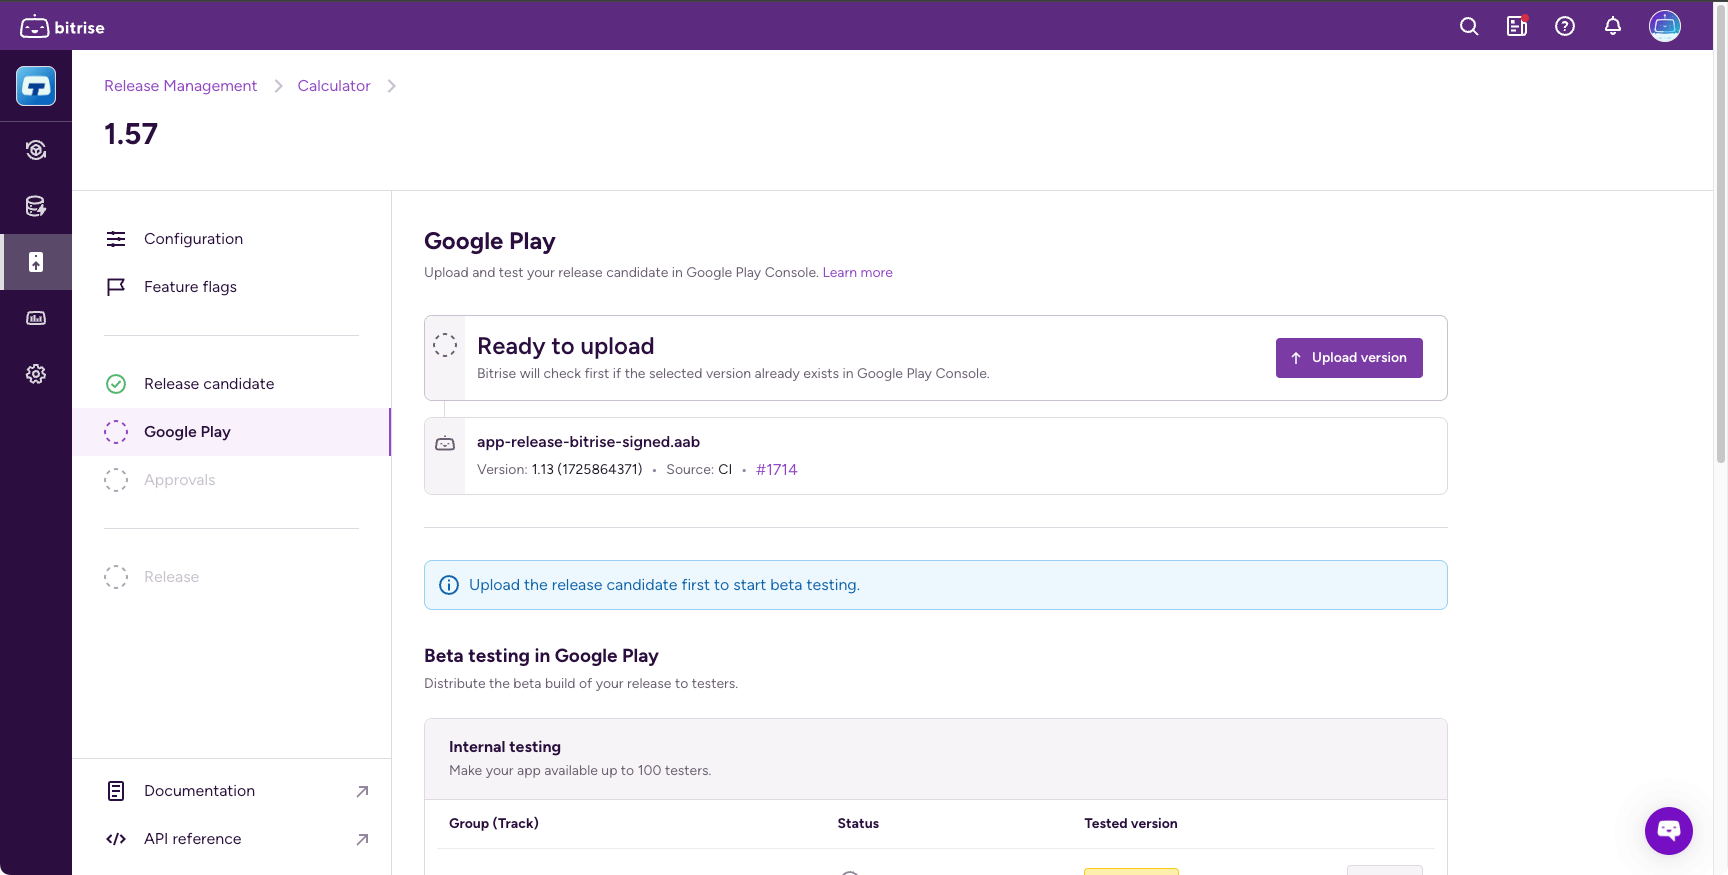
Uploading the release candidate to Google Play
Once you selected a release candidate in Bitrise Release Management, you can continue with uploading your app to Google Play.
成功したすべてのビルドを自動的にアップロードする
成功したすべてのビルドを自動的にアップロードするオプションを選択した場合、 リリース候補ステージ, このステージは自動的に完了します。
To upload the selected release candidate to Google Play manually:
-
リリースを開きます。
-
選択する Google Playのアップロード 左側のナビゲーションバーにあります。
-
クリック ボタン。
-
アップロードが完了するまで待ちます。
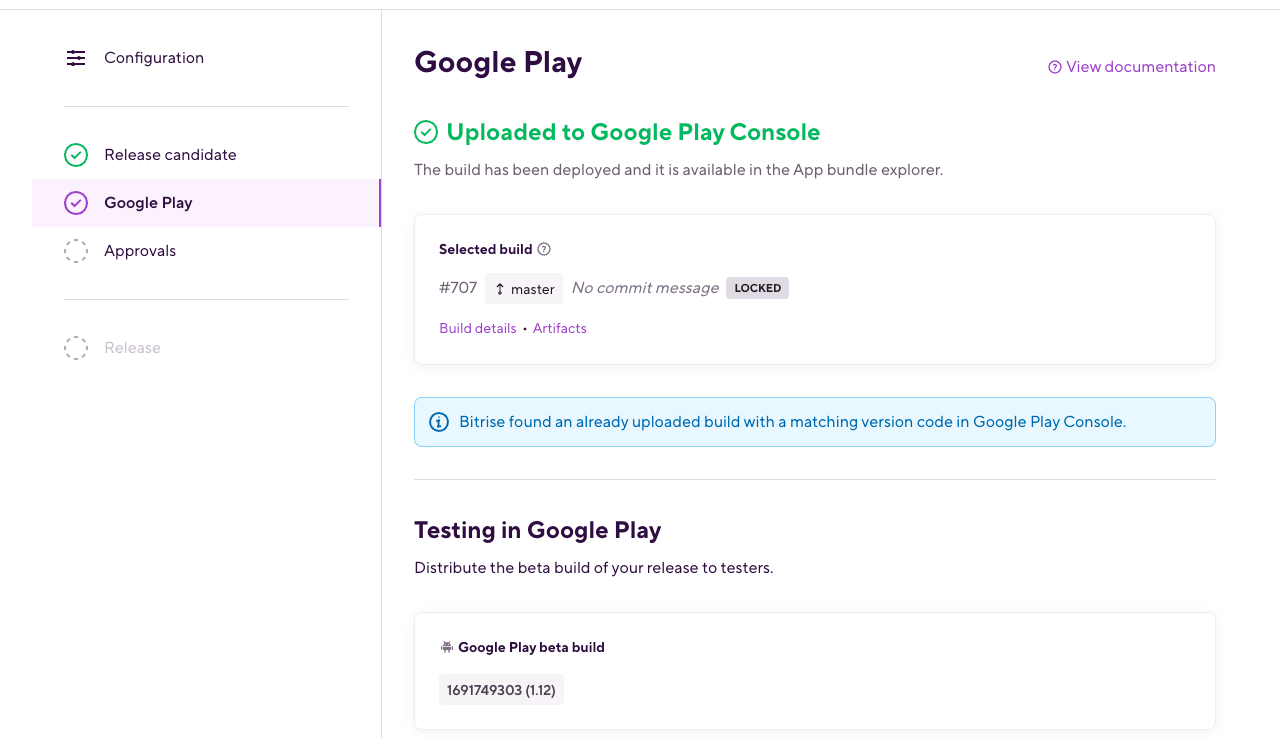
Distributing Android release candidates for testing
After uploading a release candidate to Google Play, you can distribute it to Google Play testing tracks:
-
リリースを開いて、 Google Playでのテスト セクション。
-
テストトラックを選択します。
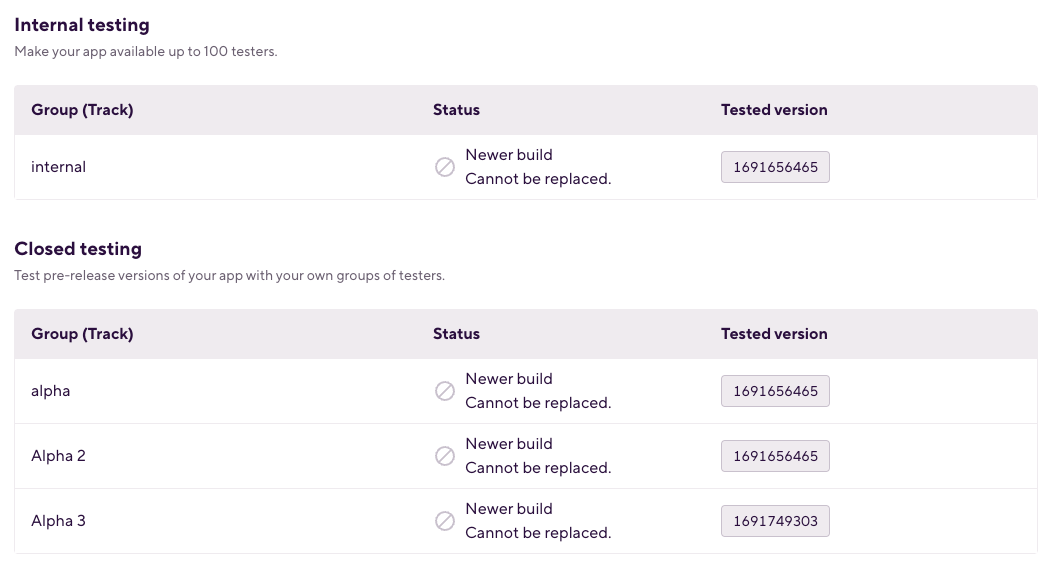
リリース管理は、オープン、内部、クローズドのテストをサポートします。 Google Play のテストについて詳しくは、 Google Play Consoleのドキュメント。
新しいビルド
新しいビルド (より高いバージョンのビルド) がある場合は、
version_code番号) のテスト トラックでは、そのビルドをリリース候補に置き換えることはできません。 ボタンは使用できなくなります。テスト トラックに古いビルドがある場合は、リリース候補がそれを置き換えます。
-
クリック トラック名の横にあるボタンをクリックして配信を開始します。
すべてがうまくいけば、 状態 ビルドの テスト。