GitHub / GitLab / BitbucketアカウントをBitriseに接続する
自動Webhook登録など、Bitriseが提供するすべての機能を最大限に活用するには、GitHub / GitLab/BitbucketアカウントをBitriseアカウントに接続する必要があります。
Bitrise needs access to your code in a Git repository to be able to build. We recommend connecting your Git provider account to Bitrise for this and we offer two main methods of doing so:
-
The Bitrise GitHub App: We strongly recommend using the GitHub App to connect your Bitrise account to GitHub. The app offers increased security and granular repository access. Using the app means you don't need SSH keys or webhooks. This works on the Workspace level: you connect a Workspace to a single GitHub account or organization.
-
OAuth application to the Git provider that allows access to all repositories on the account. This means connecting your personal Bitrise account to a Git provider account. This method is supported for GitHub, GitLab, and Bitbucket.
次の 2 つの方法のいずれかで、3 つの Git プロバイダー アカウントすべてを Bitrise アカウントに接続できます。
-
新規追加時のアカウント連携 アプリ.
-
からアカウントを接続する プロファイル設定 ページ。
Gitプロバイダーごとに1つのアカウント
同じGitプロバイダーの2つのアカウント(たとえば、2つのGitHubアカウント)をBitriseに接続することはできないことに注意してください。
1 つの Git プロバイダー アカウントの接続は最終的なものではありません。いつでもアカウントを切断して別のアカウントに接続できます。 間違った Git アカウントを Bitrise にリンクしました.
GitHub アプリの統合
Bitrise GitHub アプリを使用すると、ユーザーは Bitrise ワークスペースを GitHub アカウントまたは組織に接続でき、セキュリティが強化され、ステータスが自動更新されるきめ細かいアクセスが提供されます。
BitriseアカウントをGitHubリポジトリに接続する最良の方法は、 GitHubアプリBitrise GitHub アプリには、統合を容易にするさまざまな機能があります。
-
このアプリでは、SSH キー、個人アクセス トークン、サービス認証ユーザーは必要ありません。アクセスのために、ビルドの前に一時的なアクセス トークンが生成され、セキュリティが大幅に向上します。
-
リポジトリへのきめ細かなアクセスを提供します。GitHub 組織全体へのアクセスを許可する必要はなく、アプリがアクセスできる特定のリポジトリを選択するだけです。
-
アプリをインストールすると、GitHub Checks アプリを使用して、Bitrise ステータスの更新を GitHub で直接自動的に受信できます。ステータス レポートを個別に設定する必要はありません。
Bitrise GitHub アプリは、すべての GitHub Cloud ユーザーにサポートされています。 GitHub エンタープライズ サーバー ユーザーは、関連ガイドの説明に従って、別の GitHub アプリを作成してインストールする必要があります。
Connecting via the GitHub App integration
This guide is intended for GitHub Cloud users, including GitHub Enterprise Cloud users, who wish to install the Bitrise GitHub App and connect their Bitrise Workspace to a GitHub account or organization with the app. For GitHub Enterprise Server users, we have a separate guide: Integrating self-hosted GitHub Enterprise Server with Bitrise
You can connect via the GitHub App integration in two ways:
-
From the Workspace settings page.
-
When adding a new Bitrise project.
One GitHub App installation per Workspace
A Workspace is always associated with a single installation of the Bitrise GitHub App. No Workspace can be connected to multiple installations of the Bitrise GitHub App.
Connecting a GitHub App from the Workspace settings page
A Bitrise GitHub App installation is tied to a Workspace. You can always install and check its connection from the Workspace settings page.
-
On the Bitrise main page, select your Workspace from the dropdown menu.
-
From the navigation menu on the left, select Settings.
-
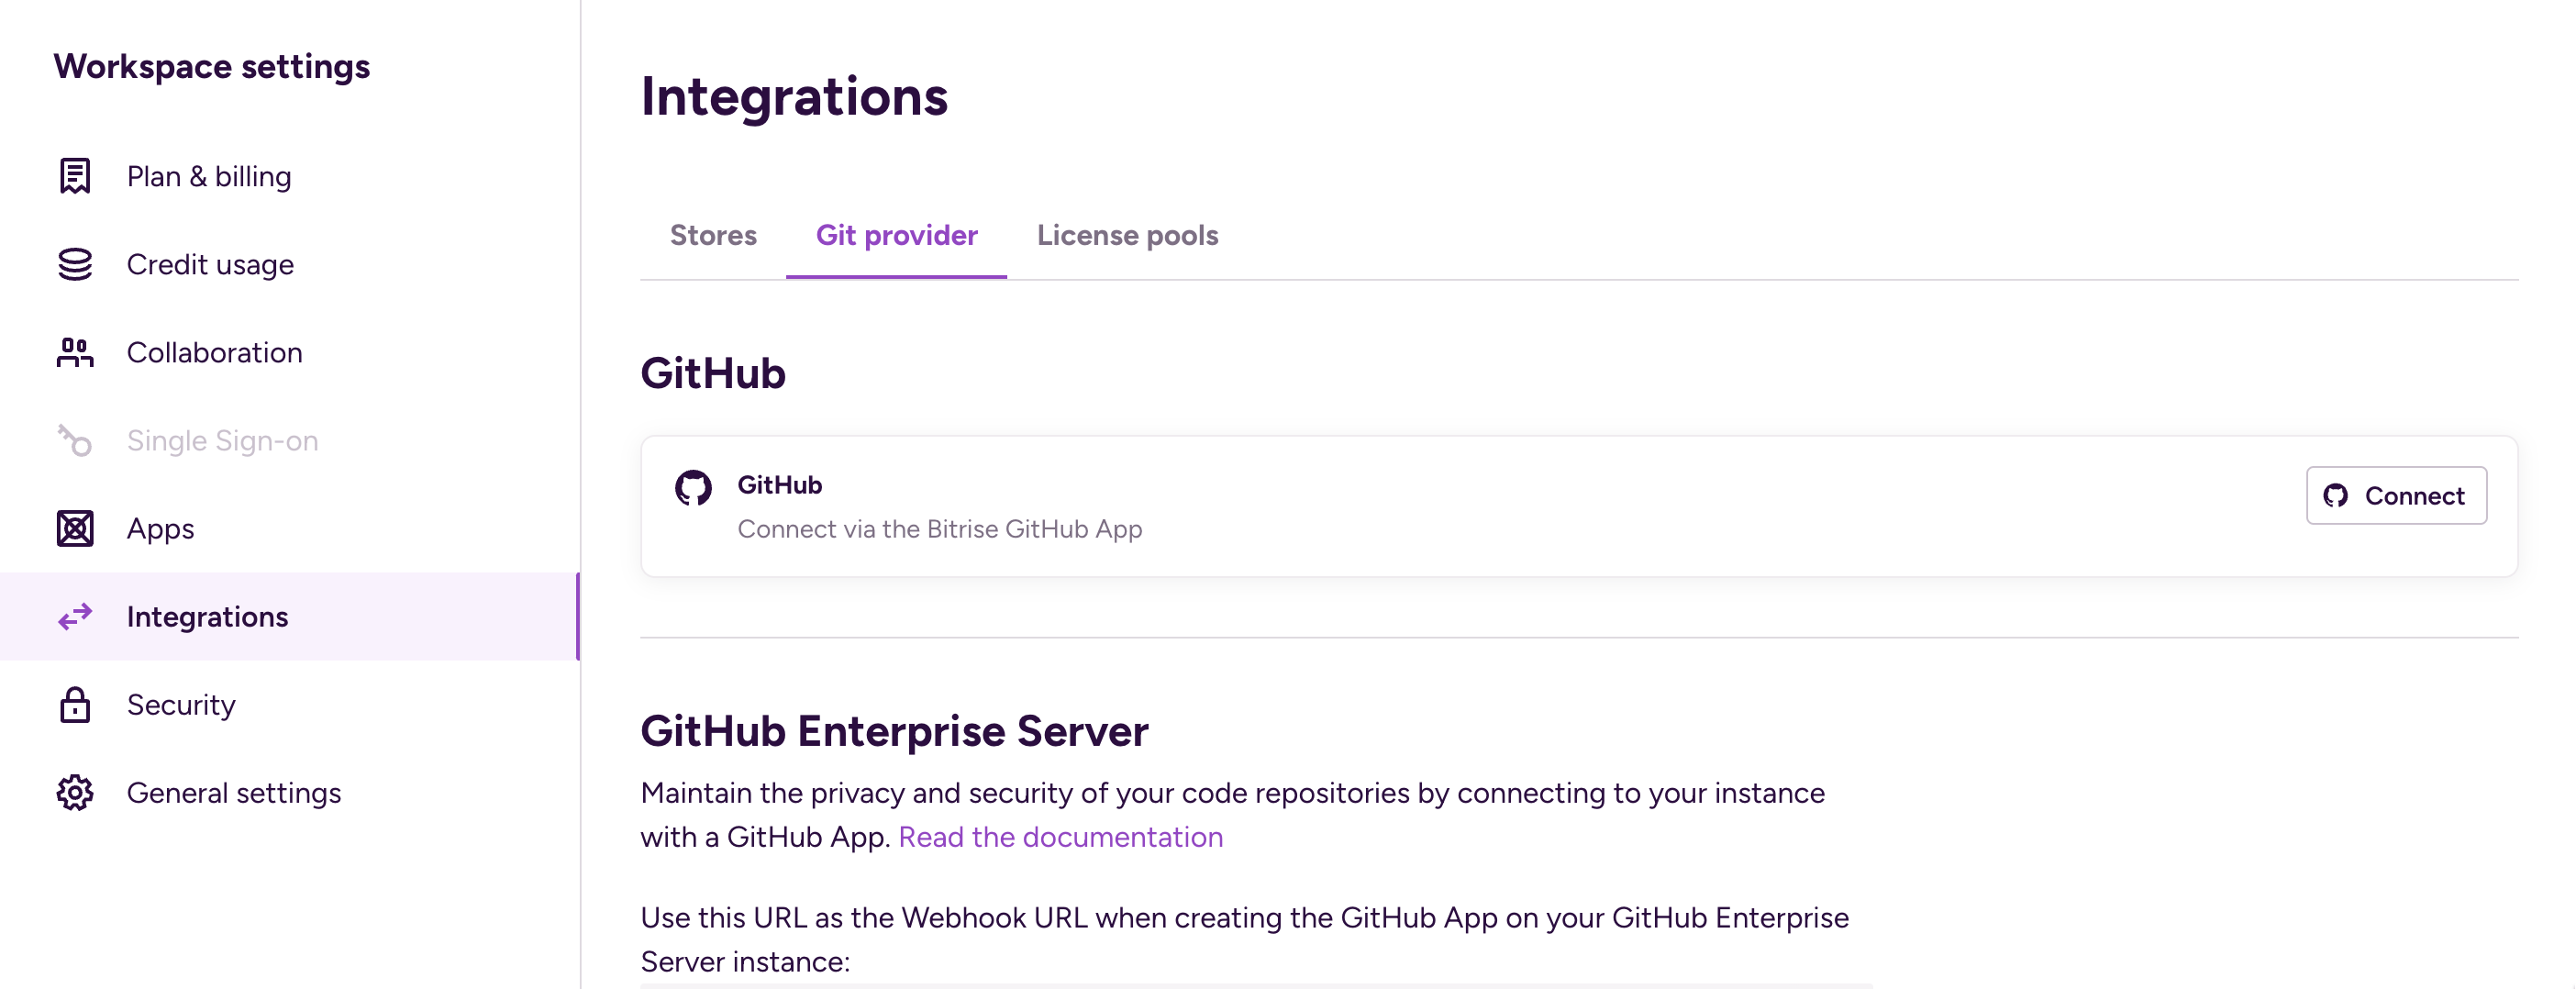
On the Workspace settings page, select Integrations.
-
Select the Git provider tab.
-
Under GitHub, you can see the GitHub App card with Connect via the Bitrise GitHub App. Click .
-
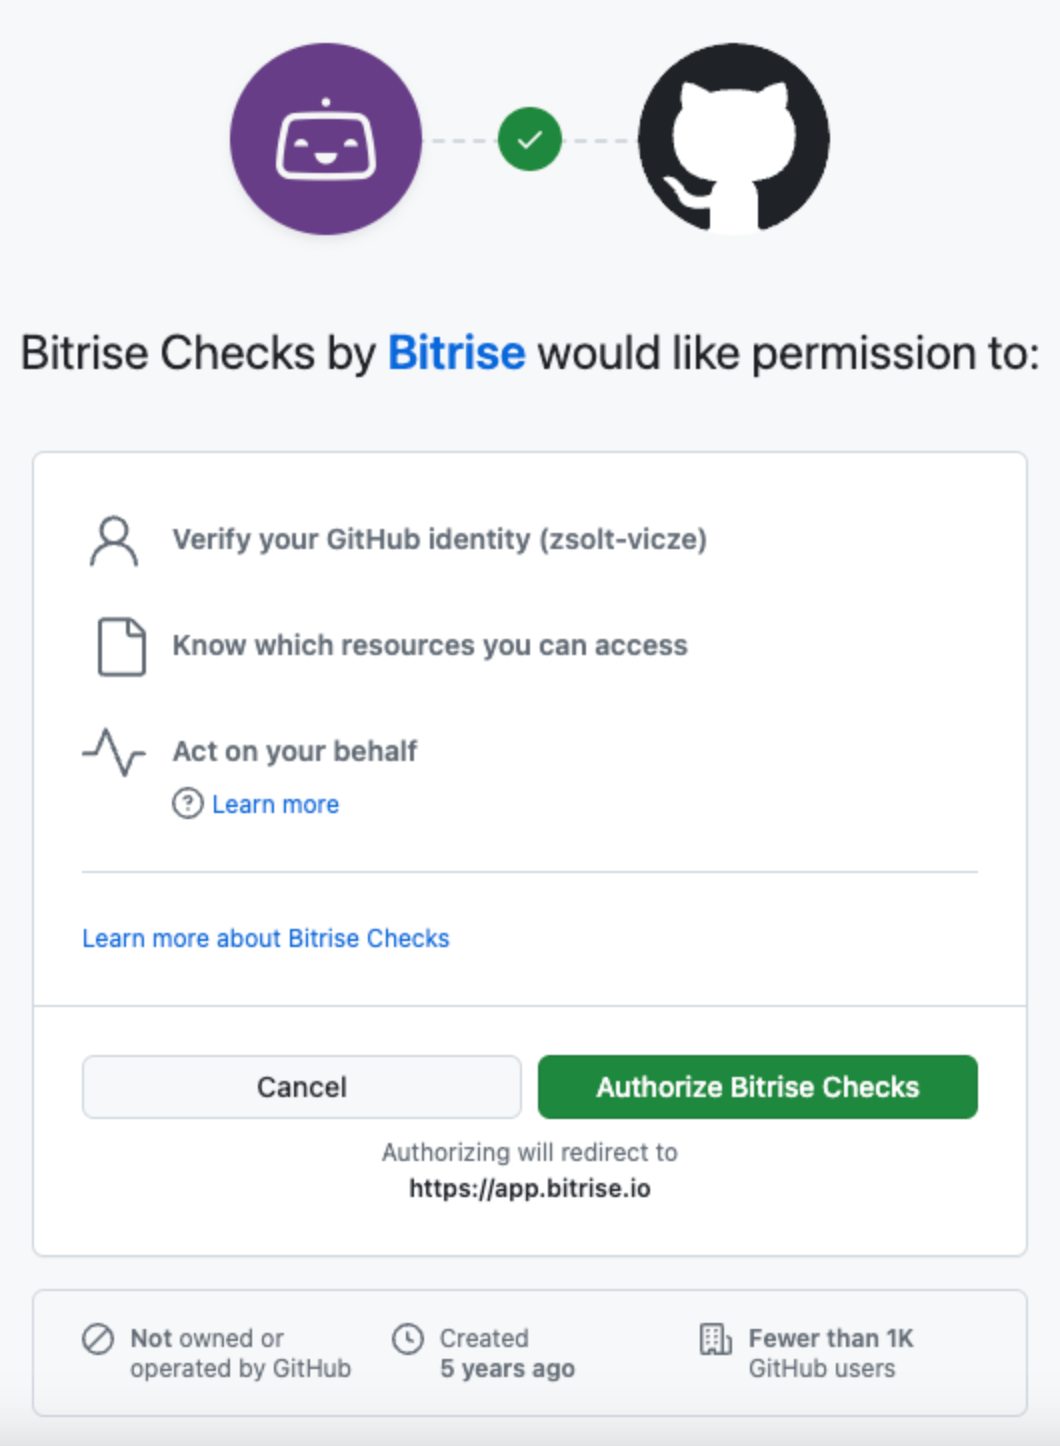
If you haven't authorized the Bitrise GitHub App before, you will be prompted for authorization at this point:
-
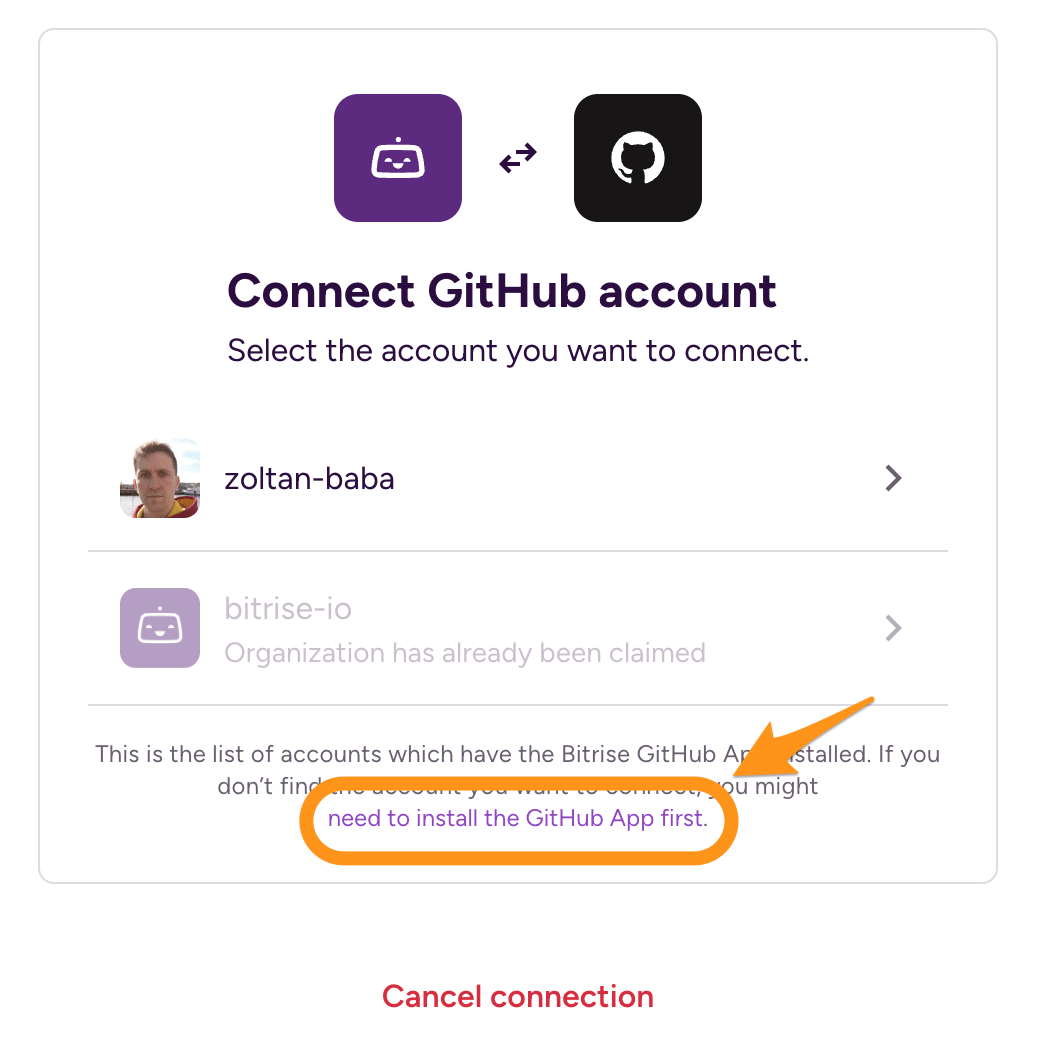
You will be prompted to select the GitHub account or organization you want to connect. If you don't find the one you need in the list, you need to install the App to that account or organization first: click the link below the list of accounts.
-
Once you click the link, you will be prompted to select an account or organization. After selecting one, you will be transferred to the Install & Authorize page.
-
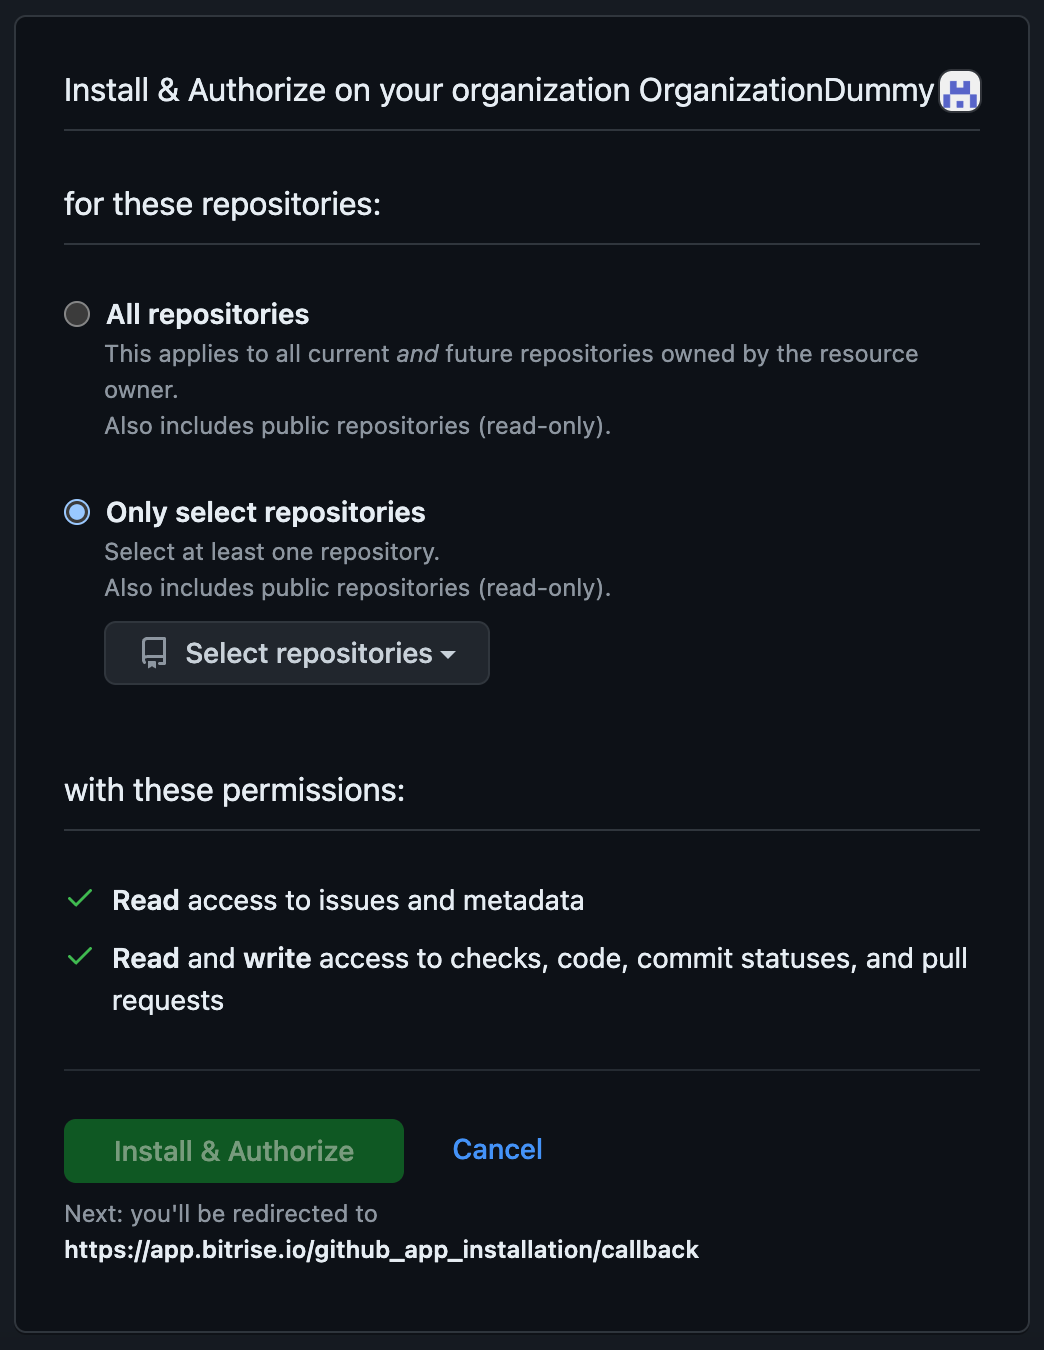
On the Install & Authorize page, select the access type:
-
All repositories: the Bitrise GitHub App will have access to all repositories belonging to the account or organization, including future ones.
-
Only select repositories: Select one or more repositories that Bitrise will be able to access. You can add more later but to do so, you will need to reconfigure your repository access on the GitHub App's page.
-
-
When done, click . You will be redirected to the Workspace settings page.
Authorization
If you are not authorized on GitHub to install the app, you can still request the installation. Once a GitHub Admin approves the installation, you can come back and select the App installation from the list.
-
If you have existing apps with OAuth connection, we recommend switching them over to the GitHub App connection.
Connecting a GitHub App when adding a new project
During the process of adding a new project on Bitrise, you have to select how Bitrise can access your repository. This process allows connecting the project via the GitHub App.
-
Start the process of adding a new project.
-
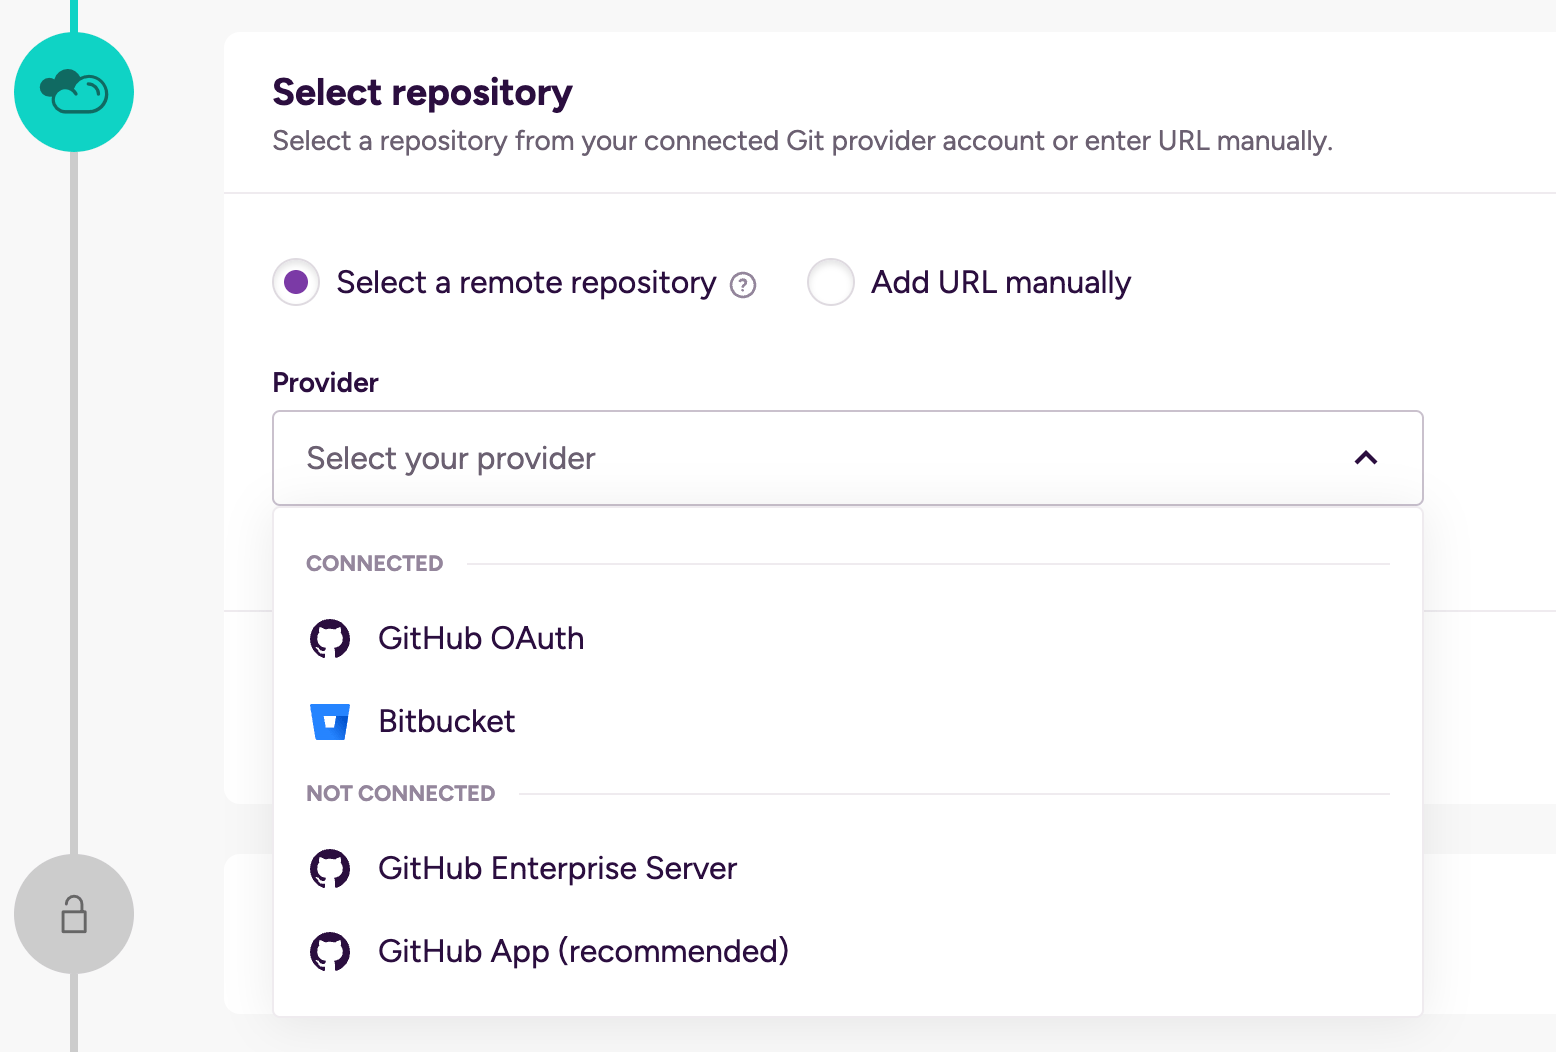
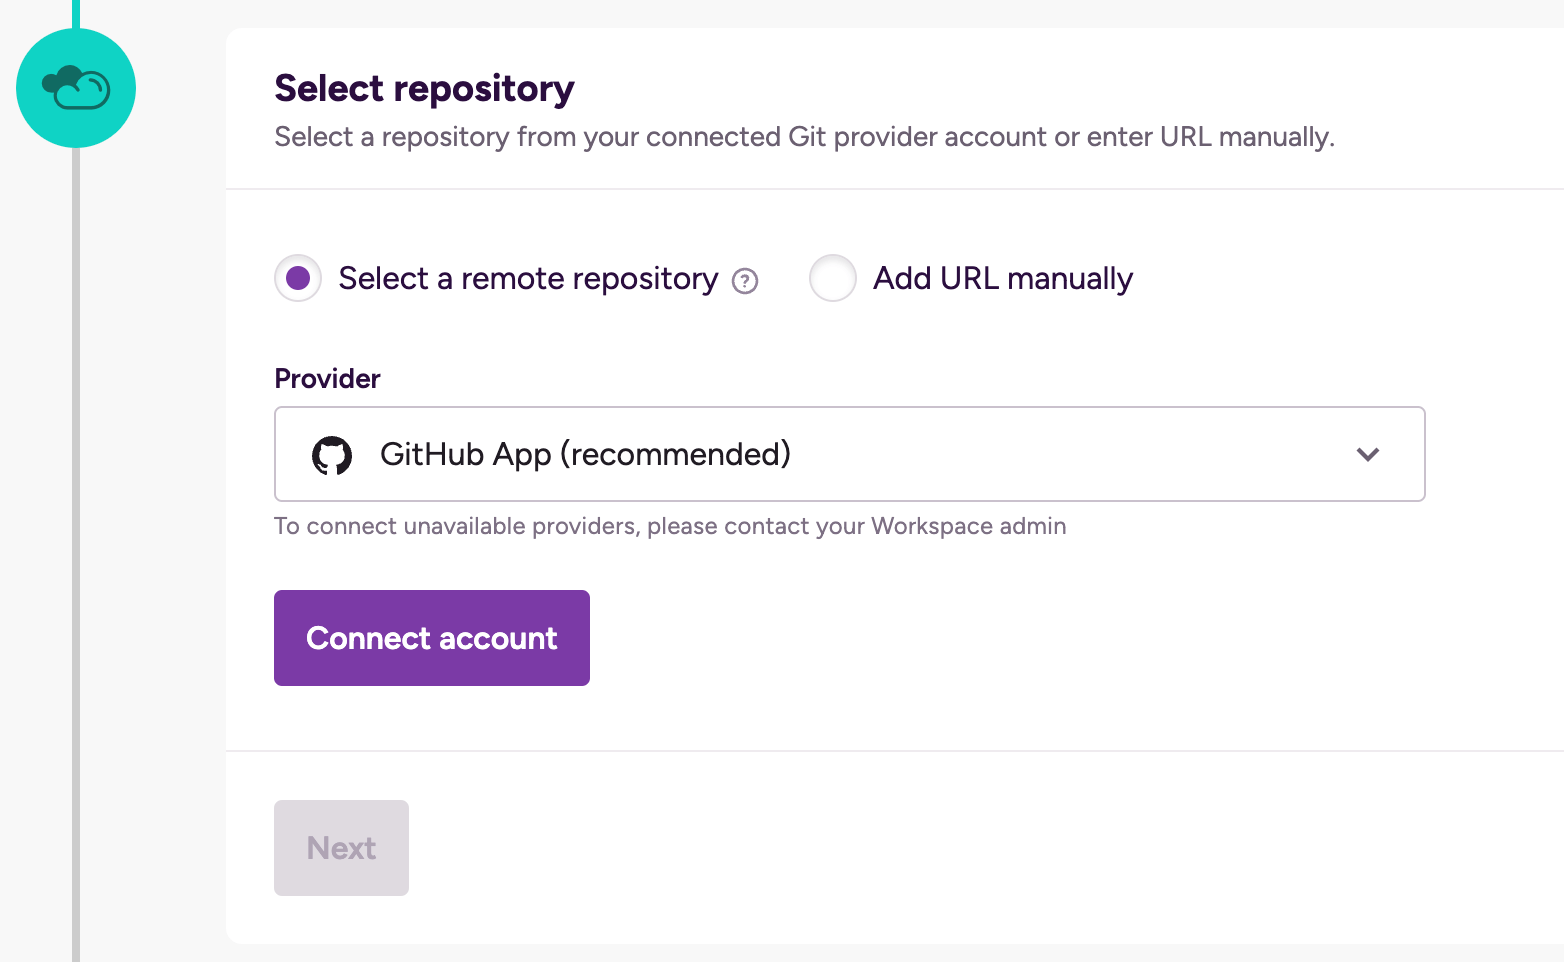
At the Select a repository section, select from the dropdown menu.
-
Click .
-
You will be prompted to select the GitHub account or organization you want to connect. If you don't find the one you need in the list, you need to install the App to that account or organization first: click the link below the list of accounts.
-
Once you click the link, you will be prompted to select an account or organization. After selecting one, you will be transferred to the Install & Authorize page.
-
On the Install & Authorize page, select the access type:
-
All repositories: the Bitrise GitHub App will have access to all repositories belonging to the account or organization, including future ones.
-
Only select repositories: Select one or more repositories that Bitrise will be able to access. You can add more later but to do so, you will need to reconfigure your repository access on the GitHub App's page.
-
-
When done, click . You will be redirected to continue adding your new Bitrise projec.
GitHub アプリ経由でリンクされた追加のリポジトリ
各 Bitrise アプリにはプライマリ Git リポジトリがあります。これはアプリのコードが保存される場所であり、ビルドを開始するとこのリポジトリがクローンされます。デフォルトでは、Bitrise アプリは他のリポジトリにアクセスできません。
ただし、プロジェクトには他のリポジトリが必要になる場合があります。たとえば、ビルド中にアクセスする必要があるプライベート サブモジュールがある場合があります。GitHub アプリを使用する場合は、追加のリポジトリをリンクすることでこれを実現できます。
その他の接続方法
Bitrise GitHub アプリを使用していない場合でも、追加のリポジトリへのアクセスを設定できます。 サブモジュールまたはプライベートリポジトリの依存関係を持つアプリ。
リンクされたリポジトリは、Bitrise アプリが GitHub App インストールを使用してアクセスできるリポジトリですが、アプリのプライマリ リポジトリではありません。
GitHub App インストールを介して接続されたアプリのビルドを実行すると、Bitrise は、デフォルトではプライマリリポジトリにのみアクセスできる一時トークンを生成します。追加のリポジトリがリンクされると、ビルド用に生成されたトークンは追加のリポジトリにアクセスできるようになります。
リポジトリをリンクするには、次の条件をすべて満たす必要があります。
-
GitHub アプリは、GitHub 上のリポジトリを所有するアカウントまたは組織にインストールされます。
-
リポジトリに対してアプリのインストールが有効になっています。
-
リポジトリをリンクしようとしているユーザーは、GitHub 上のリポジトリにアクセスできます。GitHub ユーザー アカウントにリポジトリへのアクセス権がない場合は、Bitrise にリンクできません。
追加のリポジトリへのリンク
GitHub App 接続が確立されたアプリに追加のリポジトリをリンクするには:
-
Bitriseでアプリを開くには、 管理者 アプリチームでの役割。
-
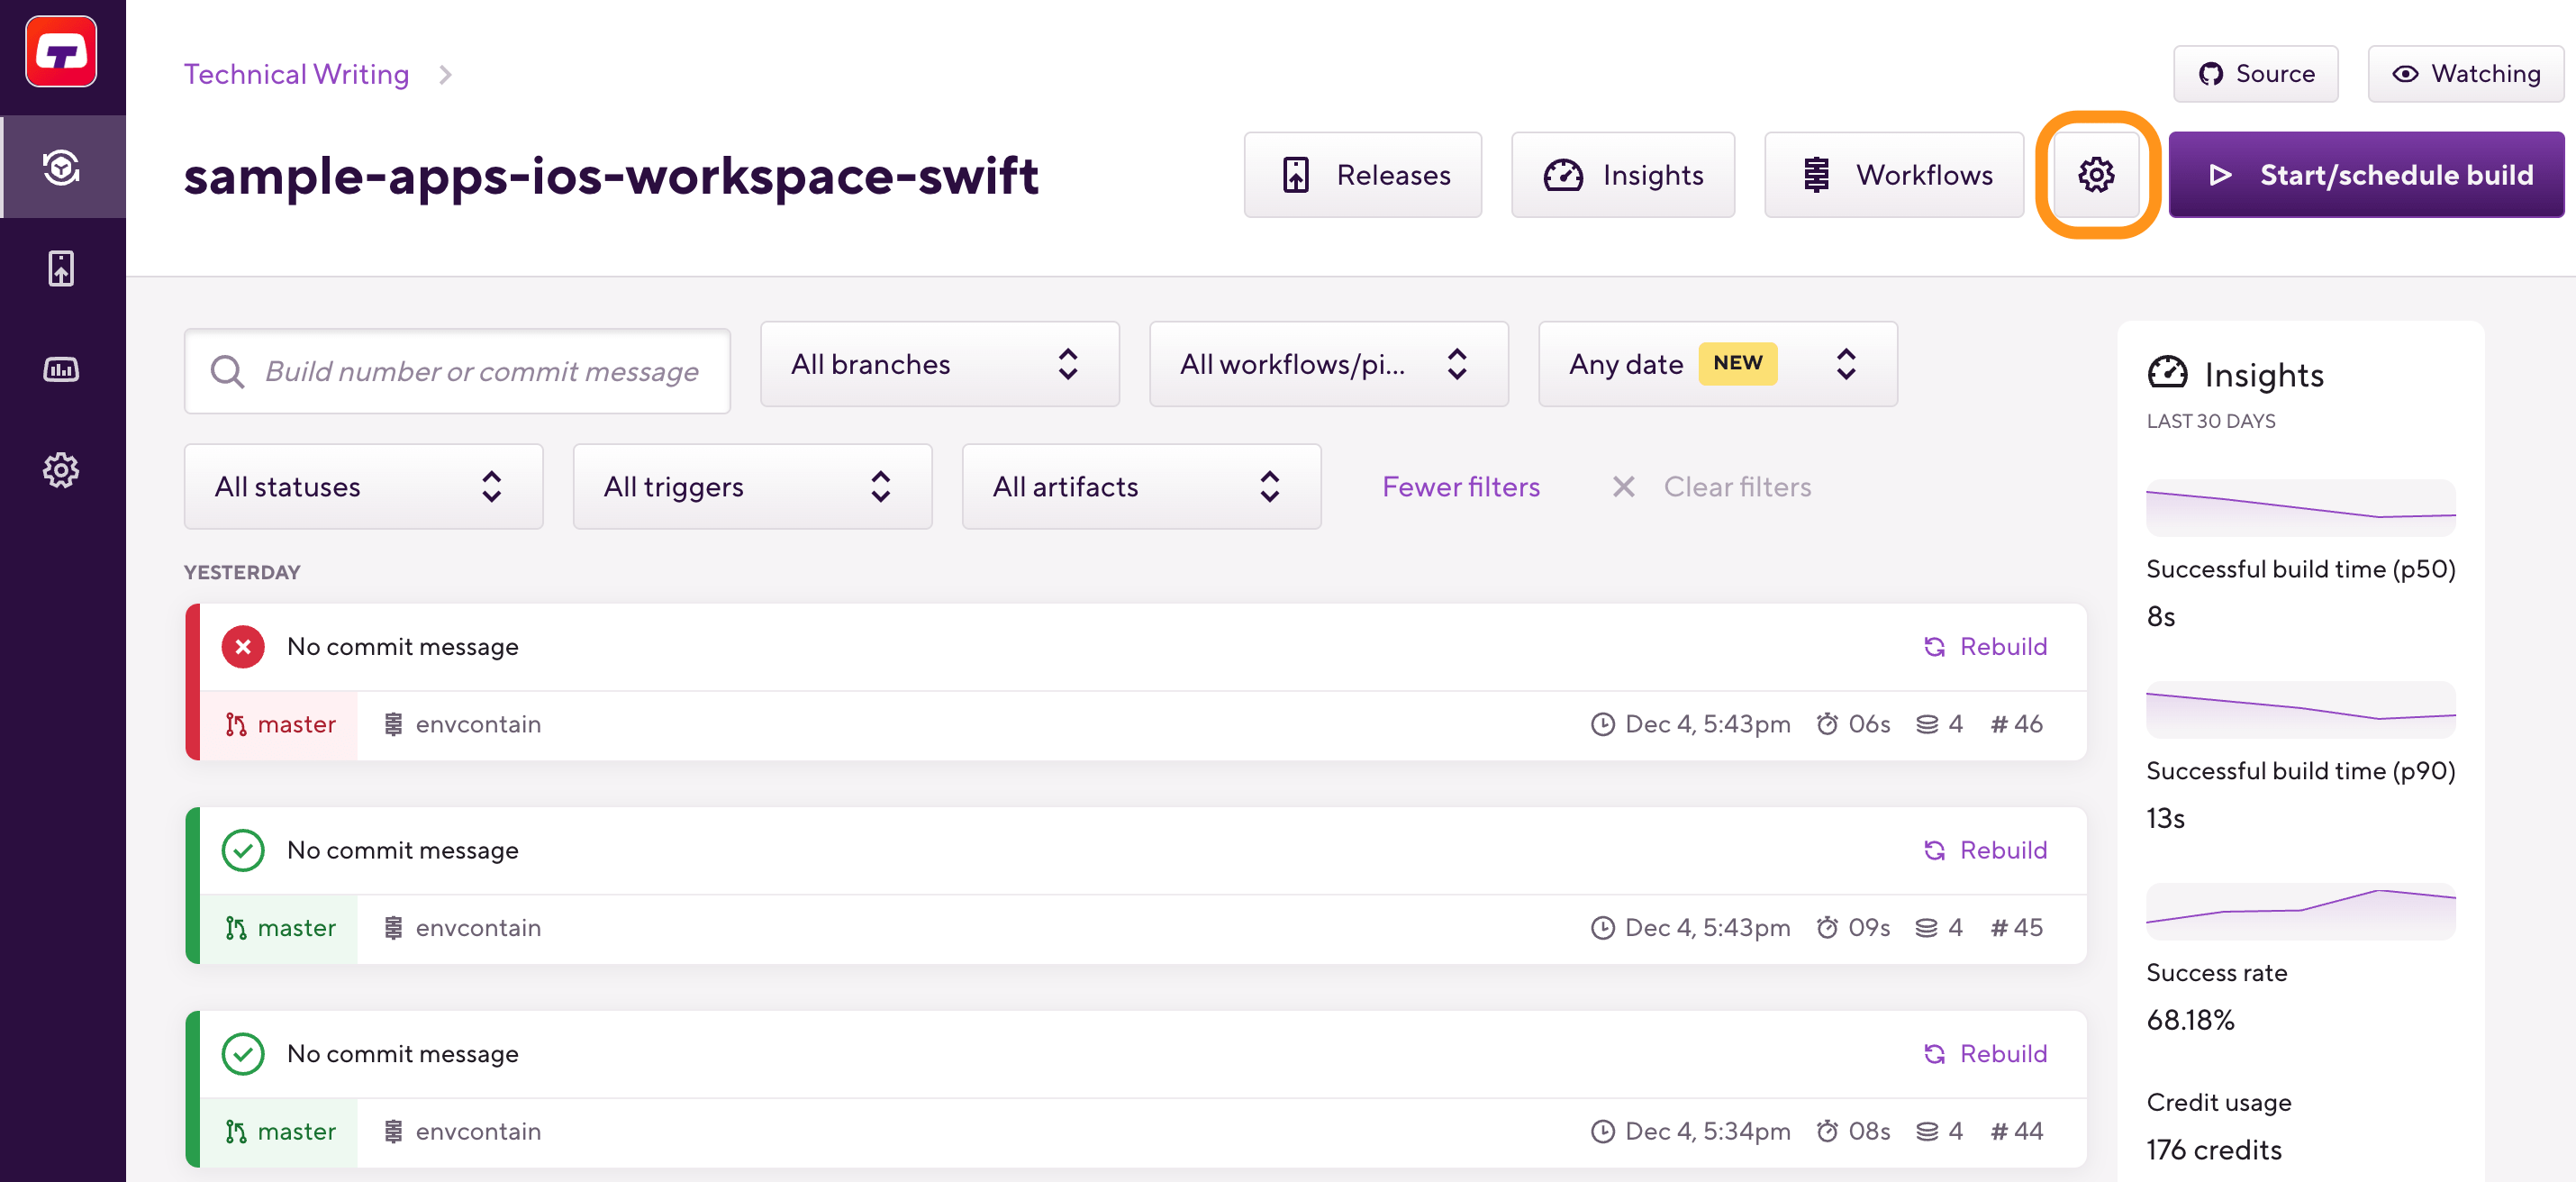
に移動します 設定 タブ。
-
左側で、 統合 そして、 統合 ページで、 Git プロバイダー タブ。
-
を見つける Git 統合ステータス カードをクリックして 。
-
の中に 追加のリポジトリを有効にする ダイアログで、リンクするリポジトリを選択します。
最大 50 個の追加リポジトリをリンクできます。
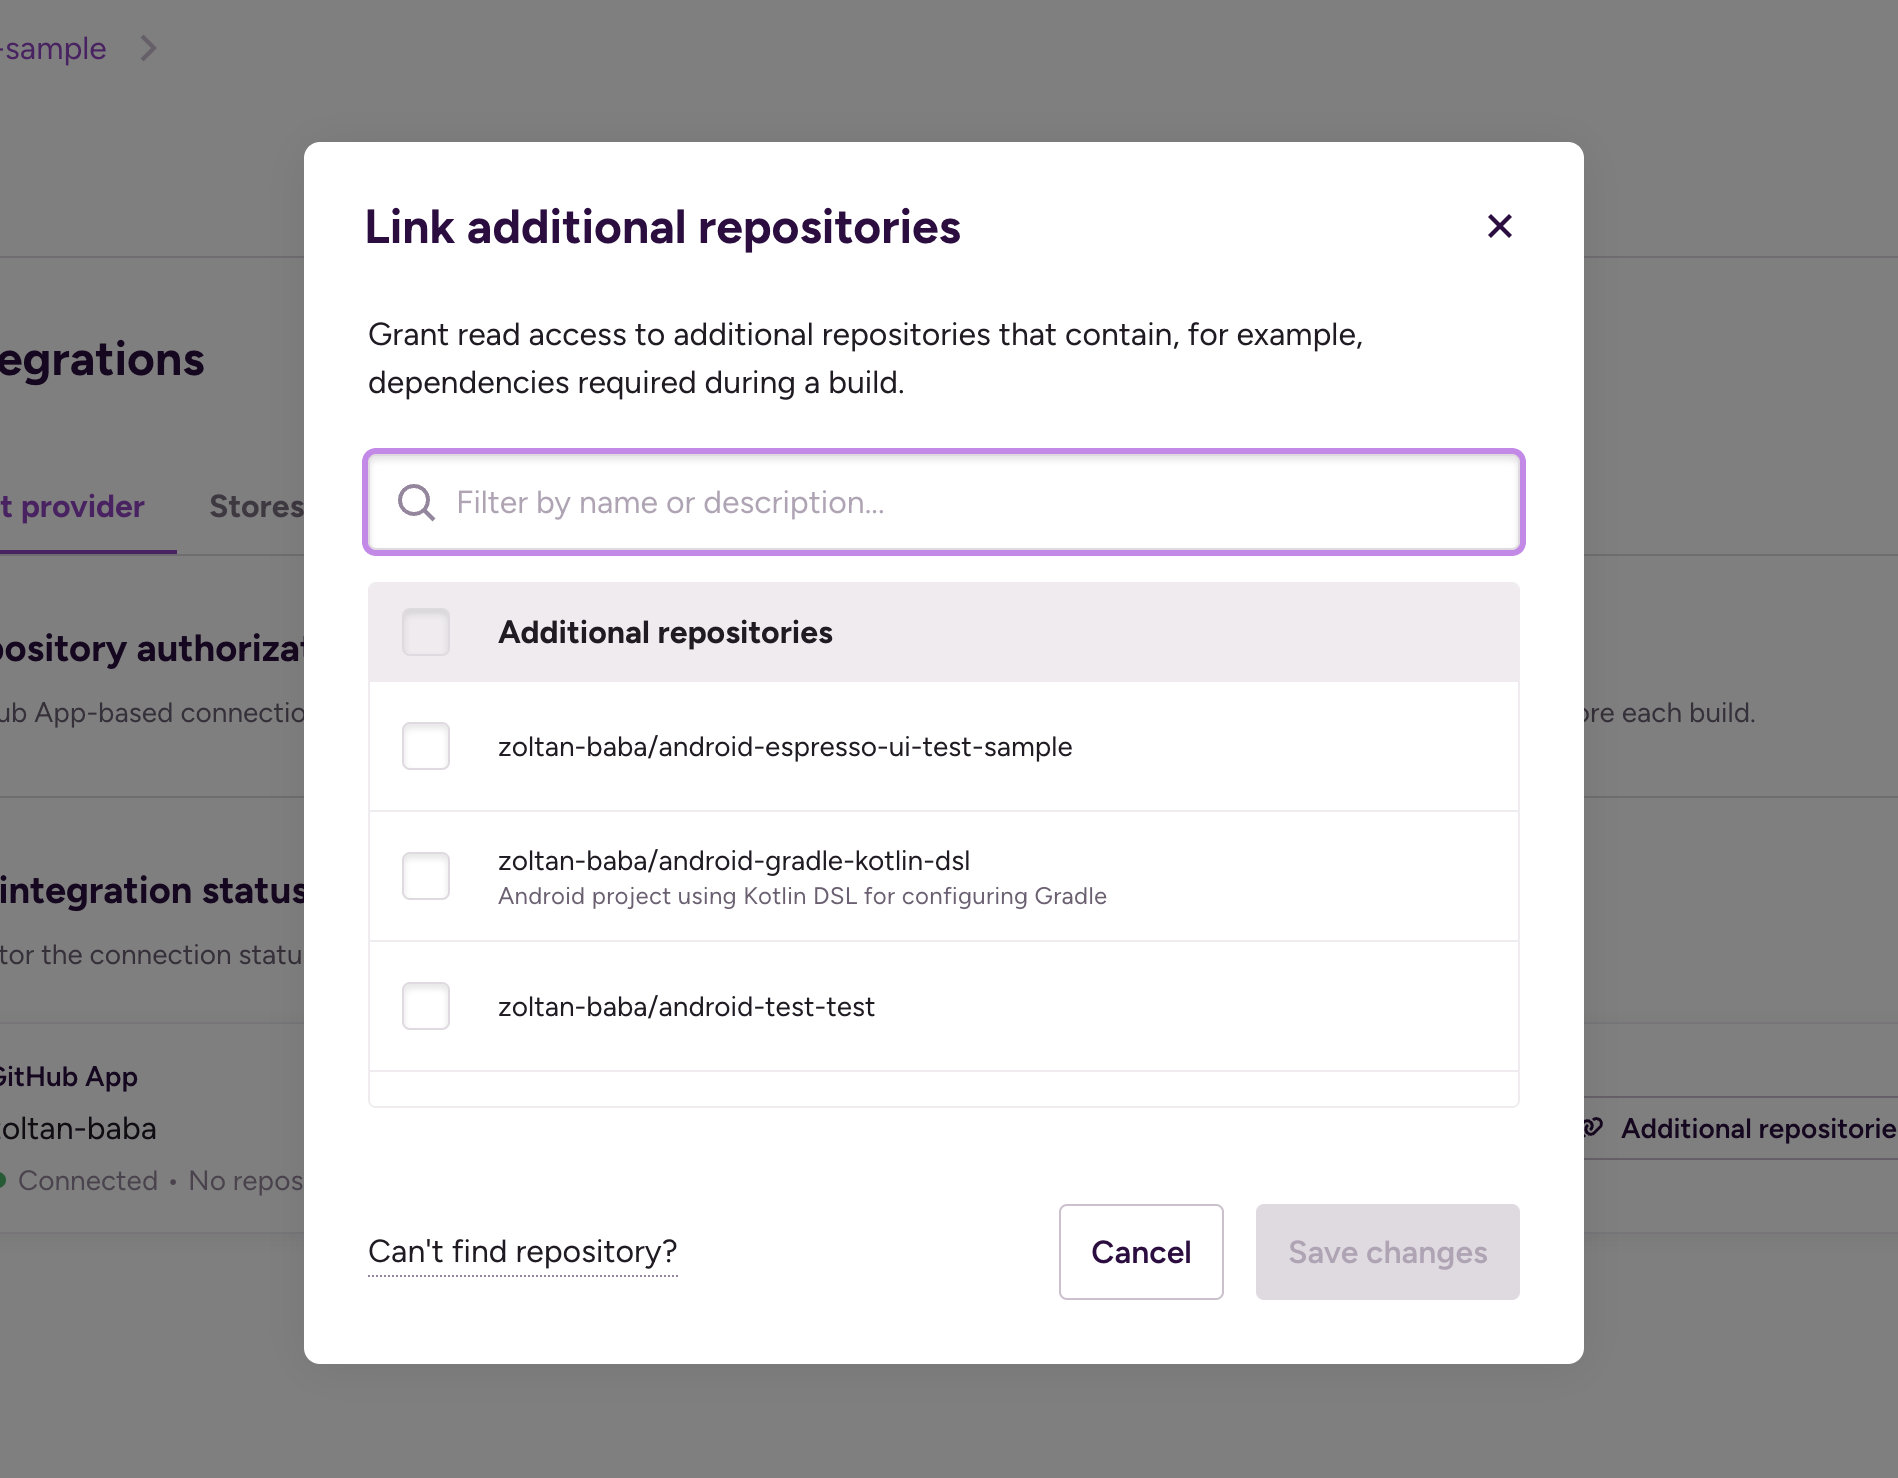
リポジトリのリストが表示されます。リストにリポジトリを表示するには、次の 2 つが必要です。
-
GitHub ユーザーはこれにアクセスできる必要があります。
-
GitHub App インストールではこれにアクセスできます。
リポジトリの無効化
すでにリポジトリがリンクされている場合、それらのリポジトリへのアクセス権を持たないユーザーはリポジトリを無効にすることはできますが、再度追加することはできないことに注意してください。
-
-
完了したらクリック 。
GitHub アプリ経由でプライベート Step ライブラリを使用する
各 Bitrise プロジェクトには、デフォルトのステップ ライブラリ (ステップのリポジトリ) があります。設定でステップの正確なソースが指定されていない場合、Bitrise CLI はデフォルトのライブラリからステップ データを取得します。
このライブラリはプライベートなステップライブラリにすることができます。GitHubアプリ経由でこのようなライブラリにアクセスするには、 authenticate-host-with-netrc ワークフローで実行される最初のステップとして次のステップを指定します。
format_version: "13"
default_step_lib_source: https://github.com/my-private-org/my-bitrise-steplib.git
project_type: ios
workflows:
  example:
    steps:
    - https://github.com/bitrise-io/bitrise-steplib.git::authenticate-host-with-netrc@0:
注意: authenticate-host-with-netrc Step には完全なソース識別子があり、プライベート ライブラリではなく公式の Bitrise Step ライブラリから取得されていることを保証します。
Using the Step requires specifying three inputs: the host, the Git username, and the Git password. The Bitrise GitHub App integration uses token-based authentication: each build receives a one time token under the GIT_HTTP_PASSWORD Environment Variable.
This Env Var can be used as the password. The username can't be empty because the Step will fail but it is not used so it doesn't matter what you put there.
format_version: '13'
default_step_lib_source: https://github.com/tothszabi/steplib.git
project_type: ios
workflows:
  example:
    steps:
    - https://github.com/bitrise-io/bitrise-steplib.git::authenticate-host-with-netrc@0:
        inputs:
        - host: github.com
        - username: username
        - password: "$GIT_HTTP_PASSWORD"
    - private-script@1: {}
Running git clone with linked repositories
If you attempt to run git clone or other git commands for a linked repository, your build
might fail with an authentication error. This is because the authentication credentials are stored in a local netrc file. This file is automatically generated by the official Git Clone Step.
However, if you use your own script to perform git clone, or you use any other Git command requiring authentication before the Git Clone Step, you need to create the netrc file. You
have two ways:
-
You can do it manually.
-
You can use the Authenticate host with netrc Step. It should be the first Step of your Workflow.
HTTP URLs
Make sure you always use HTTP URLs when cloning private repository dependencies.
Using the Step requires specifying three inputs: the host, the Git username, and the Git password. The Bitrise GitHub App integration uses token-based authentication: each build receives a one time token under the GIT_HTTP_PASSWORD Environment Variable.
This Env Var can be used as the password. The username can't be empty because the Step will fail but it is not used so it doesn't matter what you put there.
workflows:
  example:
    steps:
    - authenticate-host-with-netrc@0:
        inputs:
        - host: github.com
        - username: "username"
        - password: "$GIT_HTTP_PASSWORD"
アプリを追加するときにGitプロバイダーアカウントを接続する
Connecting a Git provider account with an OAuth app allows Bitrise to:
-
List the available repositories when adding a new project.
-
Automatically register webhooks. Webhooks allow setting up build triggers and enable the use of Git Insights.
-
あなたにログインします bitrise.io アカウント。
-
クリック 上部のメニュー バーの記号をクリックして選択します。 .
-
に 新しいアプリを作成する ページで、アカウントを選択し、アプリのプライバシー設定を設定します。
-
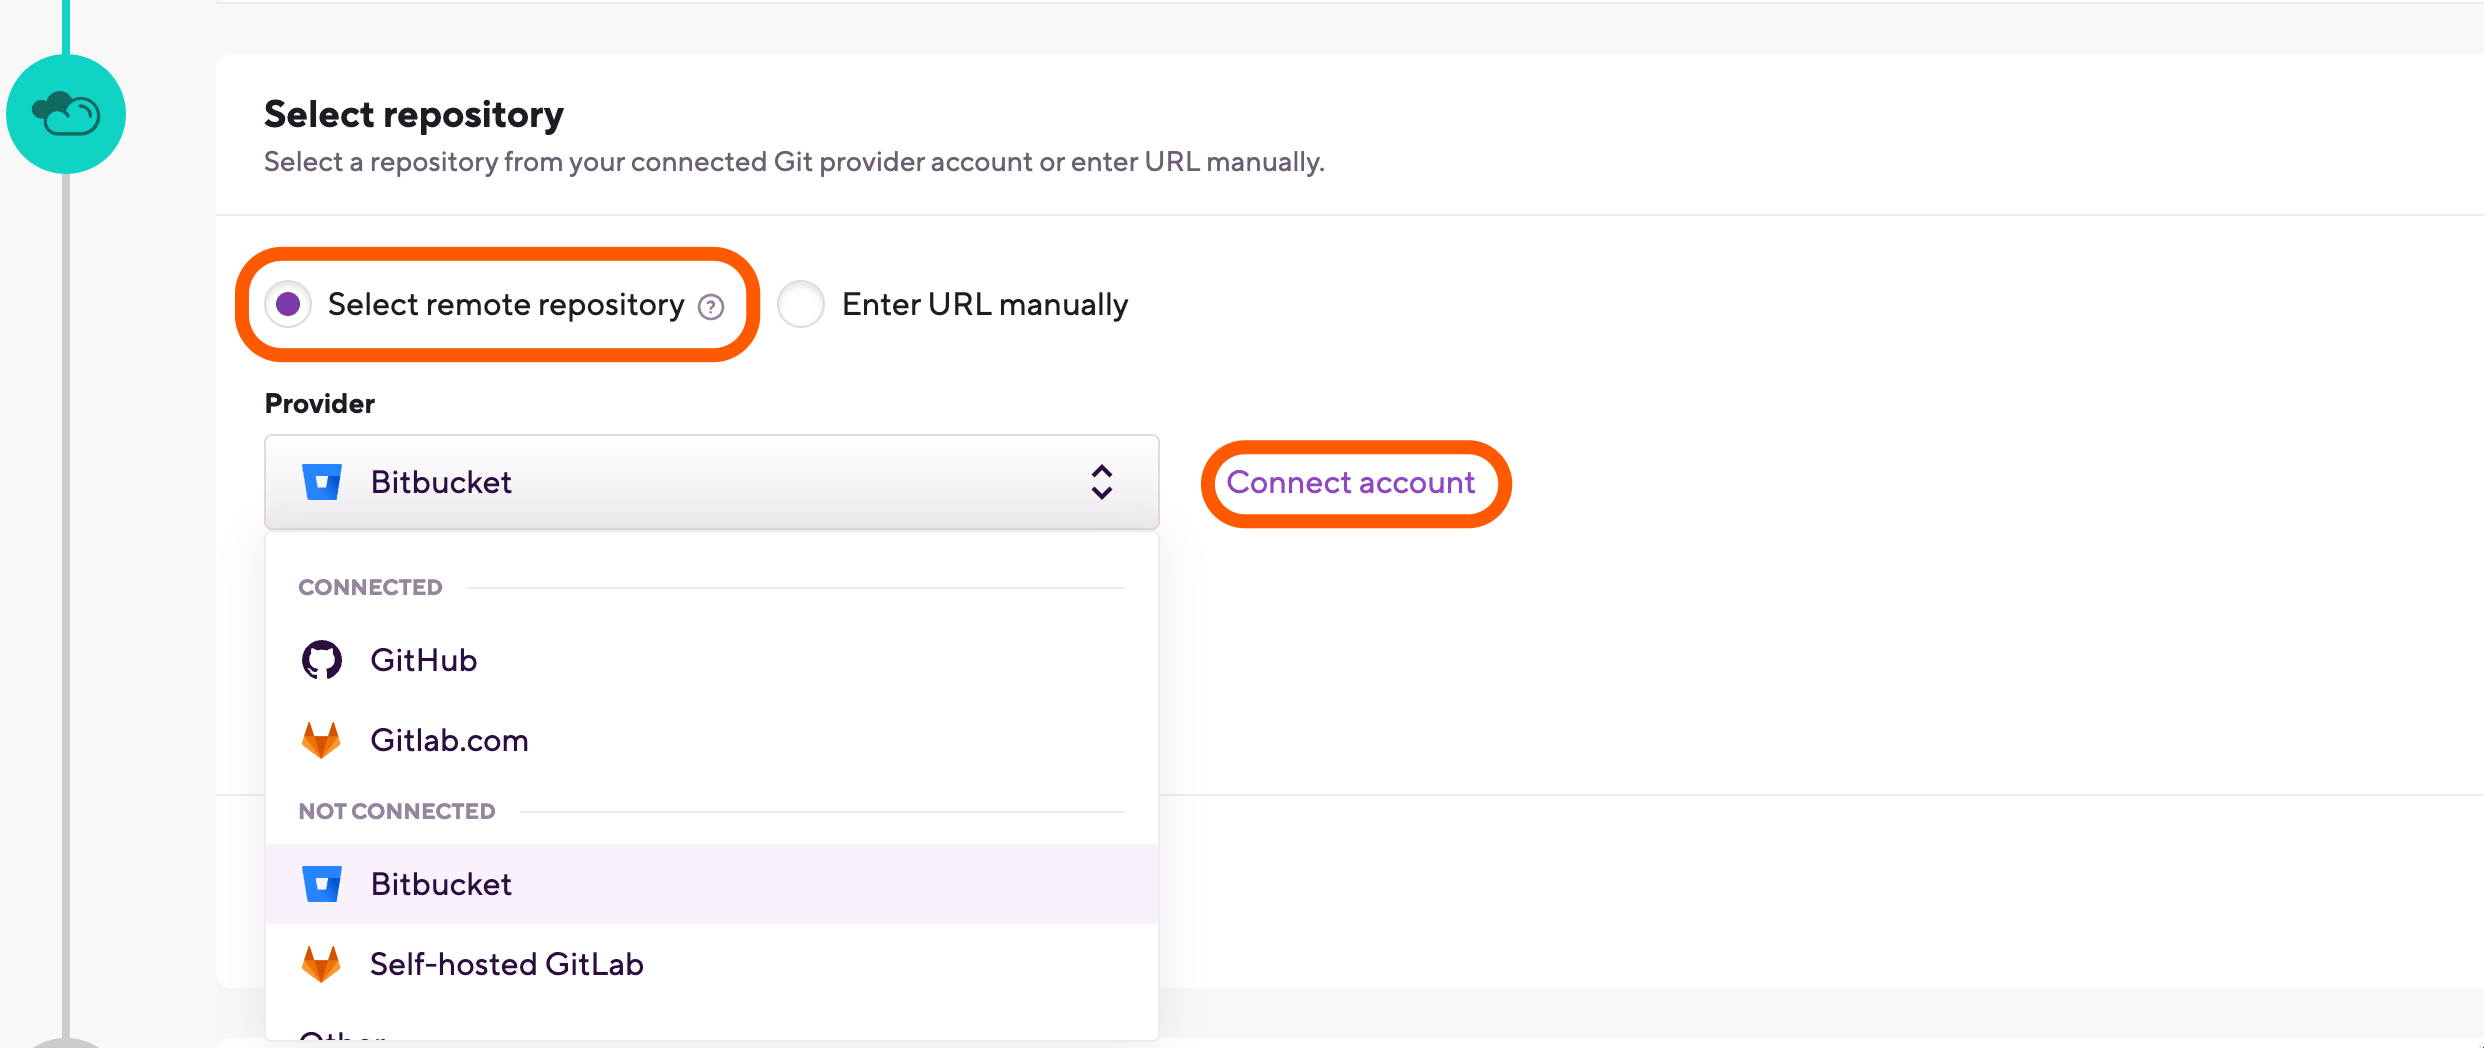
の下にあるラジオ ボタンを使用します。 リポジトリを選択 セクションで、リモート リポジトリを選択するか、手動で URL を入力するかを選択します。
git URL を手動で入力することを選択した場合は、 Git リポジトリ (クローン) URL フィールドをクリックして .
-
リモート リポジトリを選択した場合は、アプリのリポジトリの Git サービス プロバイダーを選択します。そのプロバイダーのアカウントが Bitrise アカウントに接続されていない場合、UI に接続オプションが表示されます。
-
クリック .これにより、Git プロバイダーのログイン ページが表示されます。
-
Gitプロバイダーアカウントにログインします。
-
bitrise.ioを承認するように求められるはずです-やってください!成功した場合は、Bitriseにリダイレクトされ、アカウントが正常にリンクされたことを通知するポップアップメッセージが表示されます。クリック 。
プロファイル設定ページからGitプロバイダーアカウントを接続する
Connecting a Git provider account with an OAuth application allows Bitrise to:
-
利用可能なリポジトリを一覧表示する 新しいアプリの追加.
-
Webhook を自動登録する. Webhook により設定が可能 ビルドトリガー.
-
Bitriseにログインし、 ビットライズCI 左側のナビゲーション メニューから。
-
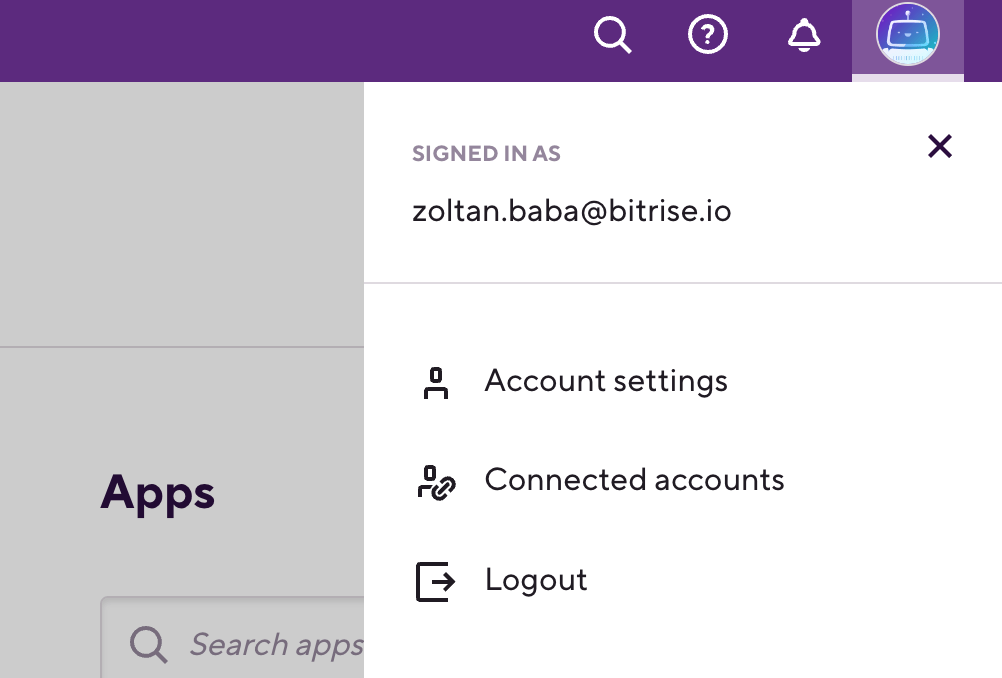
右上隅のプロフィール画像をクリックして、ドロップダウン メニューを開きます。
-
を選択 オプション。
-
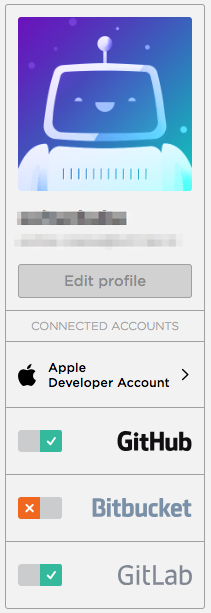
左側のメニューバーで、接続するGitプロバイダーの名前の横にあるトグルをクリックします。
-
Gitプロバイダーアカウントにログインします。
-
bitrise.ioを承認するように求められるはずです-やってください!成功した場合は、Bitriseにリダイレクトされ、アカウントが正常にリンクされたことを通知するポップアップメッセージが表示されます。クリック 。
Gitプロバイダーアカウントの切断
-
Bitriseにログインし、 ビットライズCI 左側のナビゲーション メニューから。
-
右上隅のプロフィール画像をクリックして、ドロップダウン メニューを開きます。
-
を選択 オプション。
-
左側のメニューバーで、切断するGitプロバイダーの名前の横にあるトグルをクリックします。
OAuth 接続から GitHub アプリへの切り替え
Bitrise プロジェクトに GitHub アカウントへの OAuth 接続が設定されている場合は、機能を失うことなくいつでも Bitrise GitHub アプリに変更できます。切り替えを強くお勧めします。Bitrise GitHub アプリがインストールされると、Bitrise ビルドを実行するためにサービス認証ユーザー、SSH キー、または Webhook は不要になります。
元に戻すことはできません
Bitrise プロジェクトを OAuth 接続から GitHub アプリに切り替えると、元に戻すことはできません。
切り替えるには:
-
関連ガイドの説明に従って、Bitrise GitHub アプリをインストールします。 Connecting a GitHub App from the Workspace settings page。
-
Bitriseでアプリを開くには、 管理者 アプリチームでの役割。
-
に移動します 設定 タブ。
-
左側のナビゲーションメニューで、 統合 そして、 Git プロバイダー タブ。
-
の中に Git 統合ステータス セクションでは、GitHub Appのサポートに関する情報が記載された青いカードが表示されます。切り替えるには、 。
