Configuring SAML SSO on Bitrise
Workspace members can log in to a Bitrise workspace using their own SAML SSO provider’s system. With SAML SSO, workspaces will be able to apply the security guidelines of their SAML SSO provider when accessing their Bitrise workspace.
Workspace members can log in to a Bitrise workspace using their own SAML SSO provider’s system. With SAML SSO, workspaces will be able to apply the security guidelines of their SAML SSO provider when accessing their Bitrise workspace.
SAML SSO can also be enforced on a workspace: enforcing makes SAML SSO the only for logging in to the workspace.
Verifying your domain
You can add and verify your corporate domains from where you will manage Bitrise users. You can have multiple verified domains on Bitrise but you can only add one domain at a time. Multiple subdomains of the same domain count as different domains as Bitrise expects an exact match.
Verifying your domain is a requirement for configuring SCIM and it makes it much more convenient for users to sign up and log in to Bitrise via SAML SSO. We recommend starting your SAML SSO setup with verifying your domain as the process can take some time.
-
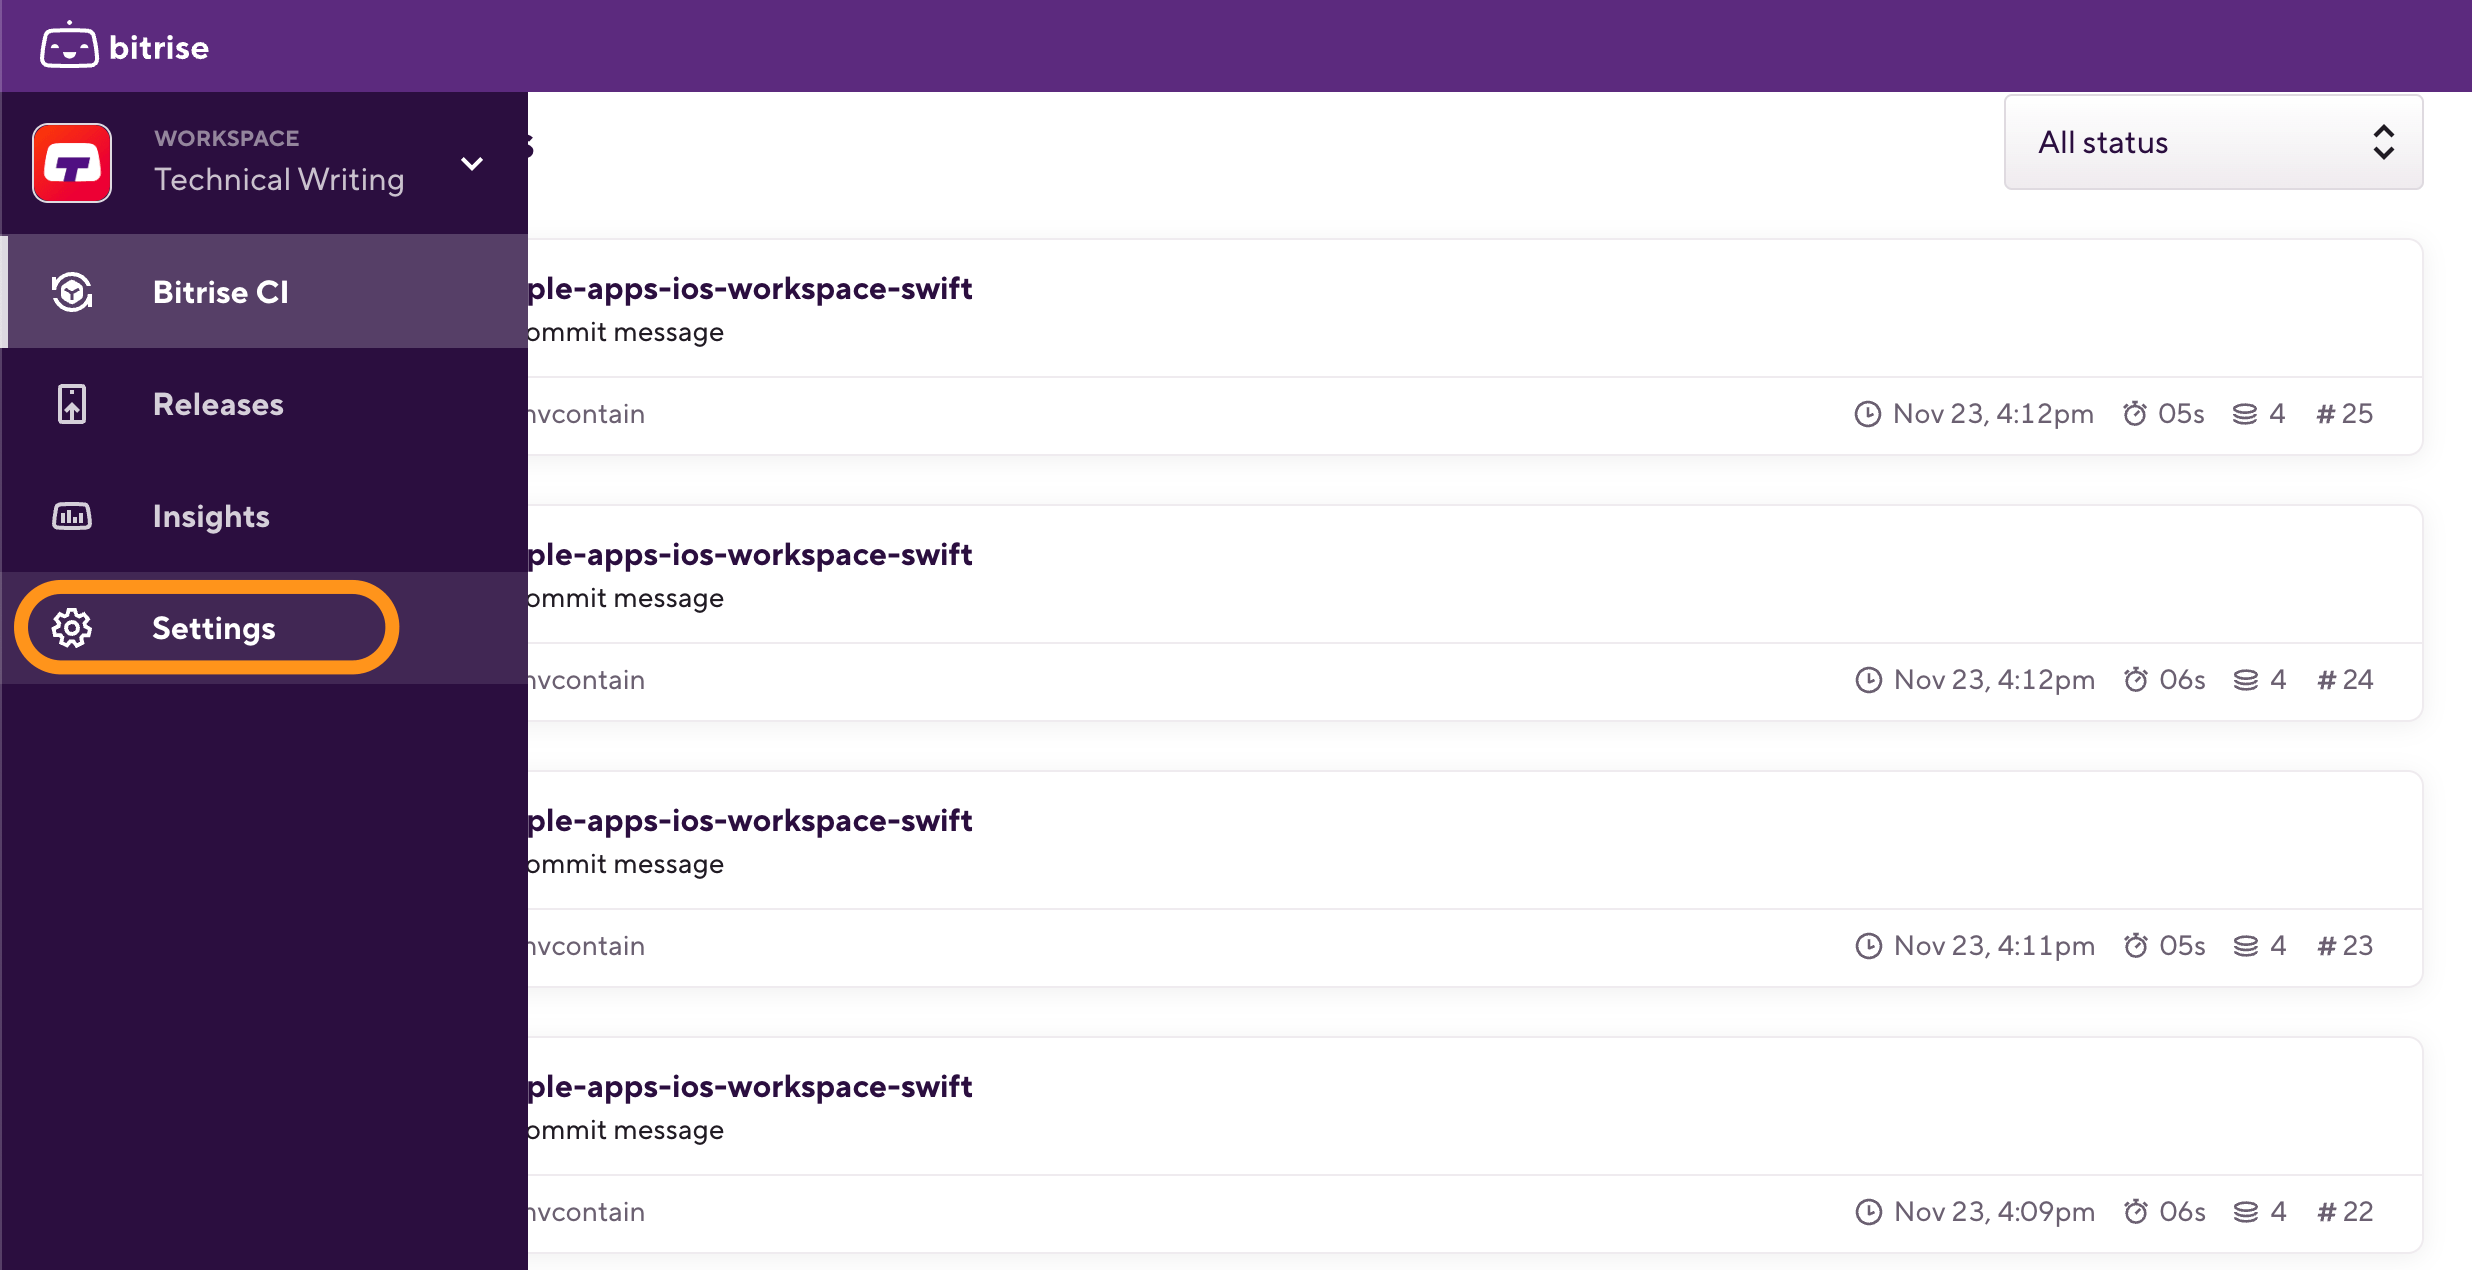
Log in to Bitrise and hover over the left navigation bar.
-
Make sure you have the right workspace selected in the Workspace menu.
-
Select Settings.
-
On the left, select Single sign-on.
-
Select the Domains tab.
-
In the Domain control section, click .
-
Enter your domain name in the dialog box, and click .
Handling subdomains
Bitrise expects an exact match for the domain names. If you use subdomains, you need to add the full name of the subdomain. For example, if you own
mydomain.comand you want to use its subdomainexternal.mydomain.com, you should write it out the subdomain's name when setting up domain control on Bitrise. -
You will see a domain verification code. You need to add this code to as a DNS TXT record at your domain provider.
-
Click to copy the verification code and close the dialog box.
After you've added the DNS TXT record at your domain provider, we'll commence domain verification. This can take up to 72 hours. You will receive an email once it is completed.
Setting up SAML SSO for a Bitrise workspace
In this tutorial, we describe how workspace owners can set up their SAML SSO and invite workspace members to set up their own connections.
Before connecting SAML SSO to your workspace, you need:
-
A SAML SSO provider (Identity Provider) that you can connect Bitrise to and the administrator to the SAML SSO provider is at hand.
-
An owner or manager of the workspace. Workspace members with the role of contributor or viewer can't set up SAML SSO.
To start configuring SAML SSO:
-
Log in to Bitrise and hover over the left navigation bar.
-
Make sure you have the right workspace selected in the Workspace menu.
-
Select Settings.
-
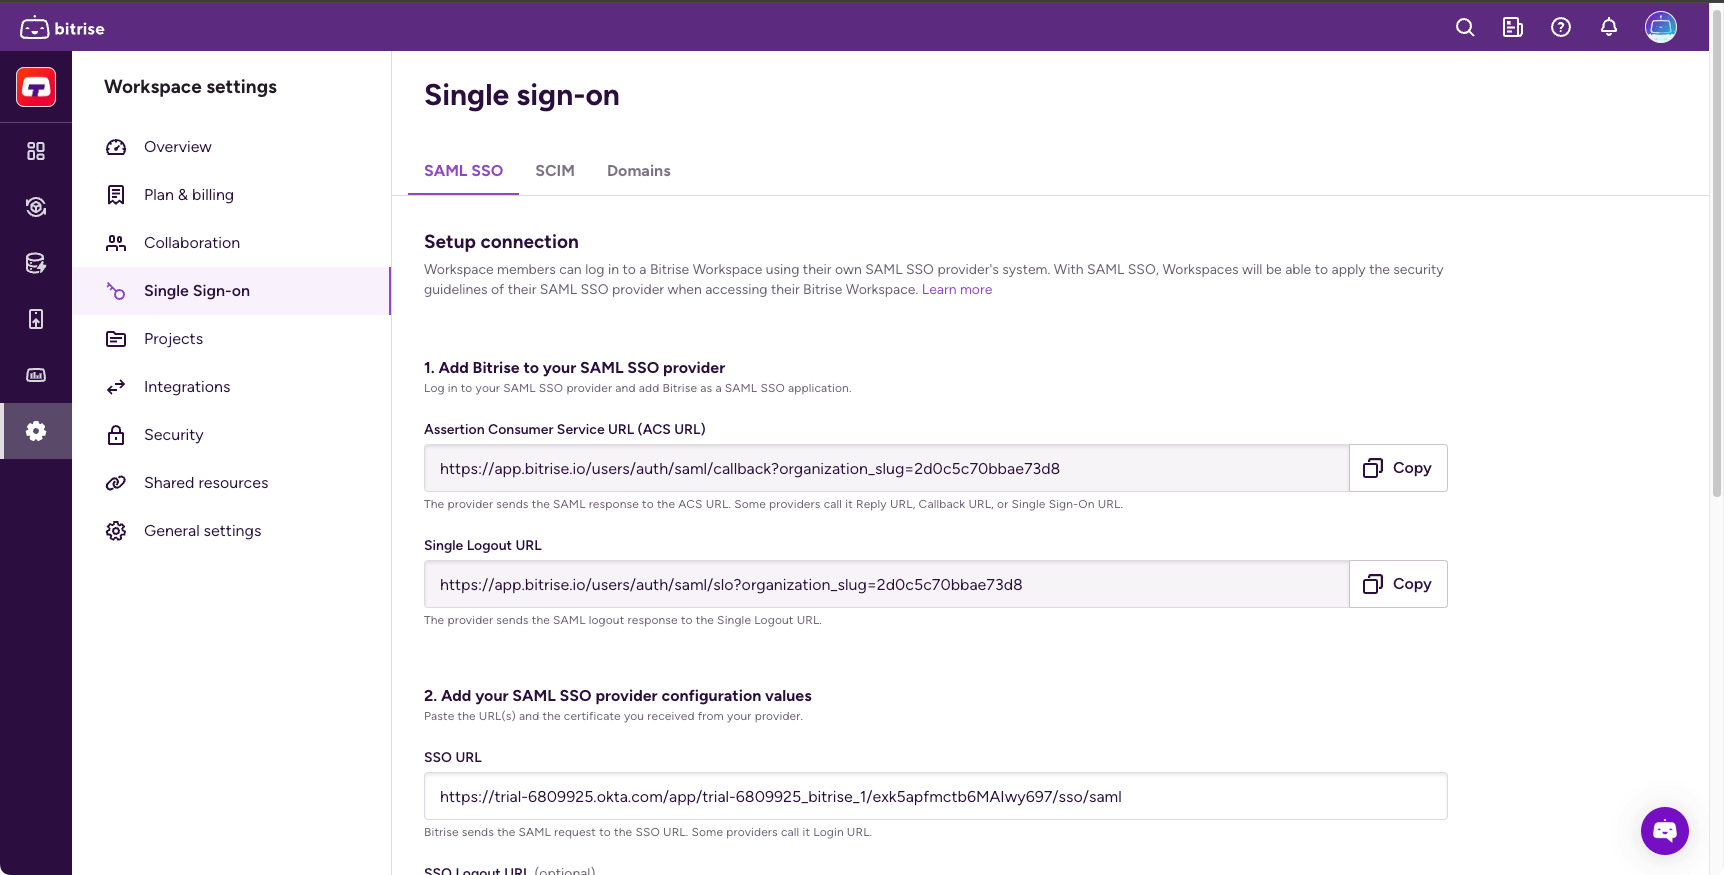
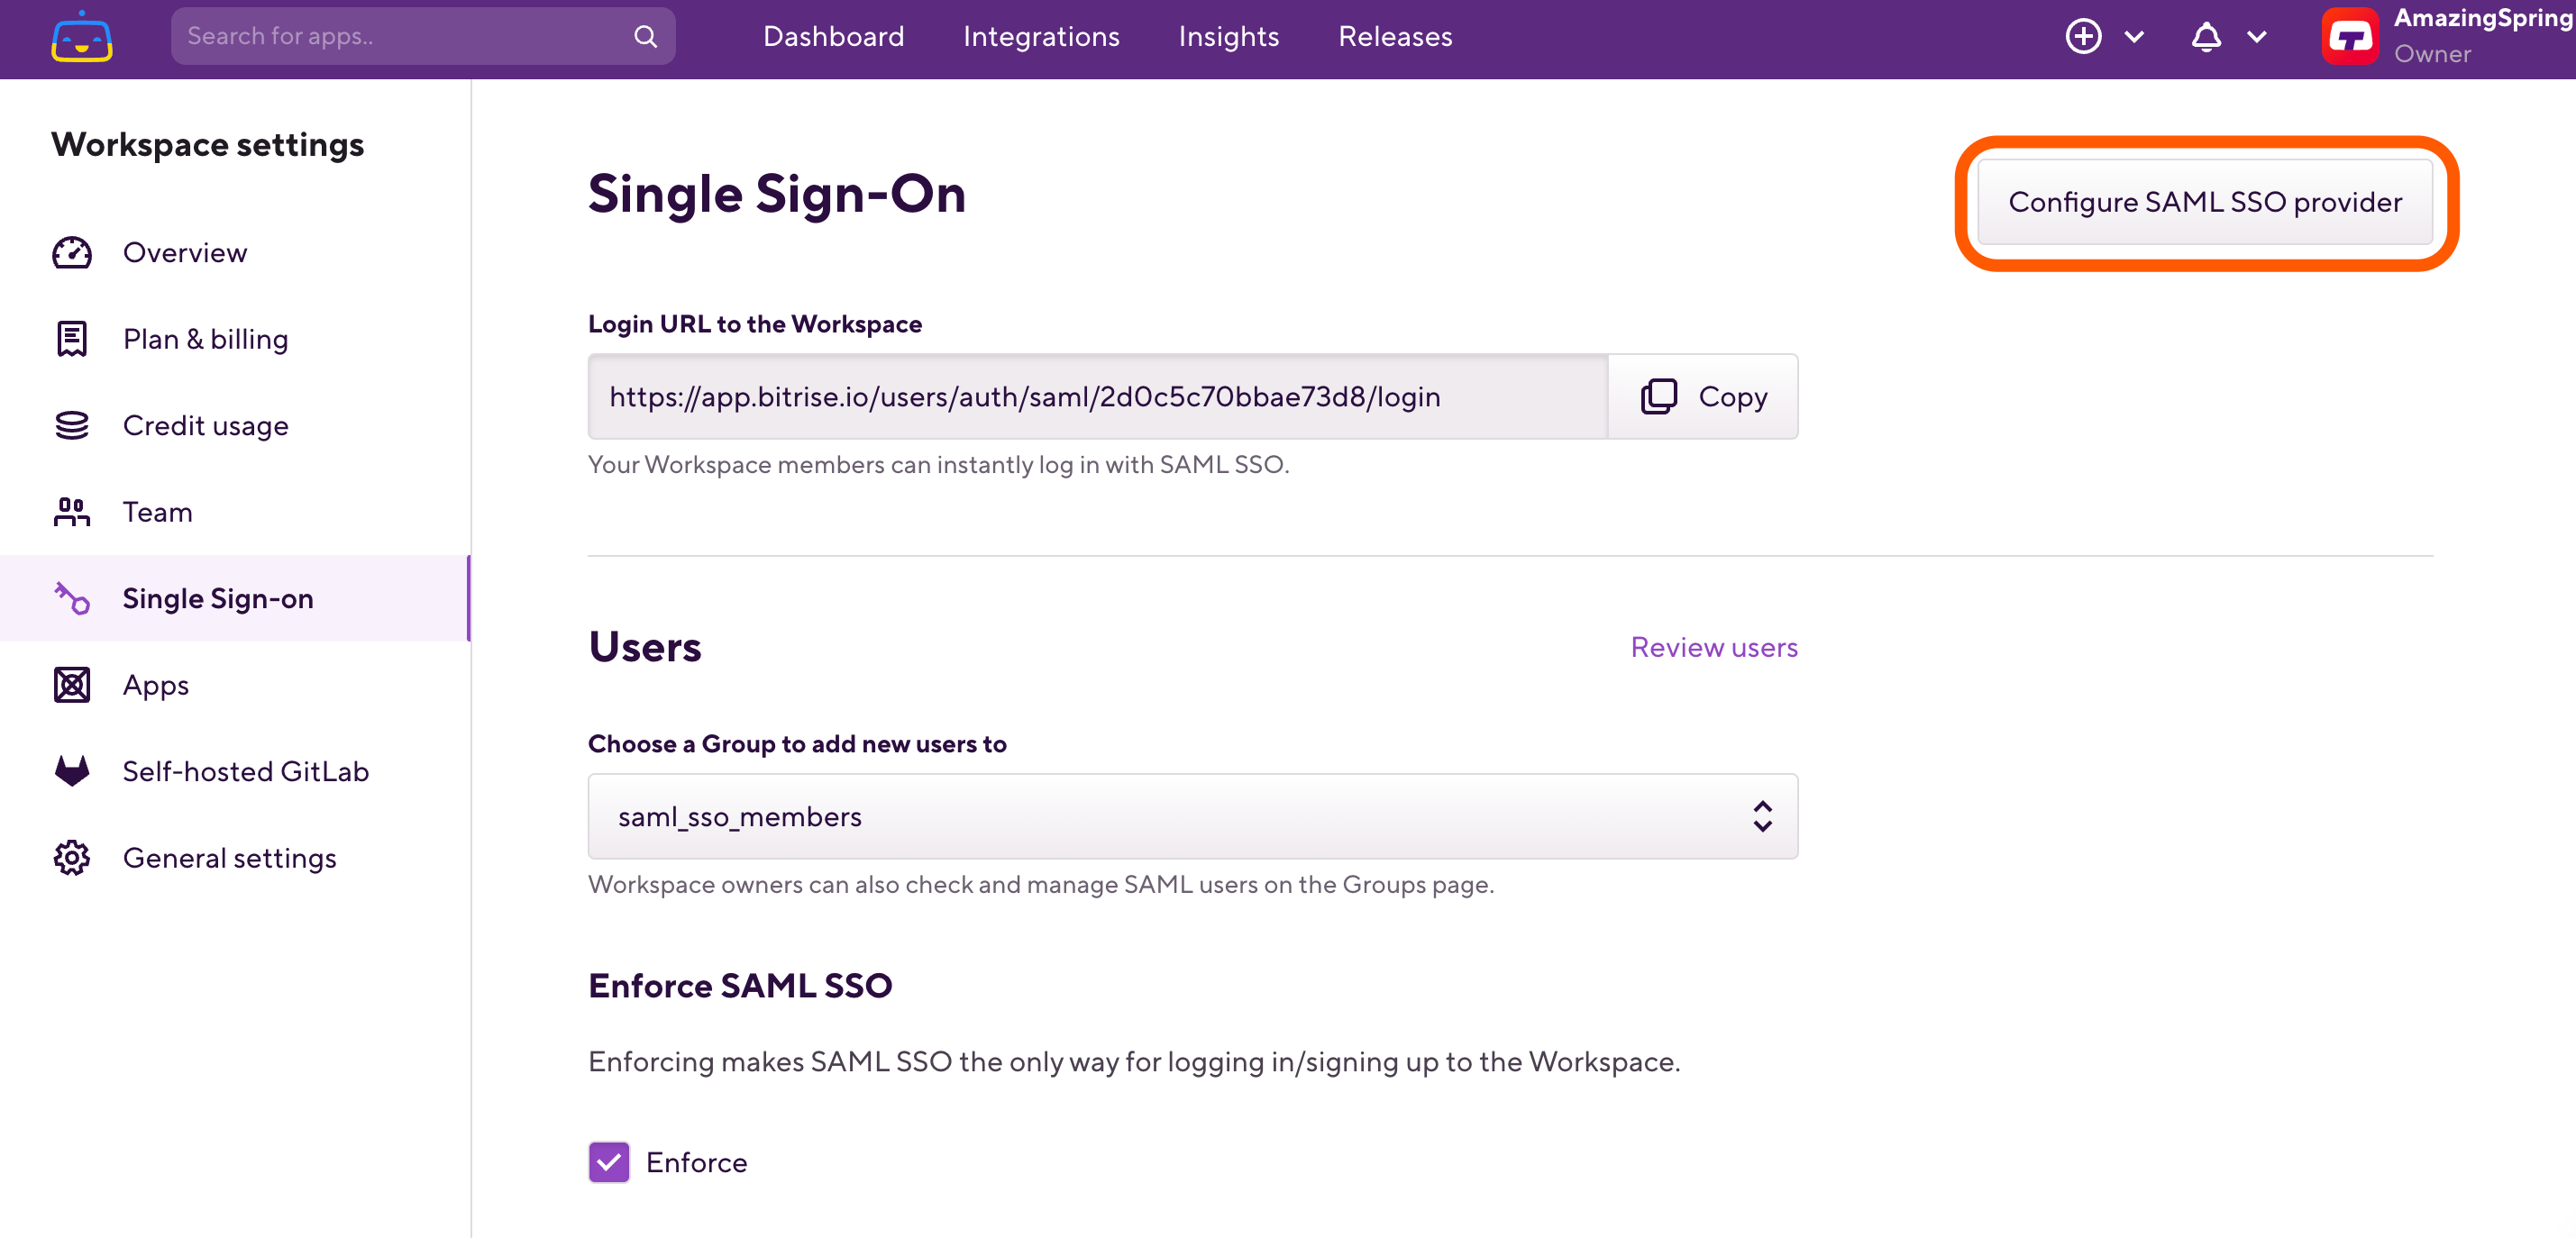
Select the Single Sign-On tab on the left.
-
Click . It opens the Setup connection screen.
-
Log in to your SAML SSO provider and add Bitrise as a SAML SSO application, using the values from the Setup connection screen in your Bitrise workspace settings:
-
Copy the Assertion Consumer Service URL (ACS URL) by clicking Copy. The provider sends the SAML response to the ACS URL. Some providers call it Reply URL, Callback URL, or Single Sign-On URL.
-
Copy the Single Logout URL by clicking . The provider sends the SAML logout response to the Single Logout URL.
You will receive configuration values from your SAML SSO provider.
-
-
Add your SAML SSO provider configuration values:
-
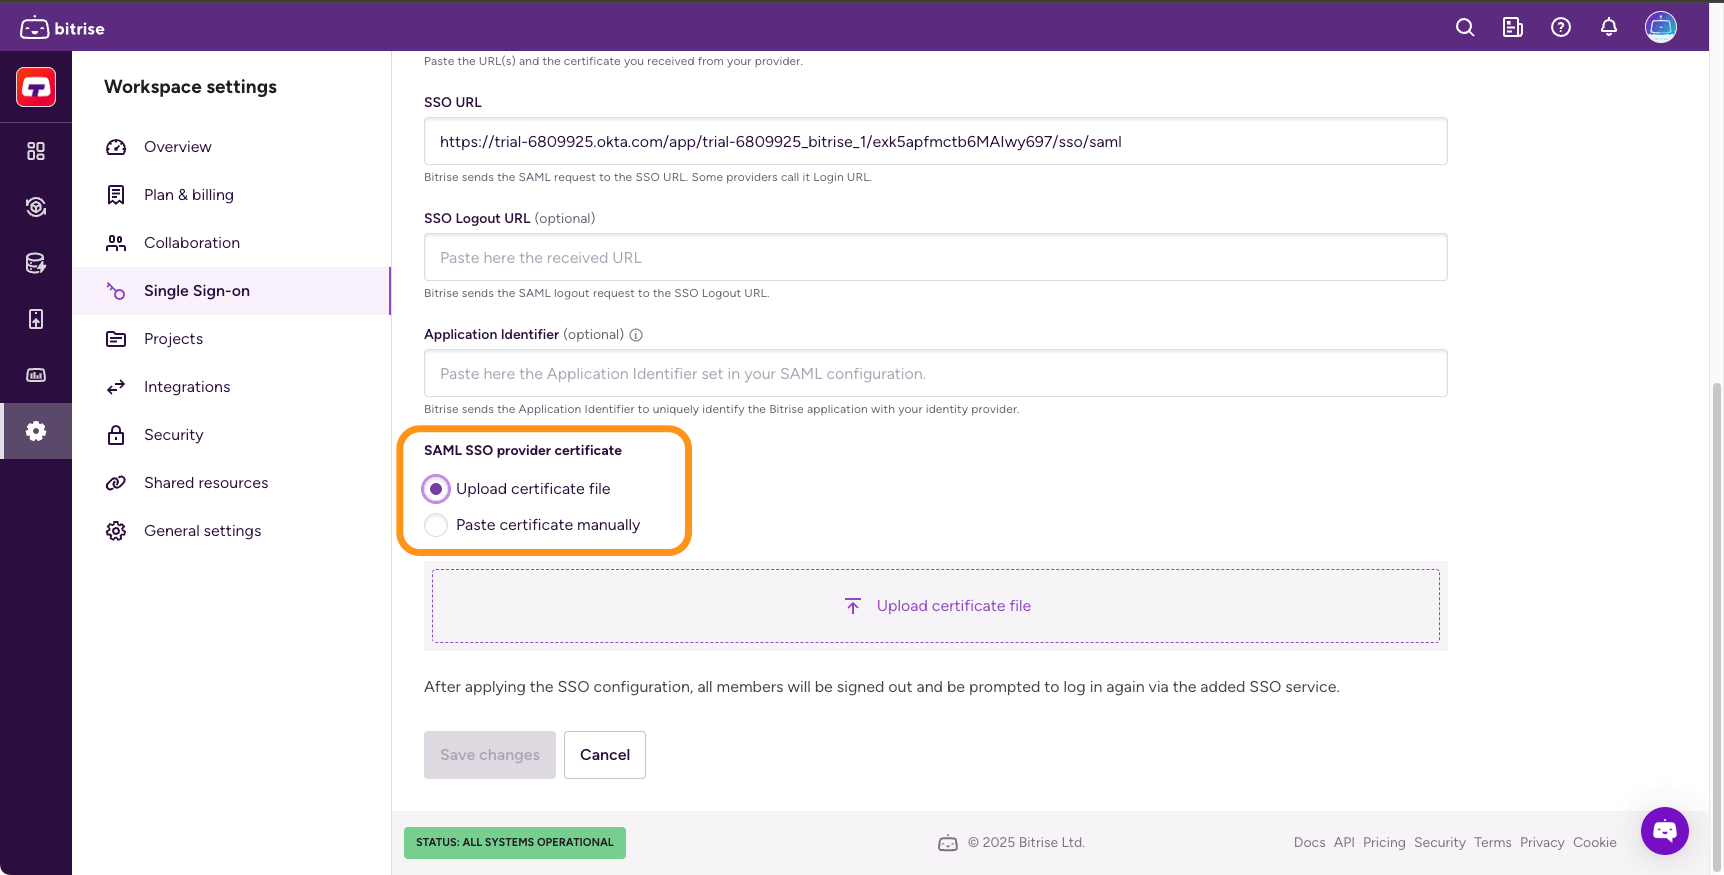
SSO URL: Bitrise sends the SAML request to the SSO URL. Some providers call it Login URL.
-
SSO Logout URL (optional): Bitrise sends the SAML logout request to the SSO Logout URL.
-
Application Identifier (optional): This is necessary if multiple workspaces use the same identity provider. This may be called Entity ID, Audience URI, or something similar.
-
-
Upload the SAML SSO provider certificate.
You can either upload the file or paste the certificate manually.
-
Click Save changes.
If you’ve completed the steps, you and workspace members should get a verification email about SAML SSO connected to the respective workspace.
Checking SAML SSO statuses on Bitrise
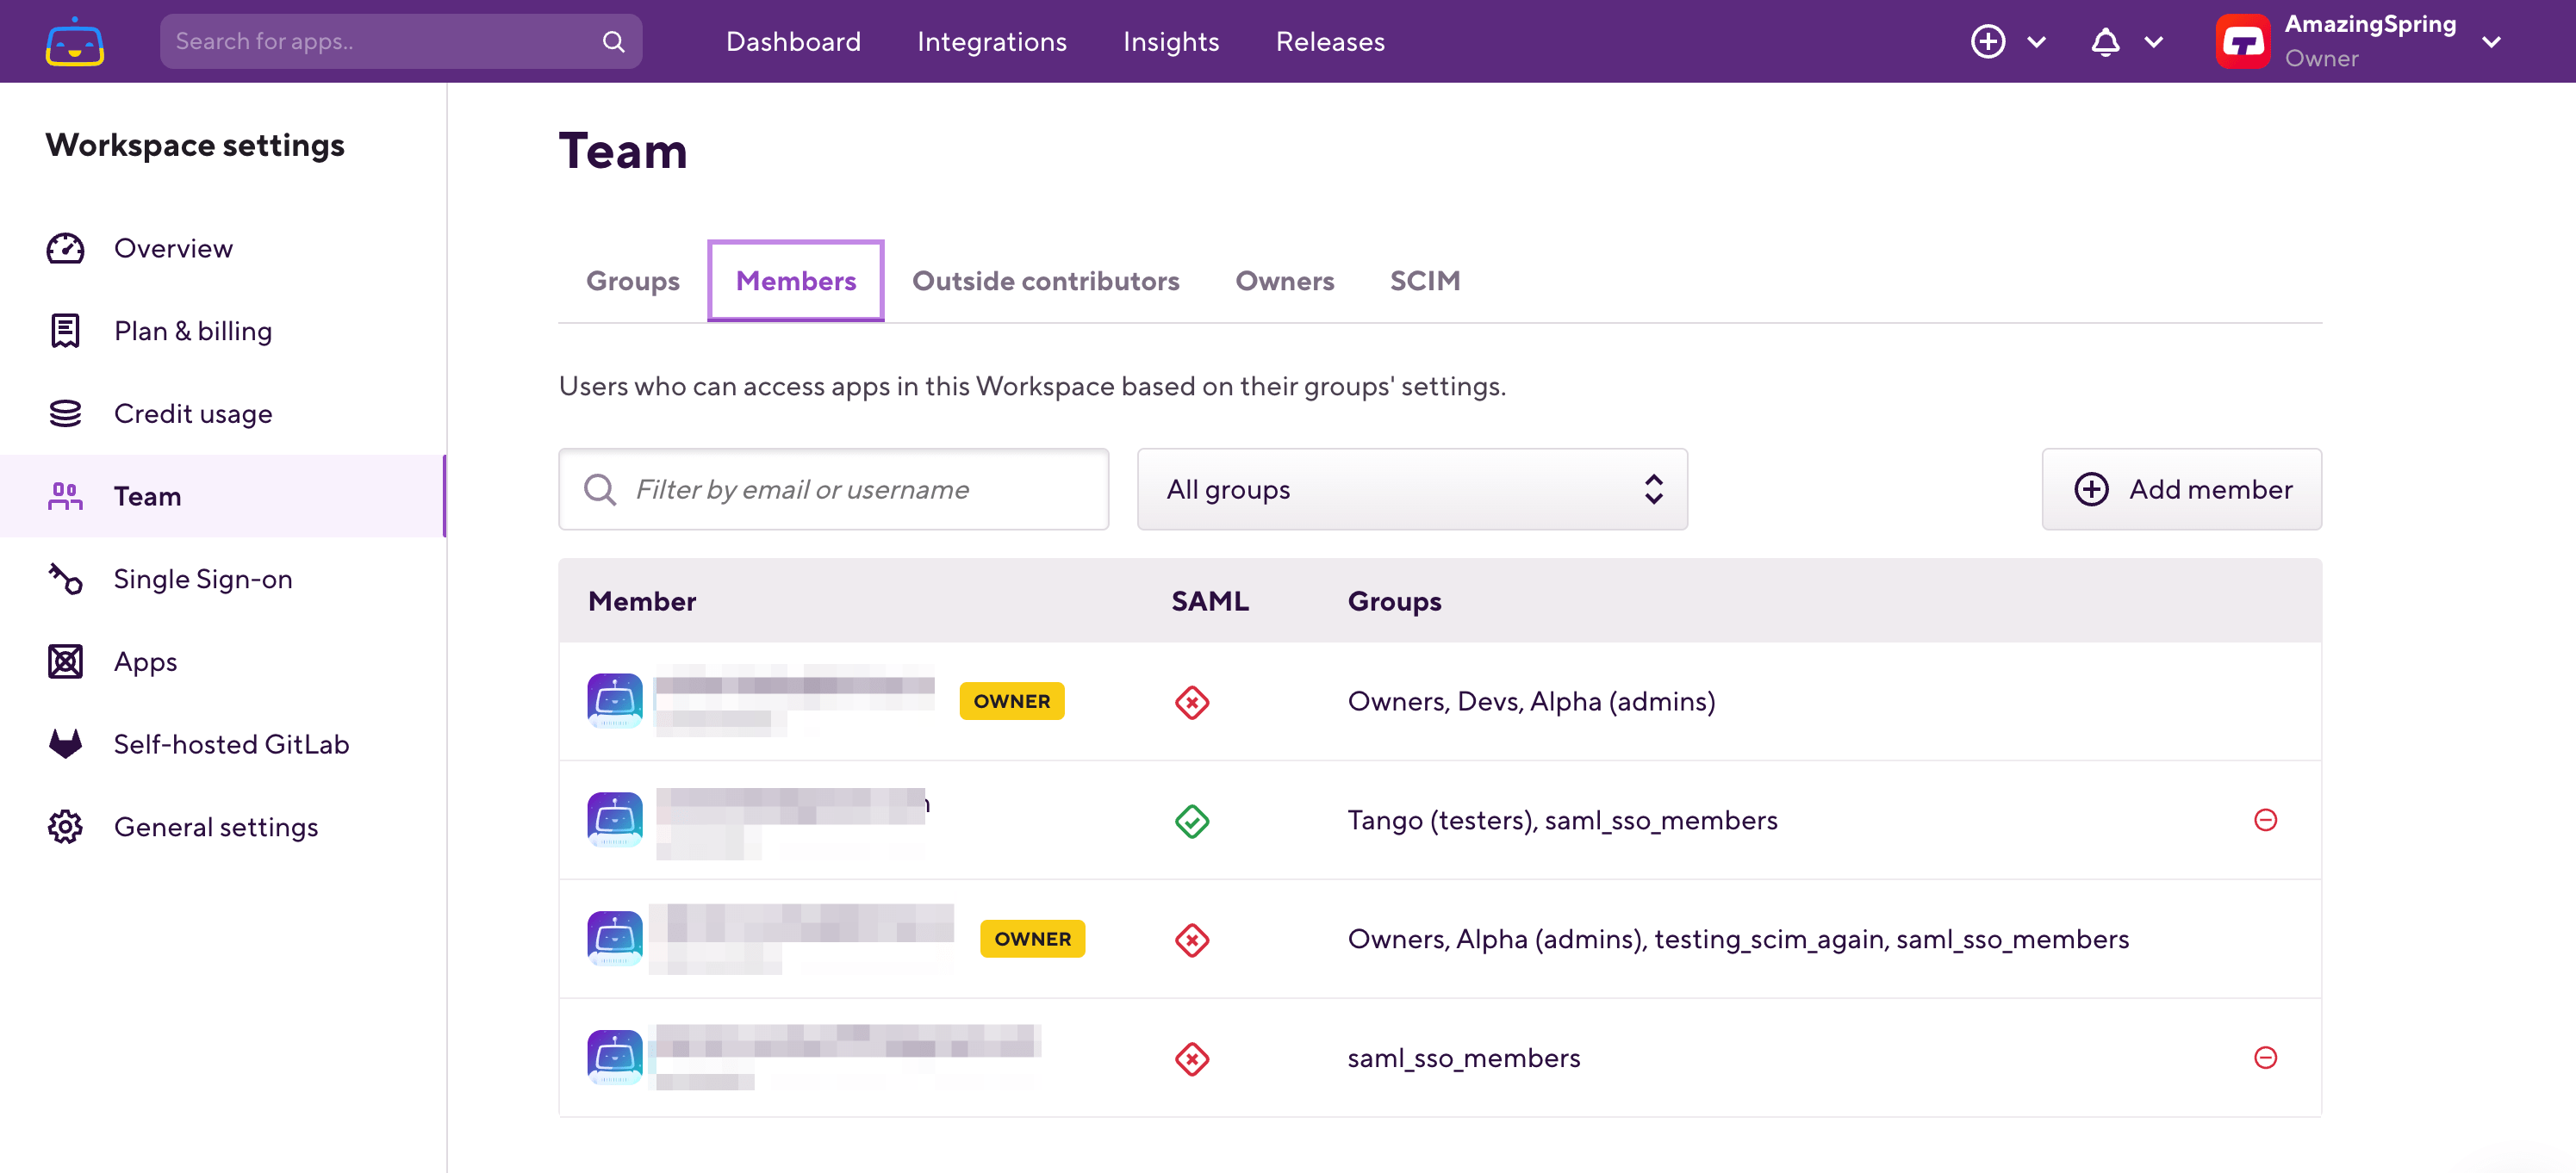
Now that the Workspace owner has set up SAML SSO for the Workspace, all Workspace members (including the Workspace owner) can check their other Workspace member’s SAML SSO statuses on the Team tab.
Accessing the Single Sign-on tab
The Single Sign-On tab is only available for the Workspace owner.
There are two kinds of SAML SSO statuses on Bitrise.
-
SAML IS ENABLED: Login via SAML SSO is enabled.
-
SAML IS DISABLED: The Workspace member has not enabled the SAML SSO connection yet. To enable it, the Workspace member has to follow the instructions in the verification email from Bitrise.
-
Go to your Workspace’s profile page.
-
Select Team from the left menu.
-
Go to the Members tab to check the Workspace member’s SAML status.
Enforcing SAML SSO on a Workspace
Enforcing SAML SSO on your Workspace provides an extra layer of security: you can enforce your own security guidelines to your Bitrise Workspace (for example, password format requirements, two-factor authentication).
Enforced SAML SSO
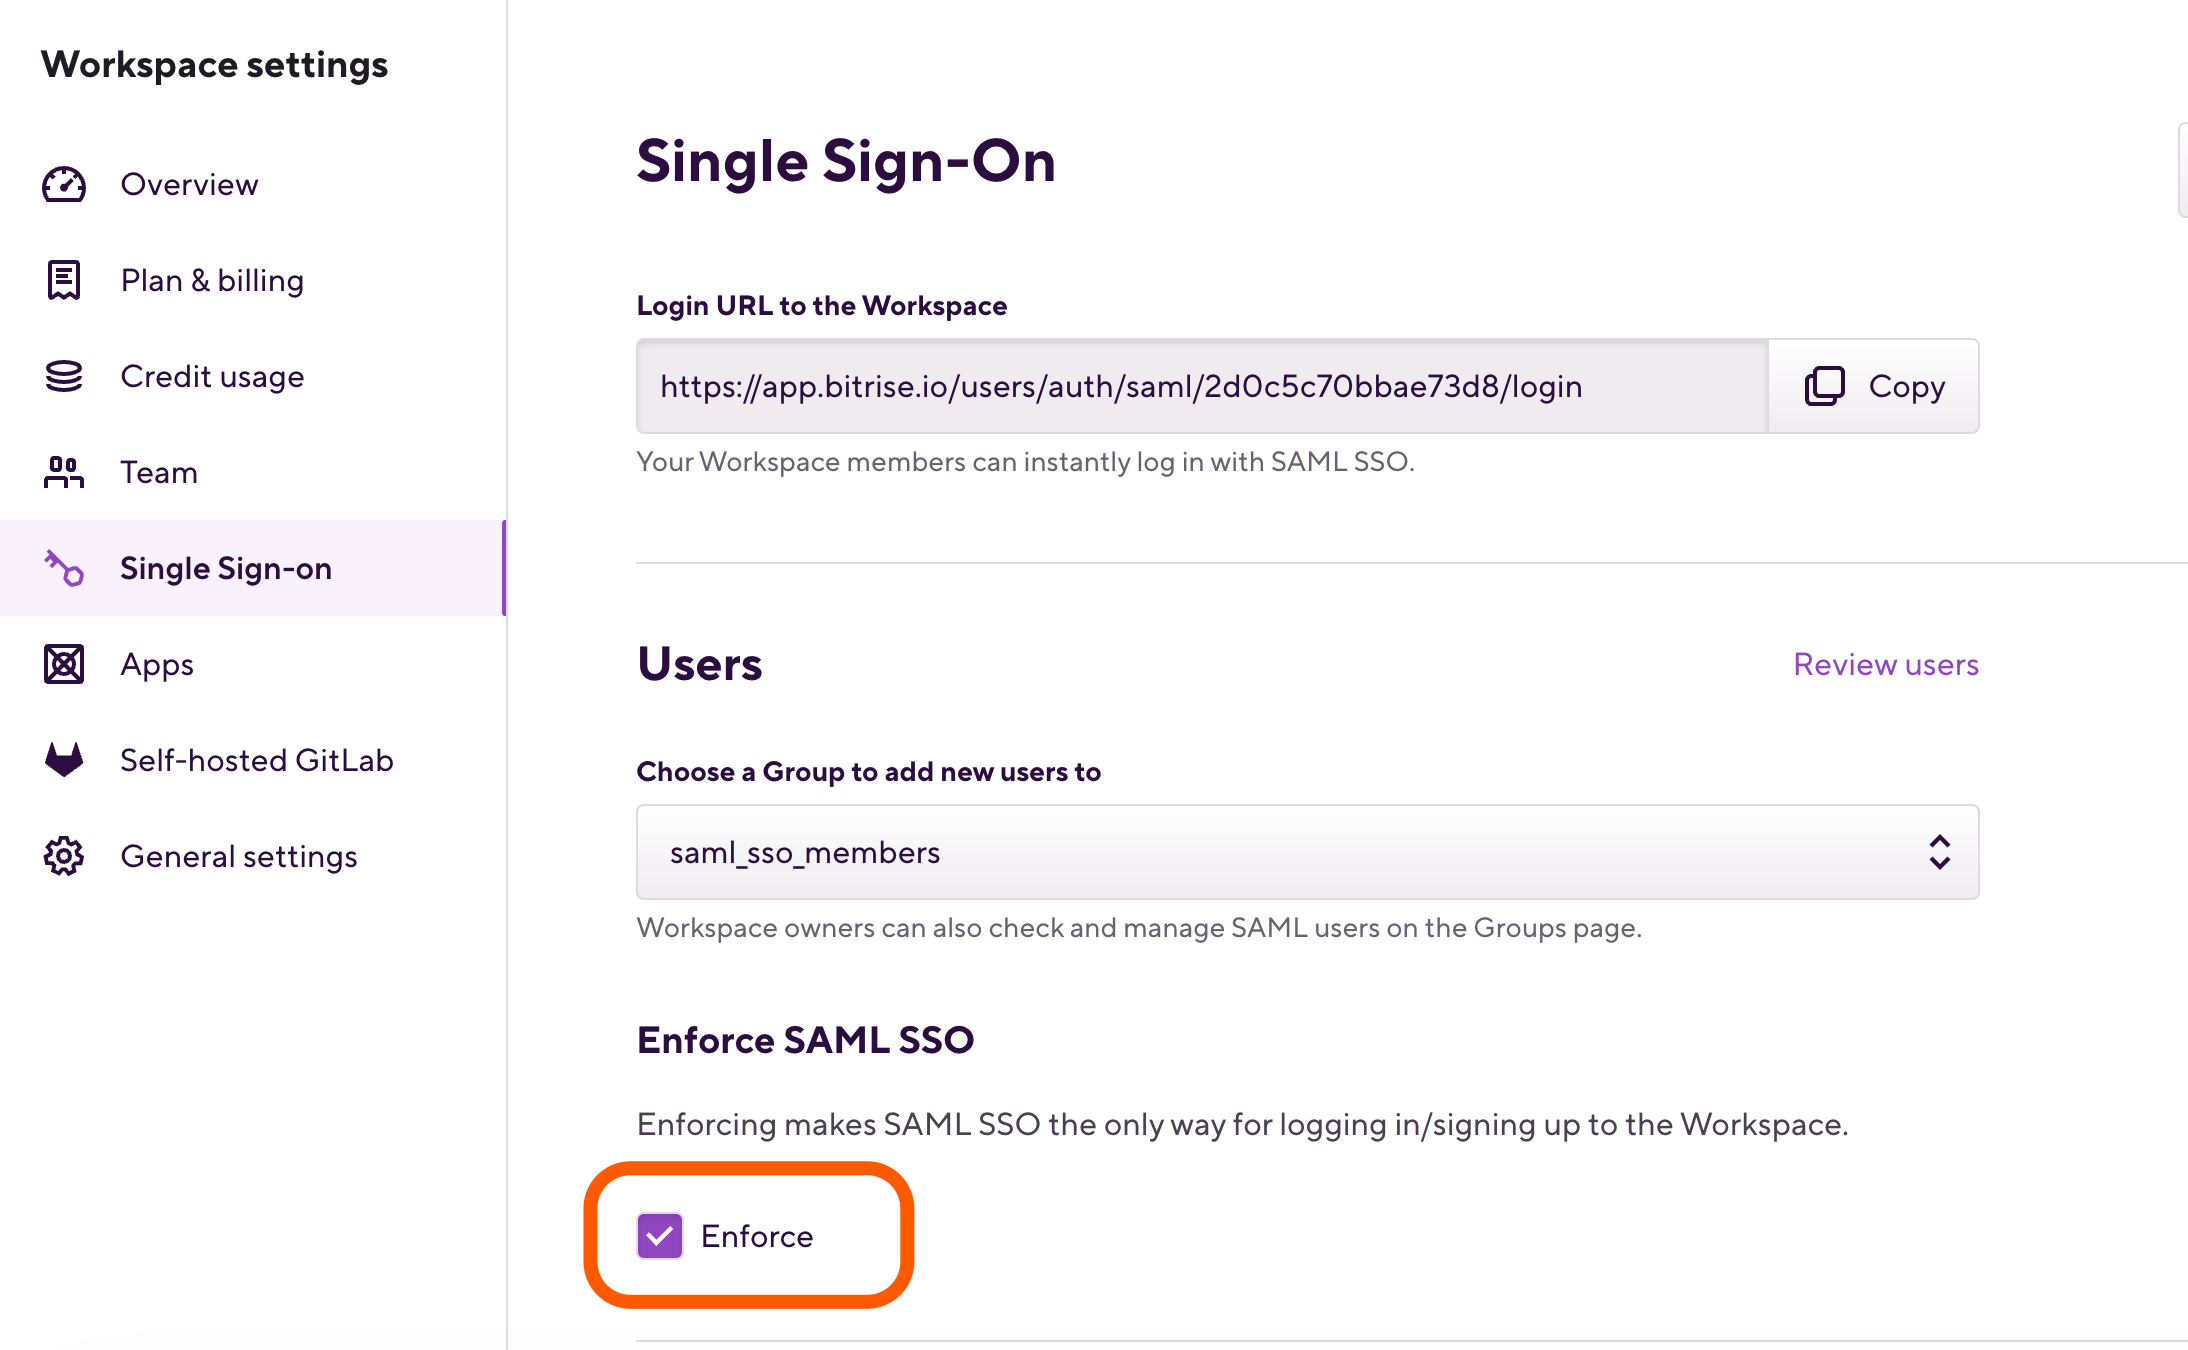
Enforcing SAML SSO in your Workspace makes SAML SSO the only way for logging in/signing up to the Workspace.
One Workspace only
You cannot be a member in two Workspaces that enforced SAML SSO on Bitrise.
-
Log in to Bitrise and hover over the left navigation bar.
-
Make sure you have the right workspace selected in the Workspace menu.
-
Select Settings.
-
Go to your Workspace’s Single Sign On tab.
-
Check the Enforce SAML SSO checkbox to enforce SAML SSO.
Unable to enforce SAML SSO
A Workspace owner cannot enforce SAML SSO on the Workspace if Workspace members have not enabled their SAML SSO connection yet or they enabled SAML SSO with another Workspace that enforces SAML SSO.
-
Click Save changes.
Now Workspace members can only log in via SAML SSO.
Adding a new user to a workspace with enforced SAML SSO
You can add new users to a workspace with enforced SAML SSO. There are three cases:
-
The workspace has a verified domain: Verifying your domain. You can invite users with the same email domain as you would to any other workspace: Workspace members.
-
The workspace doesn't have a verified domain and you want to invite a user who hasn't registered a Bitrise account yet: invite the user as you would to any other workspace.
-
The workspace doesn't have a verified domain and you want to invite a user with an existing Bitrise account: turn off enforced SAML SSO, invite the user, and turn enforcement back on.
|
Domain verification status |
New user |
Existing user |
|---|---|---|
|
Verified domain |
Simple invite |
Simple invite |
|
Non-verified domain |
Simple invite |
Turn off SAML SSO enforcement Invite the user Turn on SAML SSO enforcement again |
Disabling a Workspace's SAML SSO
If you disable SAML SSO, Workspace members will be able to sign in with the regular sign-in procedure.
-
Log in to Bitrise and hover over the left navigation bar.
-
Make sure you have the right workspace selected in the Workspace menu.
-
Select Settings.
-
Go to the Single Sign-On tab.
-
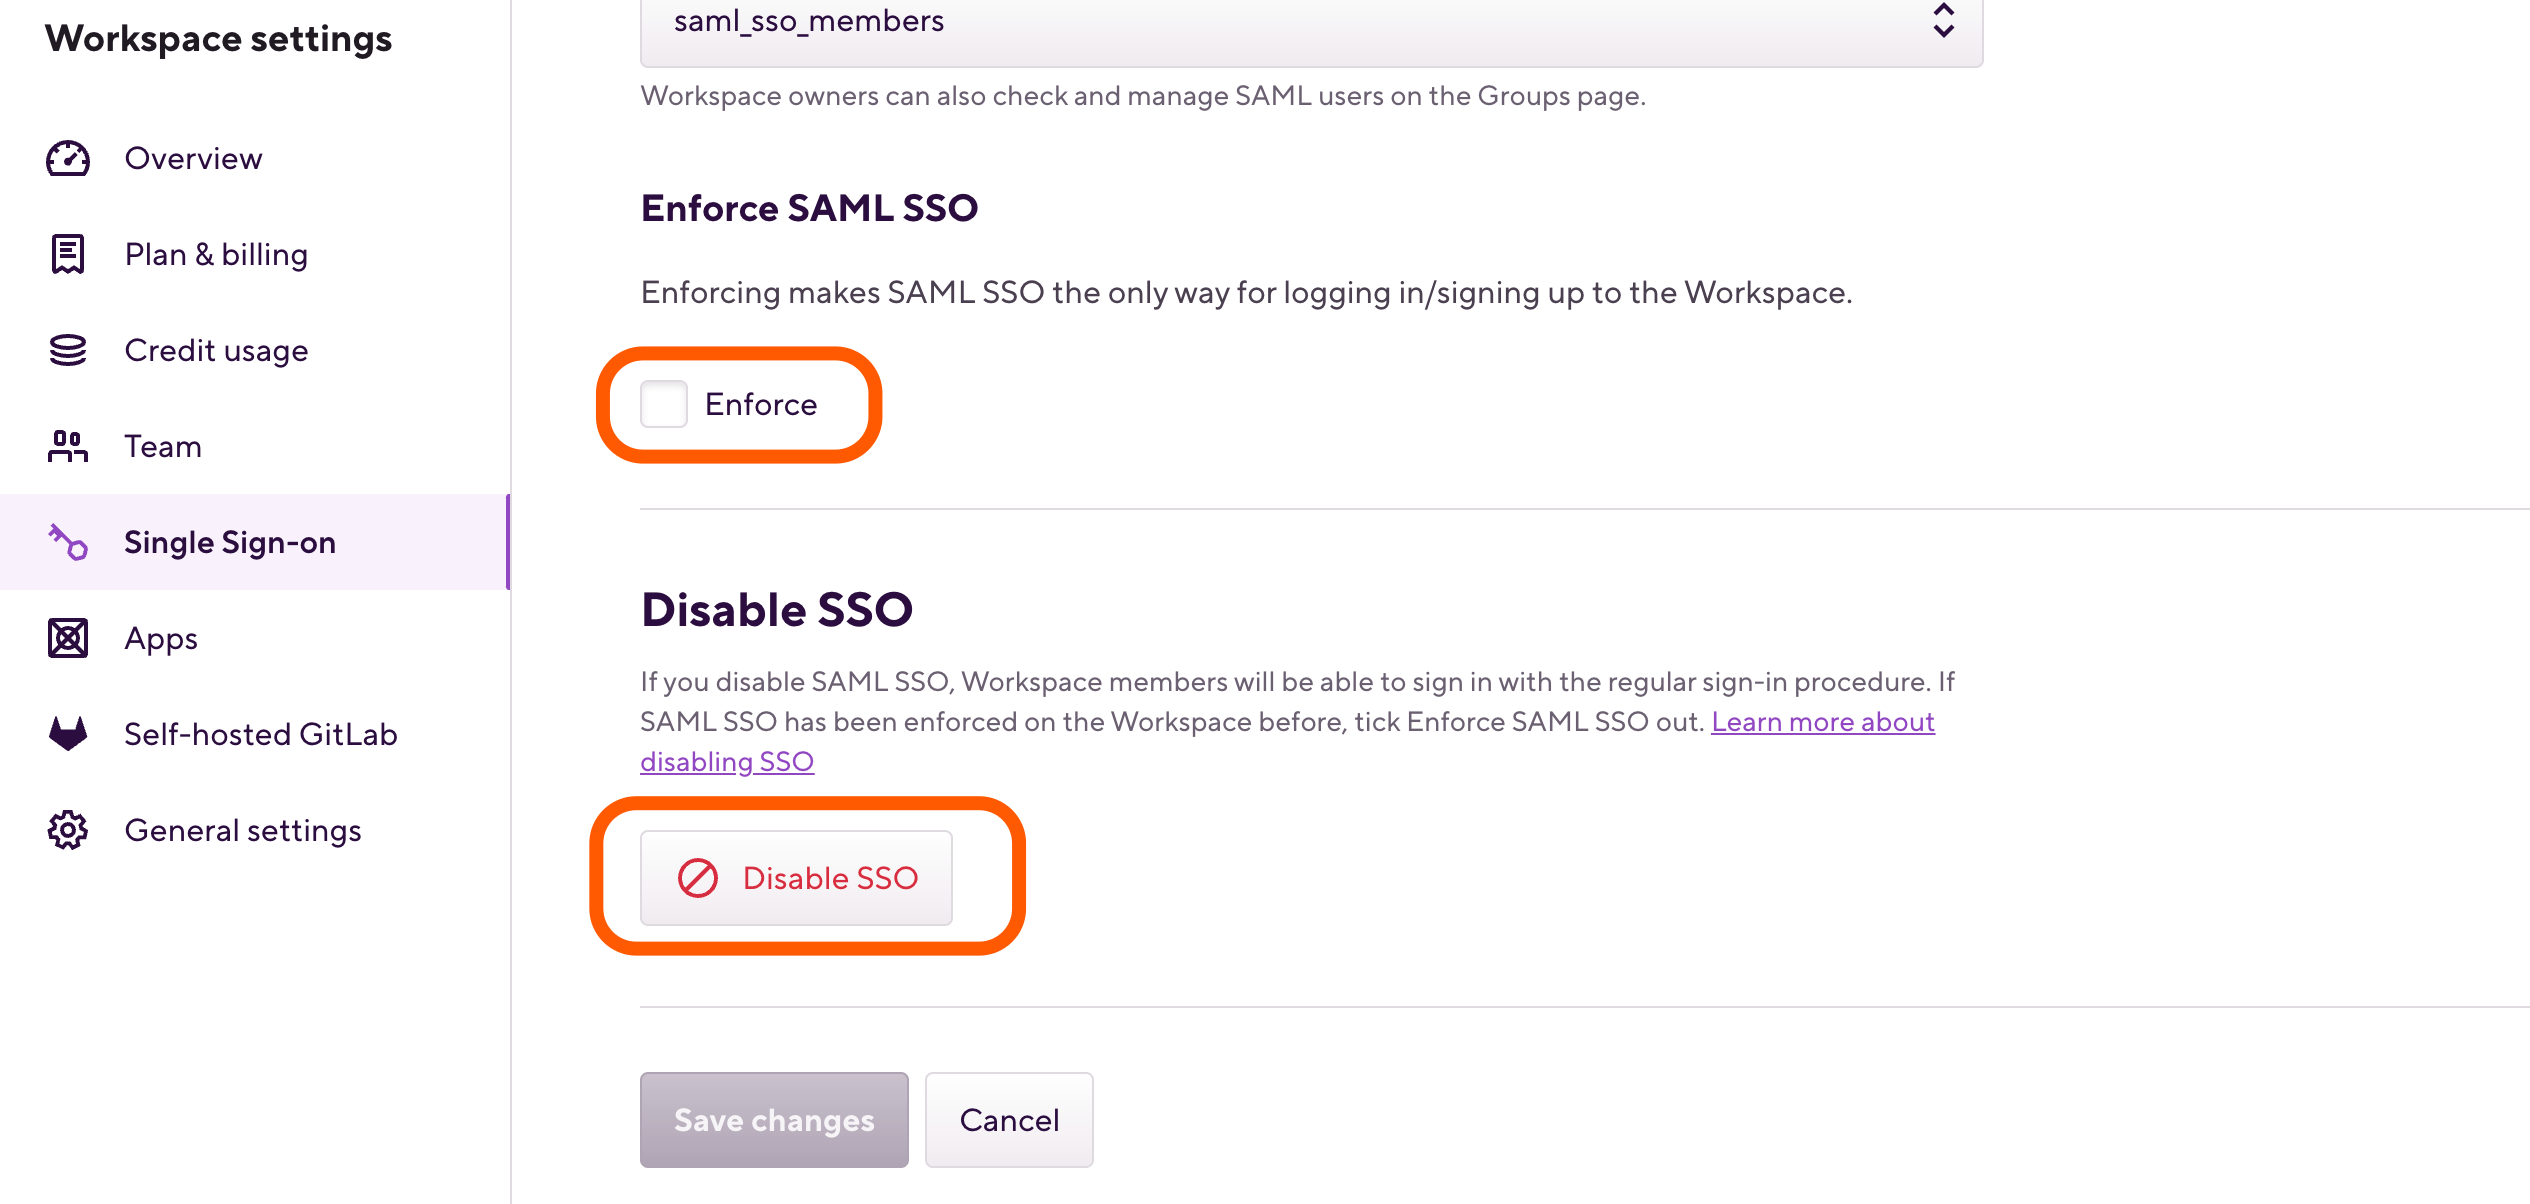
If SAML SSO has been enforced on the Workspace before, toggle under Enforce SAML SSO off.
-
Click Disable SSO.
A confirmation pop-up appears where you can confirm/cancel your action. Please note that by clicking the Disable SSO button, you will disable SAML SSO for all Workspace members. Once it’s done, Workspace members will be able to log in through their normal Bitrise credentials.
You will receive an SSO has been disabled email from Bitrise ([email protected]) which confirms the disabled SAML SSO for the Workspace.
Disabling a Workspace member's SAML SSO
If you are a Workspace owner, you can disable a Workspace member’s SAML SSO connection to the Workspace on Bitrise. There are two ways to do so:
-
Remove the user from the Workspace.
-
Remove the user from the SAML SSO provider which means the user would not be able to log in with SAML SSO any more.
Updating SAML SSO configuration
You can update a Workspace’s configured SAML SSO using the button on the Single Sign-On page.
This comes in handy if your SAML SSO provider’s certificate has expired and you wish to insert the new certificate on Bitrise. Another use case is, for example, if SAML SSO has been configured a while ago and now you wish to check the current configuration details.
Accessing the Update SSO button
As with other SAML SSO configurations, only the Workspace owner can access and use the Update SSO button.
-
As the owner of the Workspace, click your Workspace’s Single Sign-On tab.
-
Click the button. Now you can access the configuration details of Workspace’s SAML SSO.
-
Make the changes and click Save changes.
From now on any SAML SSO request will use the new configuration automatically.