Managing dependencies with Carthage
You can use Bitrise's official Carthage Steps to install and cache your iOS dependencies. Carthage doesn't alter your Xcode project in any way and managing it requires very little configuration on Bitrise.
Carthage is a dependency manager for iOS and macOS. It's a decentralized dependency manager that doesn't alter your Xcode project in any way. You can use it on Bitrise, too, to handle dependencies for your iOS apps.
Installing Carthage dependencies
To install your dependencies with Carthage:
Workflow Editor
bitrise.yml
-
Make sure you have a Cartfile included in your project.
-
Add the Carthage Step to your Workflow.
It should come after any Step that pulls from the build cache. If you don't have any caching Steps, add the Step right after the Git Clone Step.
-
In the Carthage command to run input, select the command you wish to run.
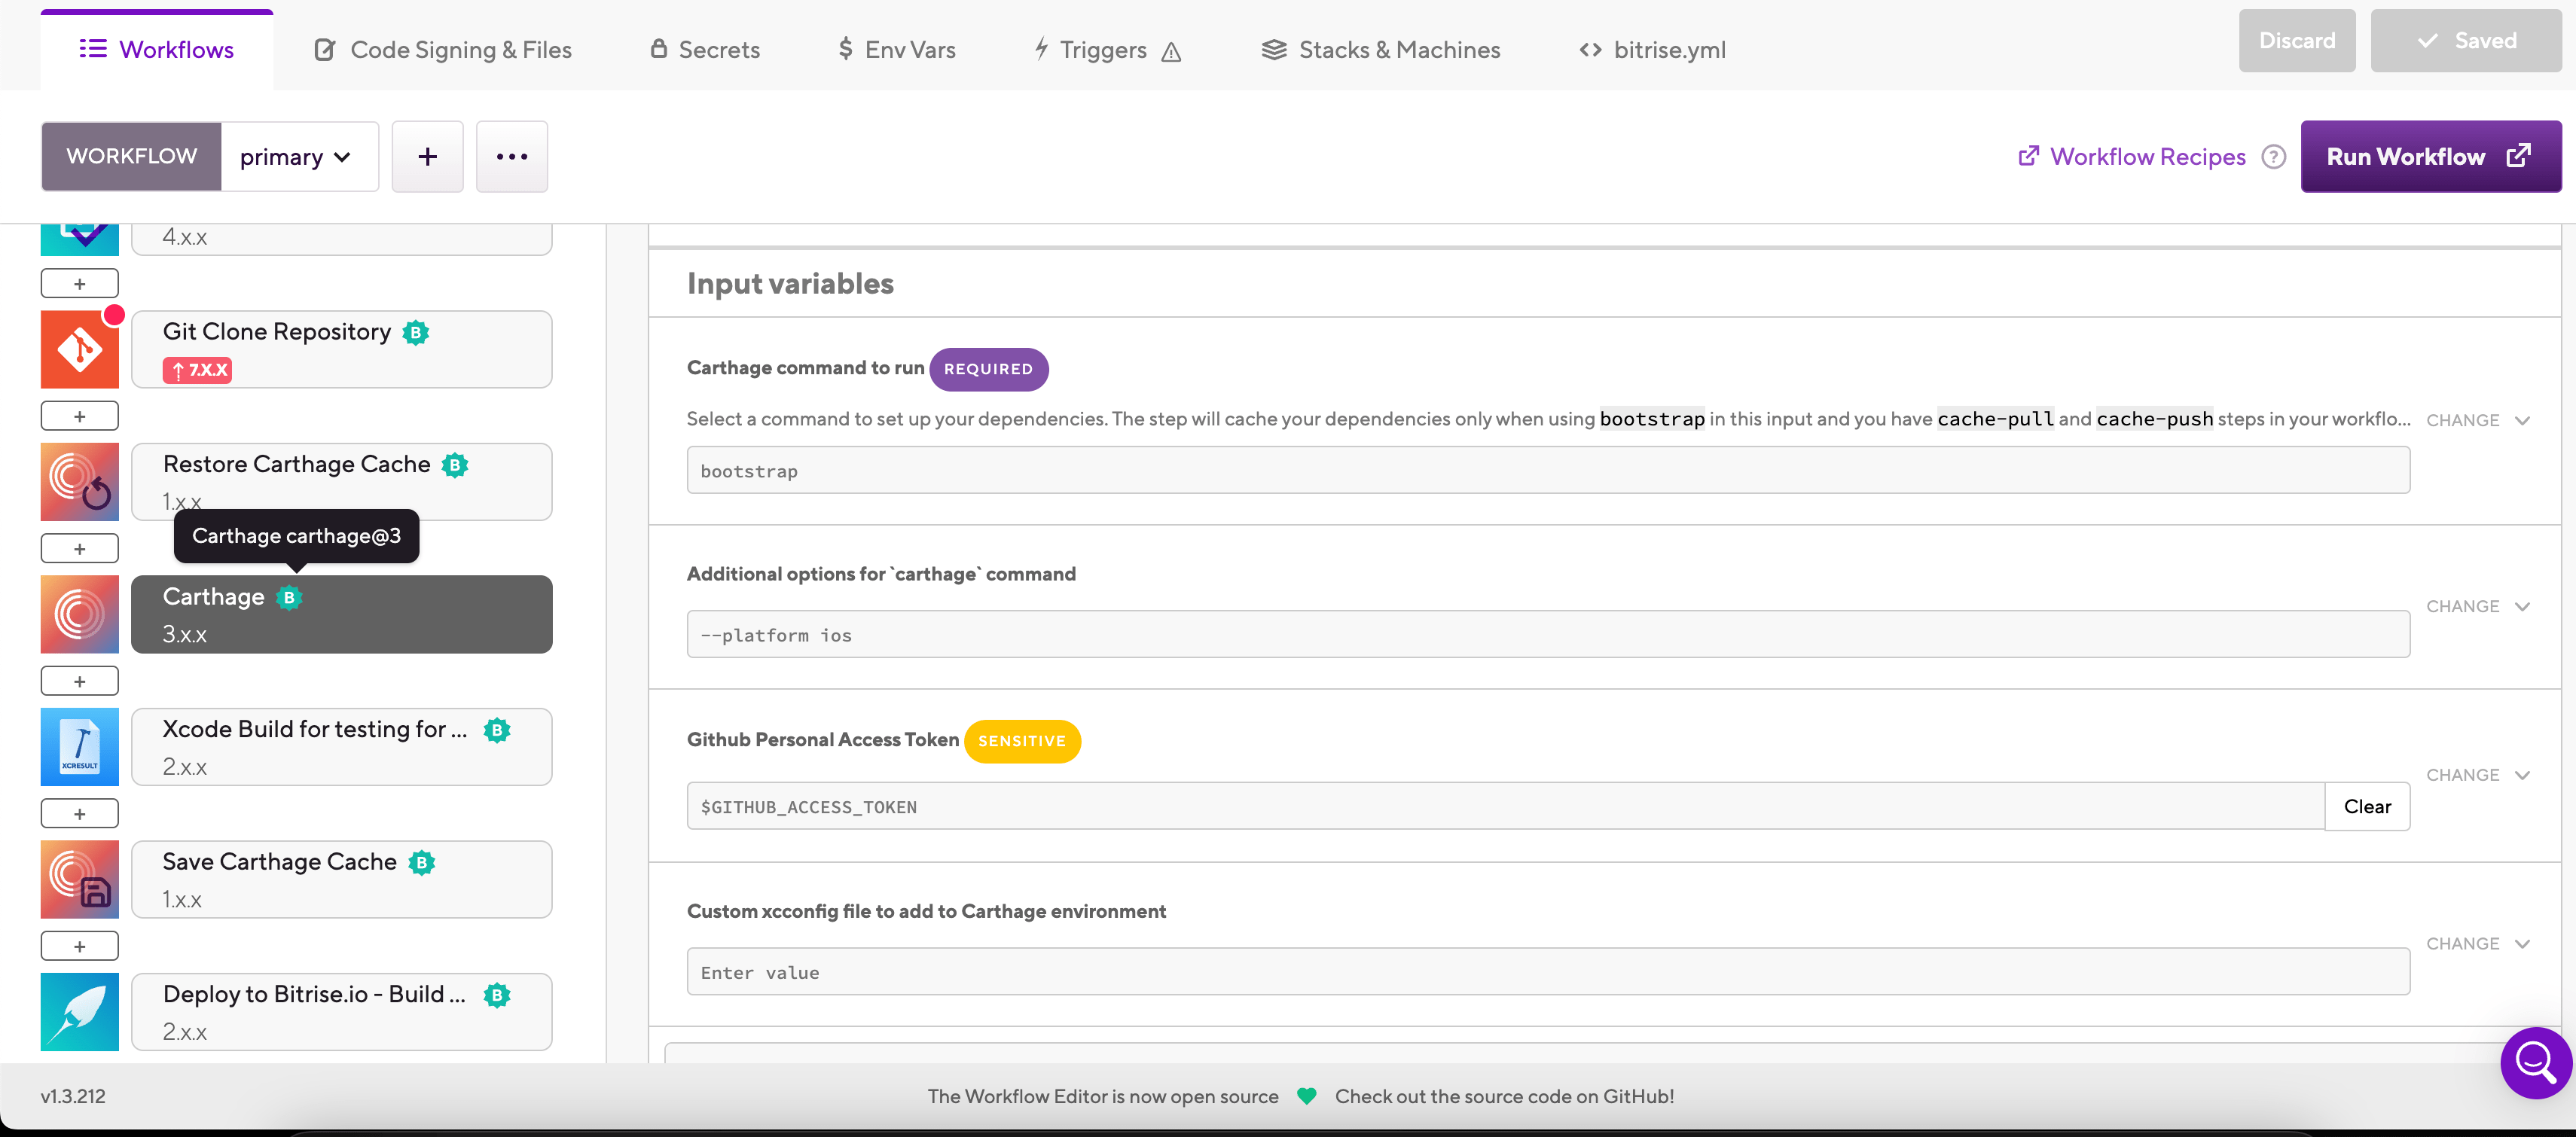
The default value is
bootstrap: using this command caches your dependencies in the branch-based build cache.For a list of available commands, run
carthage helpon a device with Carthage installed. -
You can add options to the Carthage call in the Additional options for carthage command input.
For example, the
--platform iosflag ensures that only the iOS version of frameworks will be installed.
-
Make sure you have a Cartfile included in your project.
-
Add the
carthageStep to your Workflow.It should come after any Step that pulls from the build cache. If you don't have any caching Steps, add the Step right after the
git-cloneStep.my-workflow: steps: - activate-ssh-key: {} - git-clone: {} - restore-carthage-cache: {} - carthage: - save-carthage-cache: {} -
In the
carthage_commandinput, select the command you wish to run.The default value is
bootstrap: using this command caches your dependencies in the branch-based build cache.For a list of available commands, run
carthage helpon a device with Carthage installed.my-workflow: steps: - activate-ssh-key: {} - git-clone: {} - restore-carthage-cache: {} - carthage: - save-carthage-cache: {} inputs: - carthage_command: bootstrap - save-carthage-cache: {} -
You can add options to the Carthage call in the
carthage_optionsinput.For example, the
--platform iosflag ensures that only the iOS version of frameworks will be installed.my-workflow: steps: - activate-ssh-key: {} - git-clone: {} - restore-carthage-cache: {} - carthage: - save-carthage-cache: {} inputs: - carthage_command: bootstrap - carthage_options: "--platform ios" - save-carthage-cache: {}
Caching Carthage dependencies
There are two ways to cache Carthage dependencies in a build, depending on whether you use key-based caching or branch-based caching.
Key-based caching
Key-based caching is only available for credit-based accounts!
Key-based caching
Branch-based caching
With key-based caching, you only need the Restore Carthage cache and the Save Carthage cache Steps to cache your dependencies. These Steps require no configuration as they automatically set up the cache keys and cache paths.
Setting specific cache paths
You don't have to use the default cache paths that the dedicated key-based caching Steps use. If you need to set a specific cache path, you can do so by configuring the Save cache and the Restore cache Steps: Using key-based caching in your builds.
-
Add the Restore Carthage cache Step to your Workflow
It should come before the Carthage Step or any Step that needs dependencies to build your app, such as Xcode Archive & Export for iOS.
-
Add the Save Carthage cache Step to the end of your Workflow.
Branch-based caching relies on the built-in feature of the Carthage Step to collect cache content. To use it, you just need to use the dedicated caching Steps without any extra configuration, and you need to use the bootstrap command with Carthage.
Setting specific cache paths
You don't have to use the default cache paths that the built-in caching options use. If you need to set a specific cache path, you can do so in the Bitrise.io Cache:Pull and the Bitrise.io Cache:Push Steps: Including files and folders in the build cache.
-
Add the Bitrise.io Cache:Pull Step to your Workflow. The best way is to put immediately after the Step that clones your repository.
-
Enable content caching in the Carthage Step: set the Carthage command to run input to
bootstrap.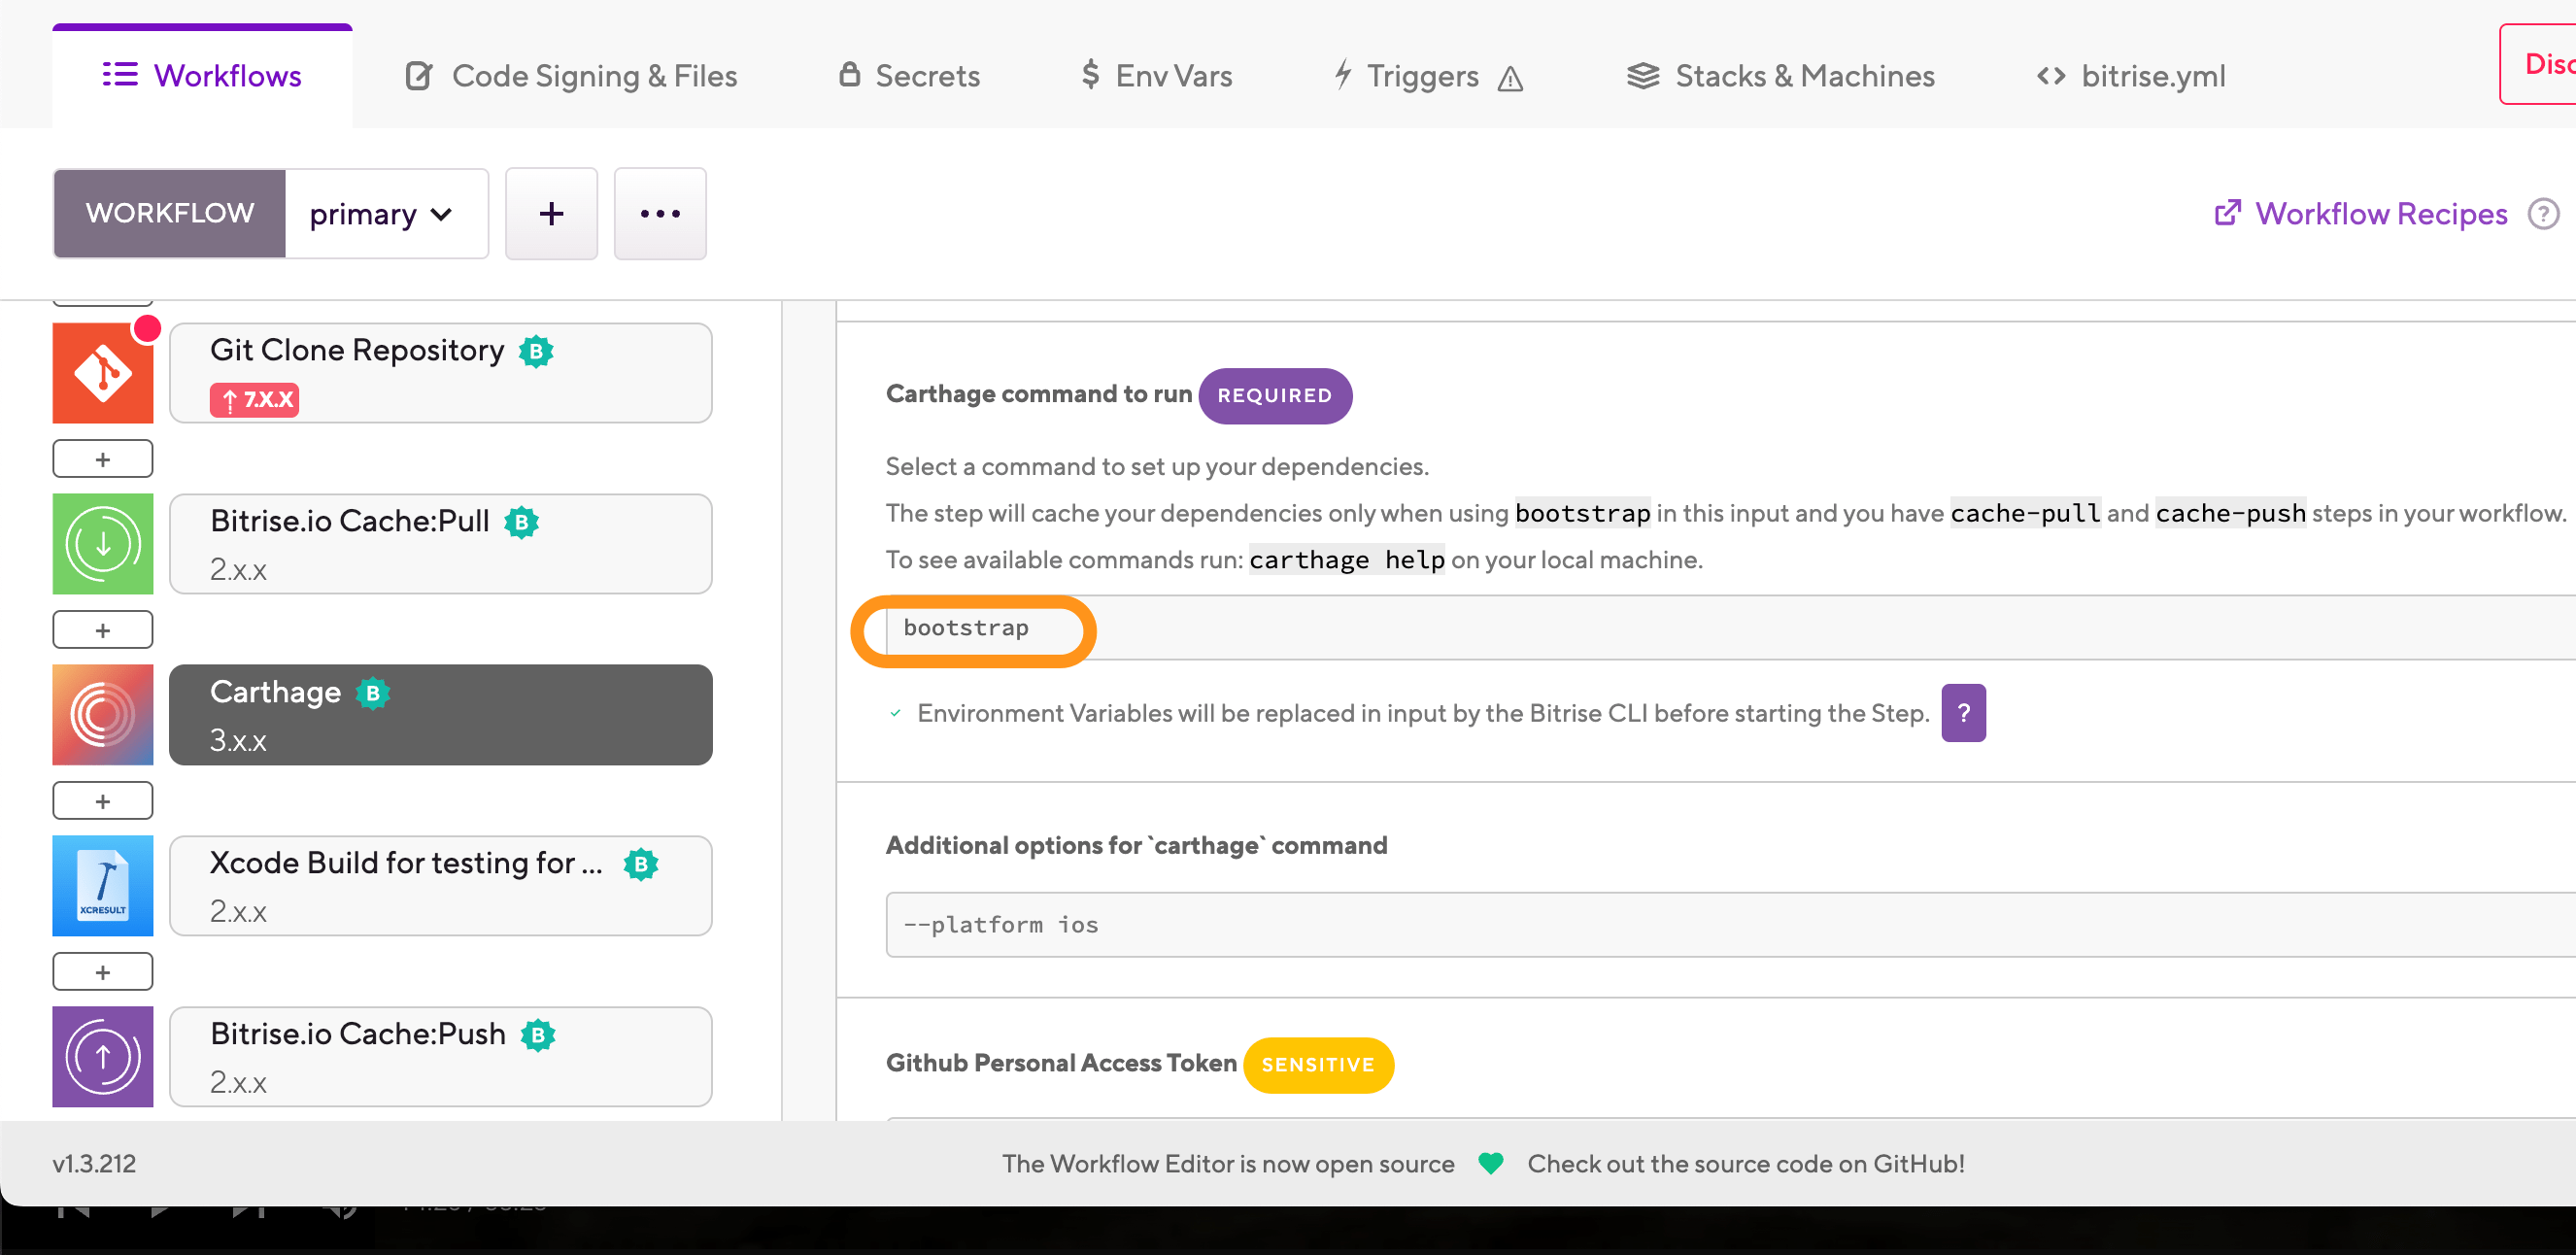
-
Add the Bitrise.io Cache:Push Step to the end of your Workflow.
The Step requires no extra configuration in this case.