Exporting to Test Reports from any Step
You can export Test Reports from any Step using the Export test results to the Test reports add-on Step. Alternatively, you could configure your own Script Step to export the files.
Test Reports allows you to view all your test results in a convenient way. By default, five Steps support the Test Reports add-on:
-
Xcode Test for iOS
-
Android Unit Test
-
iOS Device Testing
-
Virtual Device Testing for Android
-
Flutter Test
To export the test results generated by any other Step to the Deploy to Bitrise.io Step, you have two options:
-
We recommend using our Export test results to the Test reports add-on Step: this Step locates the test results based on your inputs. However, this Step cannot export screenshots or other images.
-
You can configure your own custom Script Step that creates and exports the necessary files. If you need screenshots or other images, you need to export both the test results and the images in the same Script Step.
Using the Export test results to the Test reports add-on Step
You can use the Export test results to the Test reports add-on Step to make sure your test results appear in the Test Reports add-on, even if you use Steps that don’t automatically export their results.
With the correct configuration, the Step finds the test results in your app’s repository, and puts them in the export directory.
Screenshots and other images
The Step can only export test results, in either .xcresult or JUnit XML format. If your test results are in an .xcresult file, screenshots generated as part of the test are
included and exported to the Test Reports add-on.
If you use the JUnit XML format, you need to export screenshots and other images using a Script Step: Exporting screenshots and other images to Test Reports. In this case, the test results themselves must be exported using the same Script Step. You cannot export screenshots and test results in separate Steps!
-
Go to your app’s page on bitrise.io.
-
Go to Workflows to open the Workflow Editor.
-
From the WORKFLOW menu, select the Workflow you use to run your tests.
-
Add the Export test results to the Test reports add-on Step AFTER the testing Step.
-
In the The name of the test input, set the name of the test run. The test results will be under this name in the Test Reports add-on.
-
In the Path where custom test results reside input, set the path where your test results can be found.
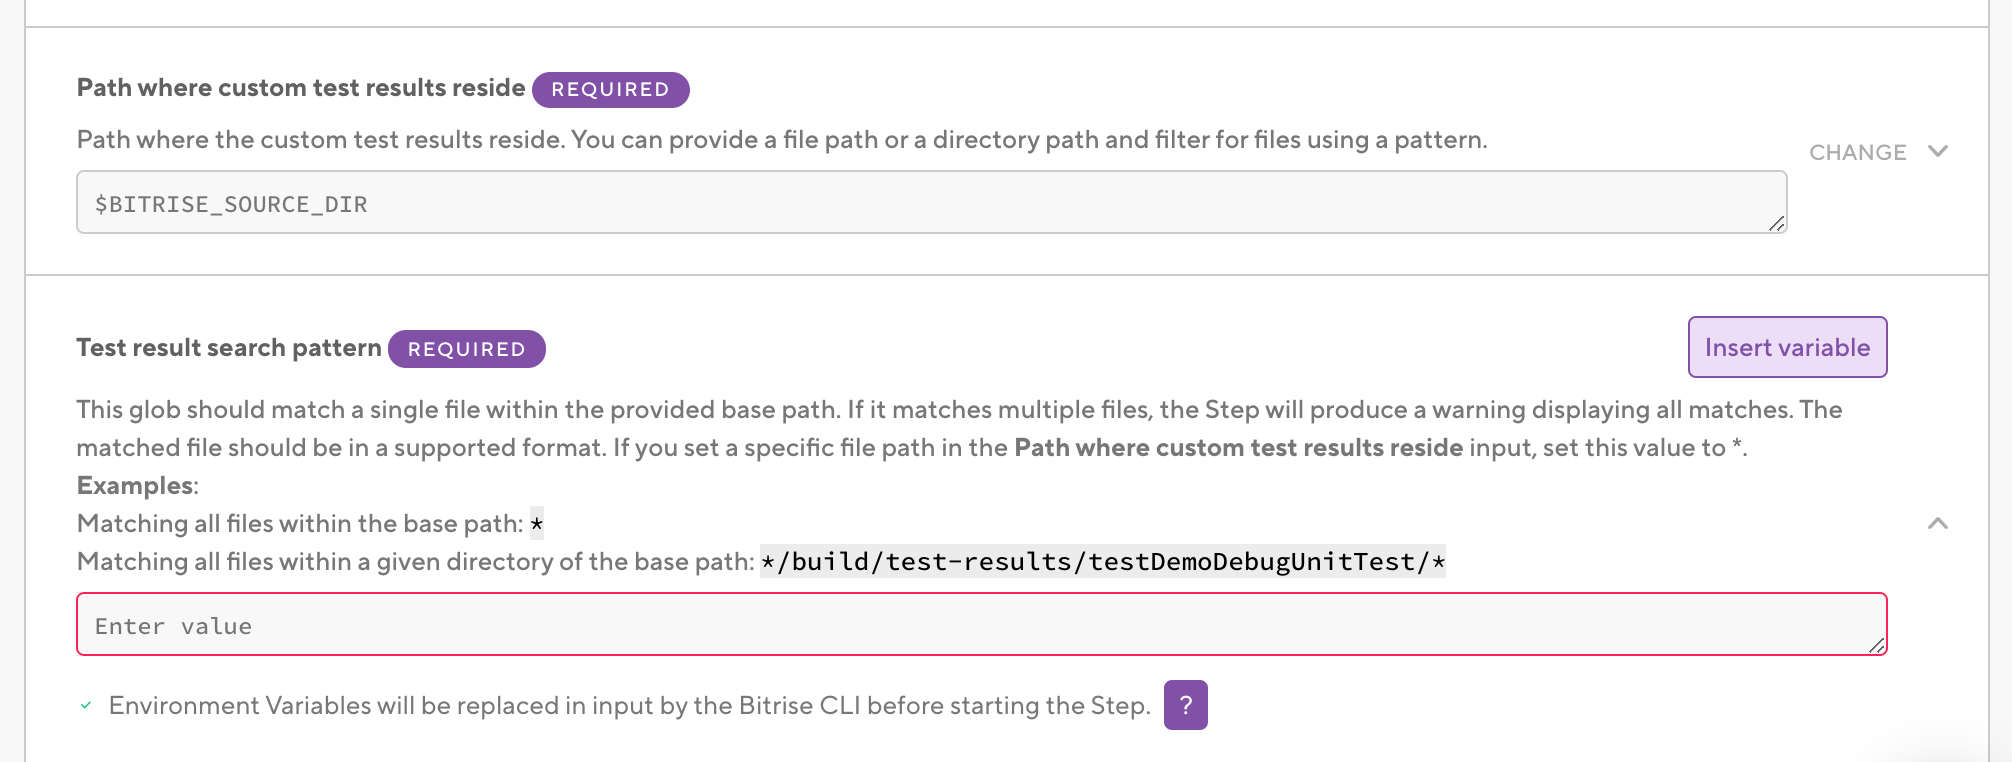
We recommend setting a folder here, though you can also set a specific filepath. The default value is the source directory of your app. Example patterns:
-
If your app’s root directory is app:
app/build/test-results/testDemoDebugUnitTest/ -
If your test results are within an app folder but app is not the root directory: ./app/build/test-results/testDemoDebugUnitTest/
-
-
In the Test result search pattern input, set a pattern that matches your test result file.
This search pattern is used to search every file and folder of the path that was set in the Path where custom test results reside input.
If there is more than one match, the Step will export the first match with a warning in the logs. If you set a specific filepath in the previous input, just set * here.
Example patterns:
-
Matching all files within the base path:
* -
Matching all files within a given directory of the base path:
*/build/test-results/testDemoDebugUnitTest/*
-
-
In the Step’s test result directory input, make sure the path is correct.
Do NOT modify this input’s value: this is the folder where the Deploy to Bitrise.io Step will look for the test results to export them. It should be set to the
$BITRISE_TEST_RESULT_DIREnv Var. -
Make sure you have a Deploy to Bitrise.io Step in your Workflow.
Using custom scripts to export test results
You can use your own scripts in a Script Step to export your test results. You just need to make sure that:
-
Your test results are in a JUnit XML format.
-
You place the results in the
$BITRISE_TEST_RESULT_DIR, which is an Environment Variable pointing to the correct path. -
The results of each test run should be in its own sub-directory. You place a
test-info.jsonfile in each sub-directory to correspond to the test run.
The test-info.json file
The test-info.json file must have the name of the test run defined in it. Each test run should have its own test-info.json file. The value of test-name will appear as the name of the test run on the Test Reports
page.
// Test Name ... { "test-name":"My first test" }
Here’s an example script to export your test results:
#!/bin/env bash
set -ex

# Creating a sub-directory for the test run within the BITRISE_TEST_RESULT_DIR:

test_run_dir="$BITRISE_TEST_RESULT_DIR/result_dir_1"
mkdir "$test_run_dir"

# Exporting the JUnit XML test report:

cp "MY/TEST/REPORT/XML/FILE/PATH.xml" "$test_run_dir/UnitTest.xml"

# Creating the test-info.json file with the name of the test run defined:

echo '{"test-name":"MY TEST RUN NAME"}' >> "$test_run_dir/test-info.json"
If all goes well, you should be able to see your test results on the Test Reports page.
Exporting screenshots and other images to Test Reports
The Export test results to Test Reports add-on Step can only export test result files to the Deploy to Bitrise.io Step which supports two formats for results:
-
The
.xcresultfile for iOS apps. -
A JUnit XML file for any app.
If your tests produce an .xcresult file, screenshots generated during the test run are part of the test result. As such, they will be exported to the Test Reports add-on.
If you use the JUnit XML format and want to export screenshots or other images, you cannot use the Export test results to Test Reports add-on Step.
You need to use a custom script to export both the result and the screenshots. The script to export both must be in the same Script Step, and you must have a test-info.json file with the necessary information about the test runs: Using custom scripts to export test results.
To export screenshots with the results, the script must place the images in the $BITRISE_TEST_RESULT_DIR folder.
Folder structure
The image files themselves must be in the $BITRISE_TEST_RESULT_DIR folder. They can't be nested in another folder within $BITRISE_TEST_RESULT_DIR.
#!/bin/env bash
set -ex

# Creating a sub-directory for the test run within the BITRISE_TEST_RESULT_DIR:

test_run_dir="$BITRISE_TEST_RESULT_DIR/result_dir_1"
mkdir "$test_run_dir"

# copying the image:

cp "MY/TEST/SCREENSHOTS/screenshot.png" "$test_run_dir/screenshot.png"
Associating images with test runs
You can associate an image with a specific test run by placing the image in the directory of that test run. In that case, the image will appear under all test suits of the given test run.