Setting up Okta SSO for Bitrise
Add SAML SSO to your Bitrise Workspace using Okta.
This guide provides step-by-step instructions on setting up Bitrise as a SAML application on Okta.
SAML SSO restrictions
SAML SSO is only available for a Workspace with our paid plans.
Since the SAML SSO feature is tied to the above plans, if you decide to downgrade to a Hobby plan or remove the add-on, you will lose this feature. All Workspace members will receive an email about the downgrade and you’ll have two weeks to re-upgrade if you wish to use SAML SSO in your Workspace again.
Before connecting SAML SSO to your Workspace:
-
Make sure you have an Okta administrator who is logged into Okta at hand.
-
Be aware that only the Workspace owner can set up SAML SSO to a Bitrise Workspace.
-
Your account on Bitrise has a Workspace with the Velocity or Enterprise plan.
Adding Bitrise to Okta
Bitrise is not an integrated app in Okta. You have to add Bitrise manually to Okta first, then you can configure SAML SSO on it.
We will be jumping back and forth from the Bitrise Workspace account to Okta so make sure both pages are available. In practice this means the Workspace owner should be logged into Bitrise and the Okta admin should be logged into Okta.
-
Log into Okta and click Admin.

-
From the left menu, select under the section.
-
Click on the button.
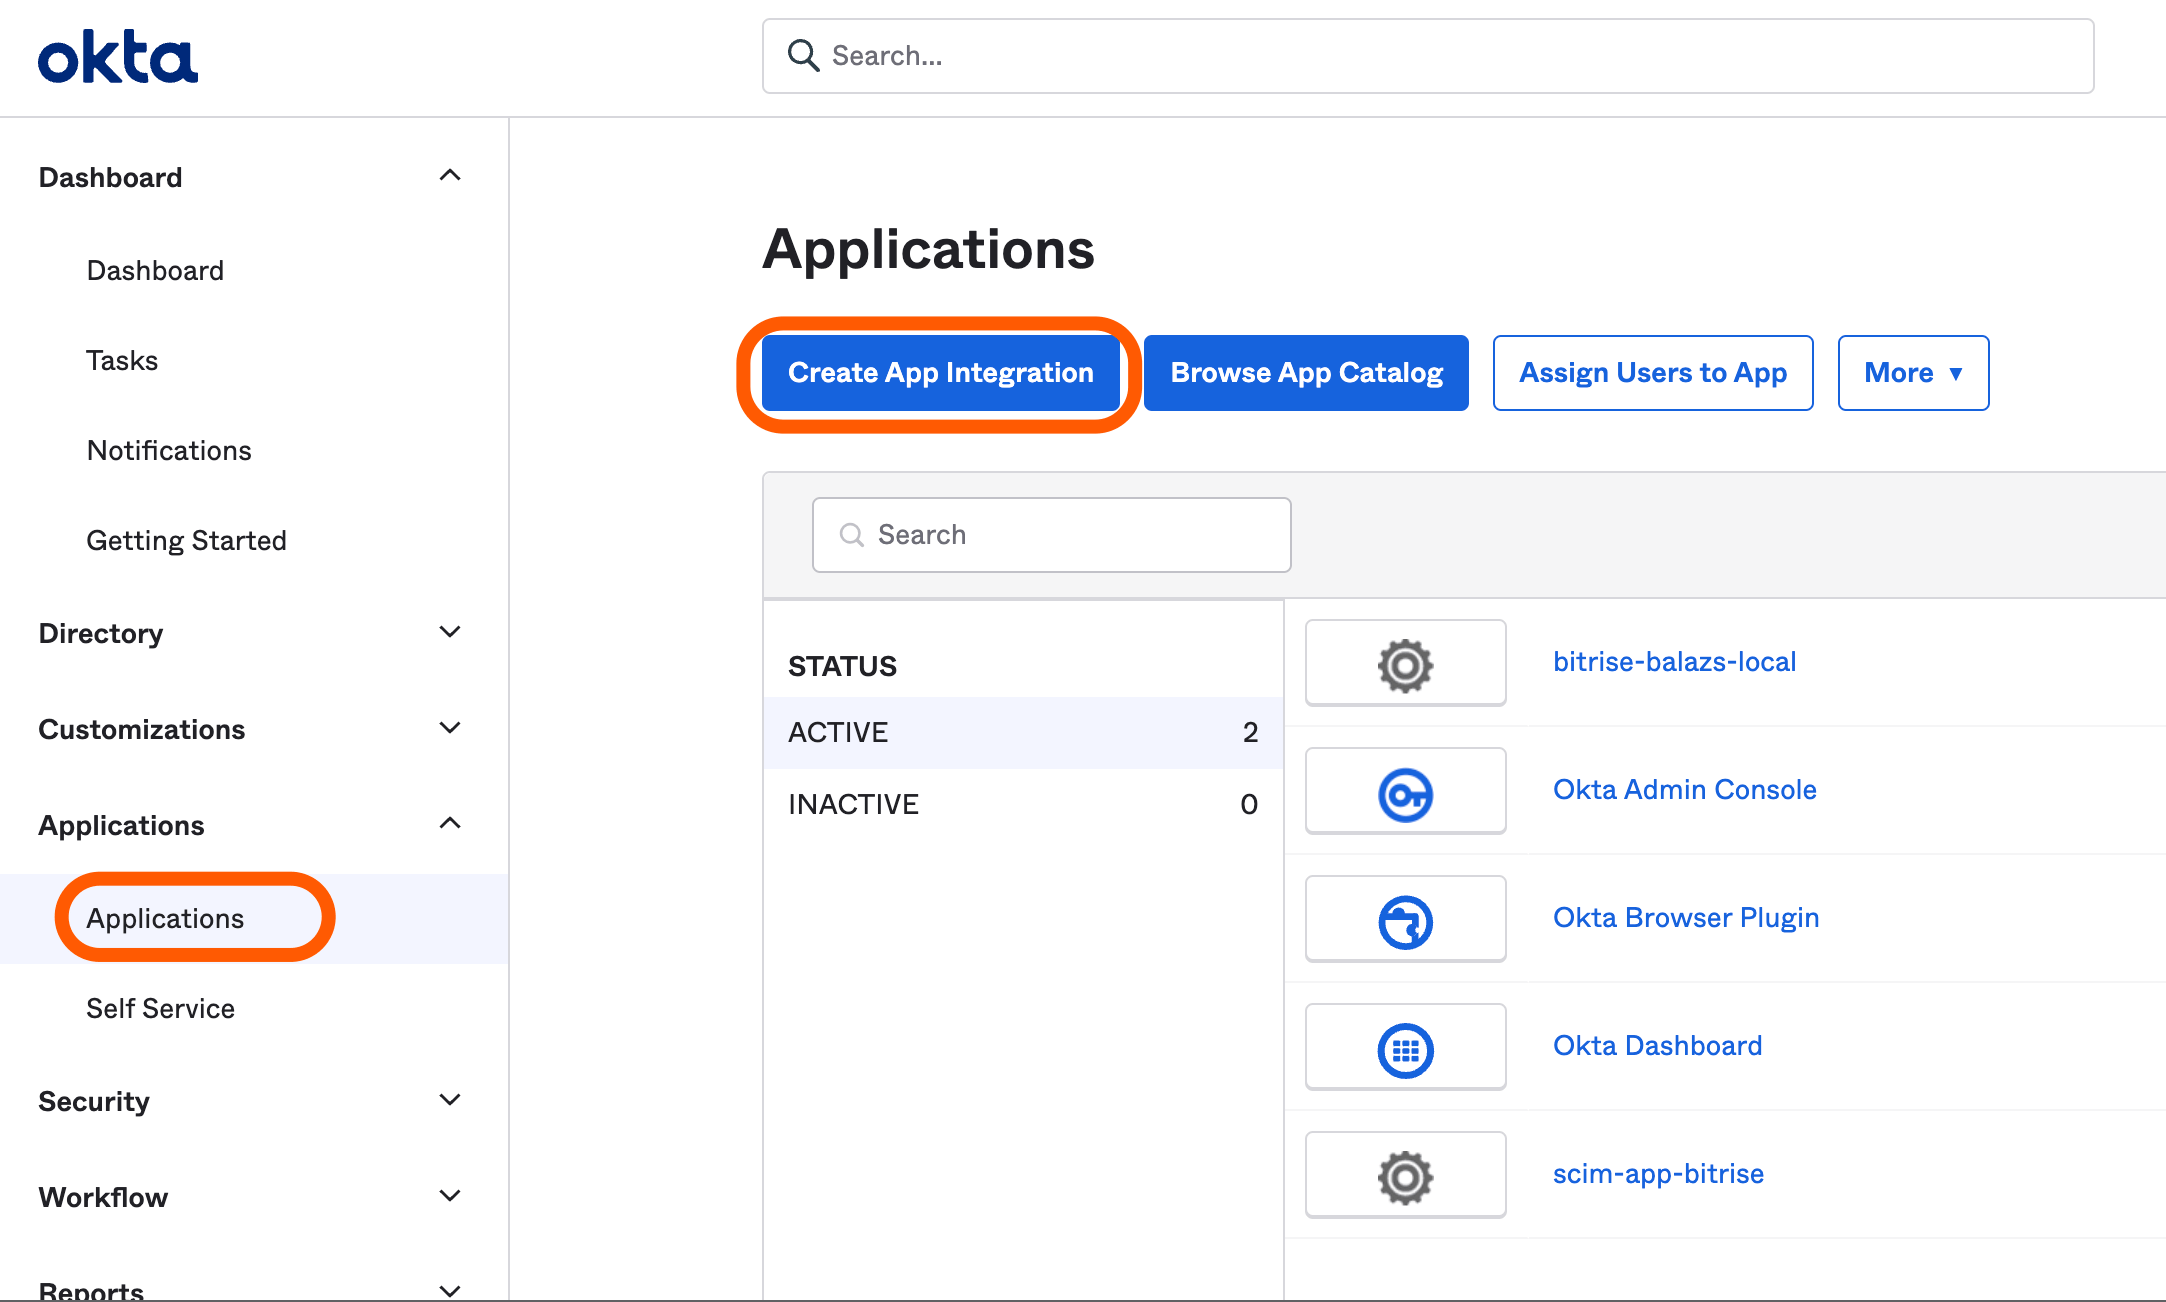
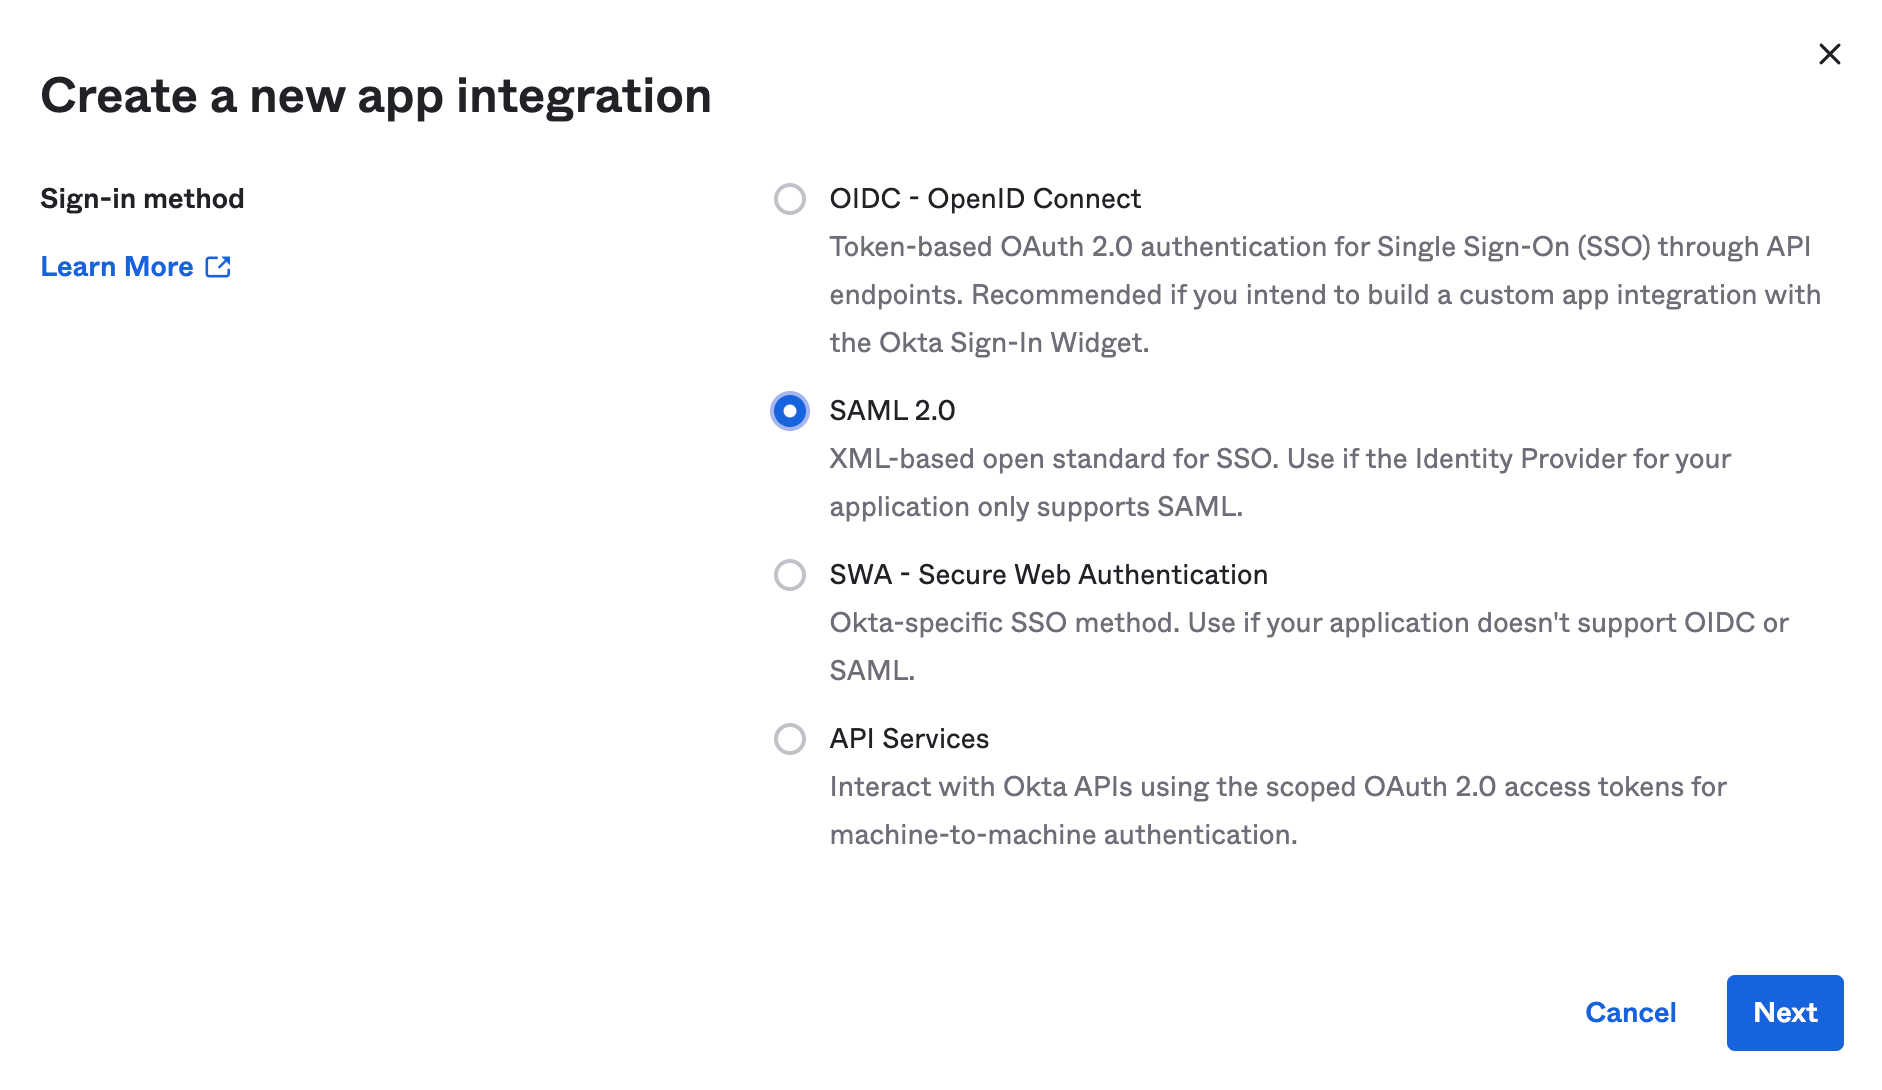
This opens the Create a new app integration window.
-
Select SAML 2.0 option as the Sign-in method and click .
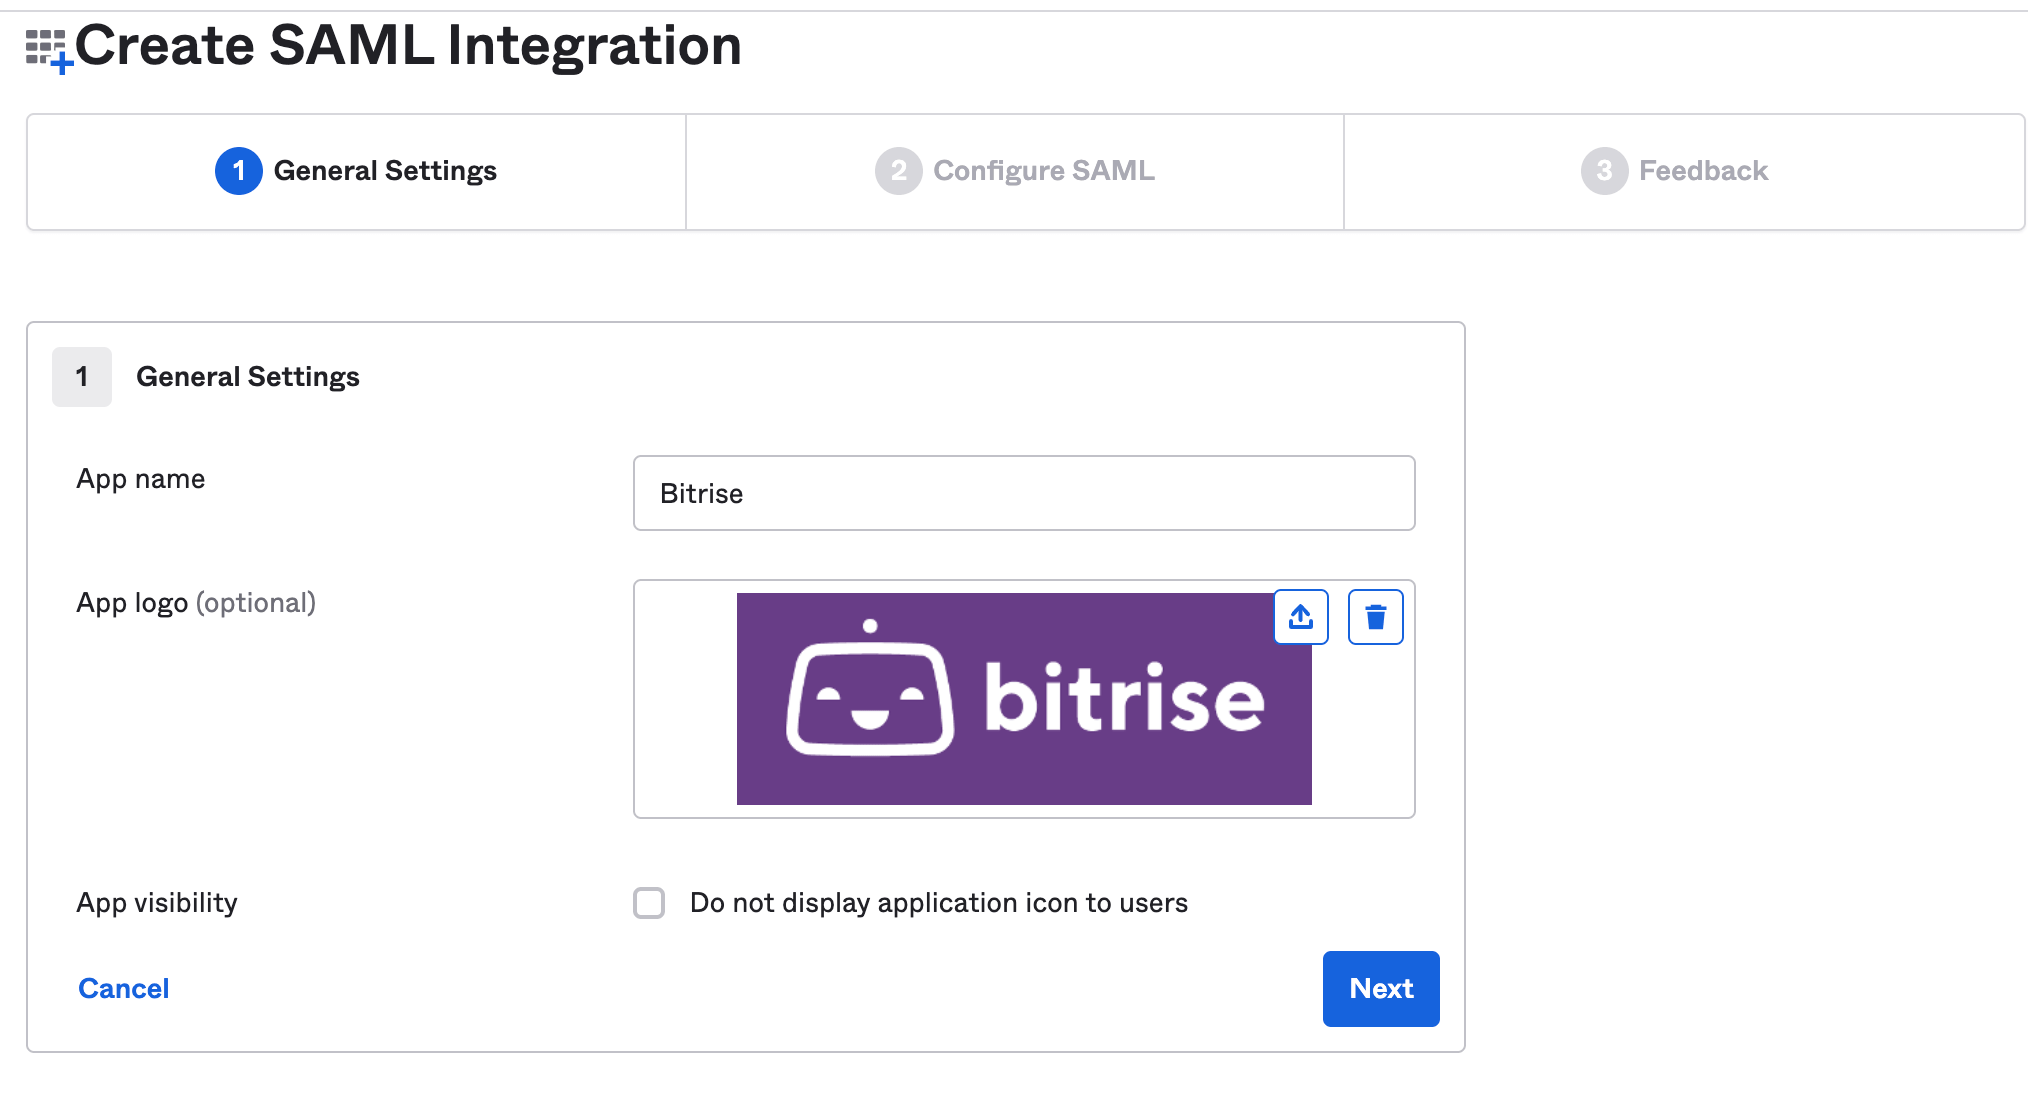
-
At the General Settings step, type Bitrise into the App name field. (Optionally, you can add an app logo if you wish.) Click Next.
-
Head over to your Bitrise Workspace and click the Single Sign On tab on the left menu.
-
Click the Copy button to copy the Assertion Consumer Service URL (ACS URL).
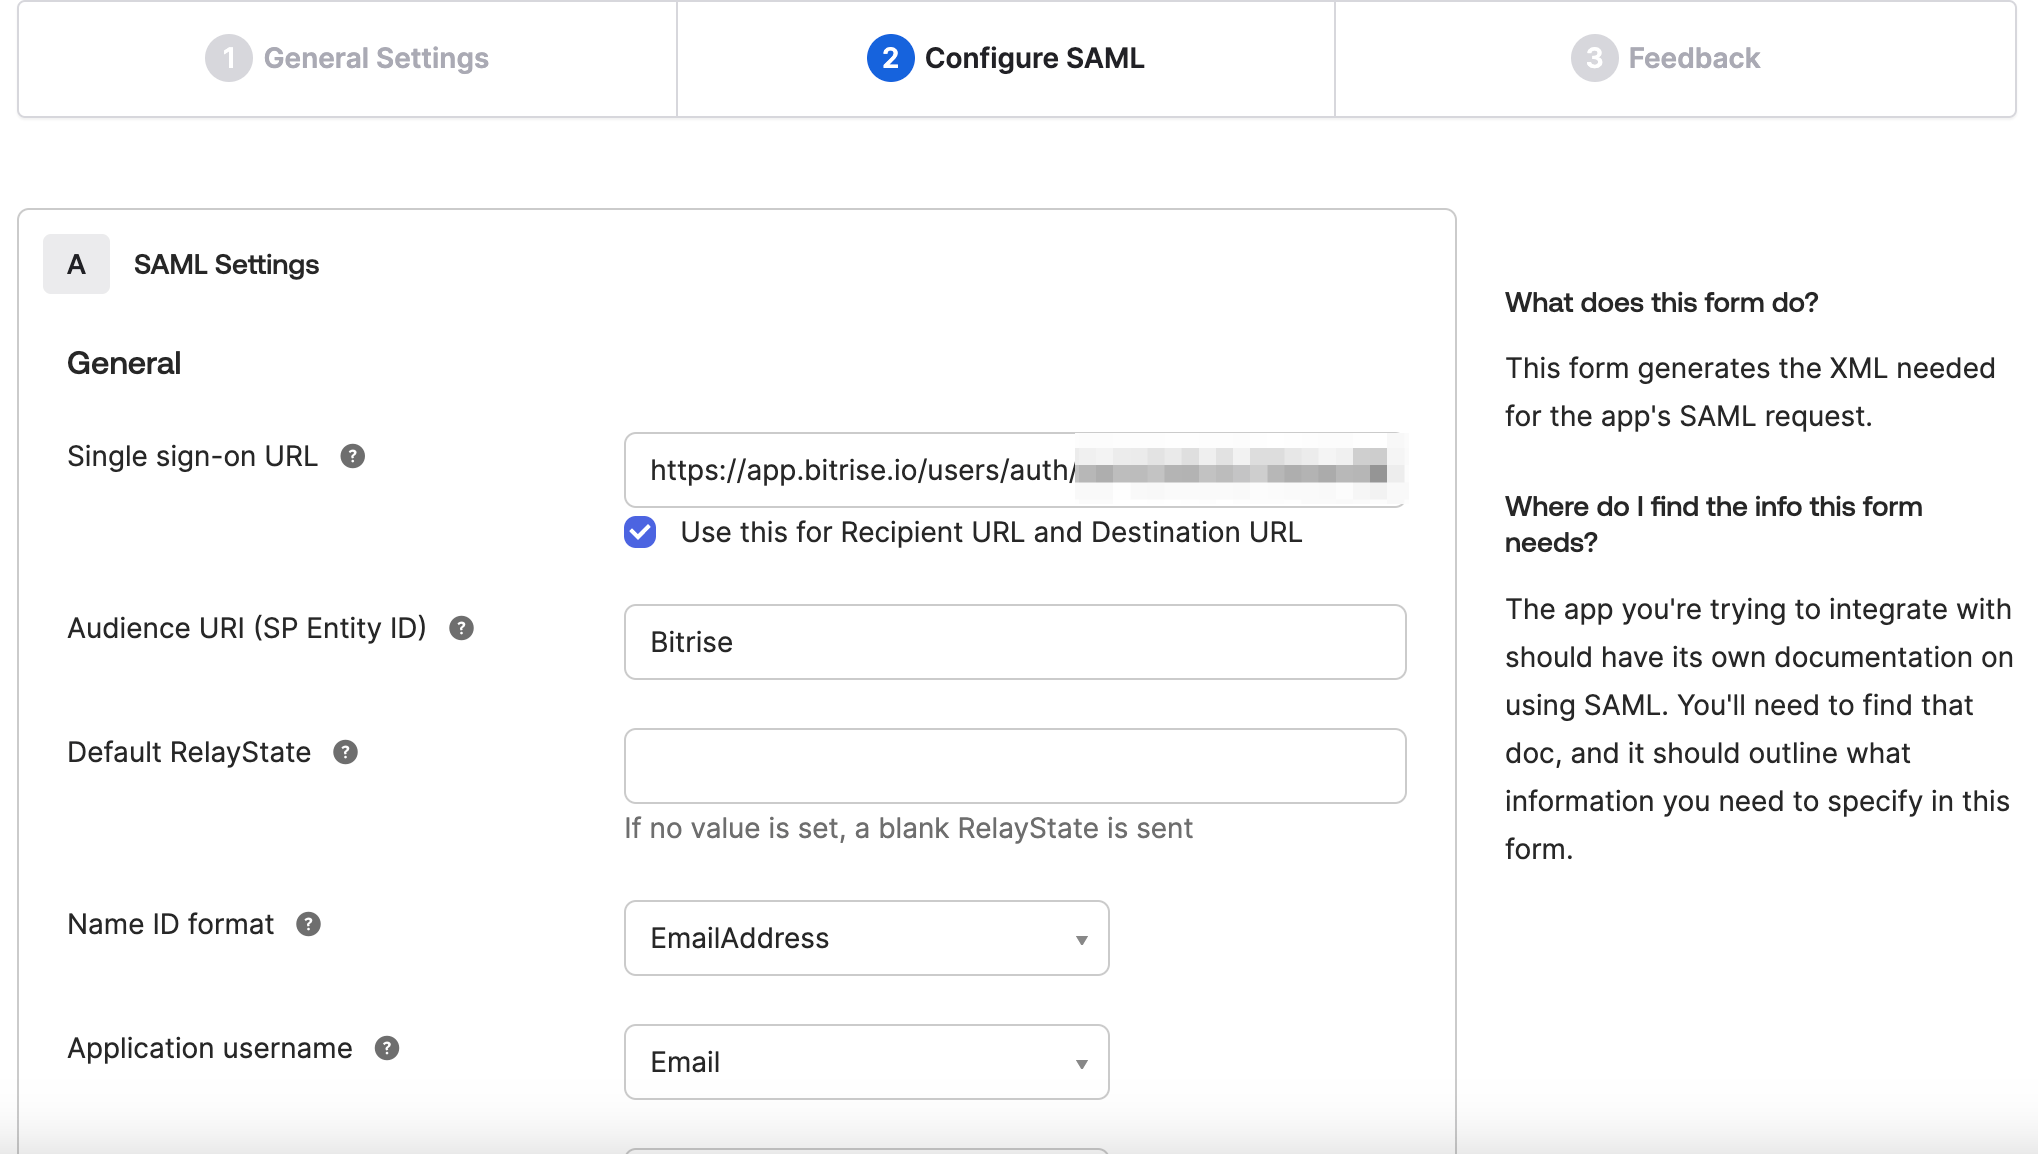
-
Head back to Okta’s Configure SAML page and paste the copied URL from Step 7. to the Single sign-on URL input field.
-
Type Bitrise at the Audience URI (SP Entity ID).
You can download the Okta certificate file now, and paste its content or upload the file itself in the SAML SSO provider certificate field on your Bitrise Workspace’s Single Sign-On page. Even easier if you leave it for later as you will need to fill out the Assertion Consumer Service URL (ACS URL) on Bitrise anyway. You will fetch this while configuring Bitrise as a SAML app on Okta. Do not hit Configure SSO on the Single Sing-On page of Bitrise just yet.
-
Set the Name ID format to EmailAddress.
-
Click Next.
-
Fill out the Feedback section. Hit Finish.
-
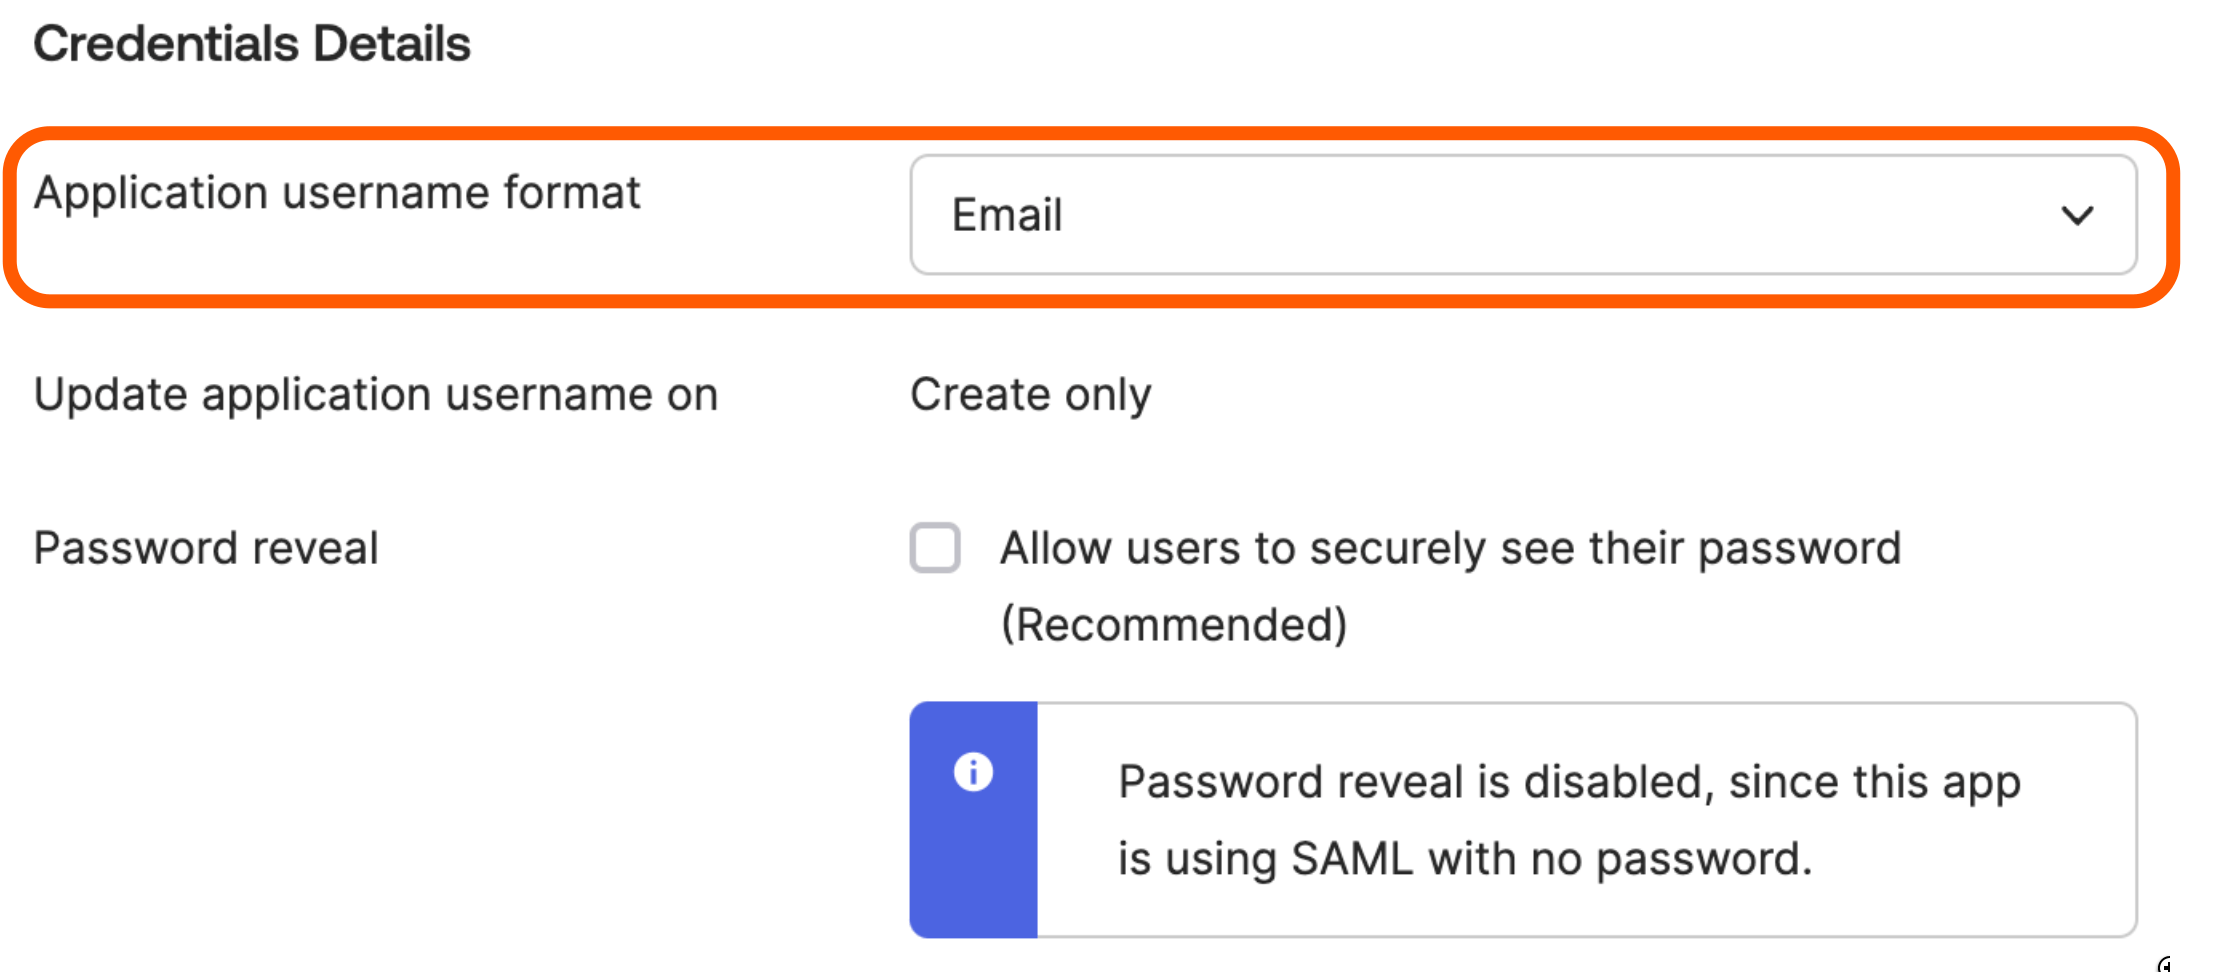
In Applications, go to the Sign-on tab, and click next to Settings.
-
Scroll down to the Credential Details section, and make sure that Application username format is set to Email.
-
Click .
Congrats! Bitrise has been successfully added to Okta as an app.
Configuring Bitrise as a SAML app for Okta
-
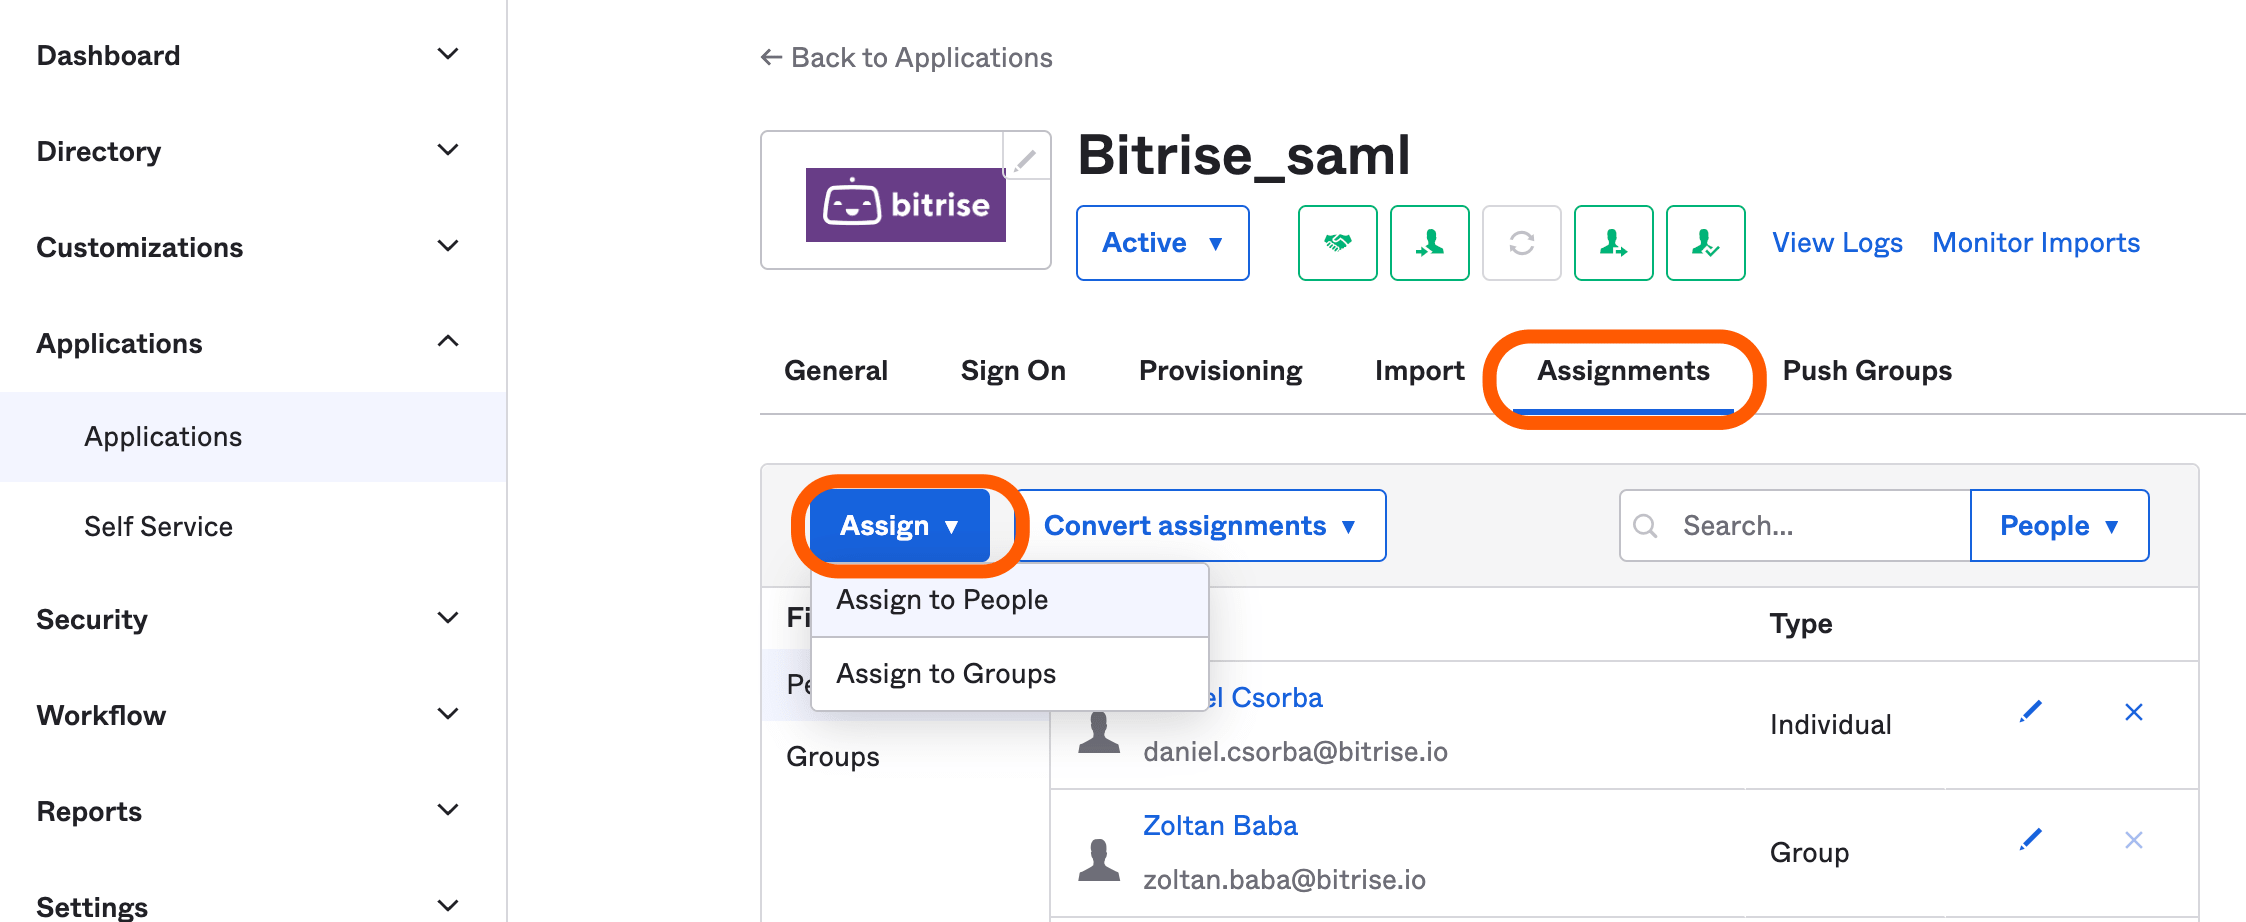
Click the tab of your Bitrise app.
Here you can assign Bitrise to individuals/groups. Make sure you assign Bitrise to all Workspace members who will access the Bitrise Workspace through SAML.

-
Click the Sign-On tab of your Bitrise app. You will see that SAML setup is not completed yet. Scroll down, and click View SAML setup instructions.
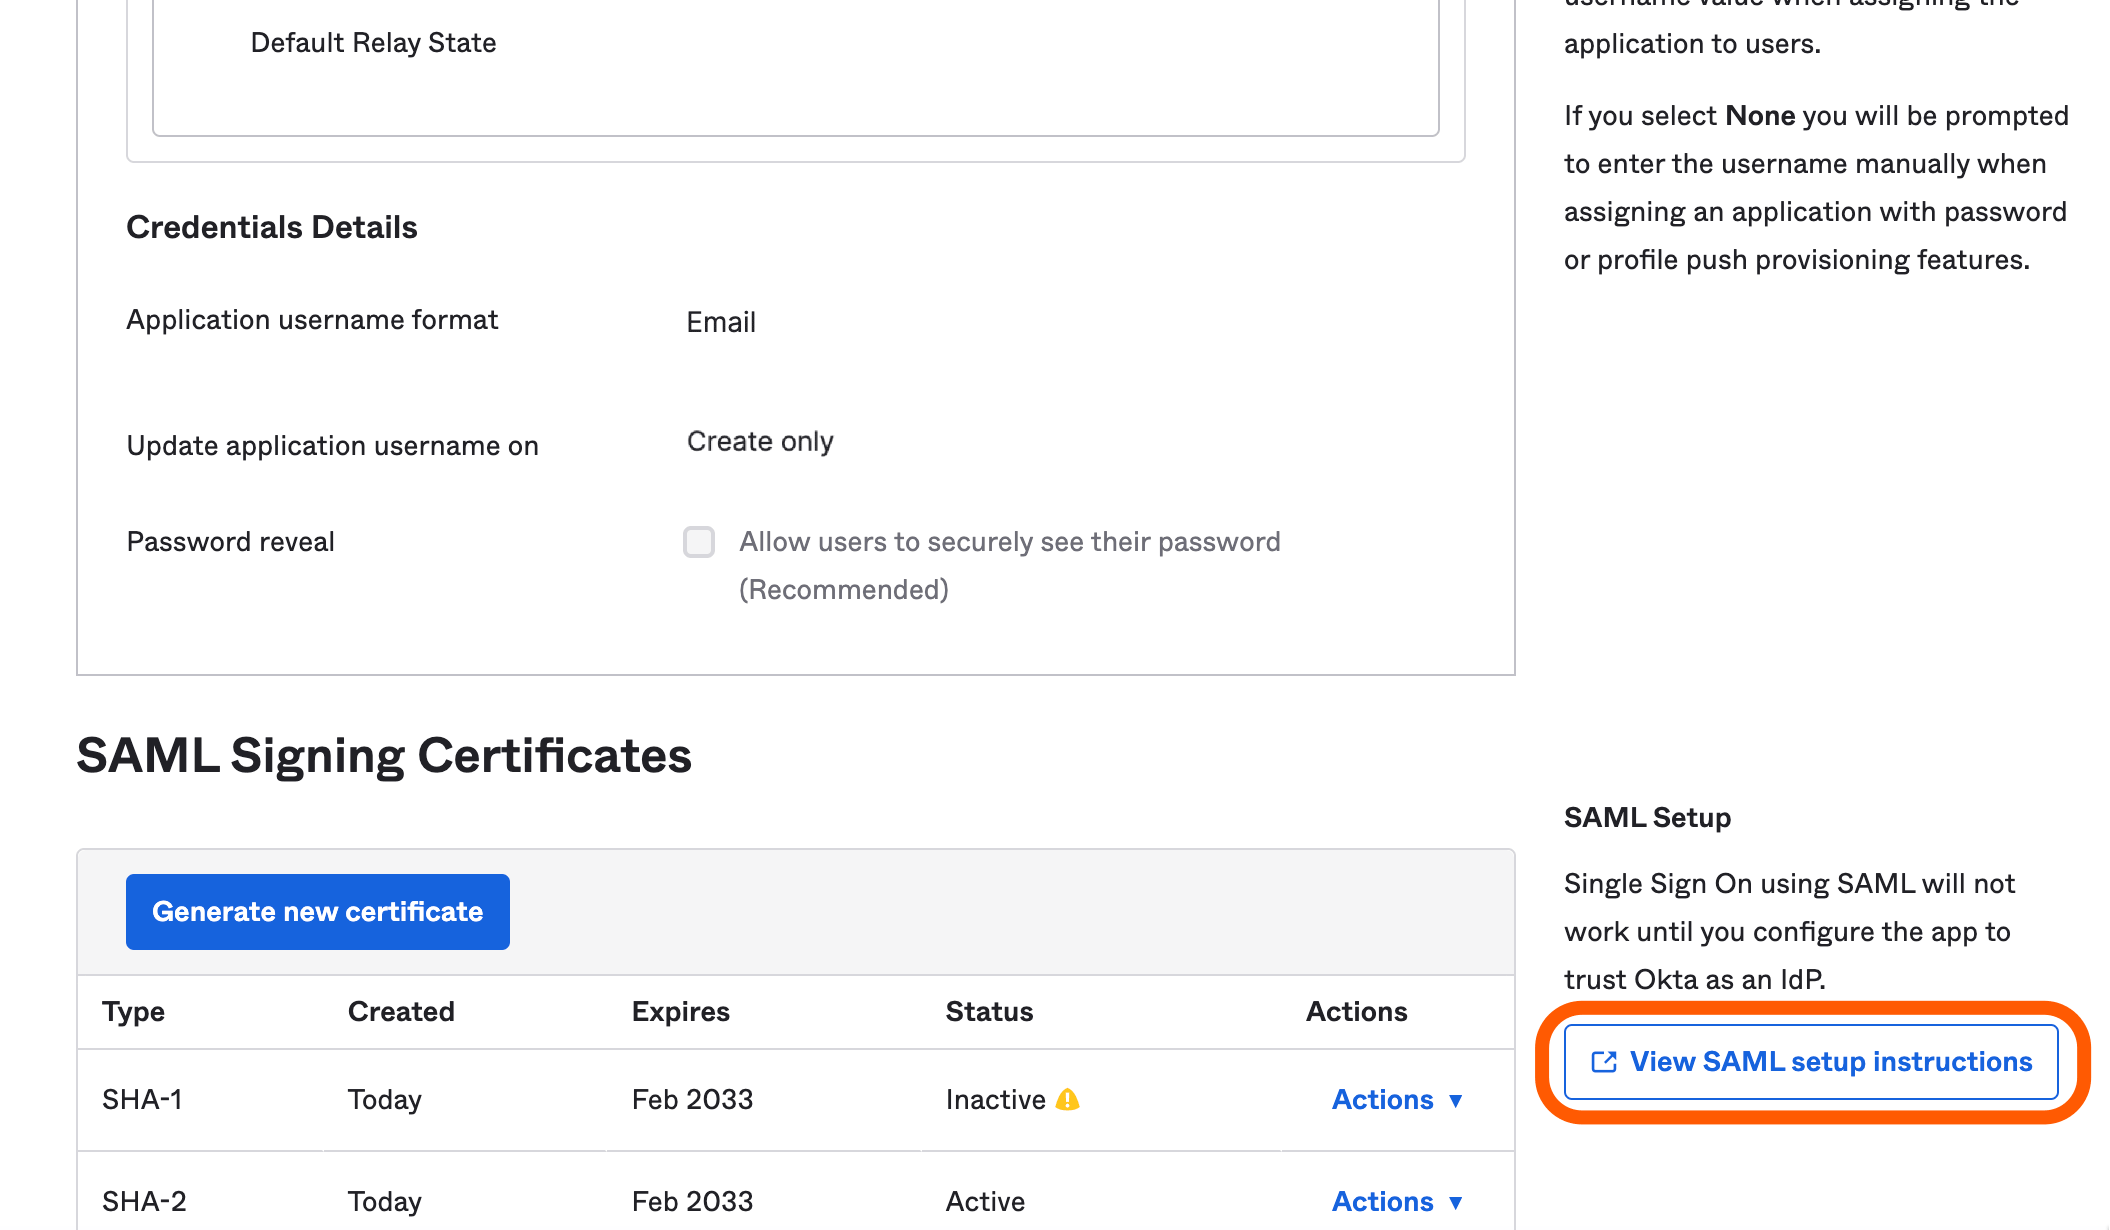
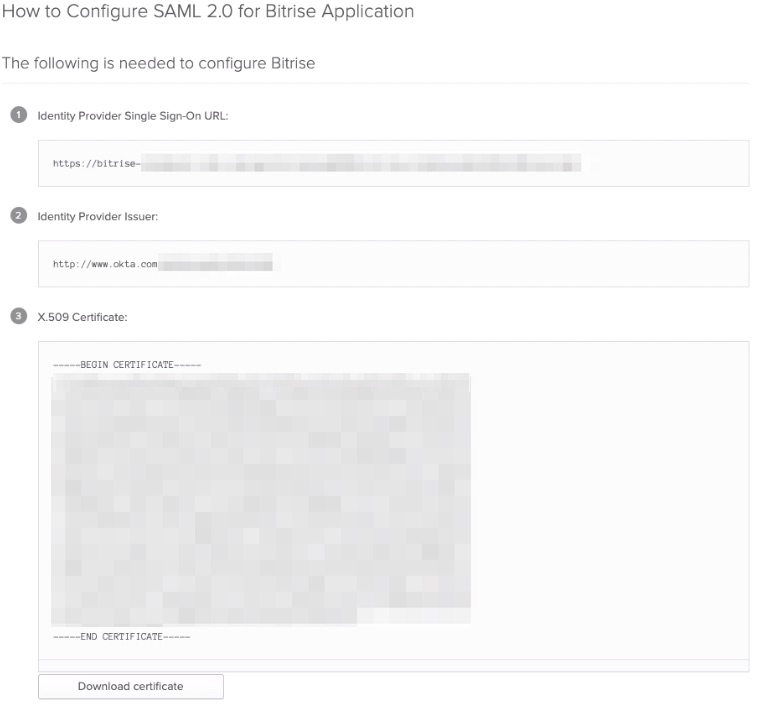
The How to Configure SAML 2.0 for Bitrise application page is displayed. It summarizes all the information you need to set up the SAML connection between Bitrise and Okta.
-
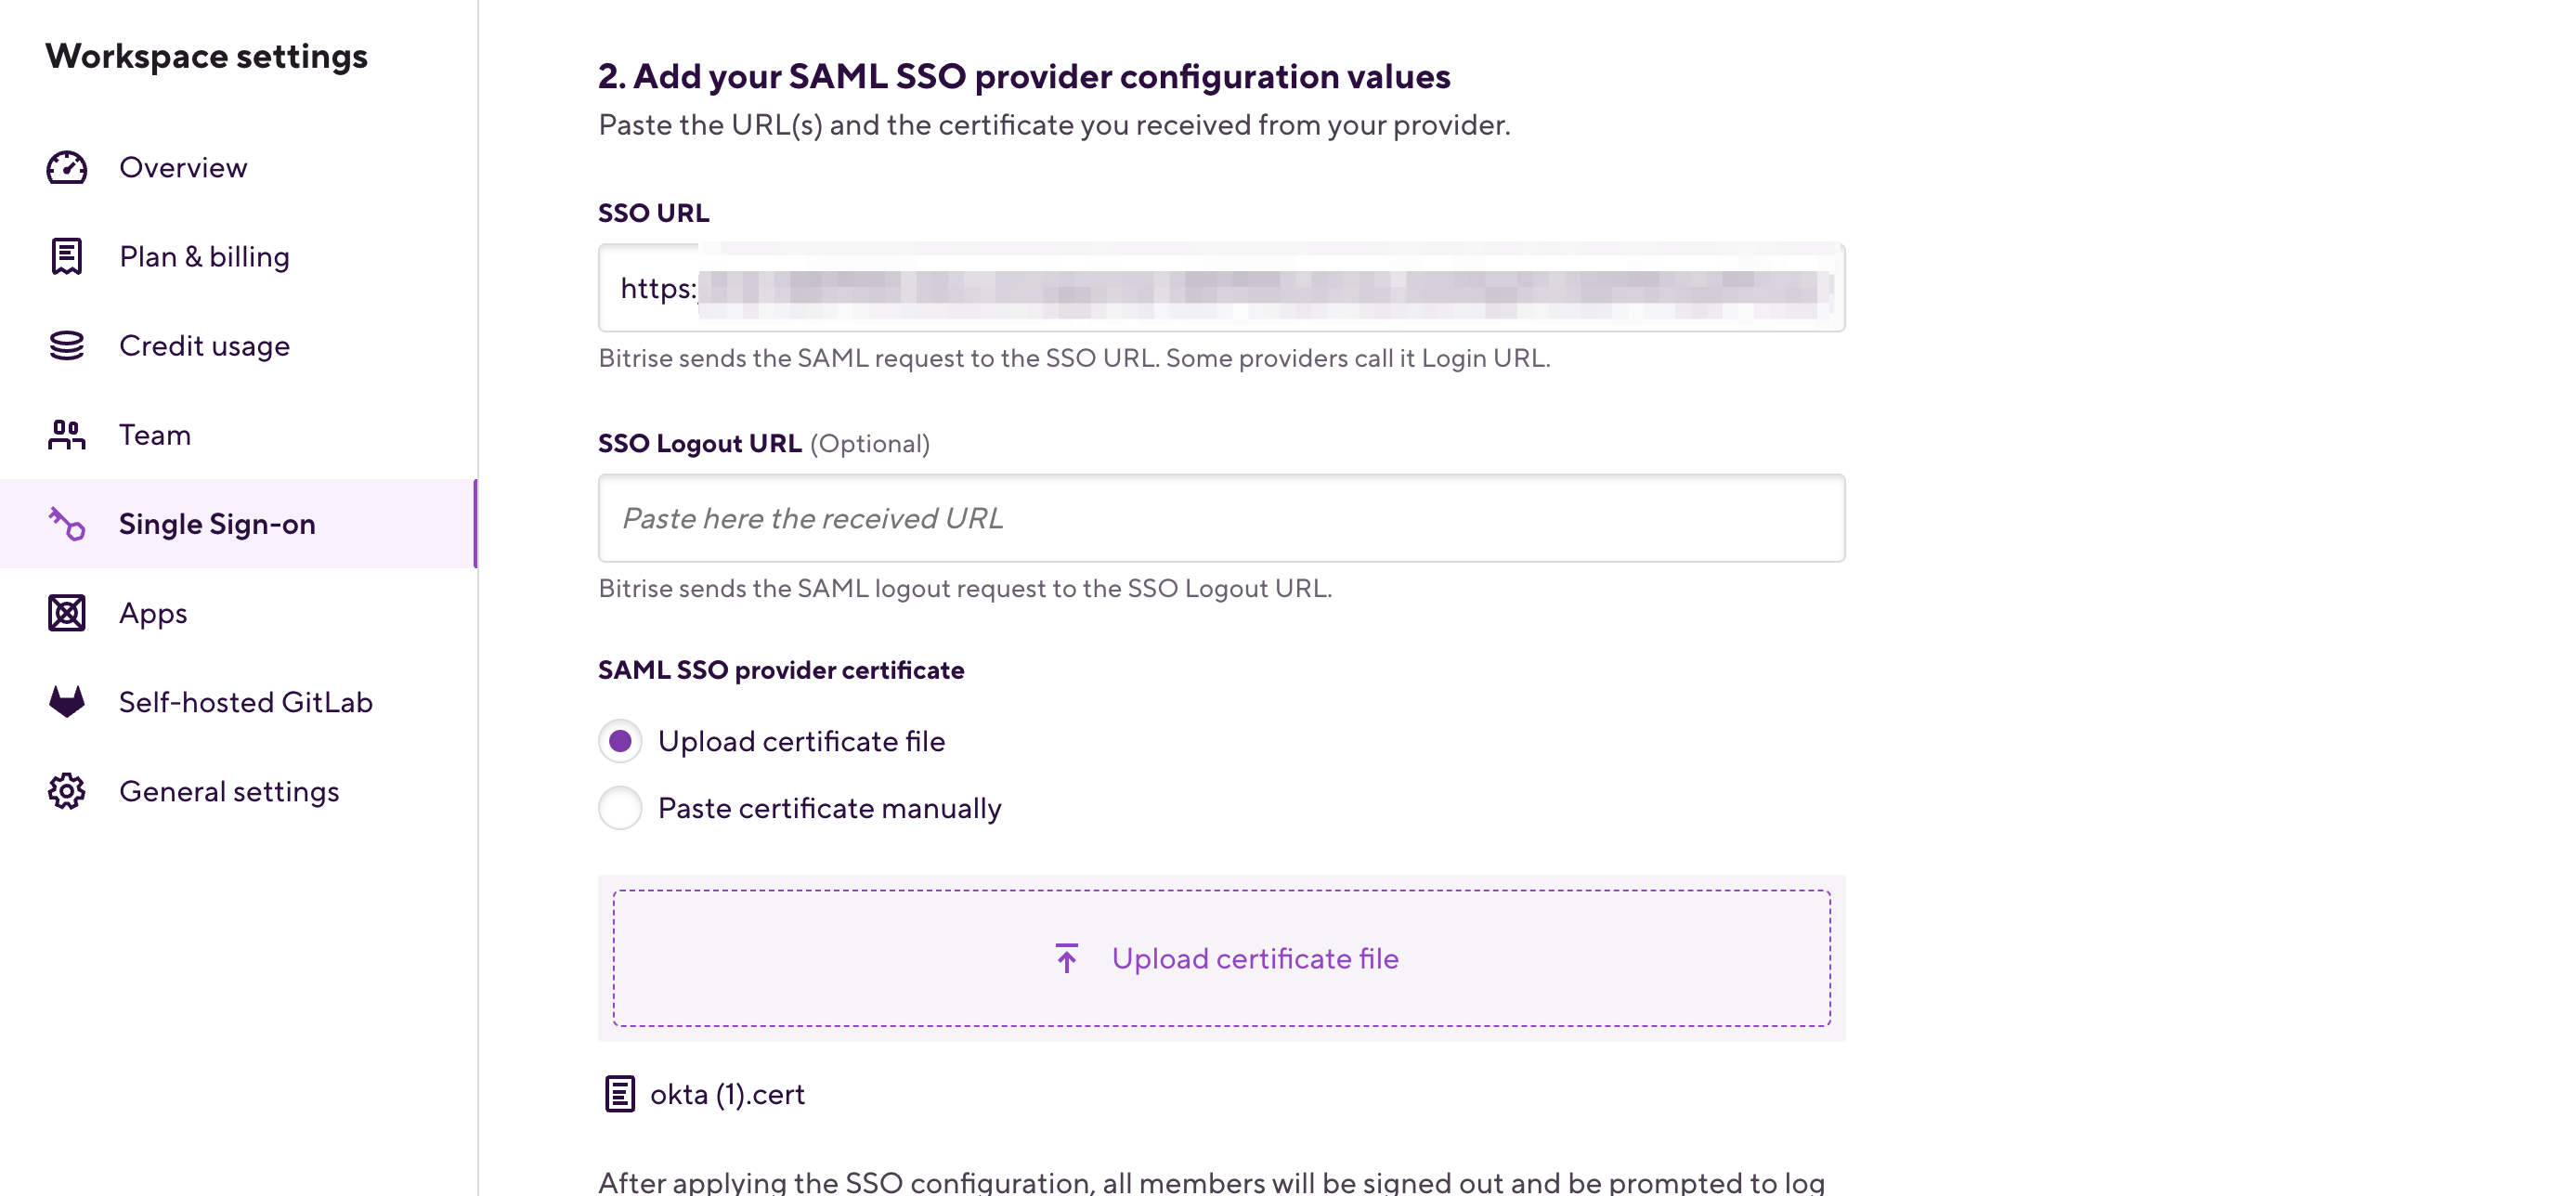
Copy the Identity Provider Single Sign-On URL and paste it in your Bitrise Workspace’s SSO URL field.
If you haven’t pasted the Certificate’s content or uploaded the file itself into the SAML SSO provider certificate field of your Bitrise Workspace yet, you can do so now.
-
Click Configure SSO on your Bitrise Workspace.
That's it! From now on, whenever you access the page, you can configure the SAML SSO settings.
Setting up SCIM provisioning in Okta
You can set up SCIM provisioning for Bitrise using Okta.
Managing Workspace groups
While SCIM is a great way to manage the access of your users for Bitrise Workspaces, you will have to do some initial configuration for your groups in Bitrise after finishing setting up the SCIM provisioning. For more information about configuring your groups, check out Adding Workspace groups to a project team.
We will be jumping back and forth from the Bitrise Workspace account to Okta, so make sure both pages are available. In practice, this means the Workspace owner should be logged into Bitrise, and the Okta admin should be logged in to Okta.
-
On Bitrise, configure domain control and generate your SCIM credentials. You need to have:
-
A verified domain.
-
An SCIM base URL and an SCIM authentication token.
Make sure you save both of these because you will need them during the process later.
-
-
Log into Okta and click .
-
From the left menu, select under the section.
-
Select your Bitrise app.
-
Click the tab of your Bitrise app.
-
Click next to the section and select the SCIM option using the radio button next to Provisioning.
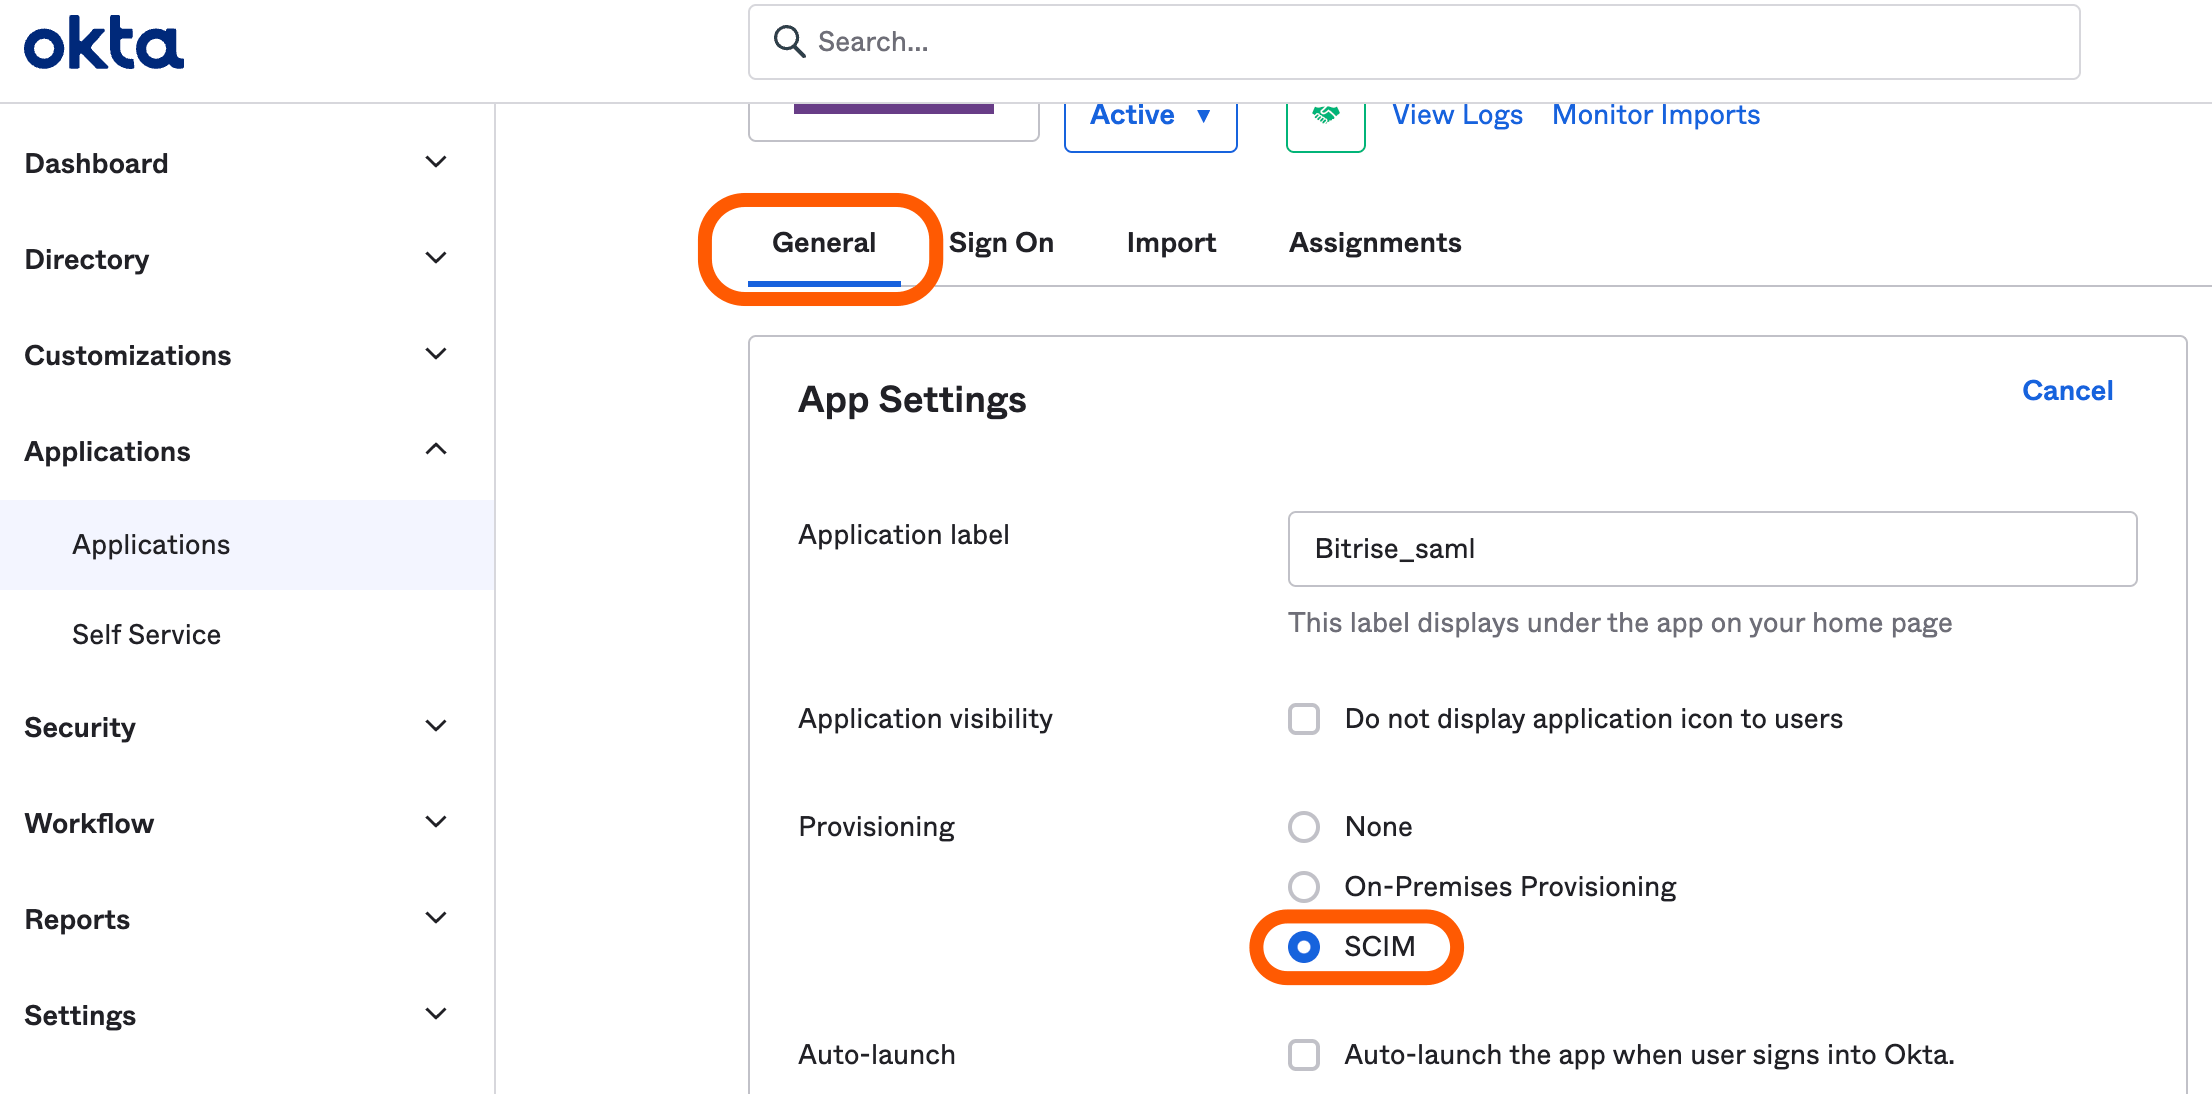
-
Click .
A new tab called Provisioning will appear.
-
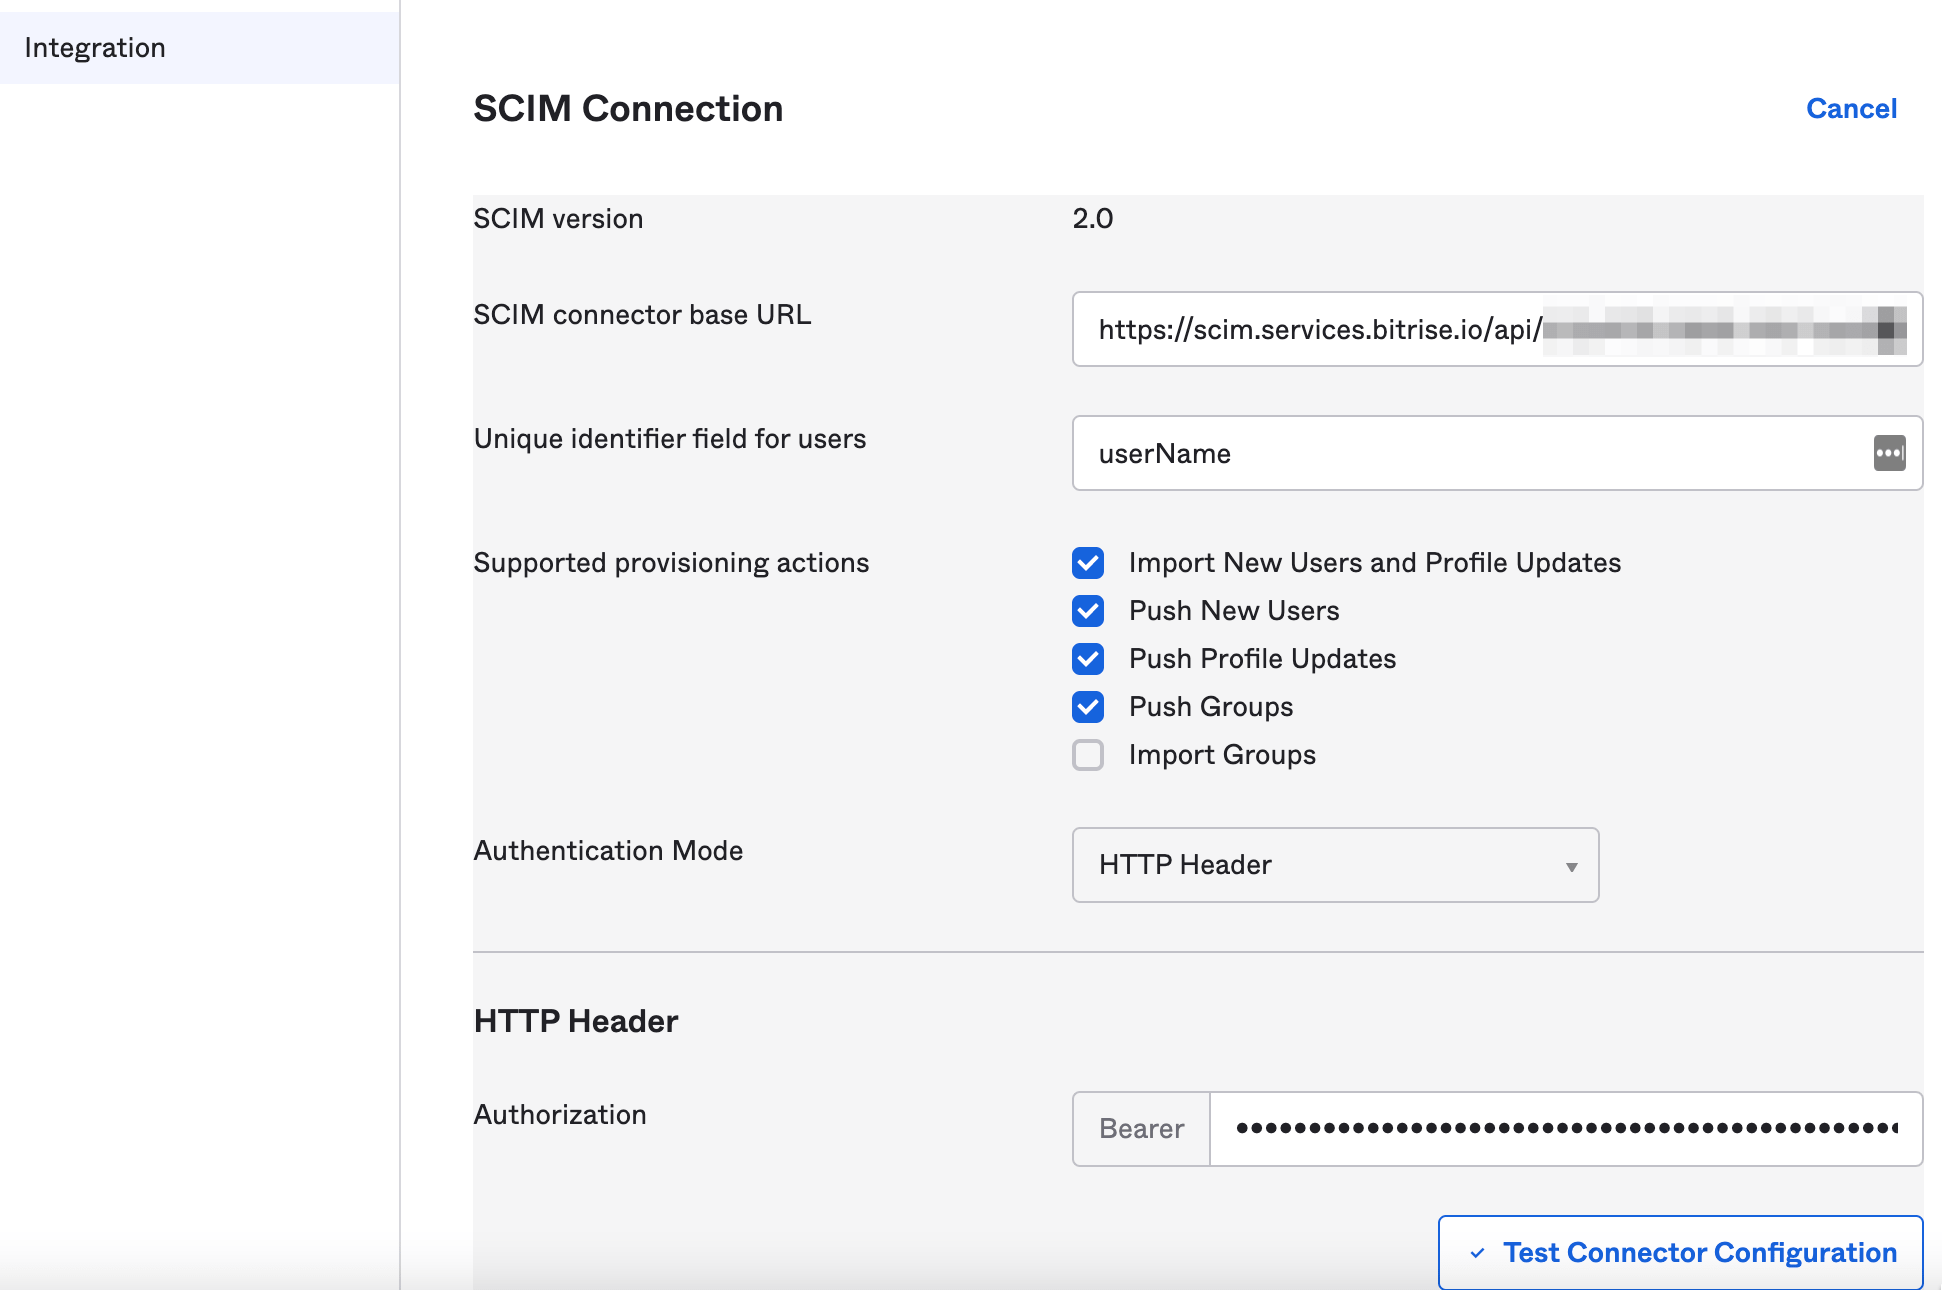
Head back to Okta, and select the Provisioning tab, then click on .
-
Paste the SCIM base URL you copied from Bitrise in the SCIM connector base URL field.
-
Add userName in the Unique identifier field for users field.
-
Select which provisioning actions you would like to enable using the checkboxes next to Supported provisioning actions.
Push Groups are mandatory
Please note that you must enable Push Groups. This is because on Bitrise, Workspace membership works via groups and Okta/SCIM can control our Workspace groups via Push Groups.
-
Select from the Authorization Mode dropdown menu.
-
Copy and paste your SCIM authentication token in the Authorization field.
-
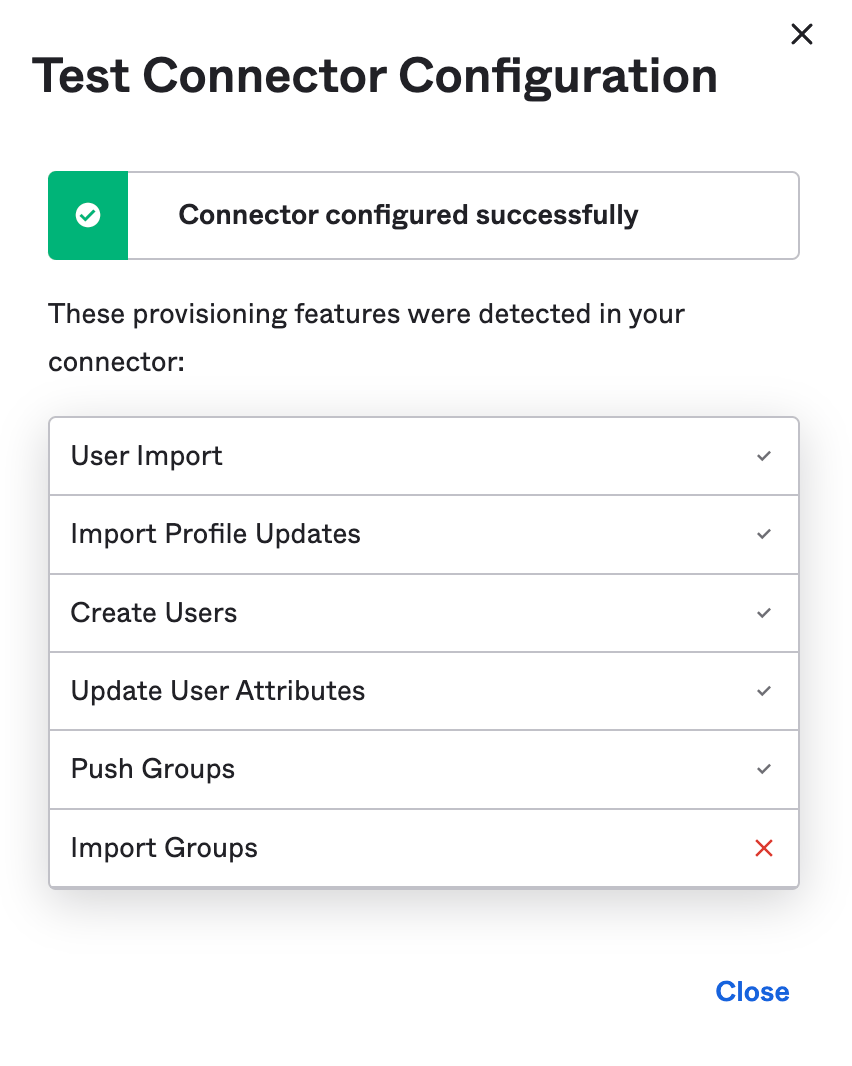
Click to test if everything is working correctly.
-
Close the Test Connector Configuration window and click .
-
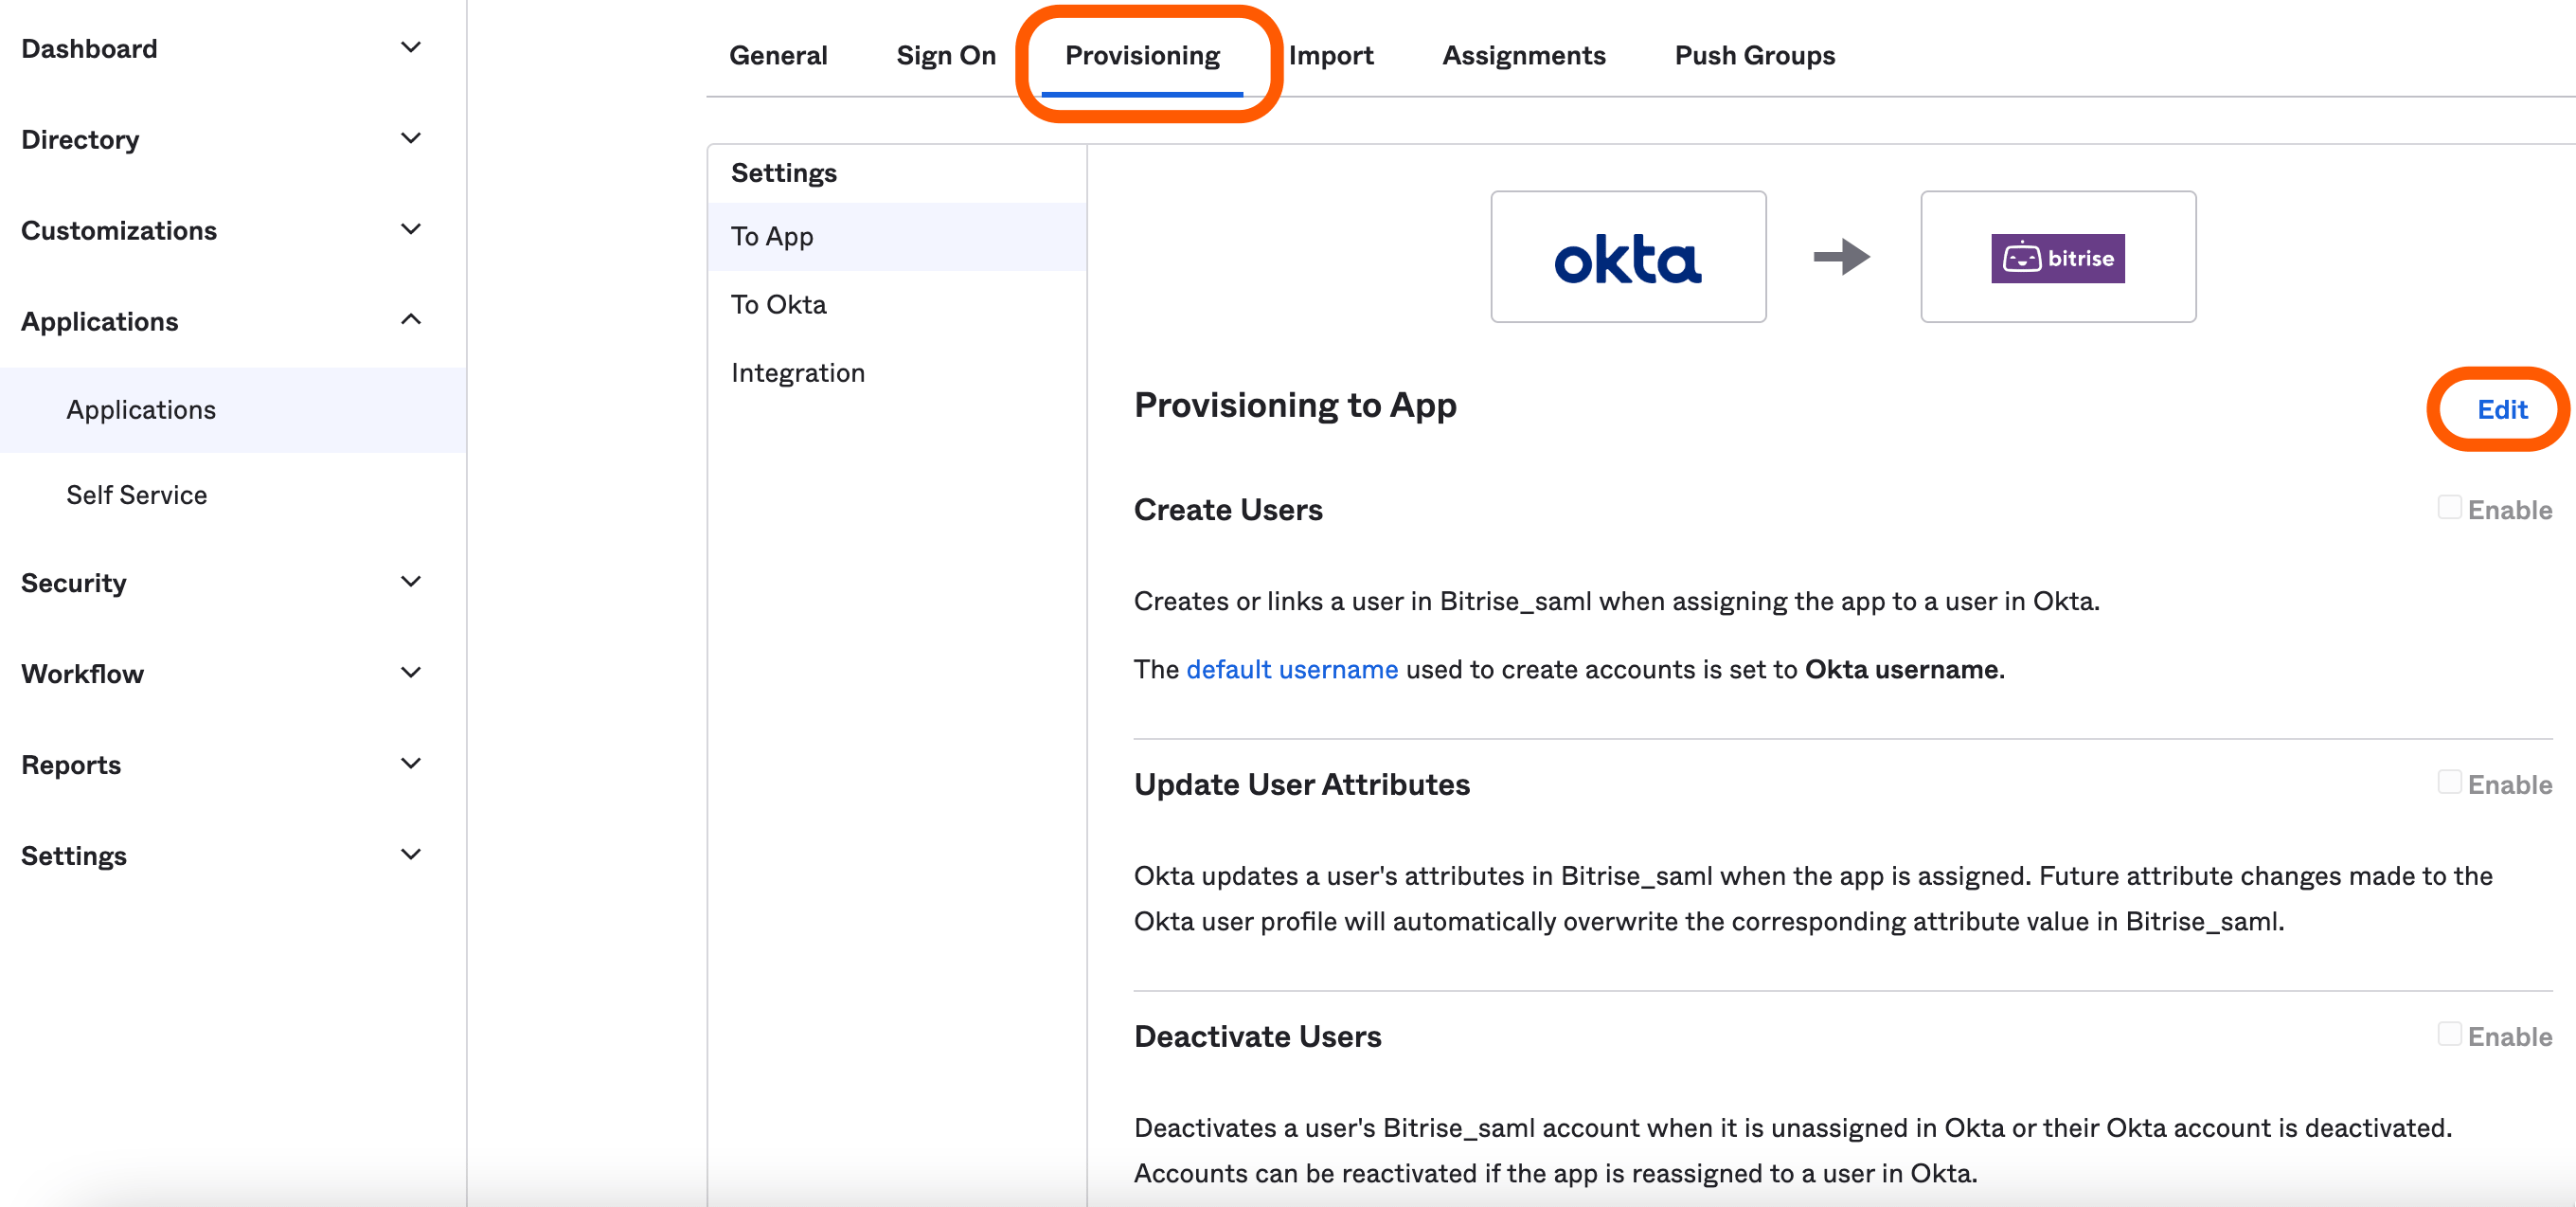
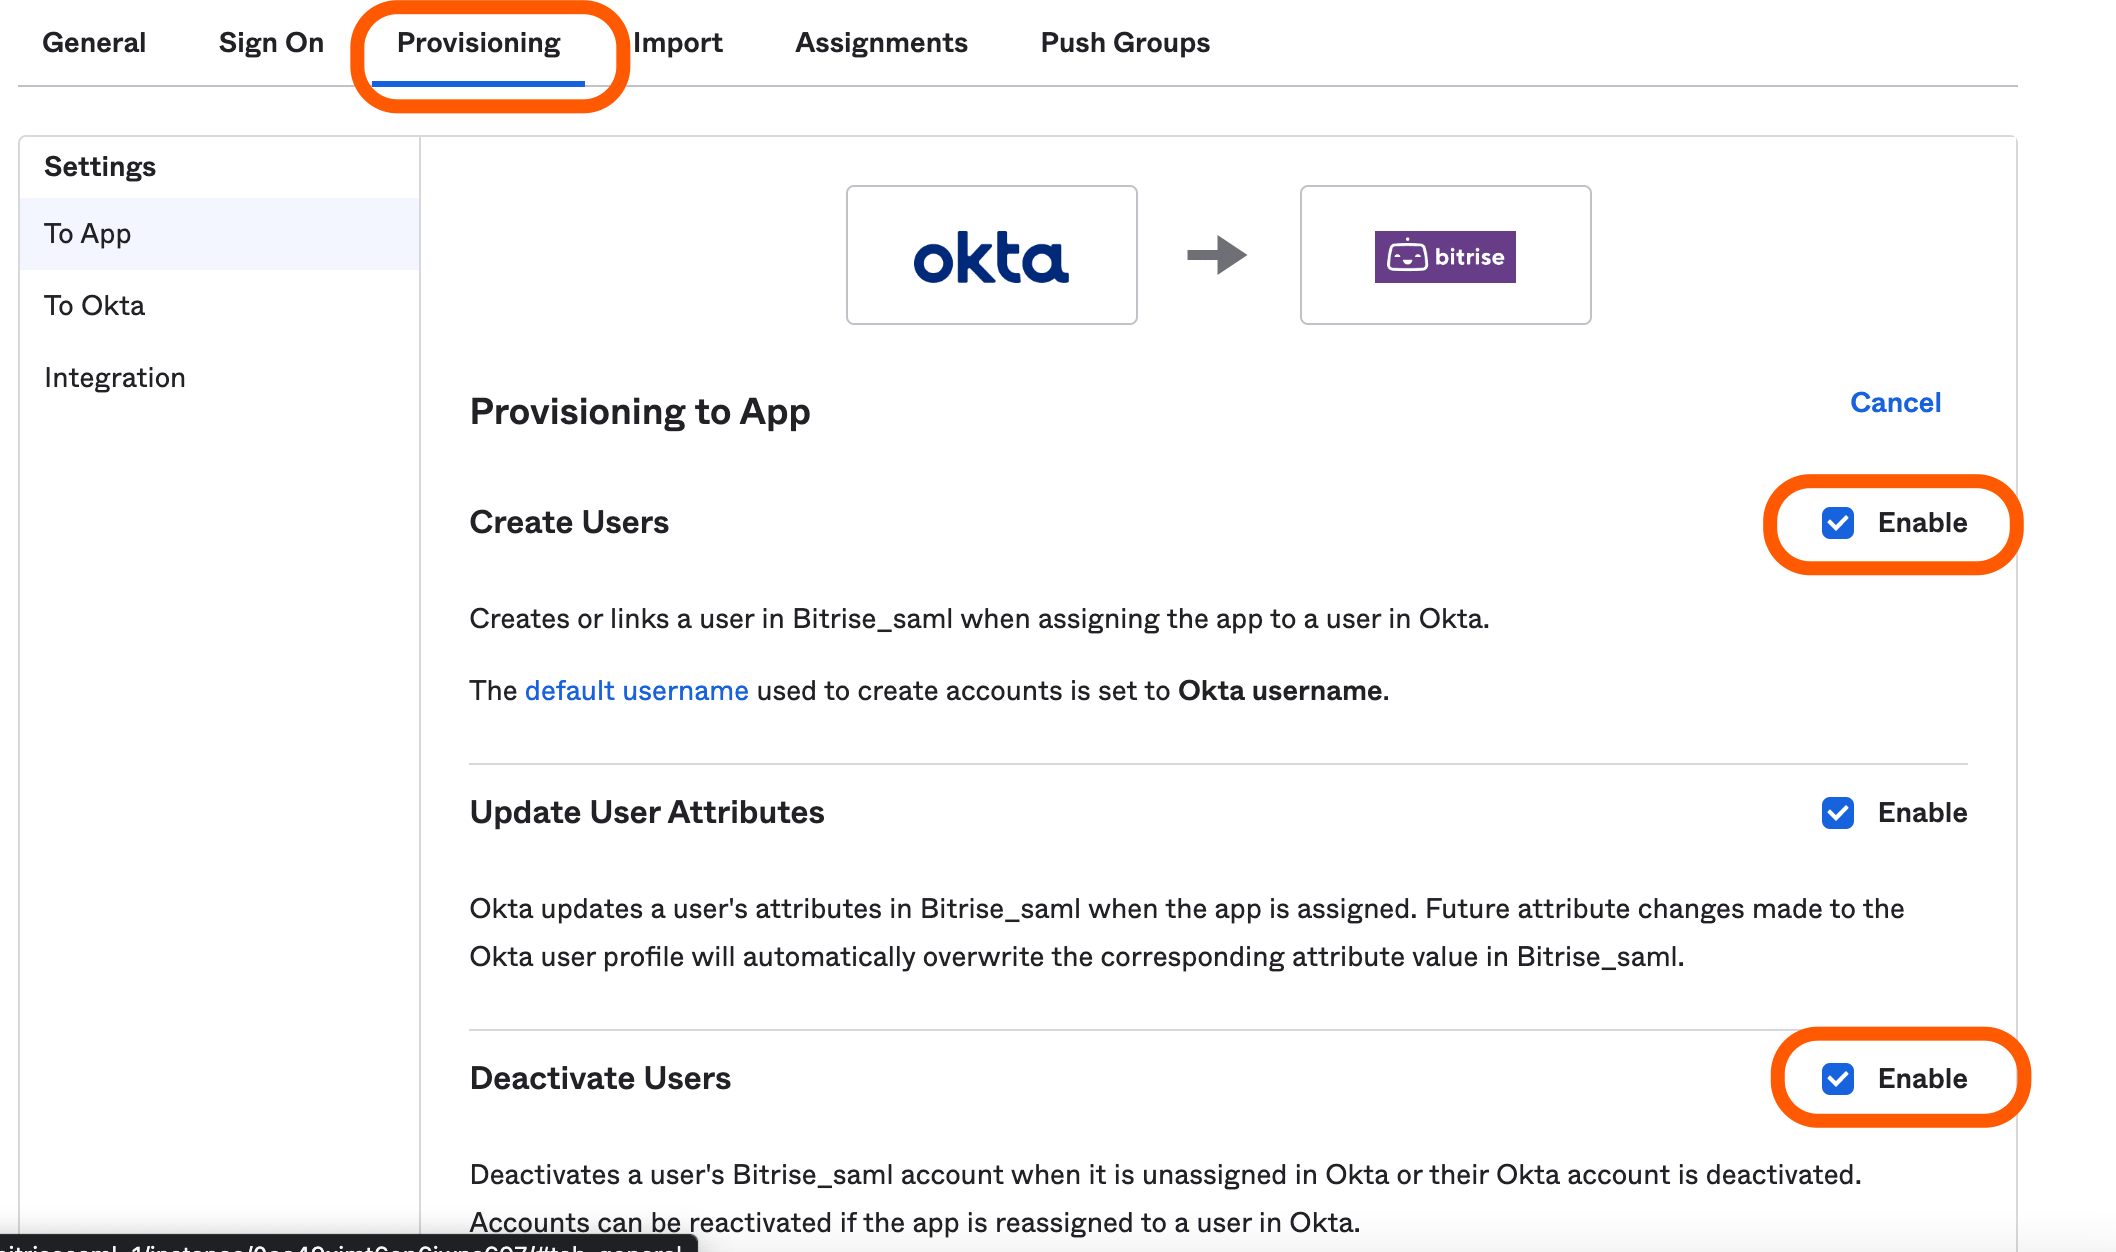
Click the tab of your Bitrise app, then click on next to the Provisioning to App section.
-
Select which provisioning options you would like to enable and click .
Sync password
We recommend keeping the Sync Password setting disabled.
That's it! You can now use SCIM provisioning in Okta to manage the access of your users to Bitrise.
Pushing Okta groups to Bitrise using SCIM
You can push groups from Okta to Bitrise using SCIM provisioning. Pushing a group either links an Okta group to an existing Bitrise group or creates a new group in your Bitrise Workspace.
Either way, by pushing a group, you set up synchronization between an Okta group and a Bitrise group.
-
Log into Okta and click .
-
From the left menu, select under the section.
-
Select your Bitrise app.
-
Click the tab.
-
Click on and choose a filtering method.
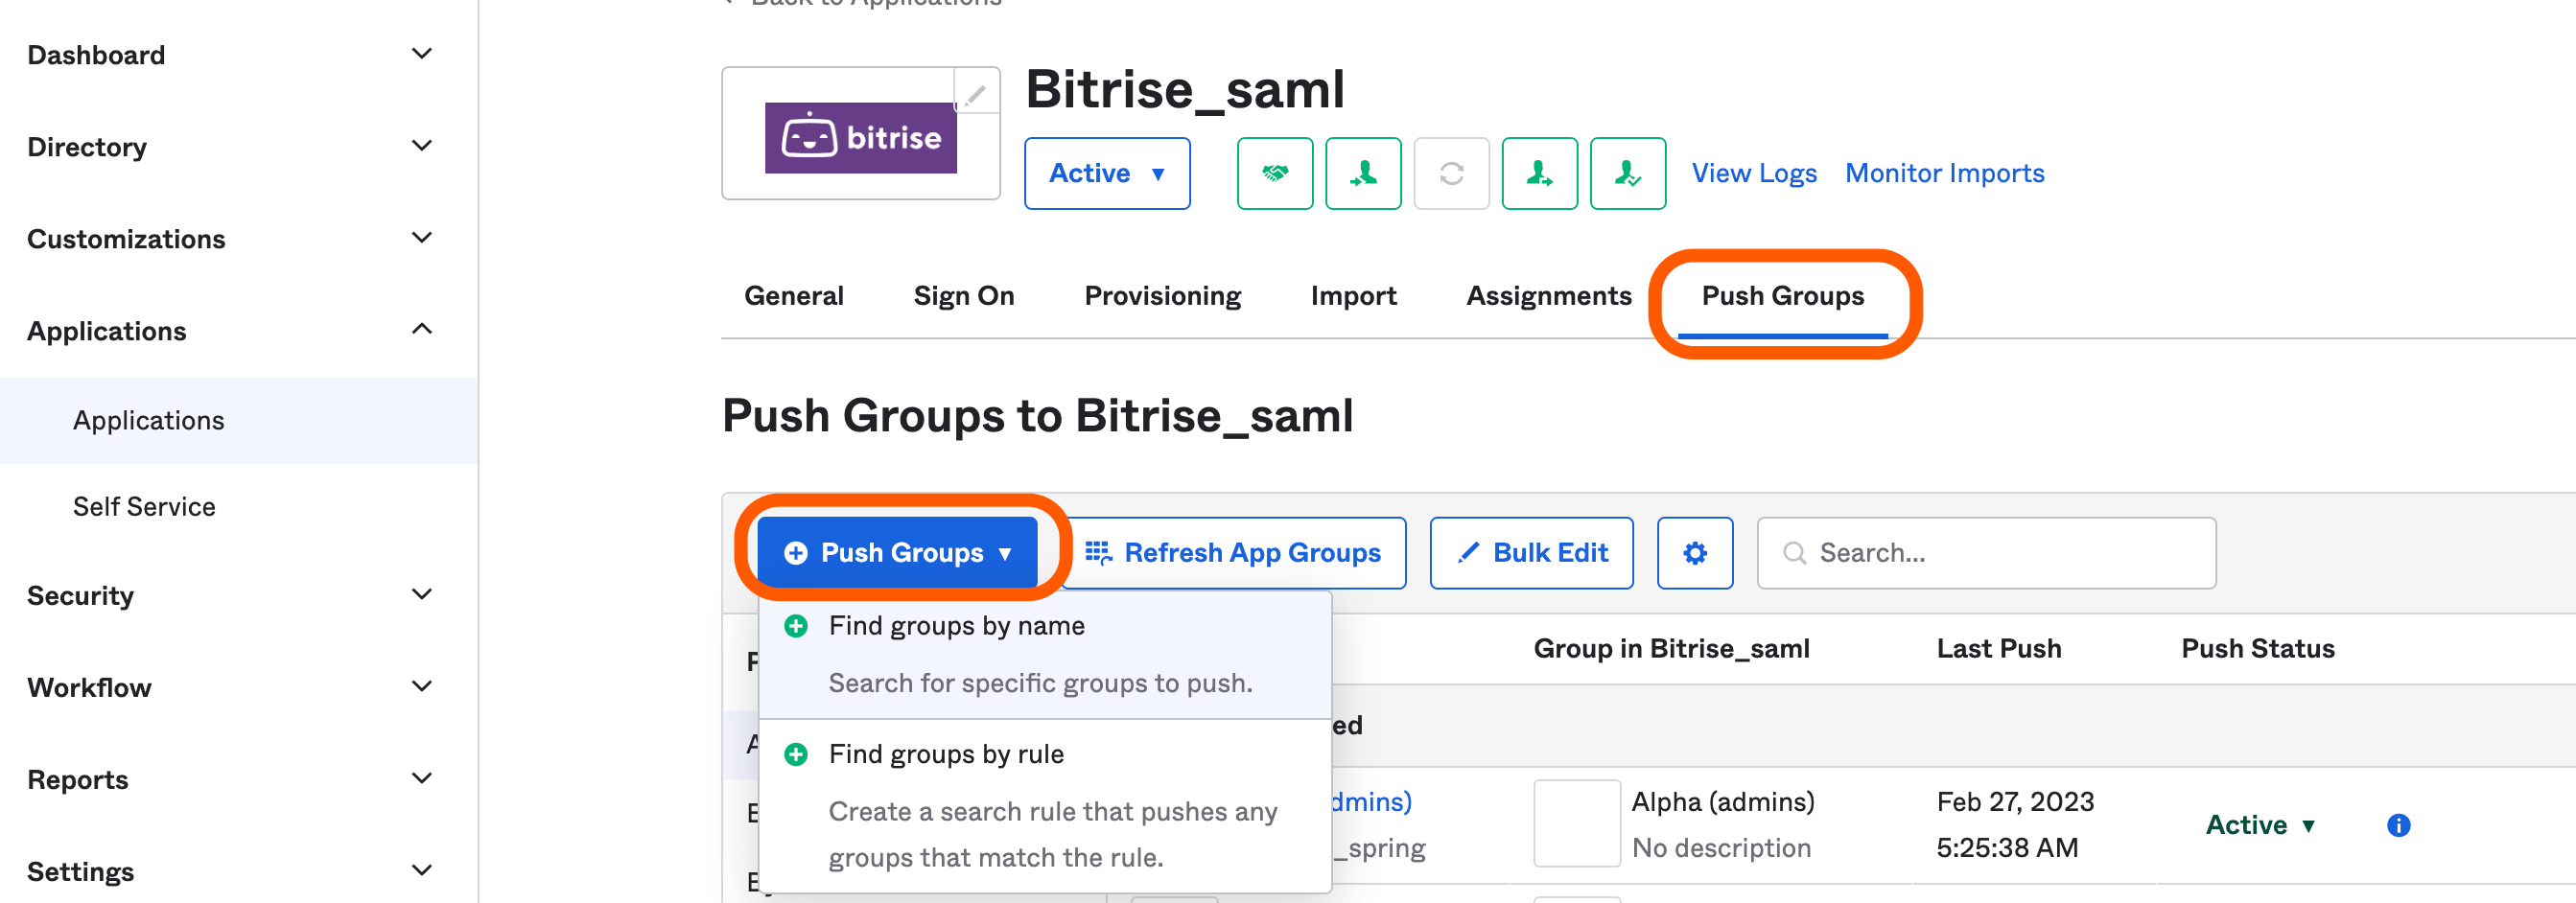
-
Find the group(s) you want to push.
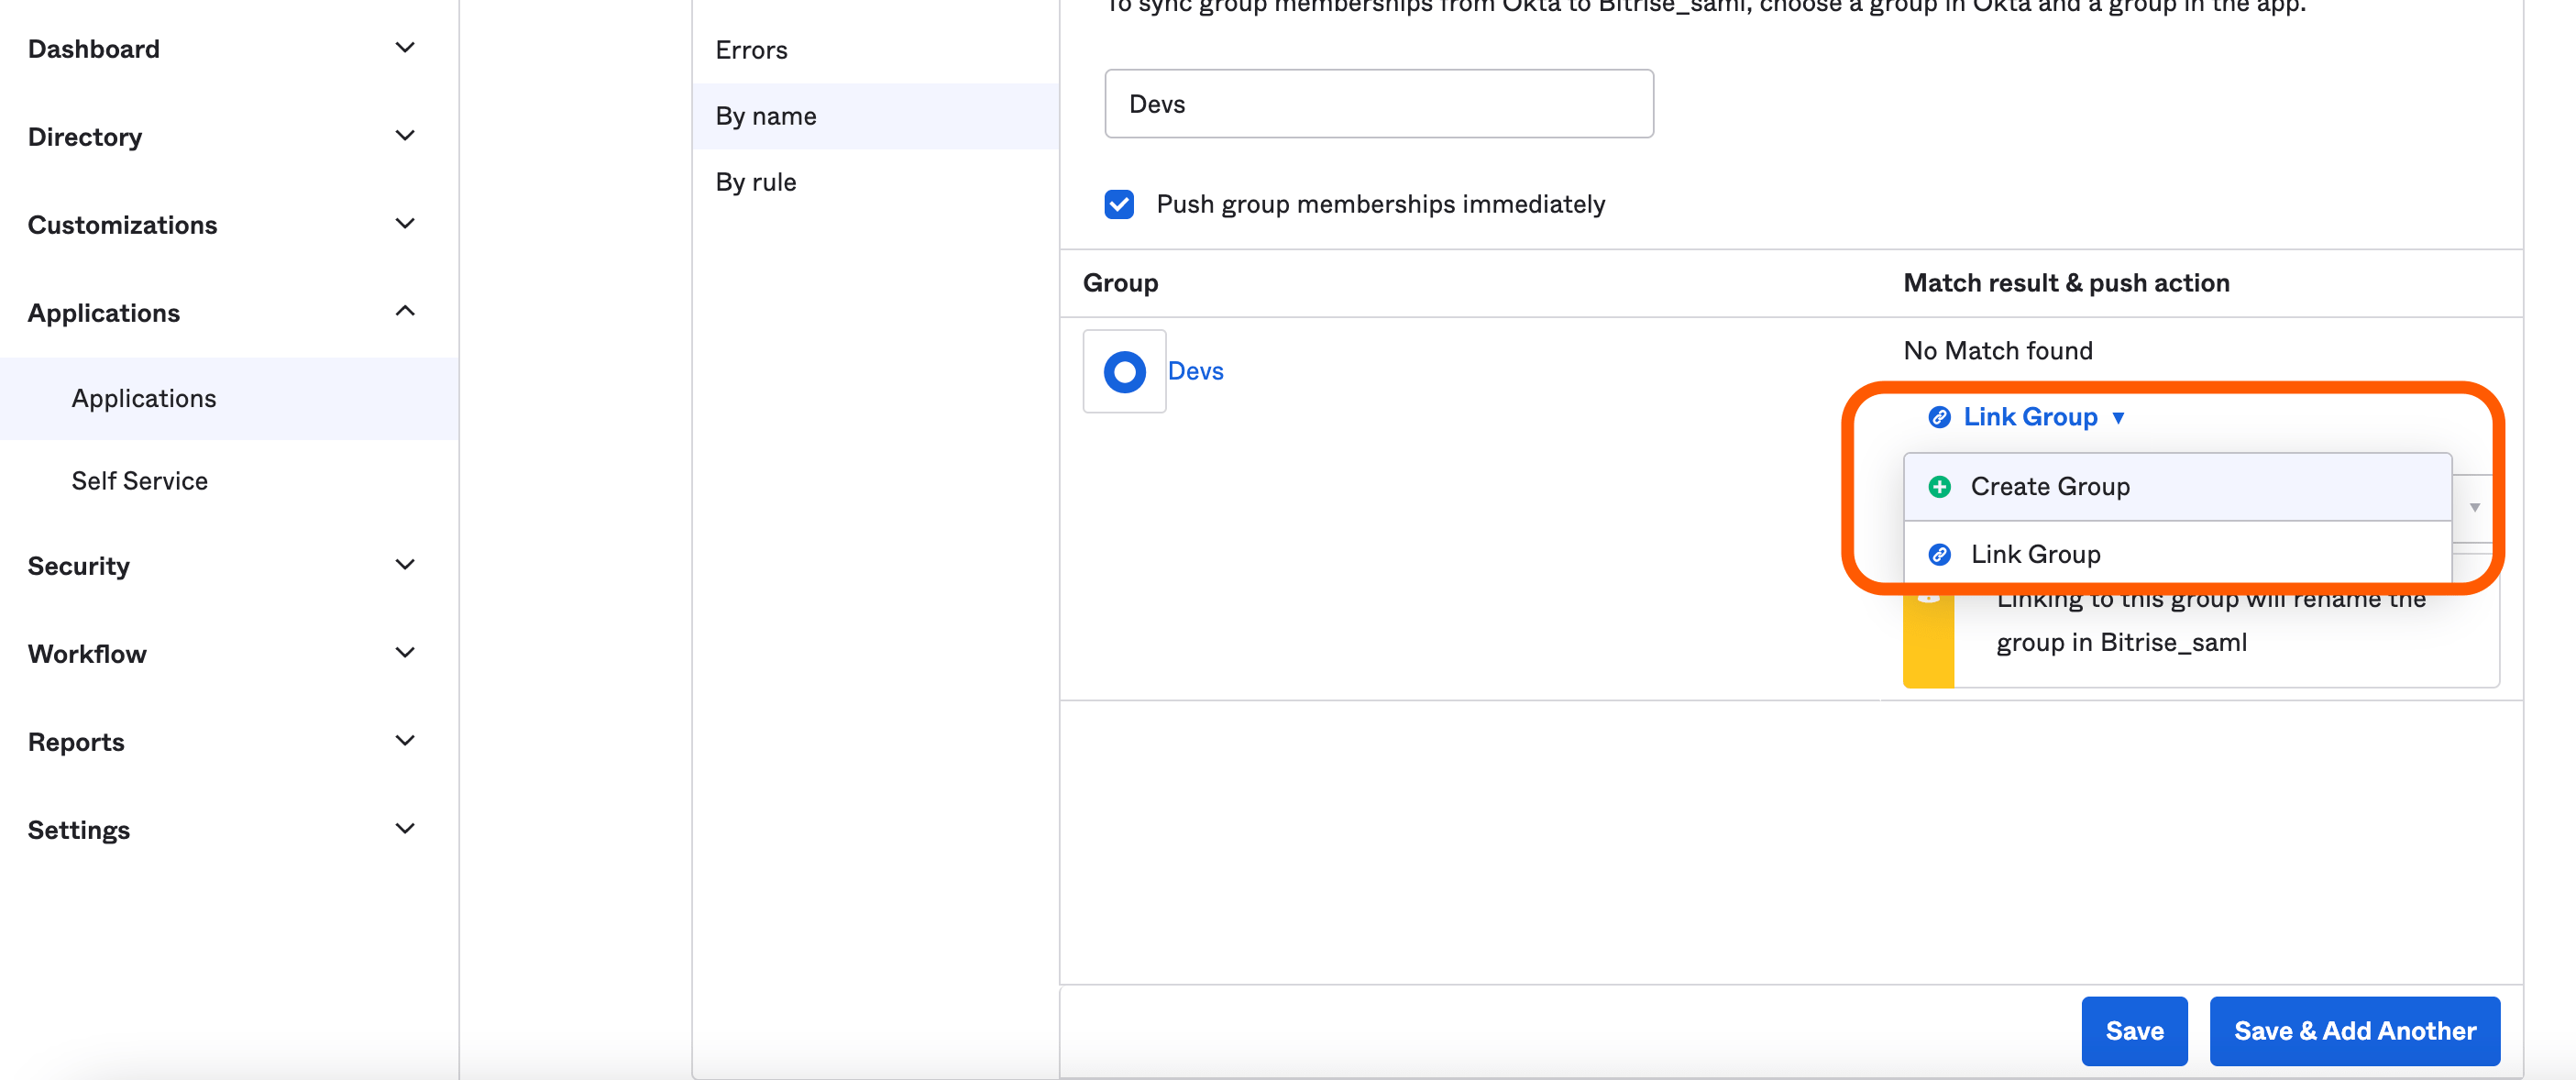
-
You must either create a new group, which will create a brand new group in your Bitrise Workspace or link the Okta group to an existing Bitrise group.
You can choose between these methods using the dropdown menu under the Match result & push action.
Linking a group
If you decide to link an Okta group to an existing Bitrise group, keep the following in mind:
-
If the Okta and Bitrise group names are different, the Bitrise group will be automatically renamed to match the name of the Okta group.
-
When you manually push a group connected to an existing Bitrise group, if the group had members who were only added on Bitrise and not included in the Okta group, then they will be removed as Okta becomes the single source of truth.
-
-
Click .
When the Push Status changes to Active, the synchronization between Okta and Bitrise is ready. Your group should be updated in a couple of seconds on your Bitrise Workspace as well.

Synchronizing groups and users between Okta and Bitrise
After pushing Okta groups to Bitrise, you can synchronize your groups and users between Okta and Bitrise. To do so, you must manage the app integration assignments in Okta:
-
Log into Okta and click .
-
From the left menu, select under the section.
-
Select your Bitrise app.
-
Make sure that Create Users and Deactivate Users options are enabled on the tab.
Deprovisioning users
If you deprovision a user with SCIM, the user will be automatically logged off Bitrise and their PATs will be disabled.
-
Go to the tab.
-
Click and choose to synchronize individual users or to synchronize groups.
-
Select the users or groups that you would like to synchronize, then click .
Domain verification
New users without verified domains will receive an email invitation to join the Workspace.
Existing users will also receive a verification email unless you verify your company domain: Configuring SCIM.
-
After synchronizing your groups and users, you can check the tab to see if the synchronization is finished.
You can also manually push your updates by clicking on the dropdown menu in the Push Status column and selecting .
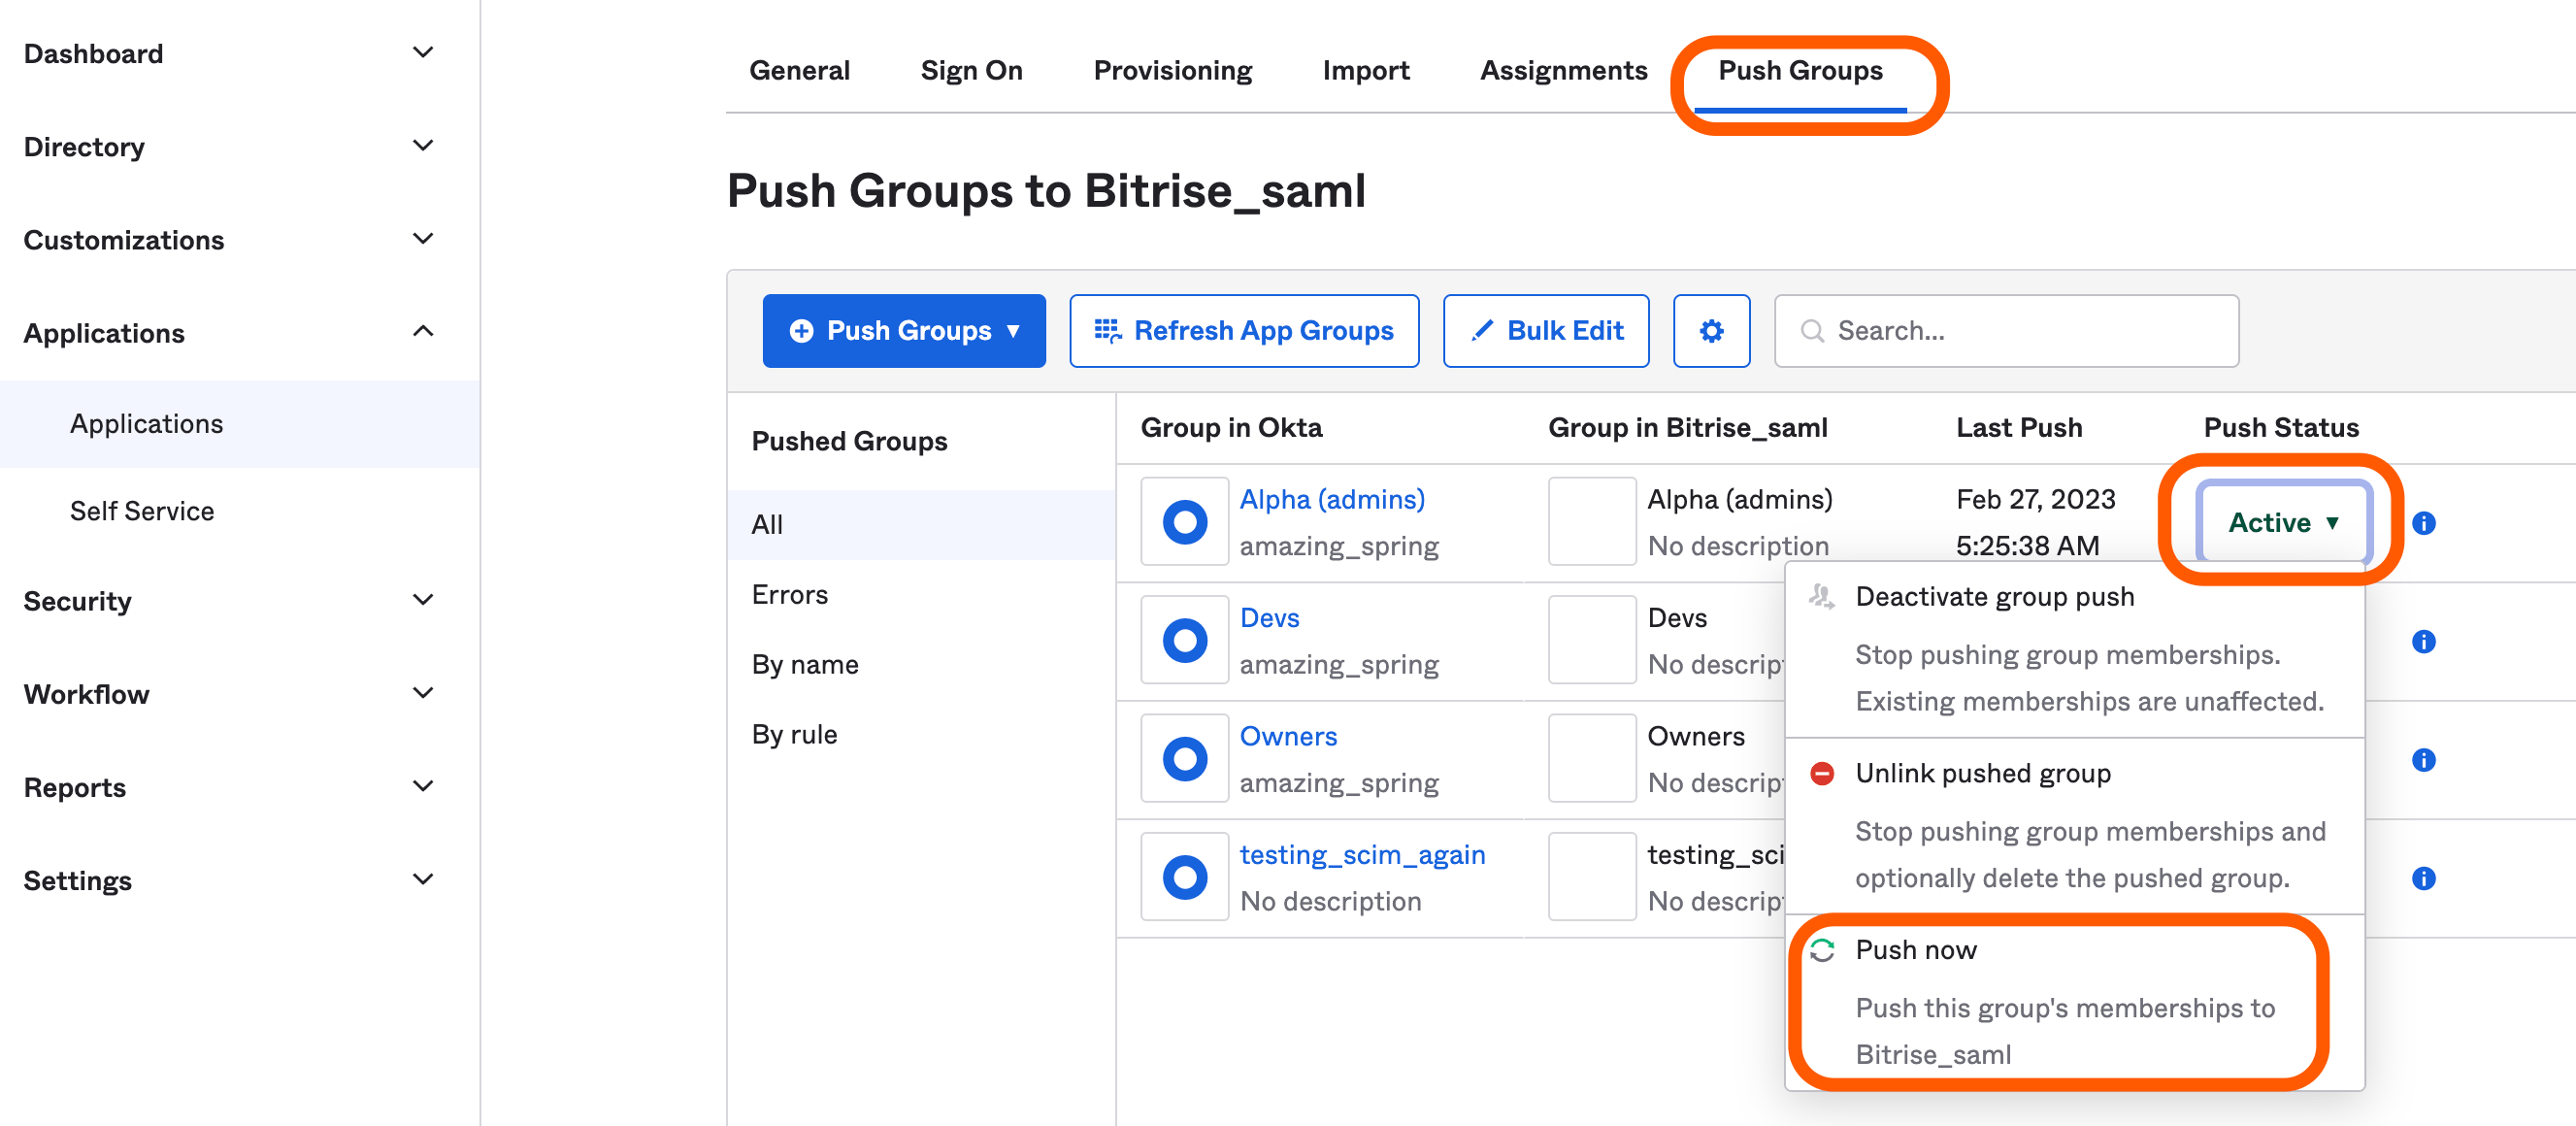
"Push now" overrides the Bitrise group
Users not included in your Okta group will be automatically removed from the linked Bitrise group.