Building an iOS app for a simulator
You can build an iOS app for an iOS or tvOS simulator platform.
To do this, you'll need the Xcode Build for Simulator Step. The Step creates an .app file which you can install on any macOS device or send to, for example, testers. This requires no code signing at all, so it is an easy way to create a distributable
version of your iOS app.
The Step also creates an .xctestrun file which you can use to run tests. Both the .app file and the .xctestrun file can be accessed by subsequent Steps referring to their output variable, and they can be downloaded as a build artifact.
To build the app for a simulator:
Workflow Editor
Configuration YAML
-
Make sure you install all necessary dependencies in your Workflow.
We have dedicated Steps for many different dependency managers, including:
-
Add the Xcode Build for Simulator Step to your Workflow after the Step(s) installing dependencies.
-
Make sure the Project path input points to either your
.xcodeprojor.xcworkspacefile.The input sets the
-projector-workspaceoption of the xcodebuild command. In most cases, if your app has been automatically configured by the project scanner during the process of adding the app, the default value does not need to be changed. -
In the Scheme input, set the name of the Xcode scheme you want to use to build the app.
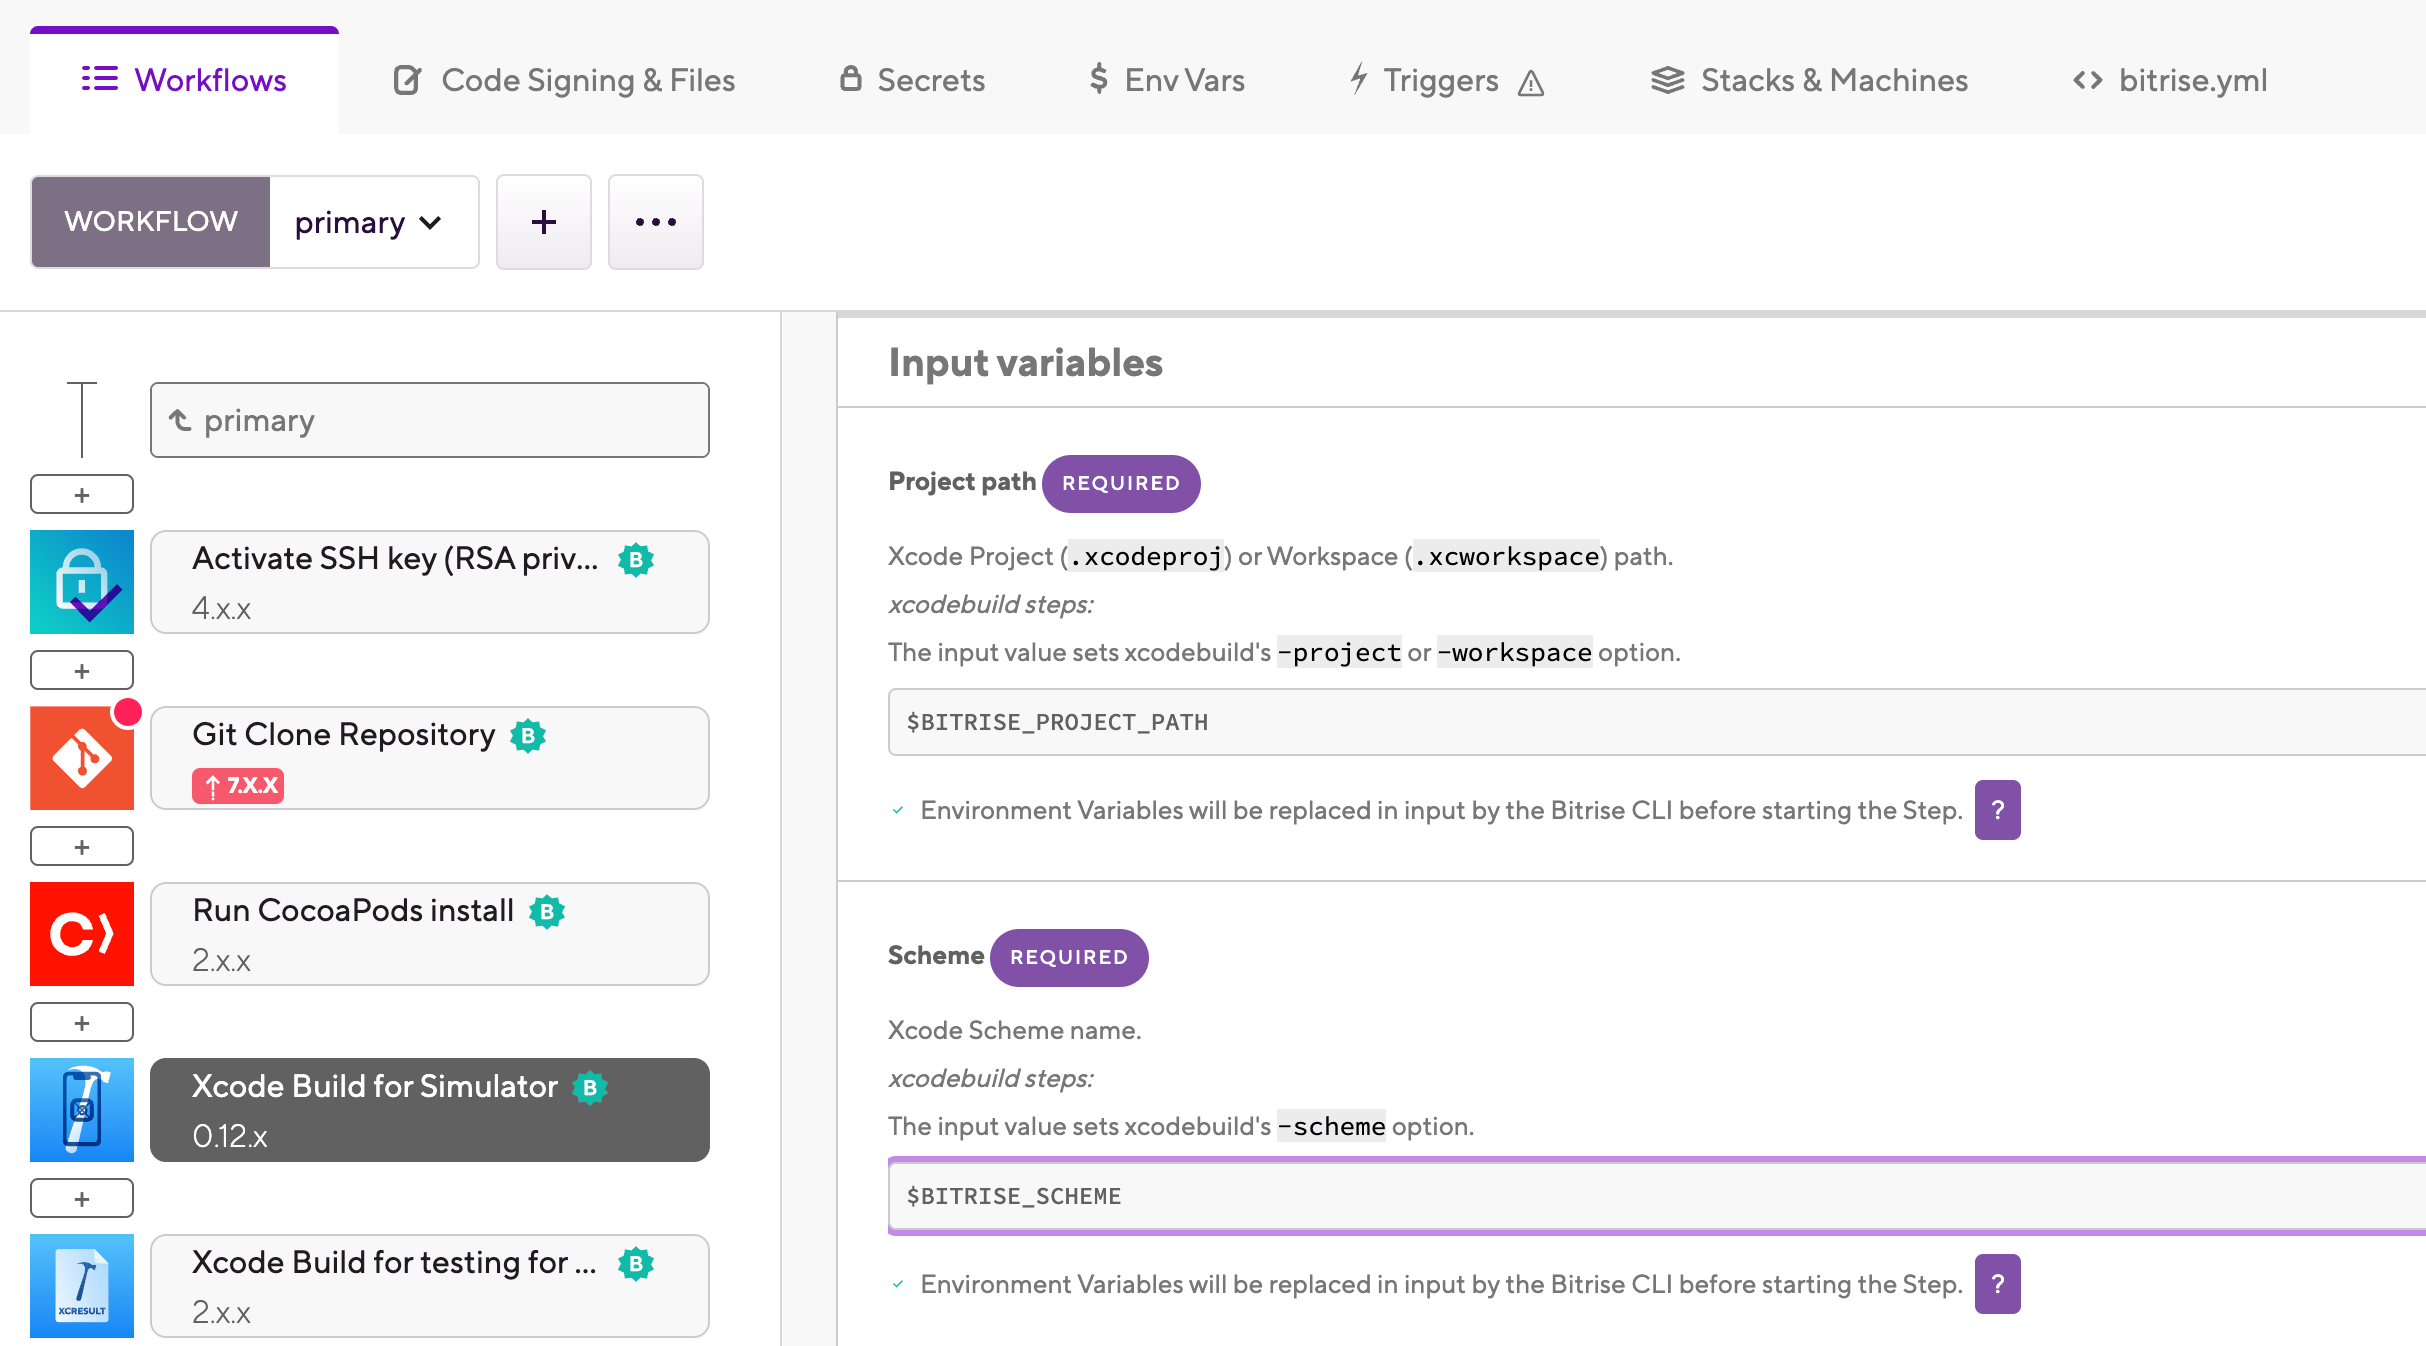
The input sets the
-schemeoption of the xcodebuild command. The default value is an Environment Variable created when adding the app and performing the first-time configuration. If you need to use a different scheme, you can type its name here.Build configuration
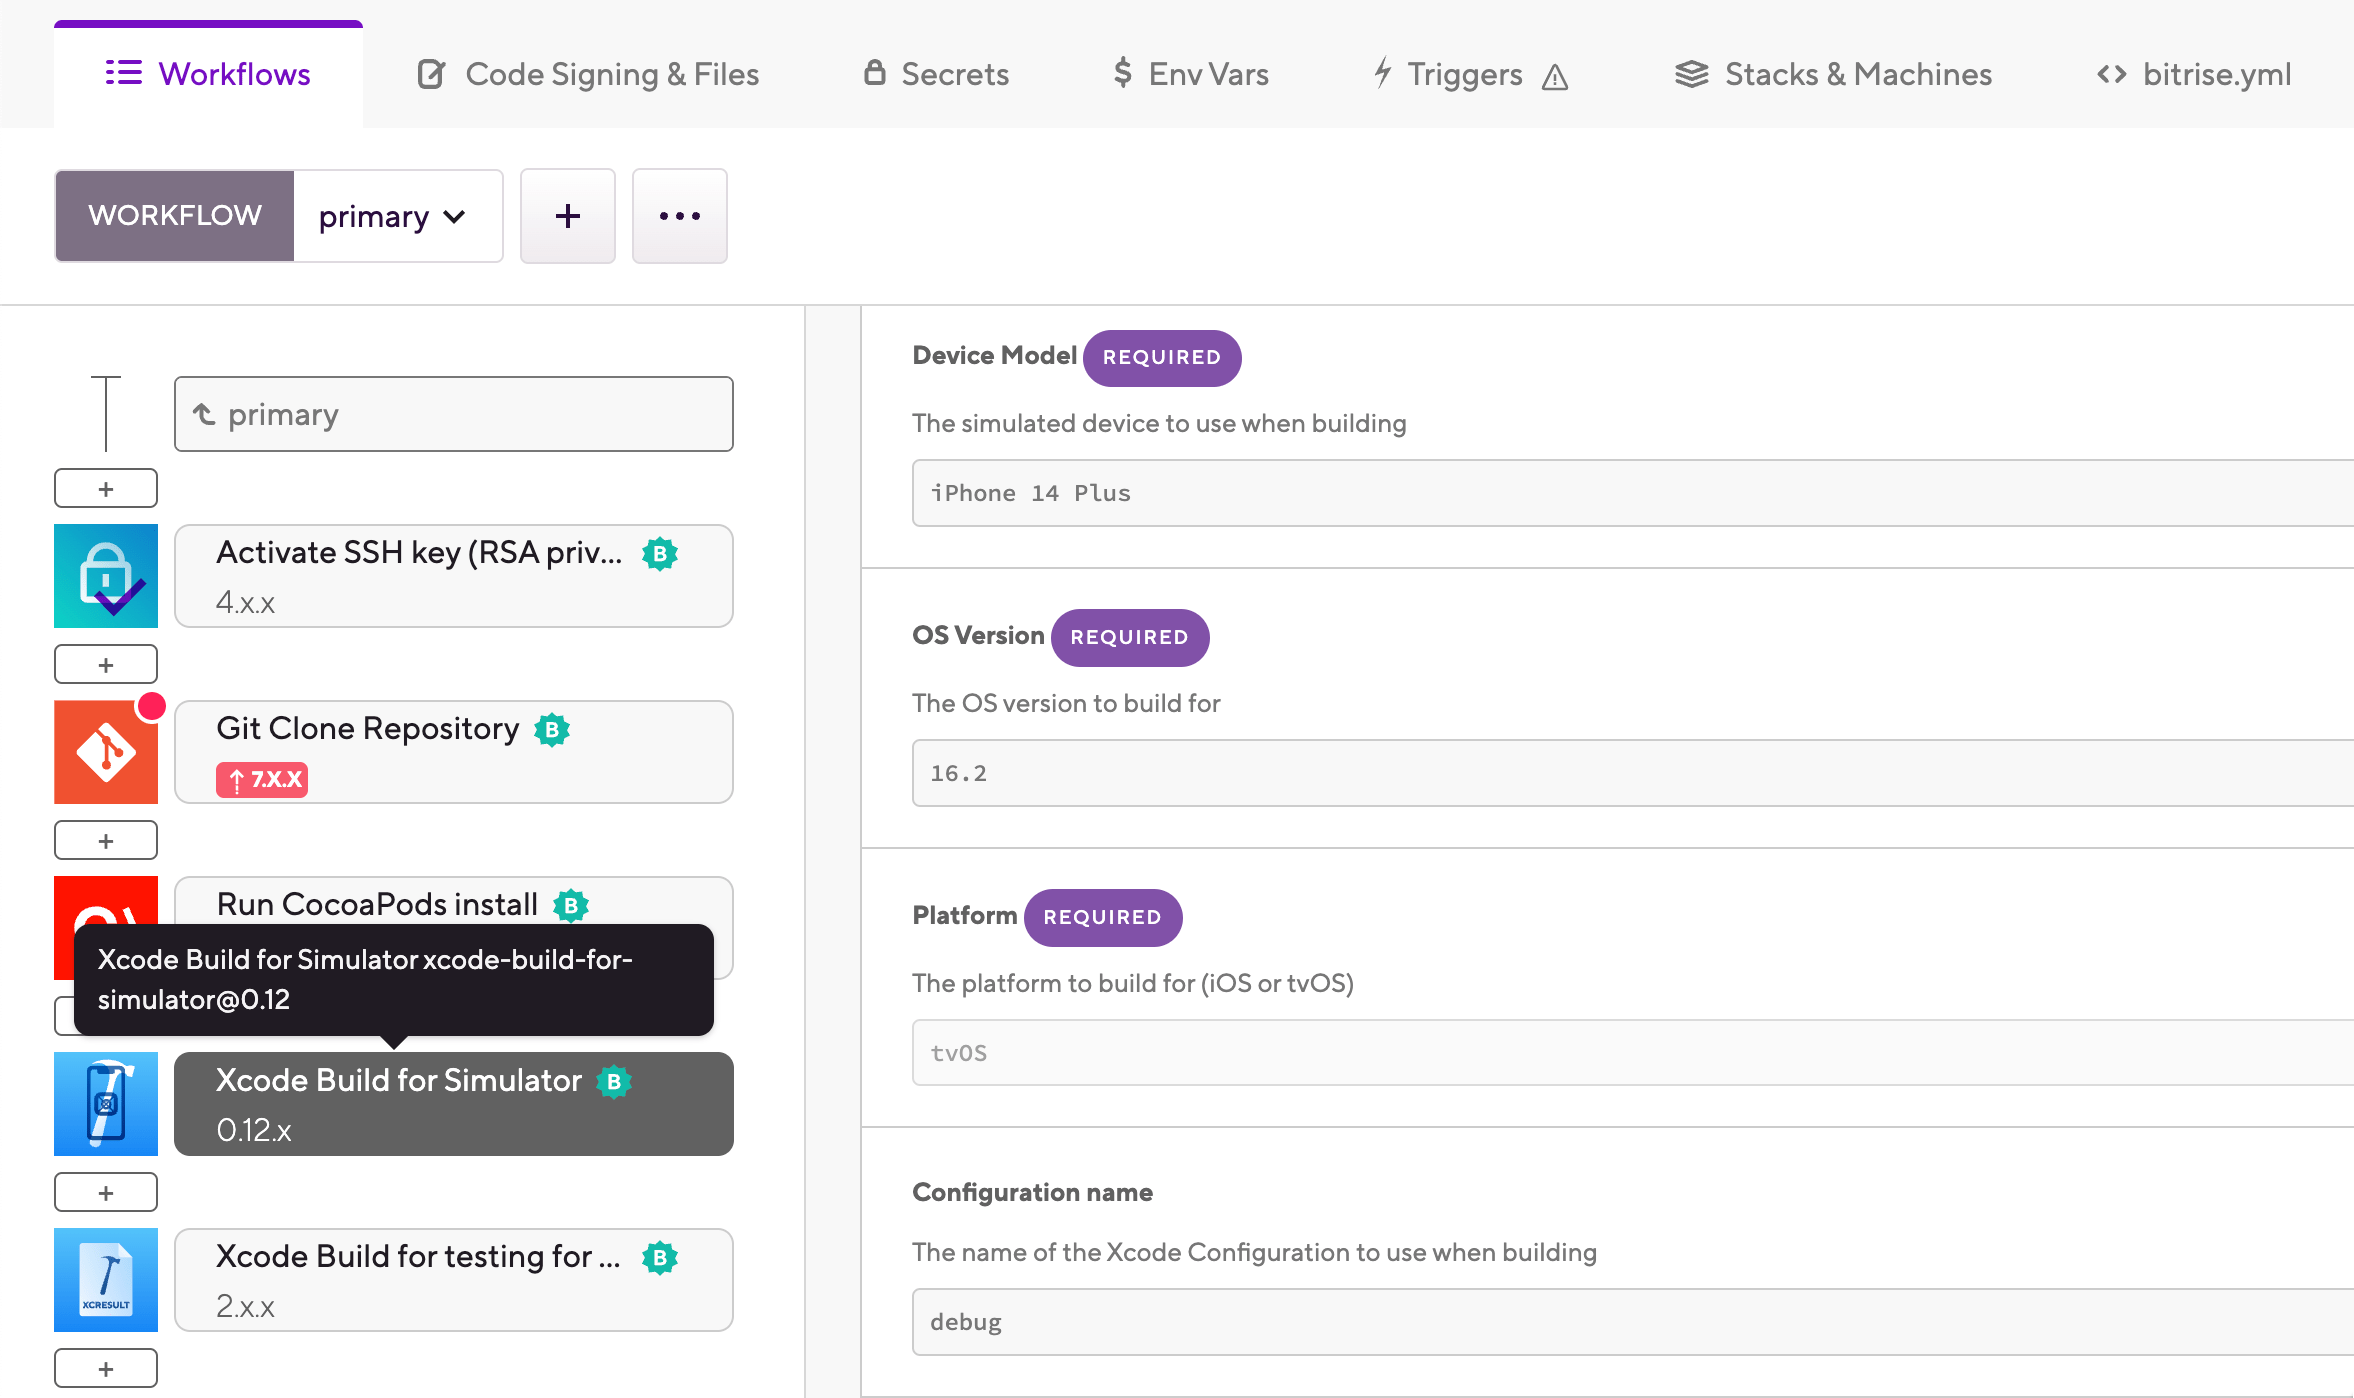
By default, the Step will use the build configuration specified in the scheme. However, you can override it and use a different build configuration: add the name of the desired build configuration to the Configuration name input. This input is optional and you only need it if you don't want to use the build configuration specified in the selected scheme.
You can create new build configurations in your Xcode project at any time: Adding a build configuration file to your project.
-
In the Device destination specifier input, select
-
Optionally, set the Build settings (xcconfig), allow code signing input to . This allows code signing files to be installed during the build.
In most cases, you don't need code signing for an app built for a simulator. It might be required for certain test cases or third-party dependencies. To set up code signing, see iOS code signing.
-
To access your app as a build artifact, add the Deploy to Bitrise.io Step to the end of your Workflow. By default, you don't have to modify anything in the Step's configuration.
-
Make sure you install all necessary dependencies in your Workflow.
We have dedicated Steps for many different dependency managers, including:
-
Add the
xcode-build-for-simulatorStep to your Workflow after the Step(s) installing dependencies.workflows: primary: steps: - cocoapods-install - xcode-build-for-simulator: inputs: -
Make sure the
project_pathinput points to either your.xcodeprojor.xcworkspacefile.The input sets the
-projector-workspaceoption of the xcodebuild command. In most cases, if your app has been automatically configured by the project scanner during the process of adding the app, the default value does not need to be changed.- xcode-build-for-simulator: inputs: - project_path: $BITRISE_PROJECT_PATH -
In the
schemeinput, set the name of the Xcode scheme you want to use to build the app.The input sets the
-schemeoption of the xcodebuild command. The default value is an Environment Variable created when adding the app and performing the first-time configuration. If you need to use a different scheme, make sure to type the name of the scheme correctly.- xcode-build-for-simulator: inputs: - scheme: $BITRISE_SCHEME - project_path: $BITRISE_PROJECT_PATHBuild configuration
By default, the Step will use the build configuration specified in the scheme. However, you can override it and use a different build configuration: add the name of the desired build configuration to the
configurationinput. This input is optional and you only need it if you don't want to use the build configuration specified in the selected scheme.You can create new build configurations in your Xcode project at any time: Adding a build configuration file to your project.
-
Set the
destinationinput togeneric/platform=iOS Simulator.- xcode-build-for-simulator: inputs: - scheme: $BITRISE_SCHEME - destination: generic/platform=iOS Simulator - project_path: $BITRISE_PROJECT_PATH -
Optionally, set the
xcconfig_contentinput with the valueCODE_SIGNING_ALLOWED=YES. This allows code signing files to be installed during the build.In most cases, you don't need code signing for an app built for a simulator. It might be required for certain test cases or third-party dependencies. To set up code signing, see iOS code signing.
- xcode-build-for-simulator: inputs: - scheme: $BITRISE_SCHEME - destination: generic/platform=iOS Simulator - xcconfig_content: |- CODE_SIGNING_ALLOWED=YES COMPILER_INDEX_STORE_ENABLE = NO - project_path: $BITRISE_PROJECT_PATH -
To access your app as a build artifact, add the
deploy-to-bitrise-ioStep to the end of your Workflow. By default, you don't have to modify anything in the Step's configuration.primary: steps: - generate-cordova-build-configuration@0: {} - xcode-build-for-test@2: {} - xcode-test@4: {} - [email protected]: inputs: - scheme: $BITRISE_SCHEME - destination: generic/platform=iOS Simulator - configuration: debug - xcconfig_content: |- CODE_SIGNING_ALLOWED=YES COMPILER_INDEX_STORE_ENABLE = NO - project_path: $BITRISE_PROJECT_PATH - deploy-to-bitrise-io