Creating and configuring a controller
To create and configure an AWS Cloud Controller to run Bitrise builds, you need to configure it on Bitrise first and then set up an instance running the controller agent on AWS.
You must create and connect a Cloud Controller to take advantage of our Controller-managed AWS offering. The process has two stages:
-
Setting up an instance running the controller agent on AWS.
Configuring the controller on Bitrise
-
Get access to the AWS controller feature from the Bitrise team.
-
Log in to your Bitrise Workspace as a Workspace owner.
Only Workspace owners can access and configure this feature.
-
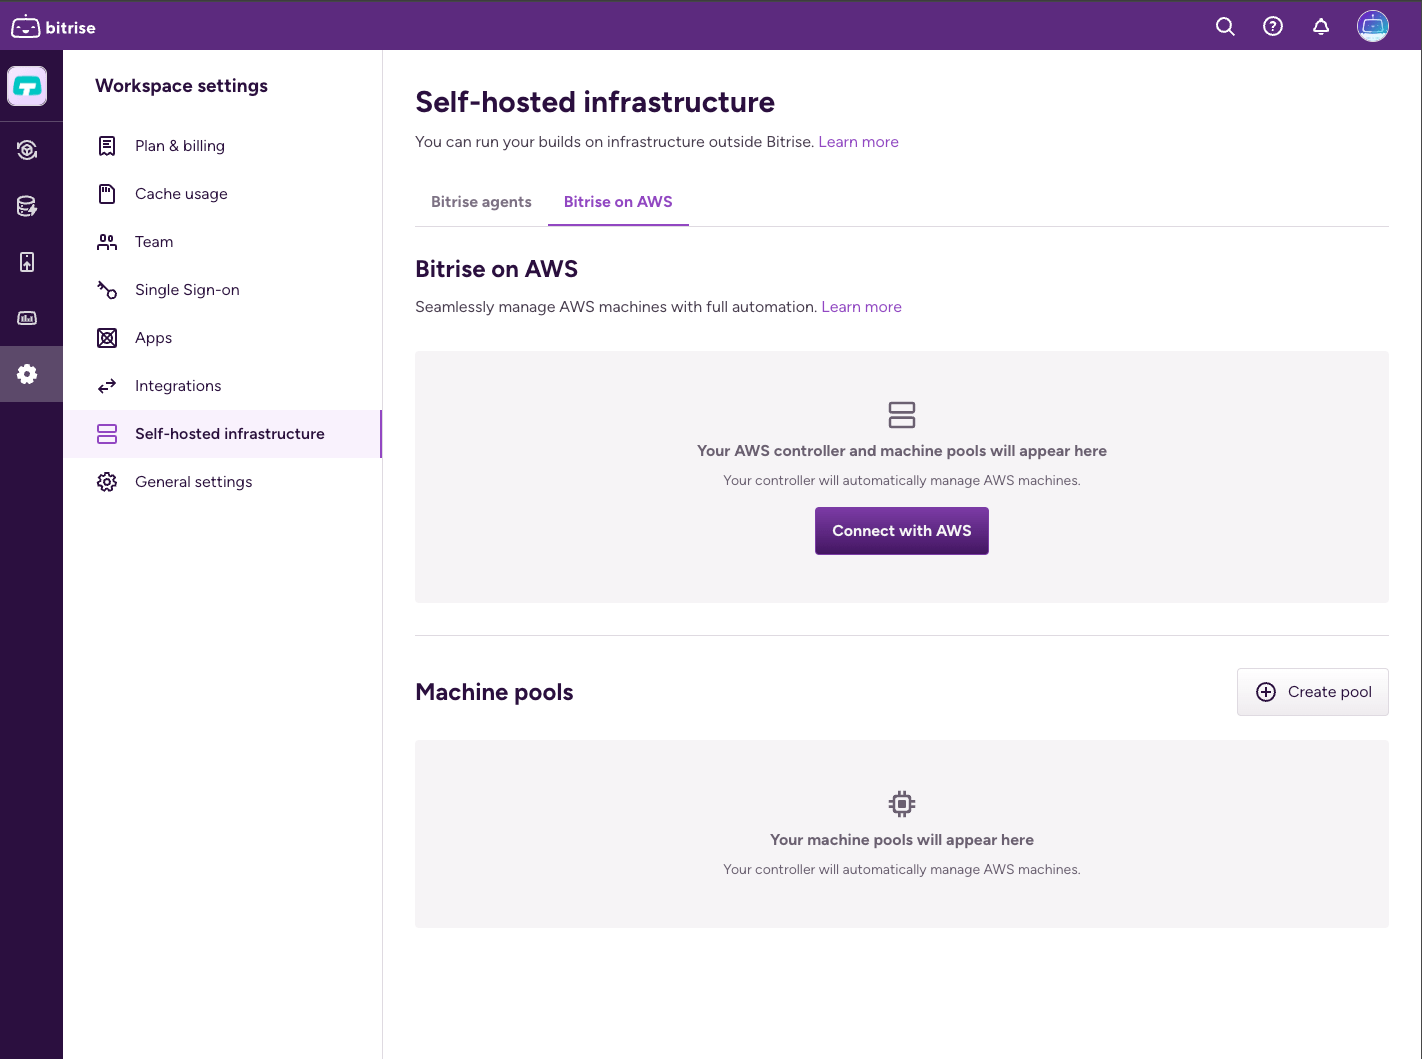
Open the Workspace settings page of the Workspace.
-
Select Self-hosted infrastructure and go to the Bitrise on AWS tab.
-
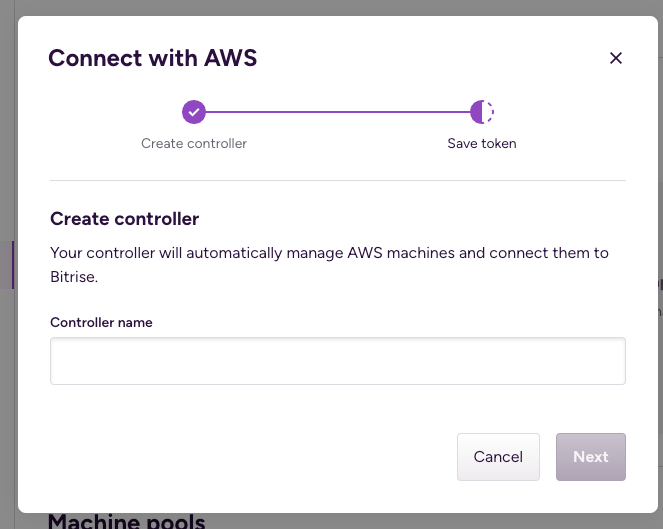
Click . This should bring up a dialog box.
-
Set a name for your controller and specify if you want to use the controller in an air-gapped network.
For more information on air-gapped mode, see Air-gapped mode for the controller.
-
Copy and save your token.
Save the token
This token is only accessible only right after creation. If the token is lost, you need to delete the controller and create a new one which would generate a new token.
After successful creation, the Bitrise on AWS screen should indicate that the controller on the Bitrise side is prepared, and it’s waiting for an AWS connection. In all cases the Controller and the build machines will initiate network calls toward the Bitrise control plane, no external inbound traffic is required.
Setting up the controller instance on AWS
After a successful controller creation on Bitrise, go to AWS and create an instance running the Controller Agent.
New or existing VPC
The configuration will need a Virtual Private Cloud (VPC). Every AWS region contains a default VPC but if necessary, you can create your own VPC within each region. If you wish to share your VPC between Bitrise-specific resources and your other resources you can reuse the already existing and configured VPC. If you prefer to separate resources, you can create a new VPC with the provided template.
For more information, read the official AWS documentation on VPCs.
Setup with an existing VPC
Setup with a new VPC
-
Log in to your AWS account.
-
Select the template option you need and you'll get the HTTP link to your template. You can read more about templates on the AWS CloudFormation templates page.
-
Link to the airgapped template. Use this if the Bitrise Controller is expected to run in airgapped mode.
Additional manual configuration
The airgapped support requires some manual configuration in AWS that is not automated via CloudFormation. For details, please check the AWS CloudFormation templates page.
-
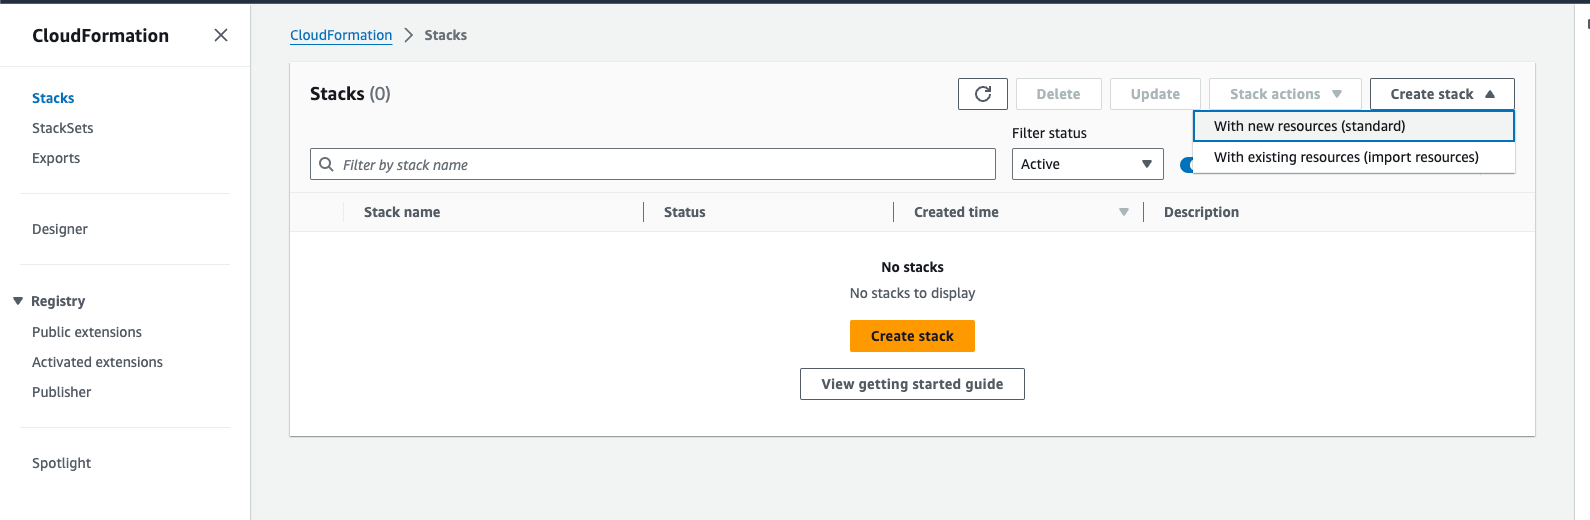
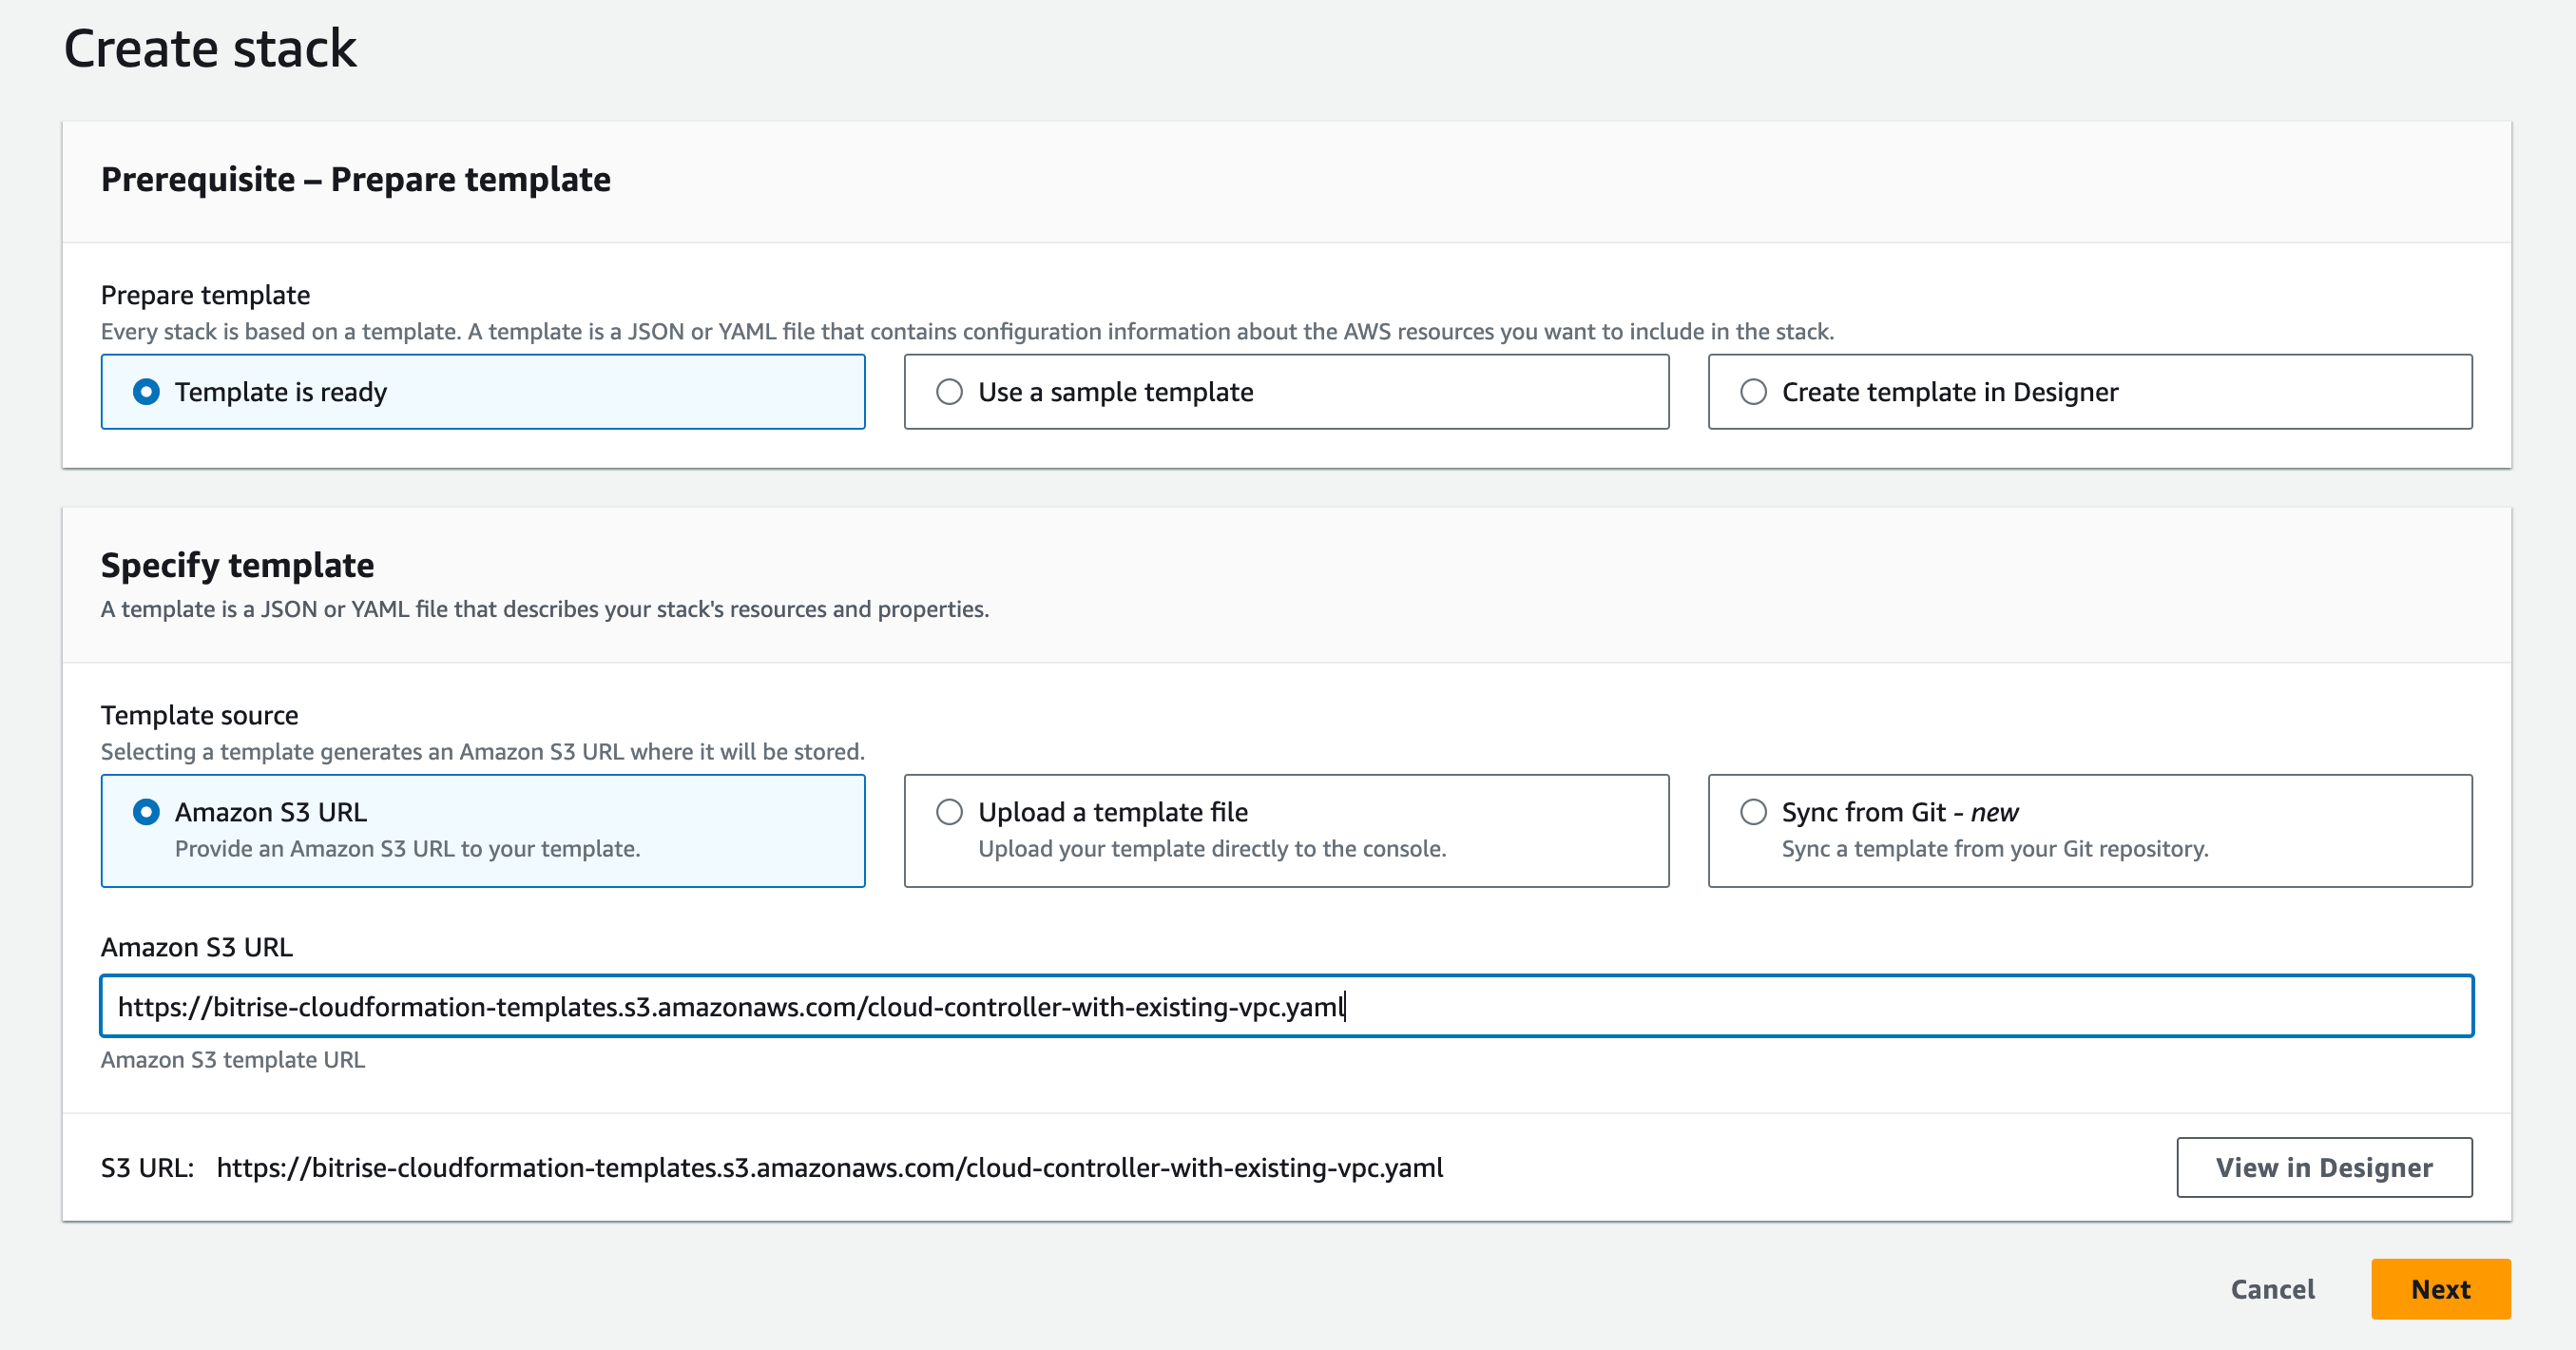
Navigate to CloudFormation and select Create stack with new resources (standard).
-
Create a stack using the Template is ready and Amazon S3 URL options.
-
In the Amazon S3 URL field, provide the URL gathered in the previous step and click .
-
On the following prompt, specify the following fields:
-
Stack name: Any value works here. This helps to identify the stack if you have multiple stacks.
-
Latest AMI ID: This AMI ID is used as a base AMI to run the Cloud Controller on.
-
Bitrise Controller Token: The token is generated as part of controller creation on Bitrise: Configuring the controller on Bitrise.
-
Bitrise Workspace ID: Identifying Workspaces and projects with their slugs.
-
Controller Log Group Class : The Cloud Controller generates logs that are accessible to the customers in AWS. This configuration specifies what features the customer wants to use during log analysis. The default is Infrequent access, which provides a limited log analyzing capability at a lower cost.
-
Controller Log Retention In Days : Determines how long AWS stores the Cloud Controller logs.
-
Controller SSH Key : Select one previously configured SSH key. With this key, you can log into the created instance and, if needed, investigate.
-
Subnet IDs : Choose at least two subnets in two different Availability Zones from the previously configured subnets, but make sure not to select more than one subnet from the same Availability Zone. The selected subnets should belong to the selected VPC. The subnets should have a route table configuration enabling the created instances to communicate to the Bitrise Services. There is no incoming communication required for the Controller.
-
VPC CIDR Block : Default value is provided. Make sure you select a CIDR Block matching the VPC’s CIDR Block. For more info, see the official AWS docs.
-
VPC ID : Select from the previously configured VPCs.
Only one controller per VPC/region
We do not recommend running more than one Controller in one VPC/one region. These Controllers could start more resources than necessary which can cost money.
-
-
The other stack option configurations are optional. For details, check AWS’s official documentation.
-
Review your previous settings on the Review screen. If everything looks correct, acknowledge your CloudFormation capabilities at the bottom and then submit your request.
-
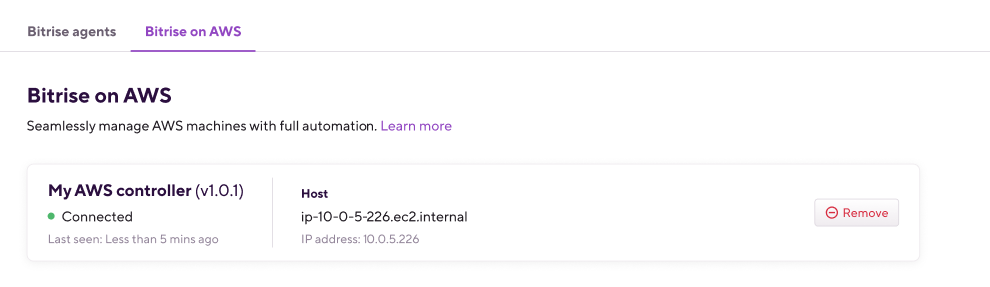
Once the AWS CloudFormation successfully creates the instance running the Controller (this process can take 5-7 minutes), go back to your Workspace page on Bitrise to confirm the connectivity between the instance and AWS. If the Controller’s status is Connected, the connection works correctly.
-
Log in to your AWS account.
-
Select the template option you need and you'll get the HTTP link to your template. You can read more about templates on the AWS CloudFormation templates page.
-
Link to the airgapped template. Use this if the Bitrise Controller is expected to run in airgapped mode.
Additional manual configuration
The airgapped support requires some manual configuration in AWS that is not automated via CloudFormation. For details, please check the AWS CloudFormation templates page.
-
Navigate to CloudFormation and select Create stack with new resources (standard).
-
Create a stack using the Template is ready and Amazon S3 URL options.
-
In the Amazon S3 URL field, provide the URL gathered in the previous step and click .
-
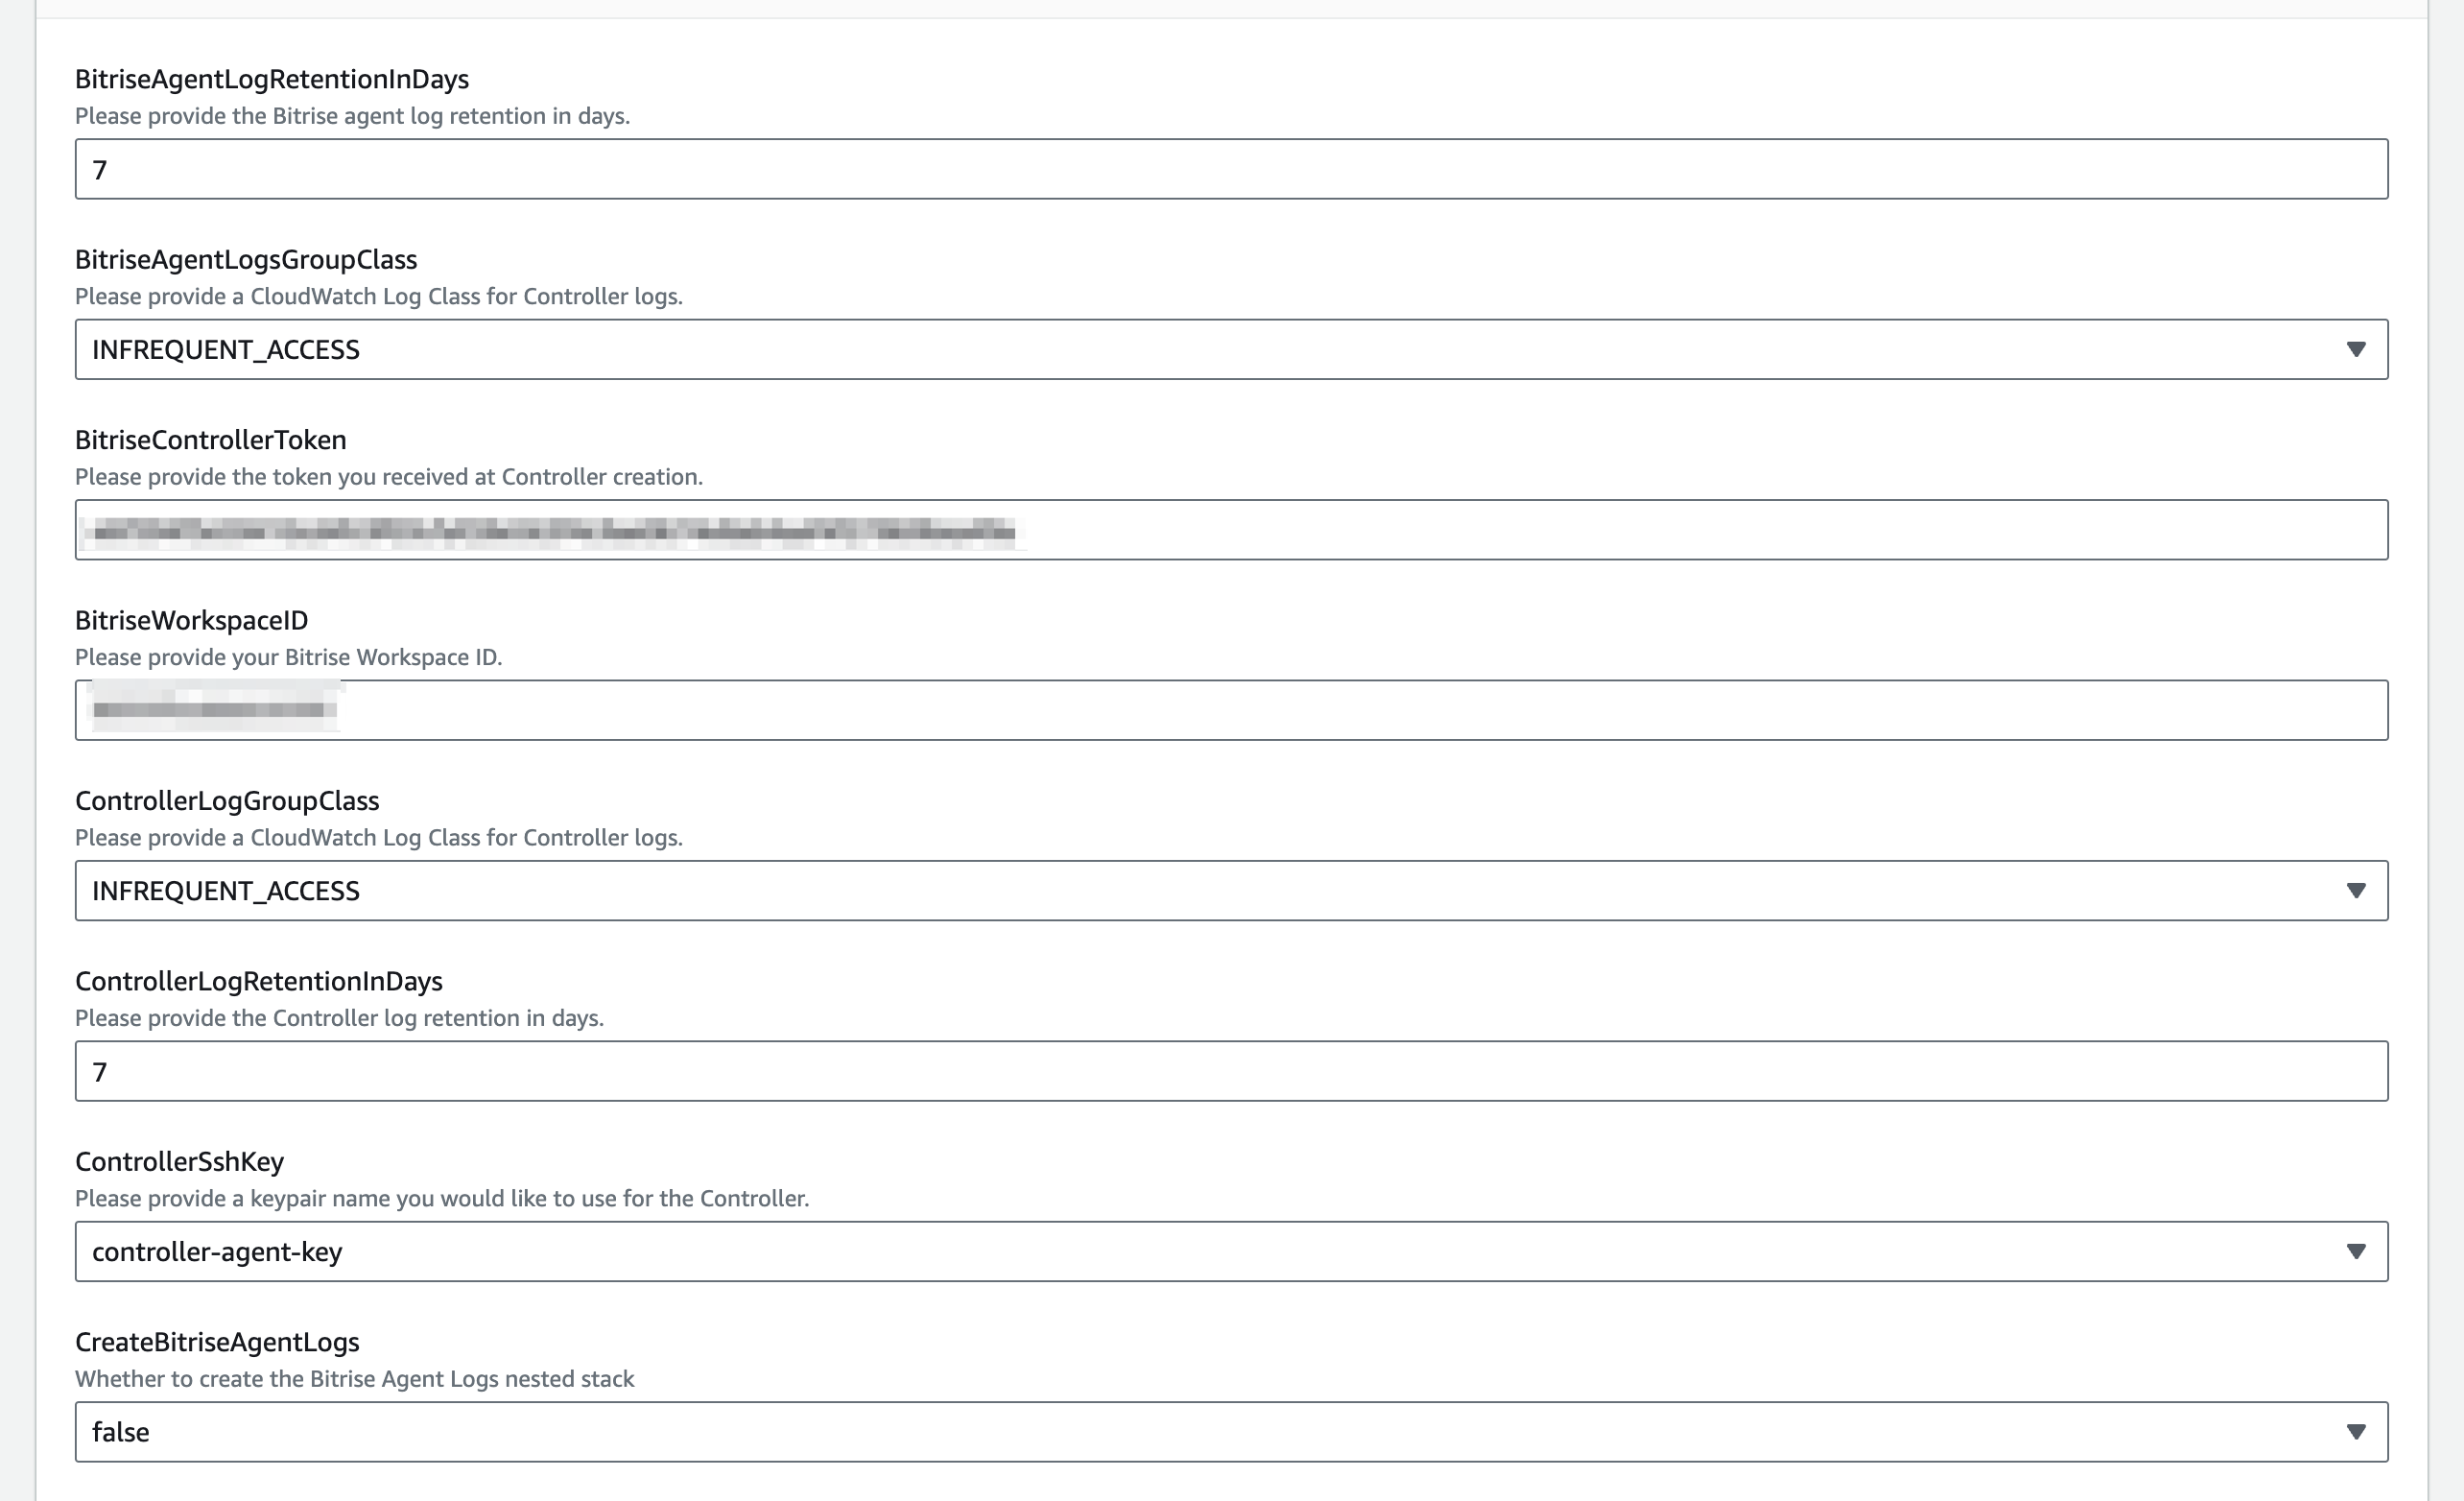
On the following prompt, specify the following fields (all mentioned fields are required unless specified otherwise):
-
Stack name: Any value works here. This helps to identify the stack if you have multiple stacks.
-
Latest AMI ID: This AMI ID is used as a base AMI to run the Cloud Controller on.
-
Bitrise Controller Token: The token is generated as part of controller creation on Bitrise: Configuring the controller on Bitrise.
-
Bitrise Workspace ID: Identifying Workspaces and projects with their slugs.
-
Controller Log Group Class : The Cloud Controller generates logs that are accessible to the customers in AWS. This configuration specifies what features the customer wants to use during log analysis. The default is Infrequent access, which provides a limited log analyzing capability at a lower cost.
-
Controller Log Retention In Days : Determines how long AWS stores the Cloud Controller logs.
-
Controller SSH Key : Select one previously configured SSH key. With this key, you can log into the created instance and, if needed, investigate.
-
Environment Name: Optional. The provided value will appear in the names of the created VPC, subnets, and route tables.
-
Private Subnet 1 CIDR: Default value is provided. IP range (CIDR notation) for the private subnet of the new VPC in the first Availability Zone. The value must be between a /28 netmask and /16 netmask.
-
Private Subnet 2 CIDR: Default value is provided. IP range (CIDR notation) for the private subnet of the new VPC in the second Availability Zone. The value must be between a /28 netmask and /16 netmask.
-
Public Subnet 1 CIDR: Default value is provided. IP range (CIDR notation) for the public subnet of the new VPC in the first Availability Zone. The value must be between a /28 netmask and /16 netmask.
-
Public Subnet 2 CIDR: Default value is provided. IP range (CIDR notation) for the public subnet of the new VPC in the second Availability Zone. The value must be between a /28 netmask and /16 netmask.
-
VPC CIDR: Default value is provided. Select the Classless Inter-Domain Routing (CIDR) for the new VPC.
-
-
The other stack option configurations are optional. For details, check AWS’s official documentation.
-
Review your previous settings on the Review screen. If everything looks correct, acknowledge your CloudFormation capabilities at the bottom and then submit your request.
-
Once the AWS CloudFormation successfully creates the instance running the Controller (this process can take 5-7 minutes), go back to your Workspace page on Bitrise to confirm the connectivity between the instance and AWS. If the Controller’s status is Connected, the connection works correctly.
Enabling CloudWatch Bitrise Agent logging
Setting up CloudWatch is optional, but we recommend doing so: it enables better build troubleshooting capabilities. Bitrise can provide you with faster support in case of an issue if you share the Bitrise Agent logs from your CloudWatch setup.
To enable your AWS resources, such as EC2 instances, to send logs to CloudWatch, you must configure it in AWS CloudFormation. You need the following settings:
-
CreatedBitriseAgentLogs: When enabled, this setting initiates the creation of a CloudWatch log group for the log stream, along with the required role and an instance profile named
bitrise-agent-log-instance-profile. -
Bitrise Agent Logs Group Class: The Bitrise Agent generates logs that are accessible to the customers in AWS. This configuration specifies what features the customer wants to use during log analysis. The default is Infrequent access, which provides a limited log analyzing capability at a lower cost.
-
Bitrise Agent Logs Retention In Days (required): The days until AWS stores the Bitrise Agent logs.