Workspace members
A Bitrise Workspace allows seamless collaboration on Bitrise projects. You can manage Workspace membership on the Collaboration page of the Workspace settings. A member can be an owner, a regular member or an outside contributor.
Your workspace isn't just an environment to manage projects: it also allows seamless collaboration with other Bitrise users. You can invite other users to your workspaces, and of course you can be invited to other workspaces, too.
You can manage workspace membership on the Collaboration page of the workspace settings. Workspace members can be organized into groups: this makes it easier to assign multiple workspace members to the same project. Members of the workspace can have one of three roles:
-
Owner: The owners of the workspace. Full administrative control over the workspace without restrictions. A workspace can have multiple Owners. The default Owner is the account that created the workspace.
-
Manager: The user can access and modify workspace settings such as connected service accounts, can manage members but can't access billing details and can't delete the workspace.
-
Contributor: The user can't access workspace settings and can't add new members or manage existing members.
-
Viewer: The user can't add CI projects or Release Management apps to the workspace.
You can manage regular members on the Members tab. On the tab, you can see:
-
Each member of the workspace. You can add and remove workspace members.
-
Each member's user role on the teams of the projects owned by the workspace: Managing user roles in workspaces. This allows managing access to the workspace's projects.
-
If SAML SSO is enabled for a member.
You can search for a specific Workspace member or use the filter function to filter members based on their roles.
Adding members to workspaces
Starter plan restrictions
On Starter plans, collaboration features for workspaces are not available. You have to add team members on a project basis: Adding an outside contributor to a project team.
You can invite people to a workspace if they have a Bitrise account. Workspace members can be assigned to the projects owned by the workspace. When inviting new members, you can:
-
Add users in bulk: you can invite as many members as the number of available seats on the workspace.
-
Add them to the team of all projects owned by the workspace, or just to particular projects.
-
Assign them user access roles to manage their permissions on the projects' team. When adding users in bulk, all of them will be assigned the same role.
SAML SSO
Bitrise supports SAML SSO for your workspace. To learn more, check out SAML SSO on Bitrise.
Inviting a new member to a workspace with SAML SSO enforced is a different process: Adding a new user to a workspace with enforced SAML SSO.
You can modify a member's user roles on project teams at any time after inviting them. You can also add members to workspace groups.
To add individuals as a workspace member:
-
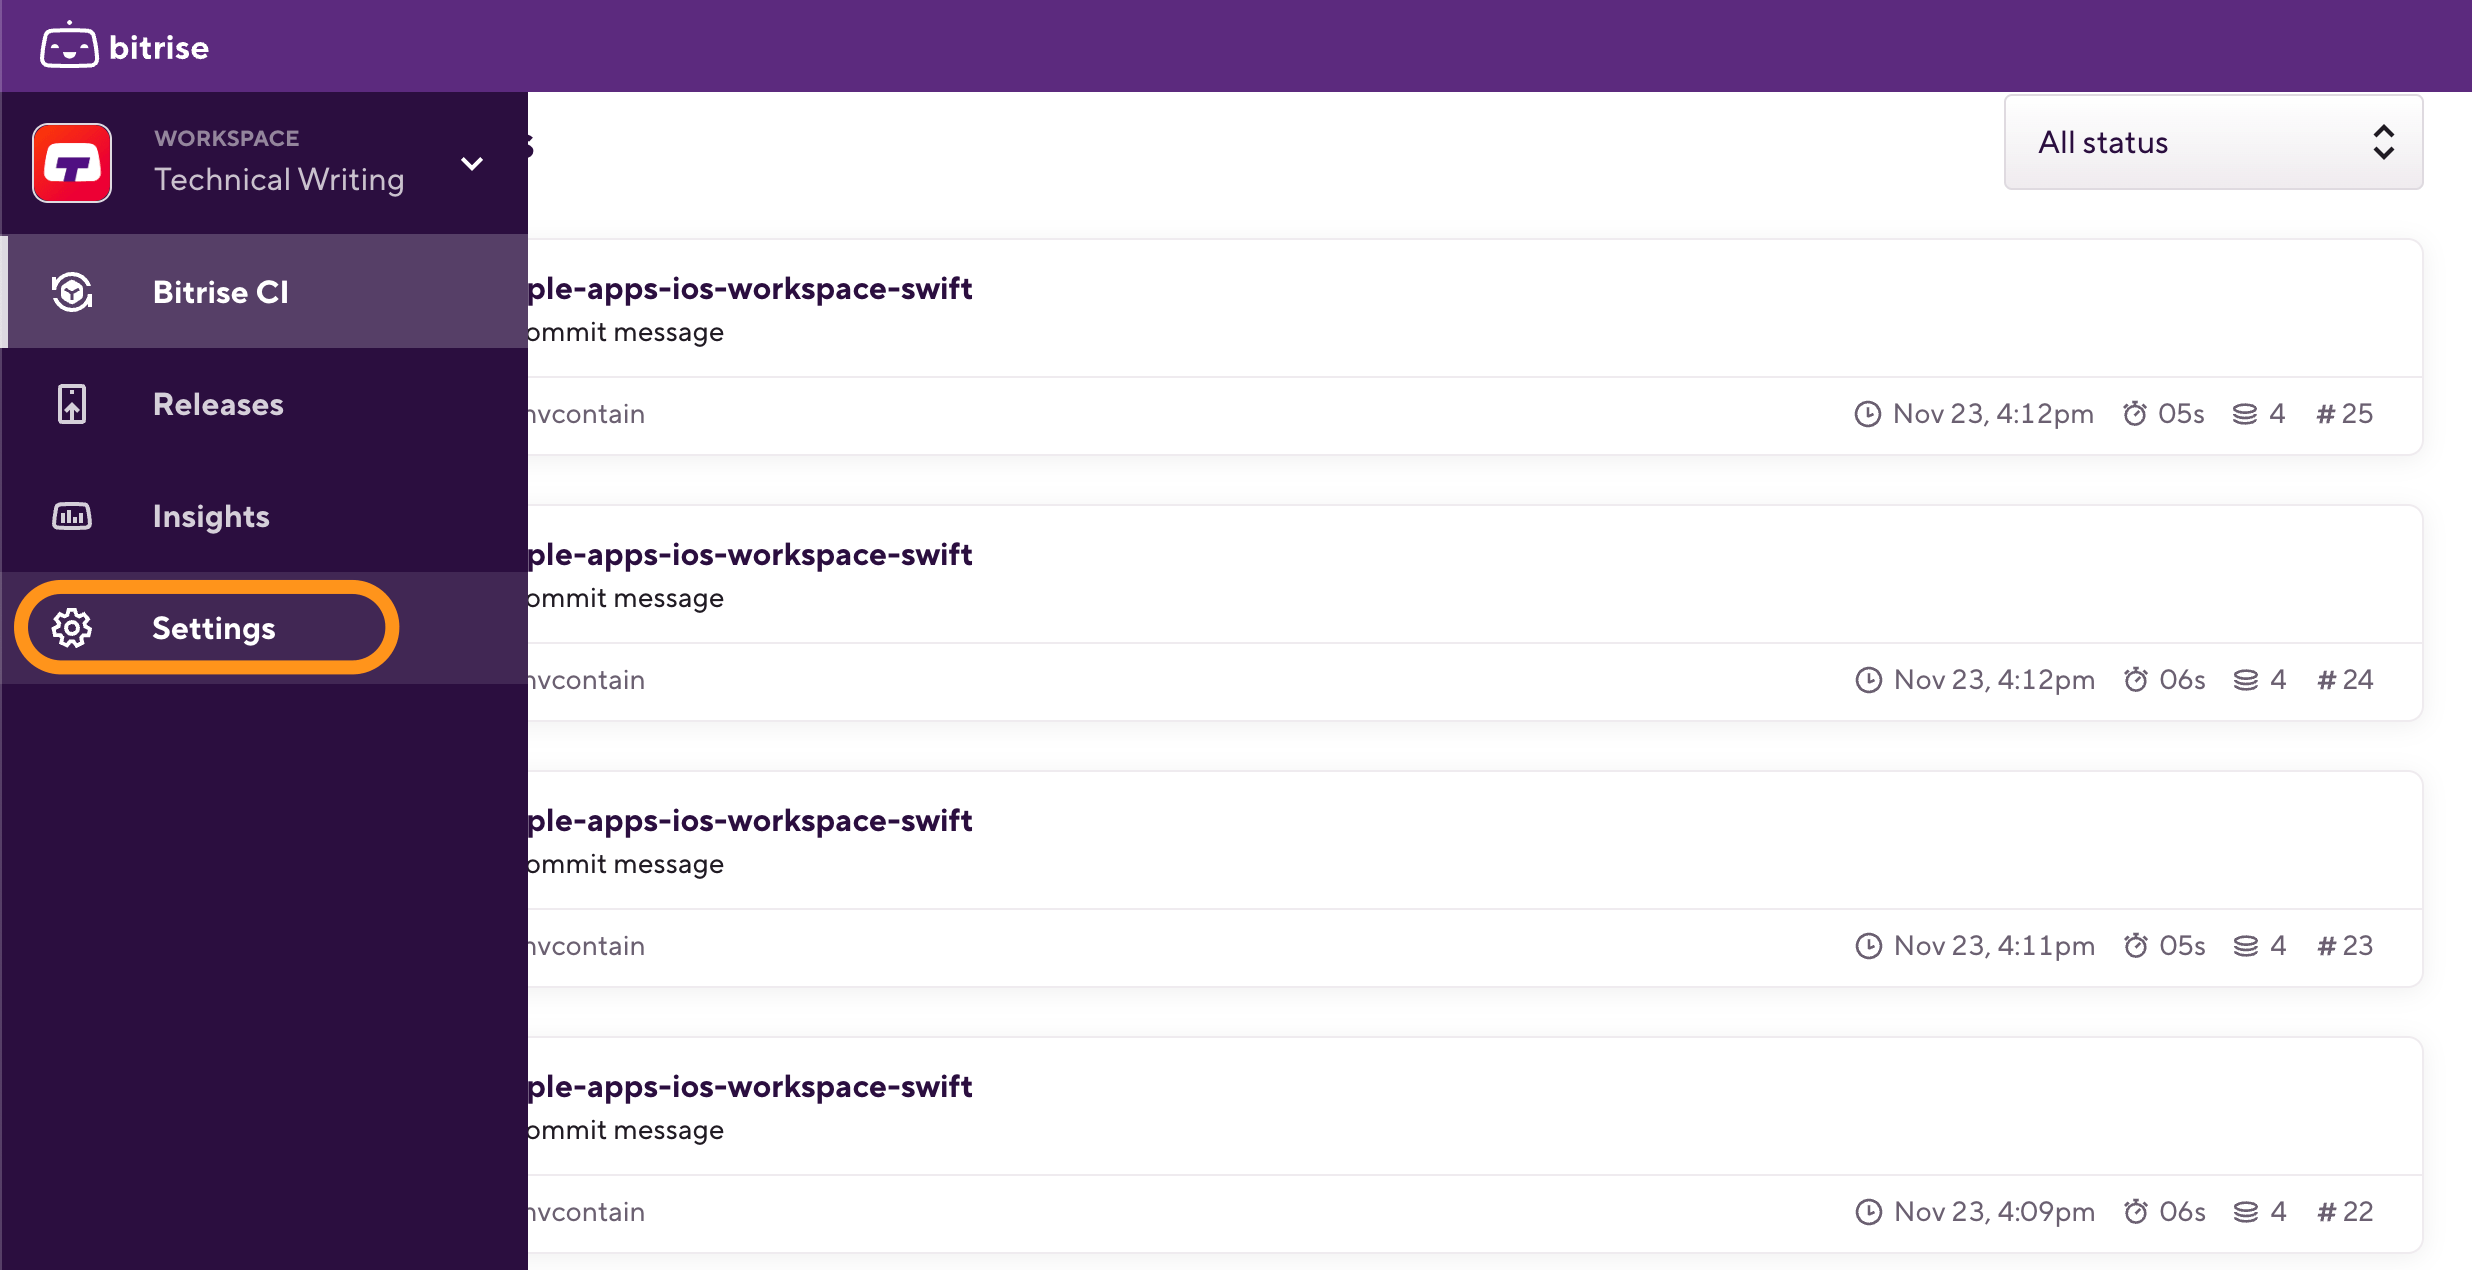
Log in to Bitrise and hover over the left navigation bar.
-
Make sure you have the right workspace selected in the Workspace menu.
-
Select Settings.
-
On the left, select Collaboration.
-
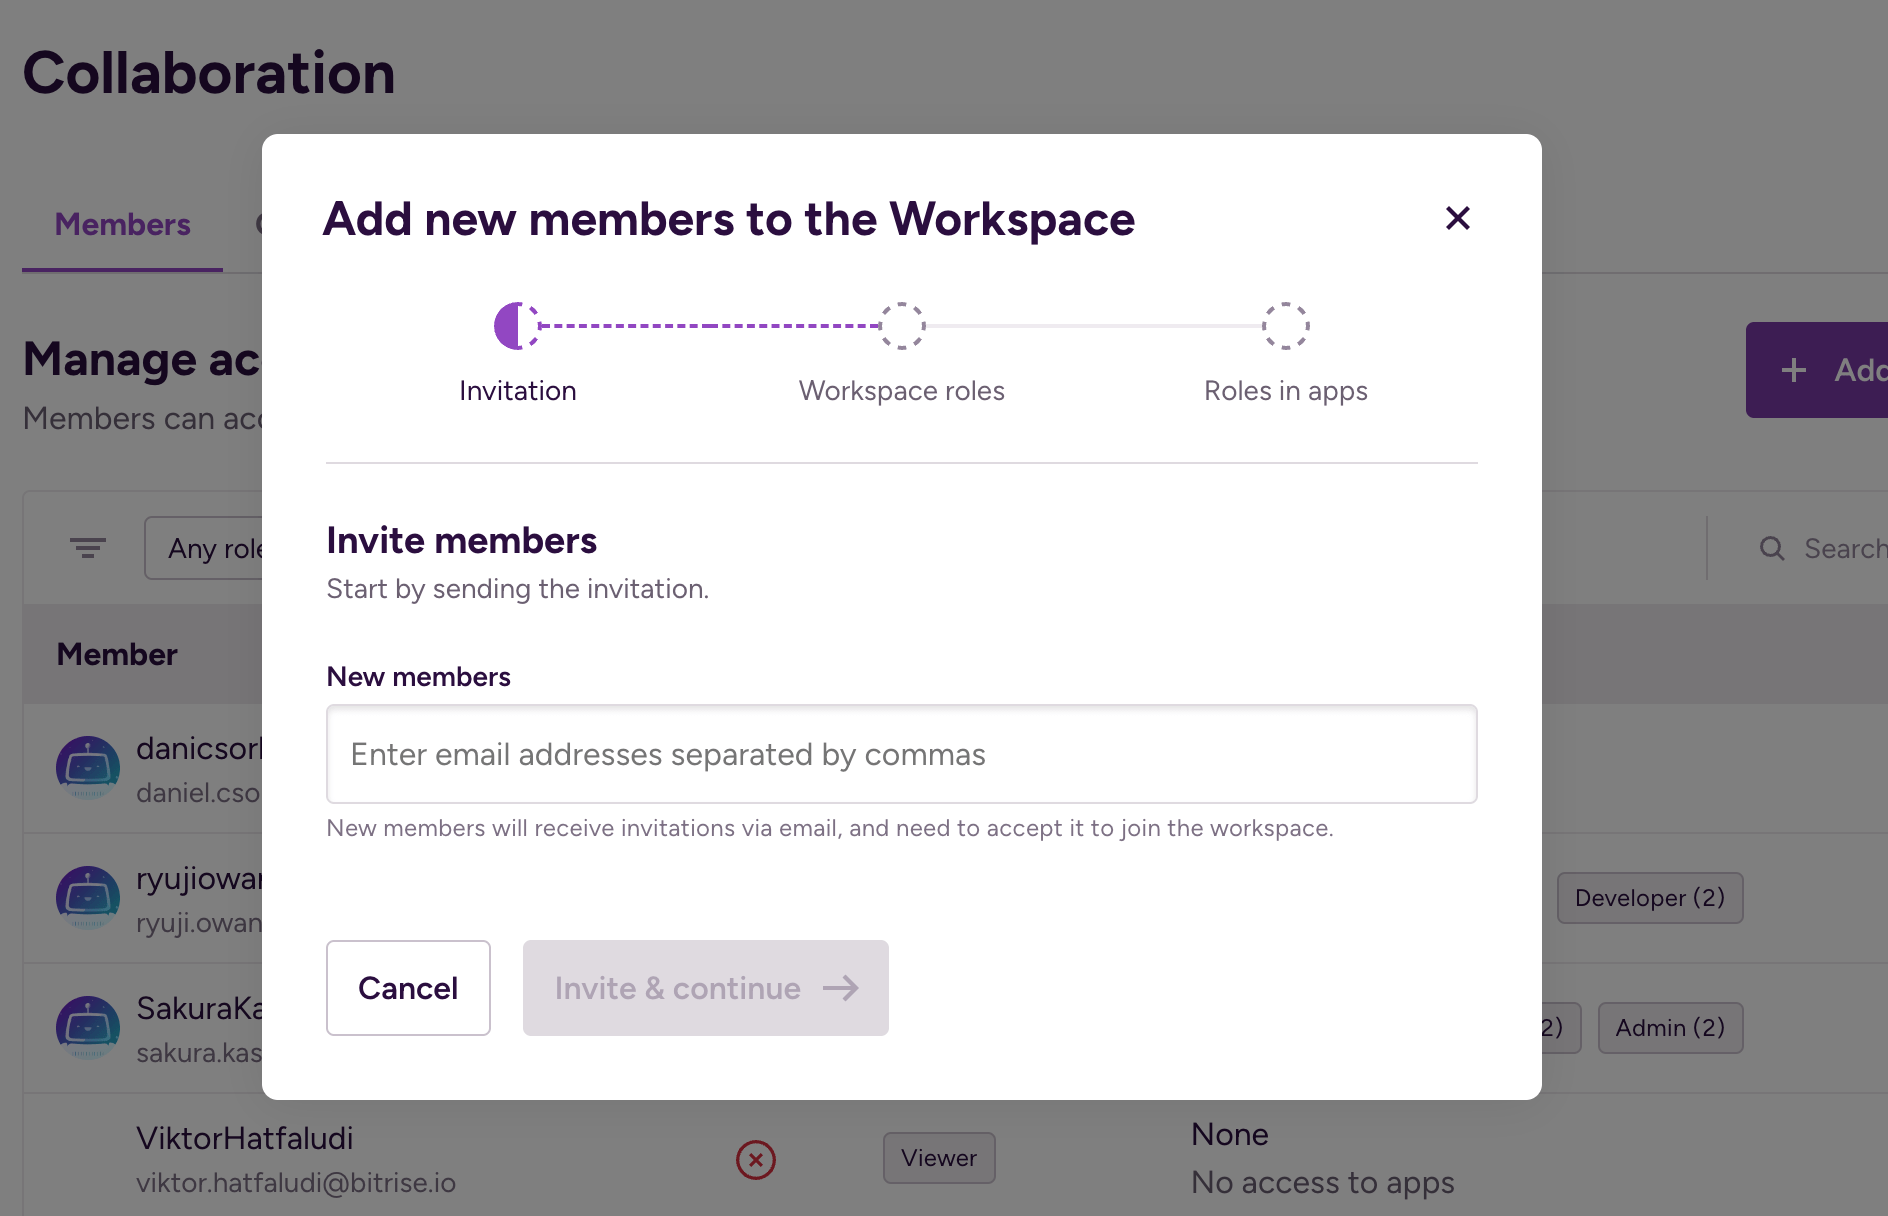
On the Members tab, click .
-
In the dialog box, find the New members section and add the email addresses of the people you want to invite.
Workspace limits
You can't invite people who are already part of the Workspace and the number of invitations can't exceed the available seats of the Workspace.
-
When done, click . It takes you to the Set workspace role page.
-
Select a Workspace role that defines access to the Workspace settings.
-
Manager: The user can access and modify Workspace settings such as connected service accounts, can manage members but can't access billing details and can't delete the Workspace.
-
Contributor: The user can't access Workspace settings and can't add new members or manage existing members.
-
Viewer: The user can't add CI projects or Release Management apps to the workspace.
-
-
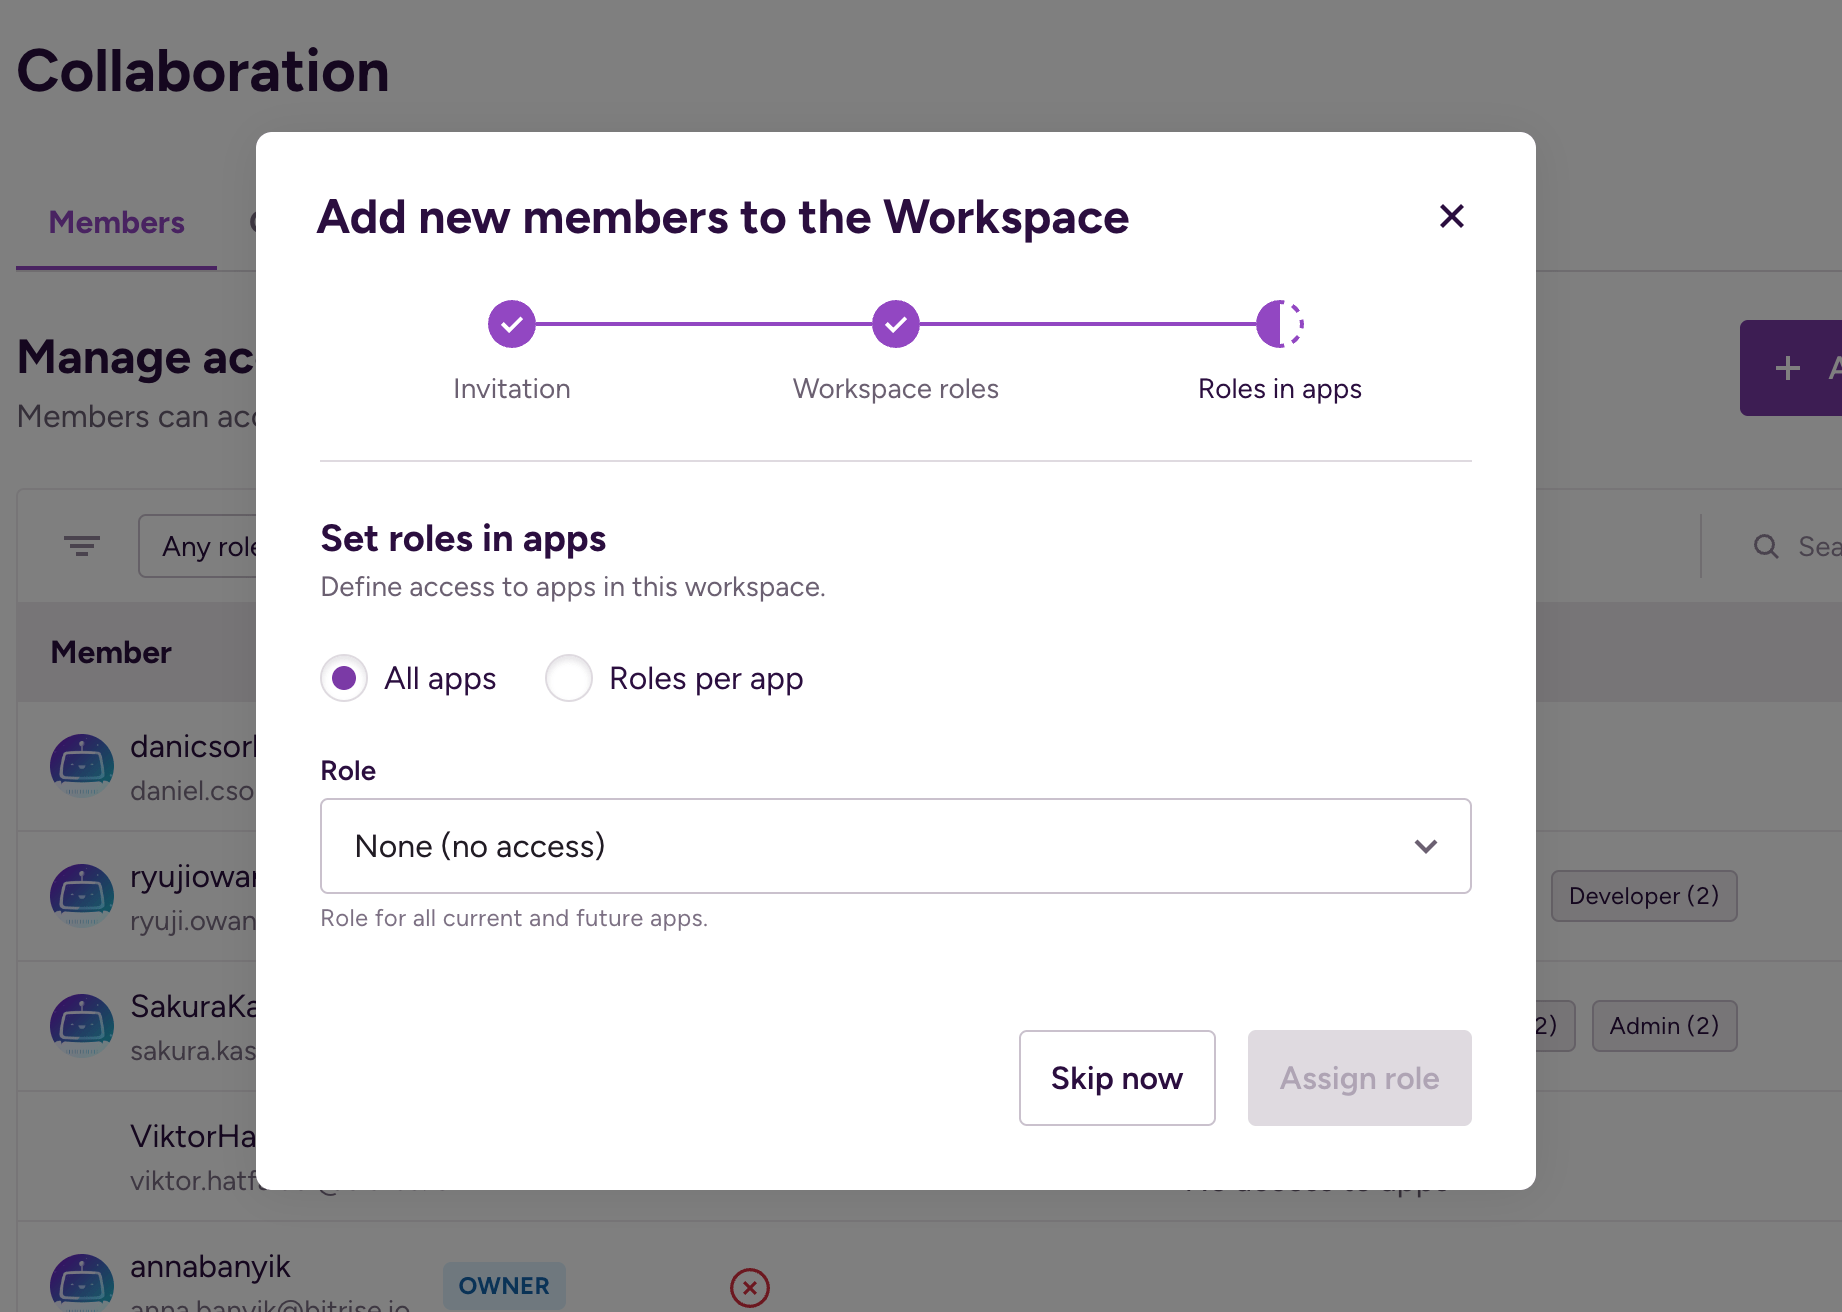
After clicking , set the access roles for the new members in the different projects. You can select either of three options:
-
All projects: Set the same role for all projects of the Workspace. All new members will have access to all the projects of the Workspace, including any future projects added to the Workspace, with the same permissions.
-
Roles per project: Set a role for each project. If you choose the option, the new member won't have access to that project at all.
-
Click the button to skip setting roles for now. This means none of the new members will have access to any projects until you assign them roles.
User roles cheatsheet
You can check the permissions of each user role: go to the All projects view and click Show permissions.
-
-
When done, click to finish the process.
Removing members from Workspaces
Owners and managers only
Only Workspace owners and Workspace managers can remove users from a Workspace.
-
Log in to Bitrise and hover over the left navigation bar.
-
Make sure you have the right workspace selected in the Workspace menu.
-
Select Settings.
-
On the left, select Collaboration.
-
Select the Members tab.
-
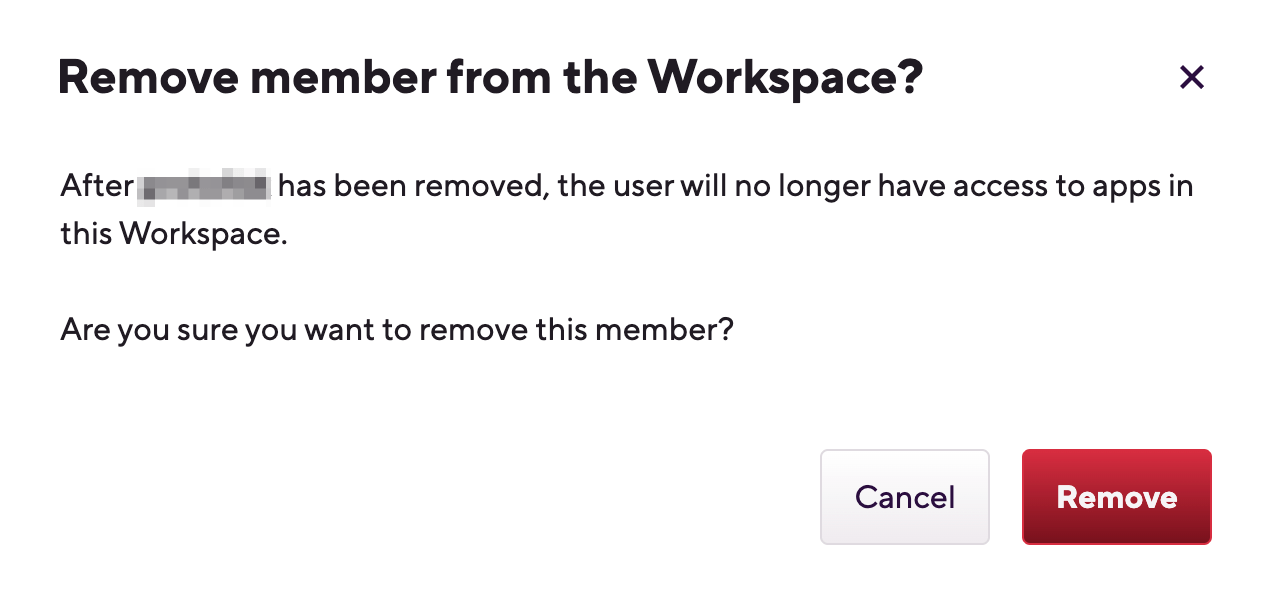
Search for the user you would like to remove, and click "
 ".
". -
Click to remove the selected user from your Workspace.
Managing user roles in workspaces
Workspaces have three access roles:
-
Owner: Only Owners have full access to the workspace, including managing membership and project ownership. Only Owners can delete the workspace.
-
Manager: Managers can access almost all workspace settings, including managing members. They can't access billing and can't delete the workspace.
-
Contributor: Contributors are workspace members who can be added to the teams of the projects owned by the workspace. They don't have access to the workspace settings.
-
Viewer: The user can't add CI projects or Release Management apps to the workspace.
You can manage user roles on project teams from your workspace page.
Workspace groups
Workspace groups can also have their own user roles assigned: that means every user in the group will have the same role on the same project's team: Managing app access roles for Workspace groups.
-
Log in to Bitrise and hover over the left navigation bar.
-
Make sure you have the right workspace selected in the Workspace menu.
-
Select Settings.
-
On the left, select Collaboration.
-
On the Members tab, you can see the existing members of the Workspace and their roles.
-
Click the edit icon
 next to a member's name to edit their roles in project teams.
 -
On the Projects tab, set the access roles for the member on the different projects. You can select either of two options:
-
All projects: Set the same role for the member for all projects of the Workspace.
-
Roles per project: Set a role for each project. If you choose the option, the member won't have access to that project at all.
User roles cheatsheet
You can check the permissions of each user role: go to the All projects view and click Show permissions.
-
-
When done, click .