Adding a GitLab webhook
You can specify webhooks on Gitlab so that Bitrise automatically triggers a build of your app whenever you perform a specified action, such as a code push or a pull request.
You can set up webhooks so that Bitrise automatically triggers a build of your app whenever you perform a specified action, such as a code push or a pull request. For GitLab, all you have to do is register your bitrise-webhooks URL as a Webhook in your GitLab repository.
In addition, you can take advantage of Git Insights. Git Insights enables you to quantify and optimize Git collaboration. It provides crucial metrics like pull request cycle time and merge frequency.
You can register a webhook either automatically or manually. This guide walks you through the process of manually registering a webhook.
-
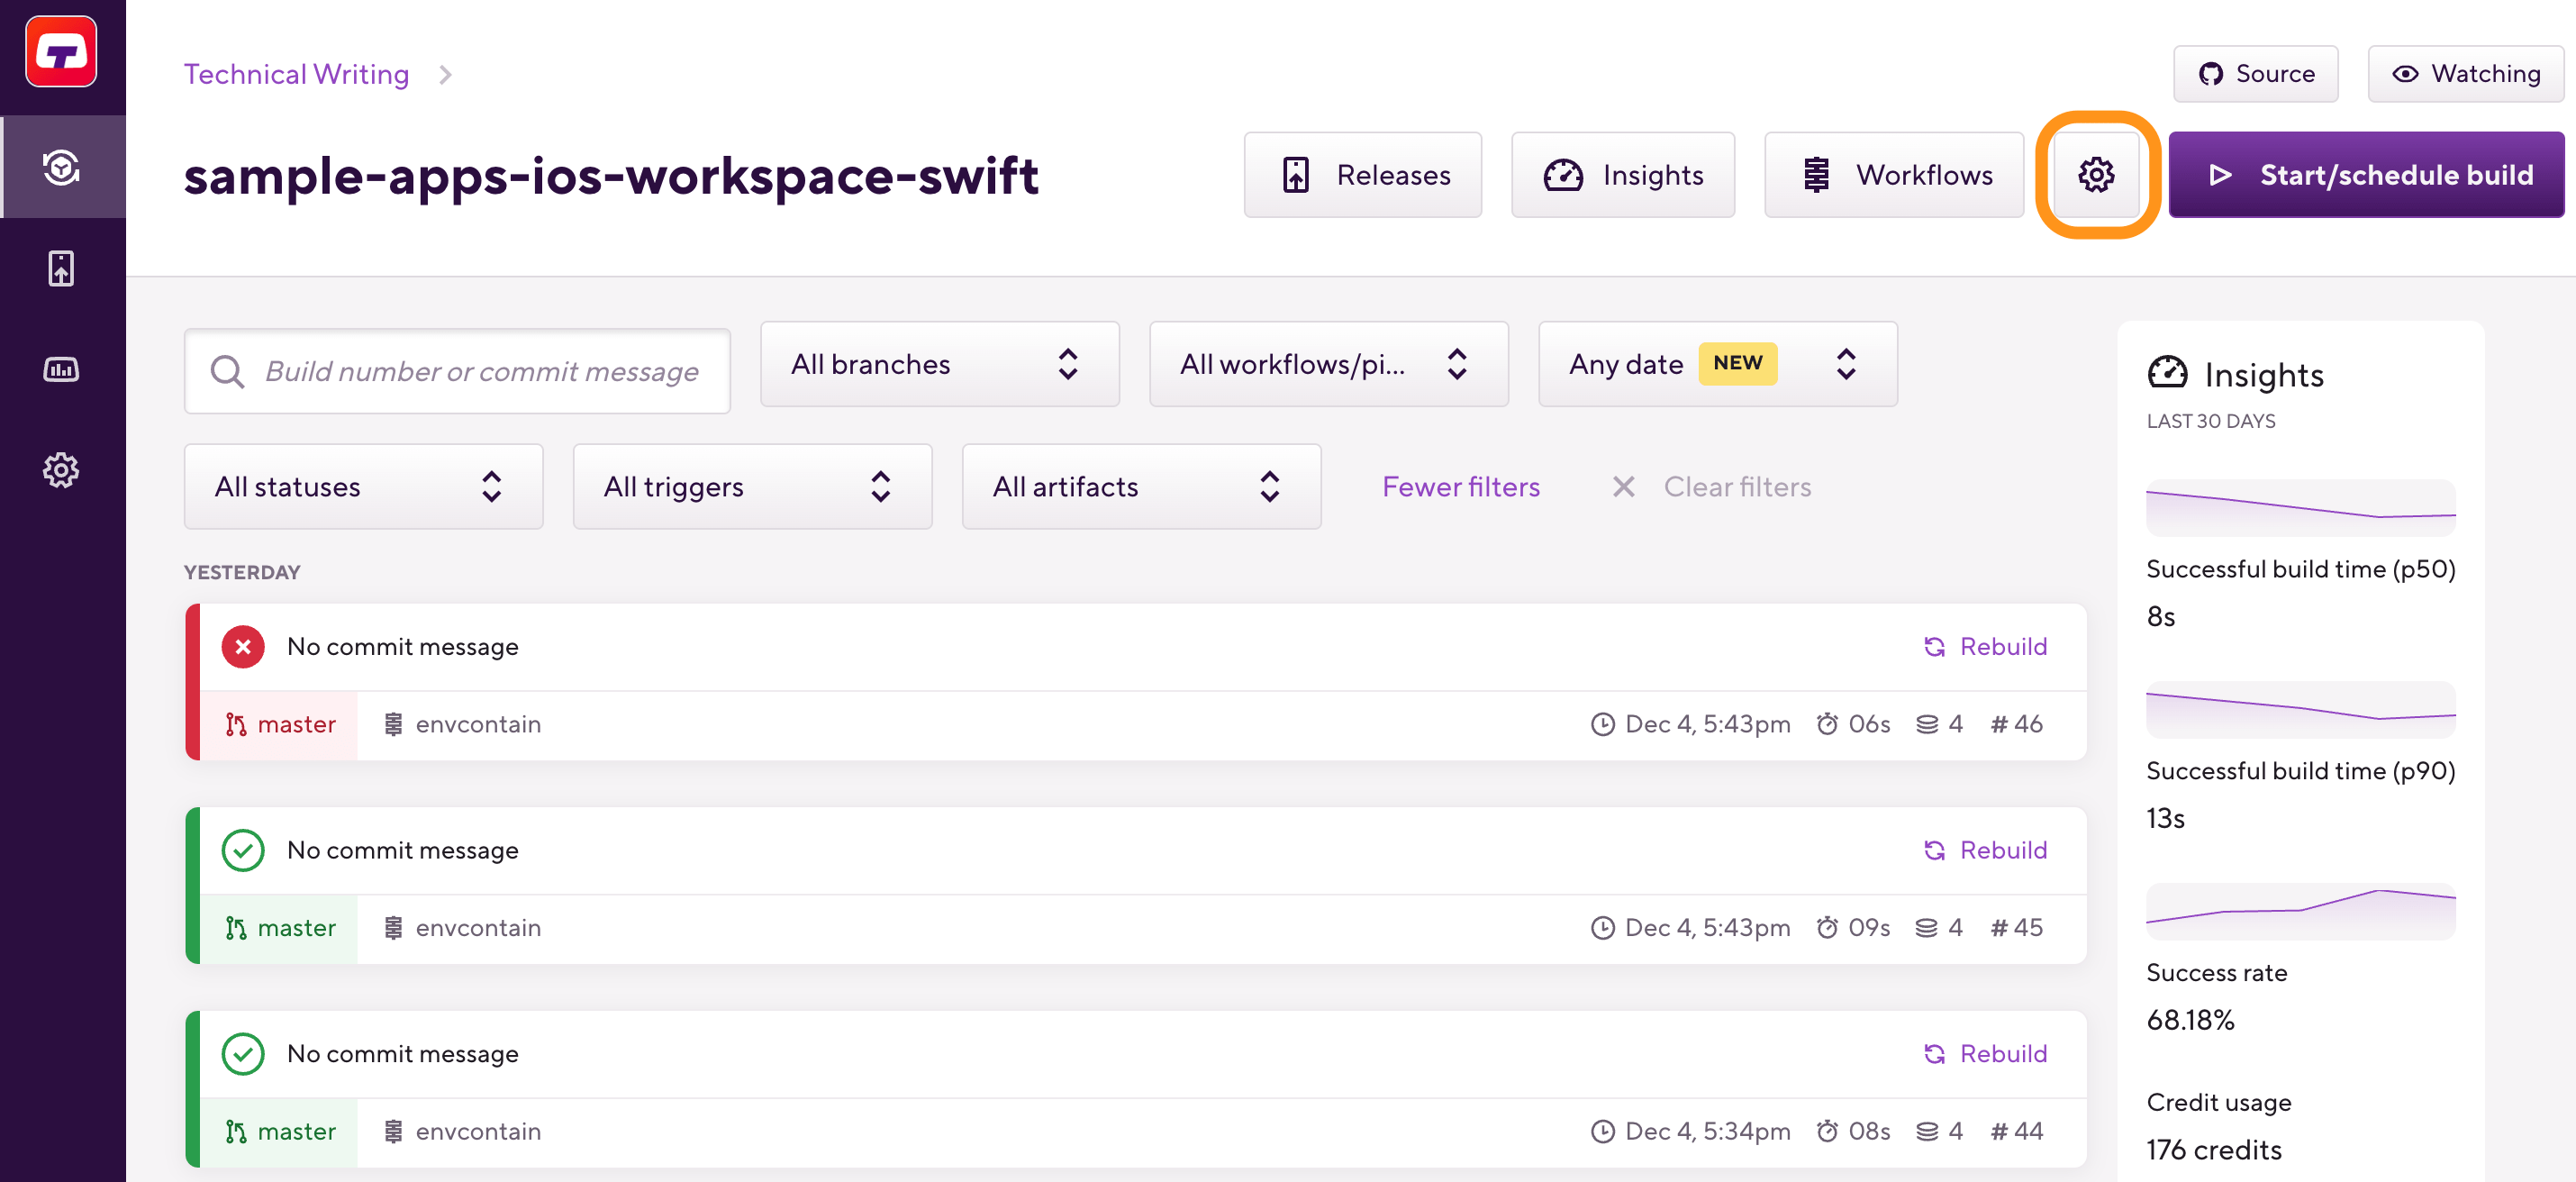
Open your project on Bitrise with a user that has the Admin role on the project.
-
On the main page of the project, click on the Project settings button.
-
On the left, select Integrations and then the Webhooks tab.
-
Find the Incoming webhooks section and open Manual webhooks.
-
Select GitLab from the dropdown menu.

-
Copy the webhook URL.
-
Open your project on GitLab.com
-
Go to Settings of the project.
-
Select Webhooks and then click .
-
Enter the
bitrise-webhooksURL in the URL field.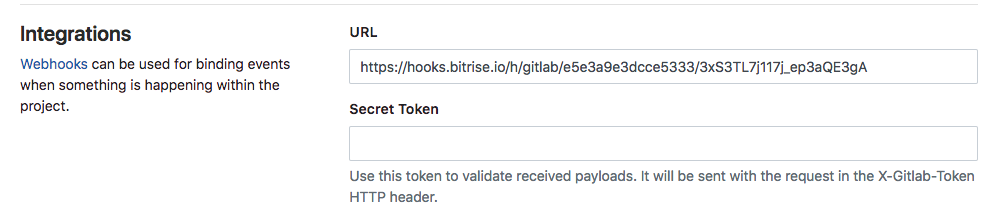
-
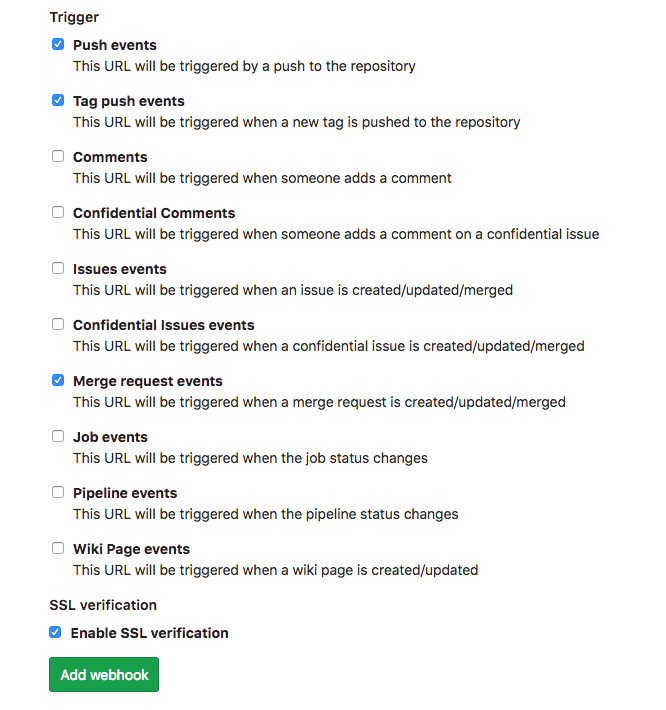
In the Trigger section select:
-
Push events
-
Tag push events
-
Merge request events
-
Comments
-
-
Click Add webhook.
That’s all! The next time you push code, push a new tag or create/update a merge request a build will be triggered (if you have Trigger mapping defined for the event(s) on Bitrise).