Setting up Google SSO for Bitrise
Add SAML SSO to your Bitrise Workspace using Google Workspace.
This guide provides step-by-step instructions on setting up Bitrise as a SAML application on Google Workspace.
SAML SSO restrictions
SAML SSO is only available for a Workspace with our paid plans.
Since the SAML SSO feature is tied to the above plans, if you decide to downgrade to a Hobby plan or remove the add-on, you will lose this feature. All Workspace members will receive an email about the downgrade and you’ll have two weeks to re-upgrade if you wish to use SAML SSO in your Workspace again.
Before connecting SAML SSO to your Workspace:
-
Make sure you have a Google administrator account where you can add Bitrise as a SAML app. The Google Workspace administrator can help setting up SAML SSO on Google Workspace.
-
Be aware that only the Workspace owner can set up SAML SSO to a Bitrise Workspace.
-
Your account on Bitrise has a Workspace with the Velocity or Enterprise plan.
You'll need to:
Getting configuration information from Google Workspace and Bitrise
-
Sign into your Google Admin Console.
-
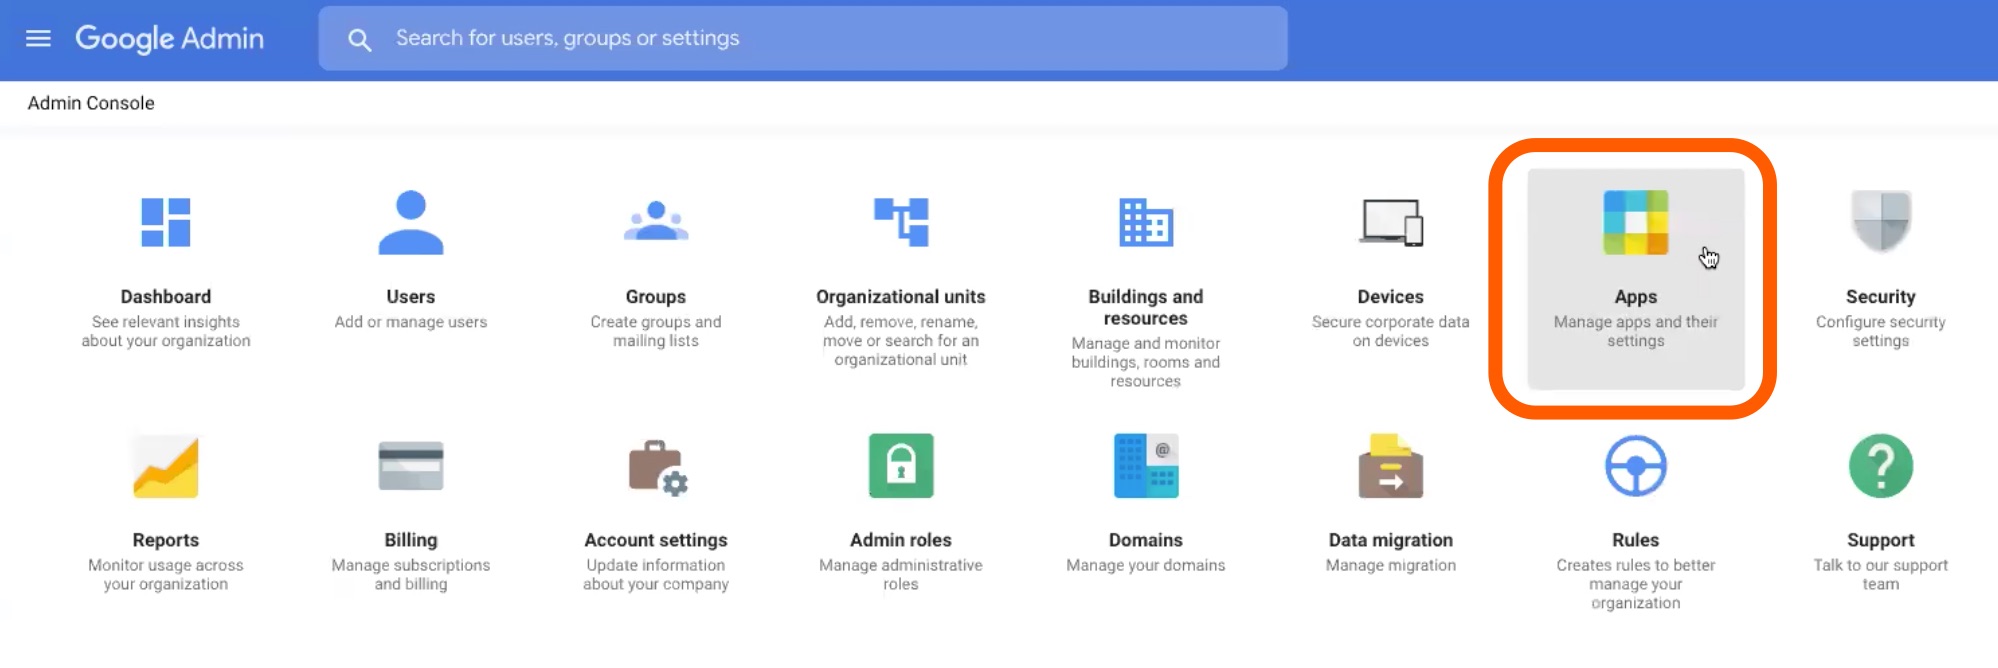
Select Apps on the Admin Console page.
-
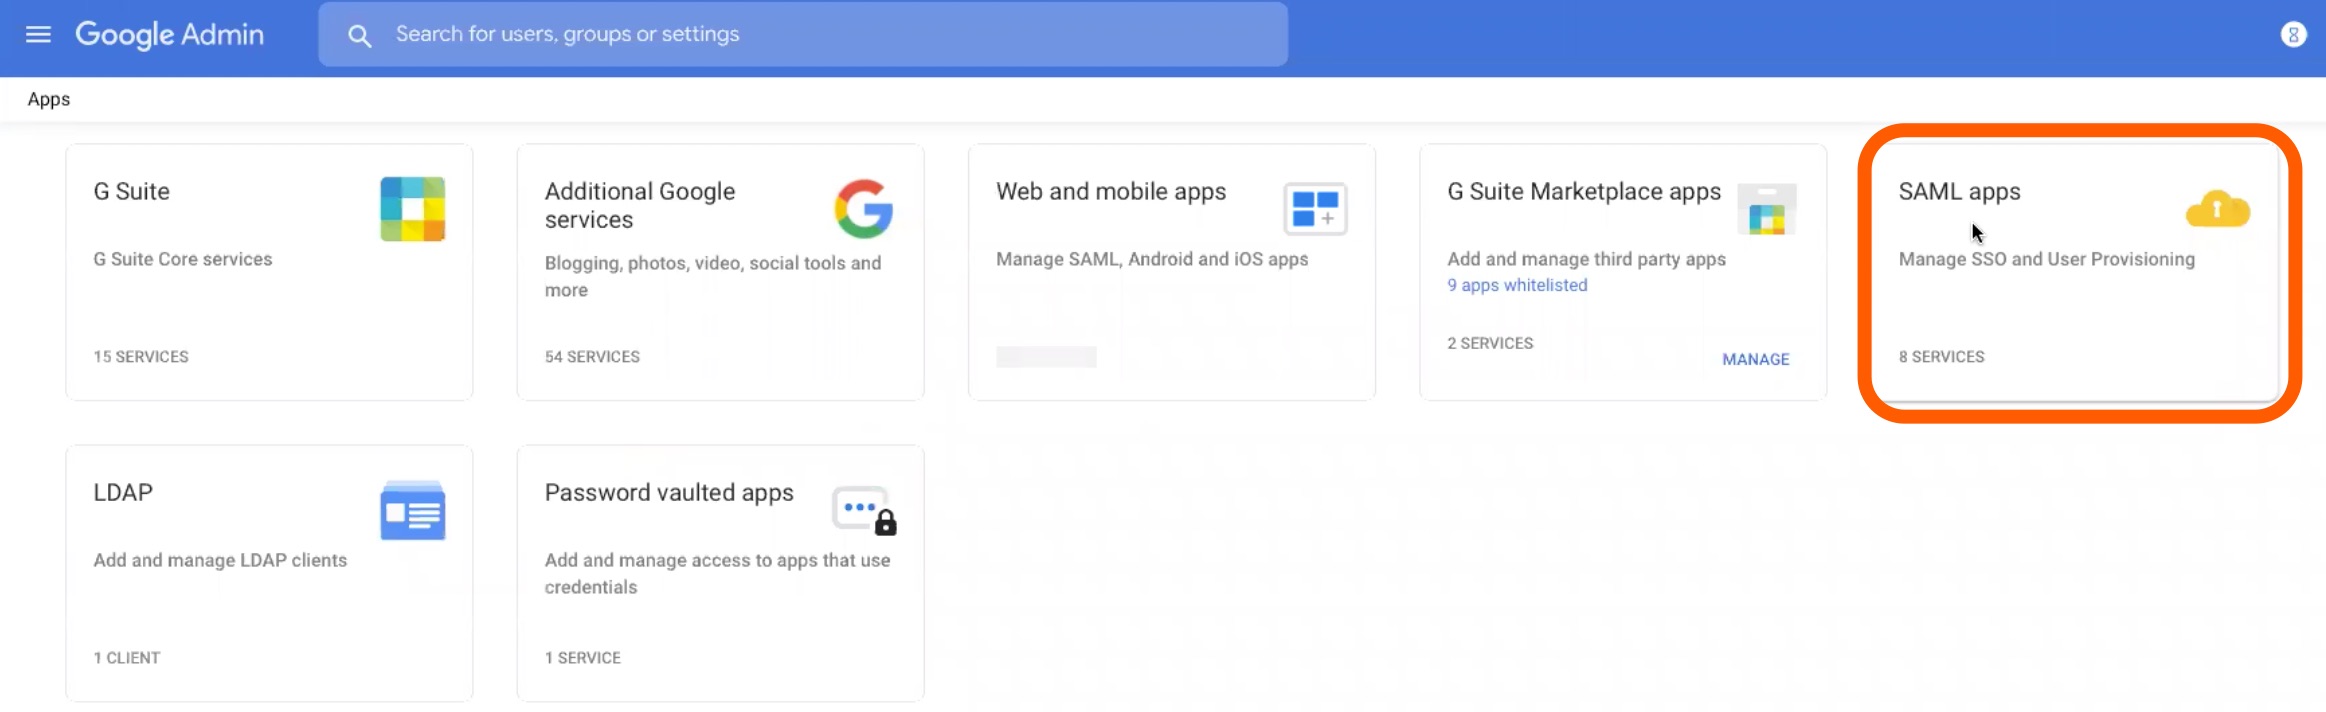
On the Apps page, click SAML apps.
-
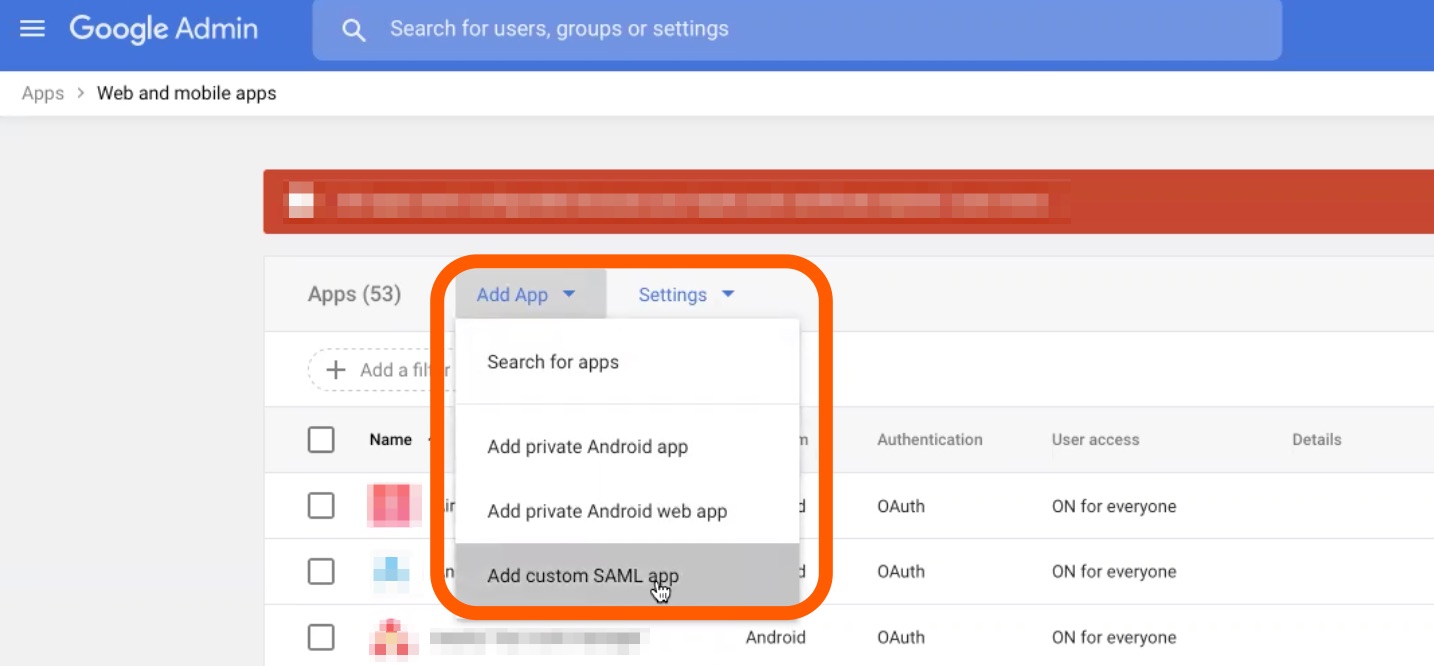
On the Web and mobile apps page, click the Add apps button, and select the Add custom SAML app option from the dropdown.
-
On the App details page add
Bitriseas your app name. Please note it must beBitriseas no other format is accepted. Click Continue.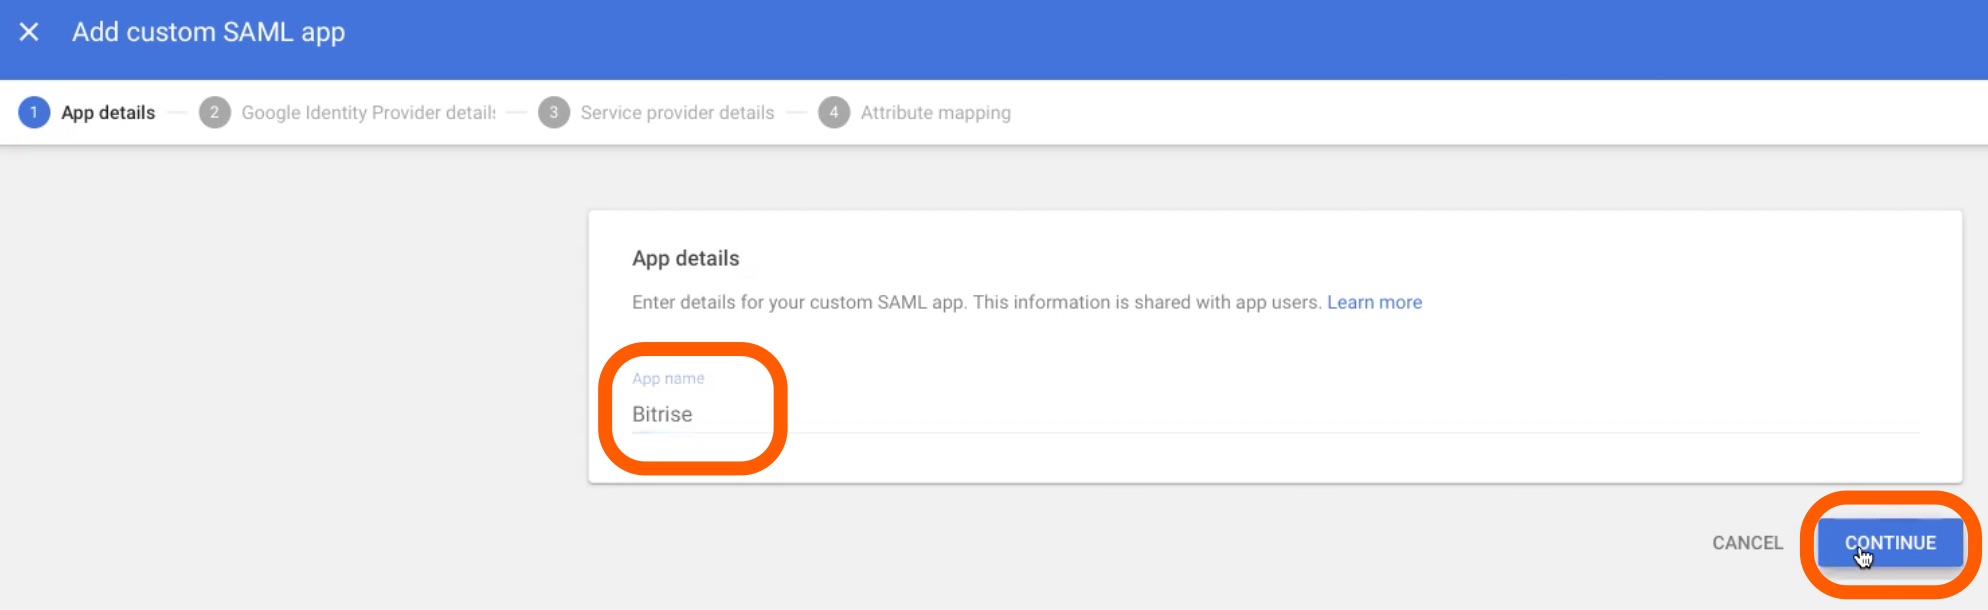
-
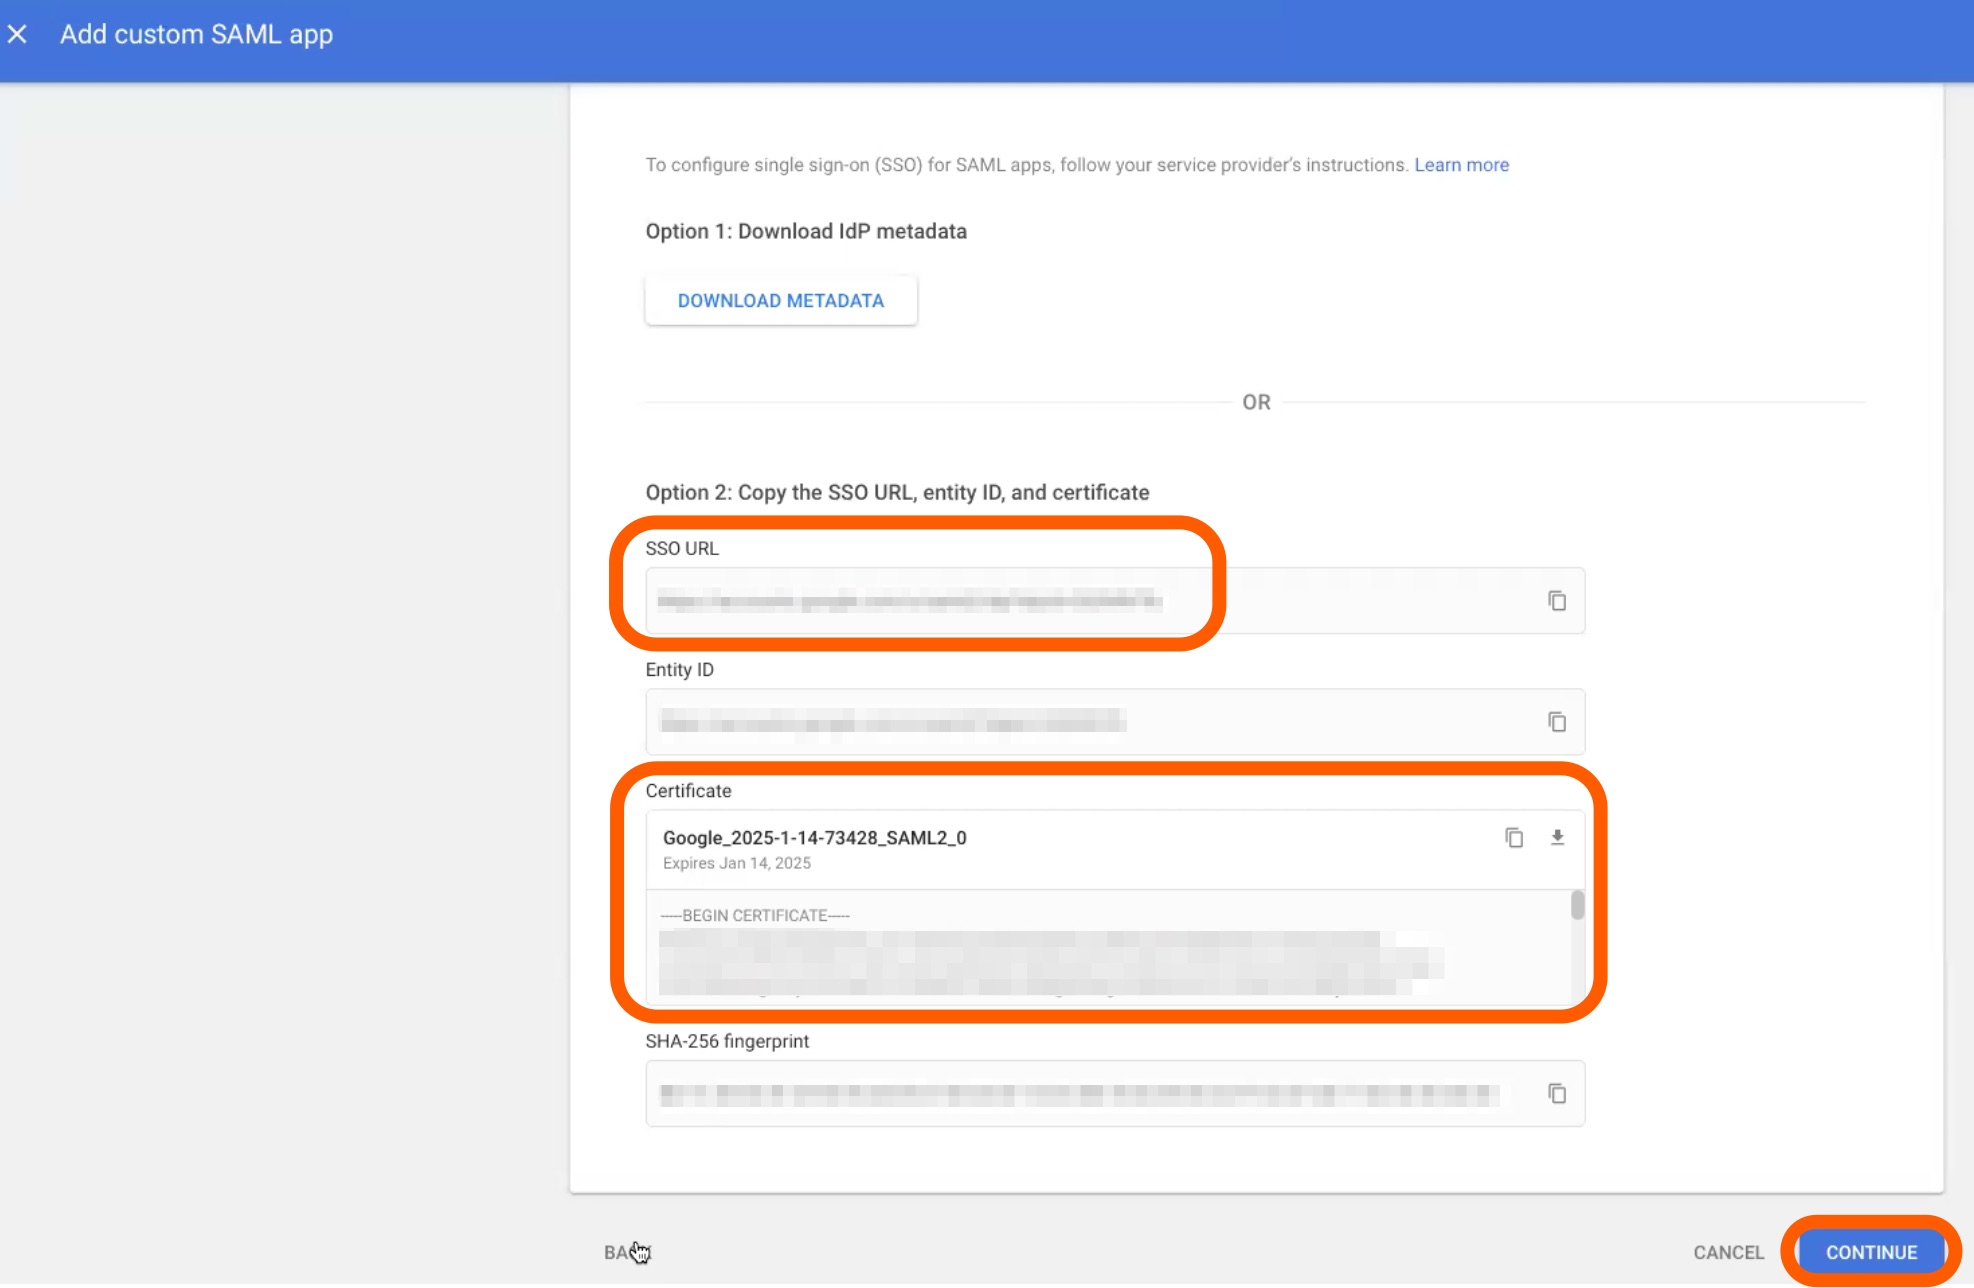
On the Getting Identity Provider details page:
-
Copy the SSO URL and paste it on the SAML SSO provider Single Sing-On URL (SSO URL) on Bitrise.
-
Copy the whole content of the Certificate field and paste it in the SAML SSO provider certificate field of Bitrise. You can upload the Certificate from your local computer too.
-
-
While you are in Bitrise, click the Copy Link button to copy the Assertion Consumer Service URL (ACS URL). We will need it on Google Workspace in a second. Let’s NOT click the Configure SSO button just now!
-
Let’s head back to the Getting Identity Provider details page of Google Workspace. Click Continue.
-
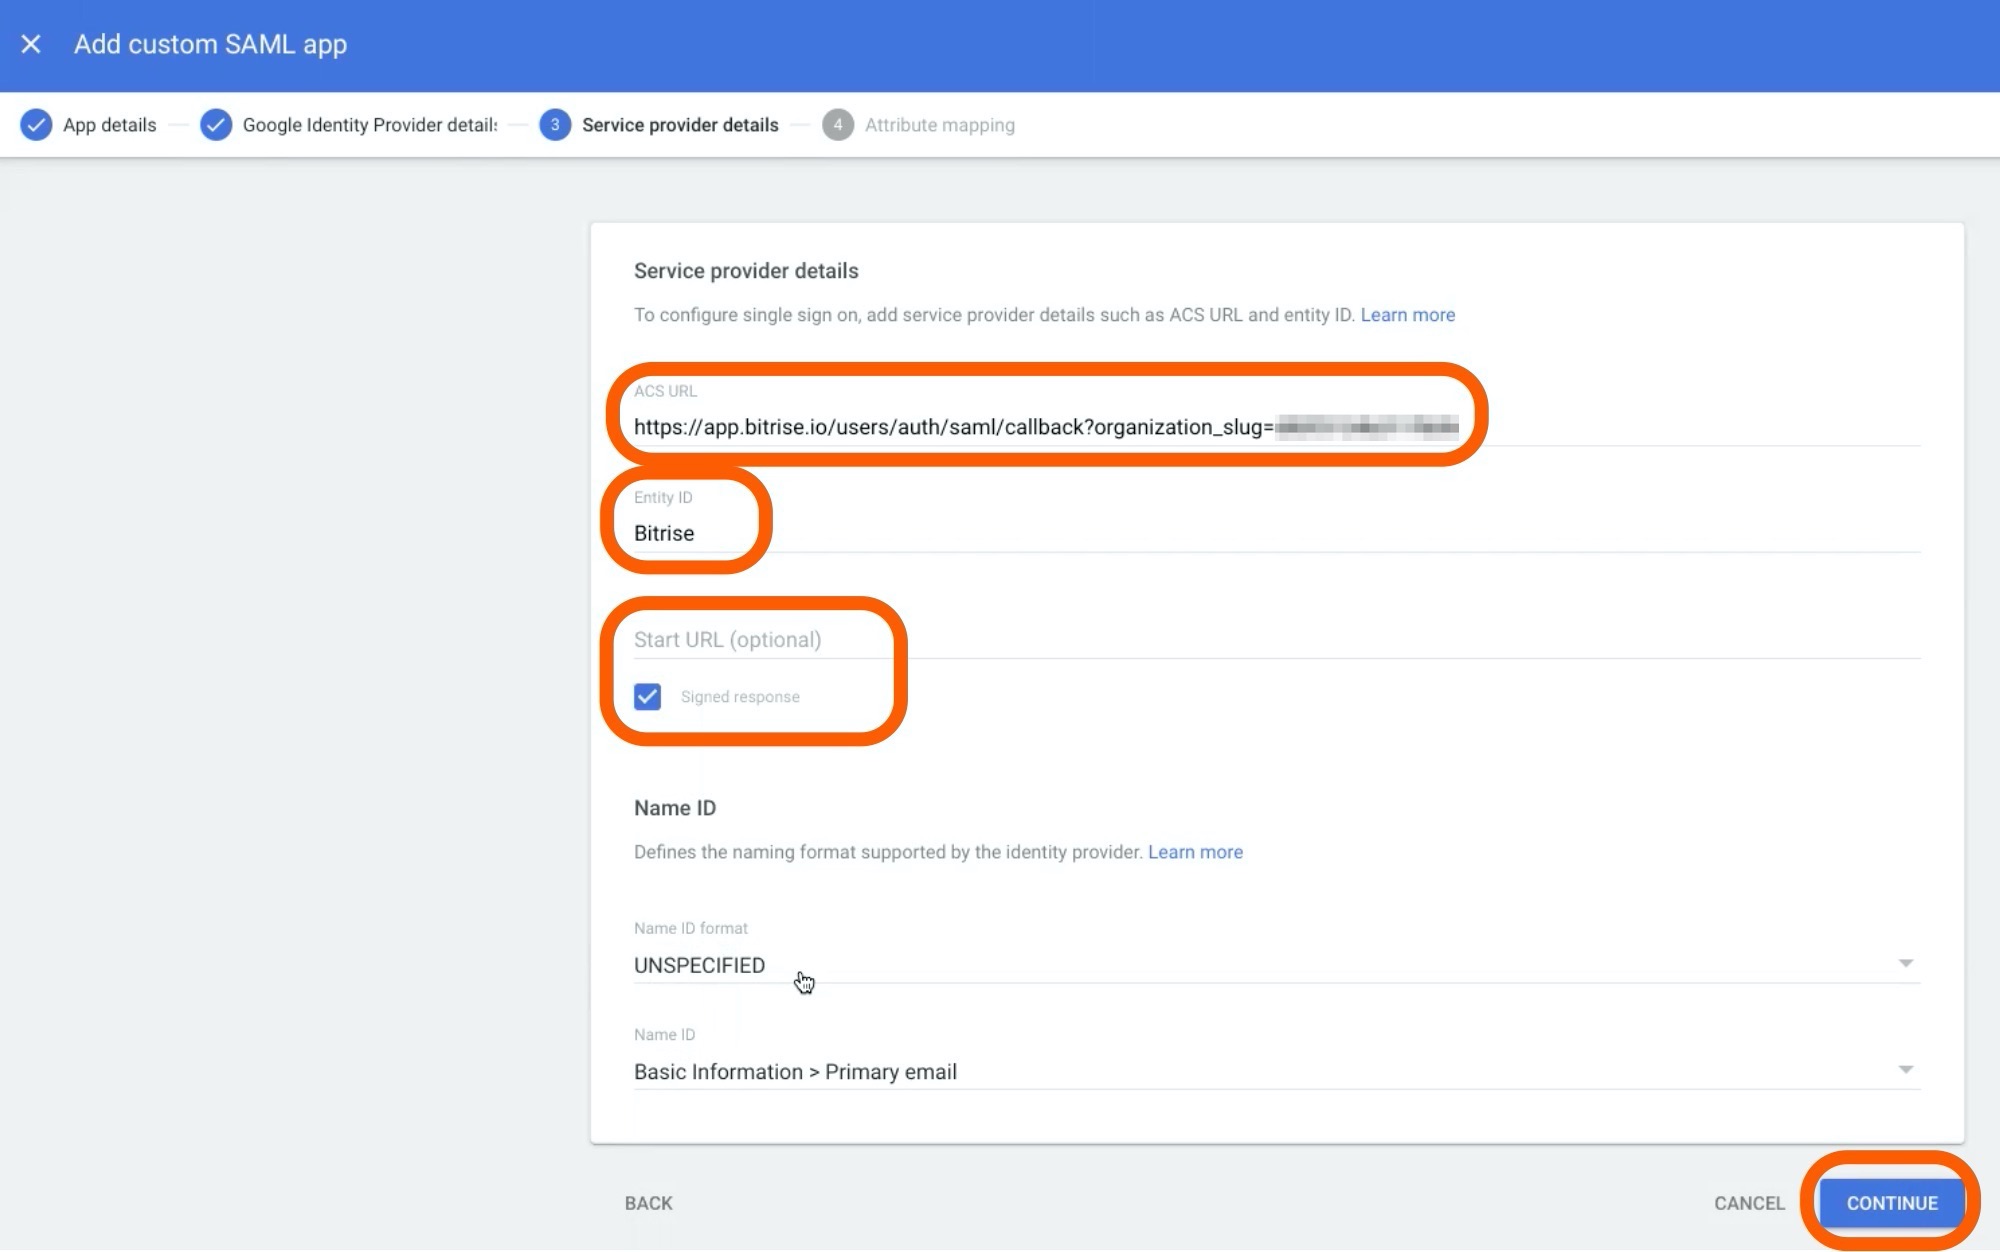
On the Service provider details page:
-
Paste the Assertion Consumer Service URL (ACS URL) of Bitrise in the ACS URL field on Google Workspace. (Remember, we got the link at Step 7.)
-
Type
Bitrisein the Entity ID field. Please note it must beBitriseas no other format is accepted. -
Tick the Signed response checkbox under START URL (optional).
-
Click CONTINUE.
-
-
Click the Configure SSO button on Bitrise.
-
On Google Workspace’s Attribute mapping page, click Finish - you do not have to configure anything here.
Enabling Bitrise app for a group or an organizational unit
All there is left to do on G Suite is to enable the newly created Bitrise app for a group or organization of your choice.
-
Go to the Web and mobile apps page on G Suite and select Bitrise from the Apps list.
-
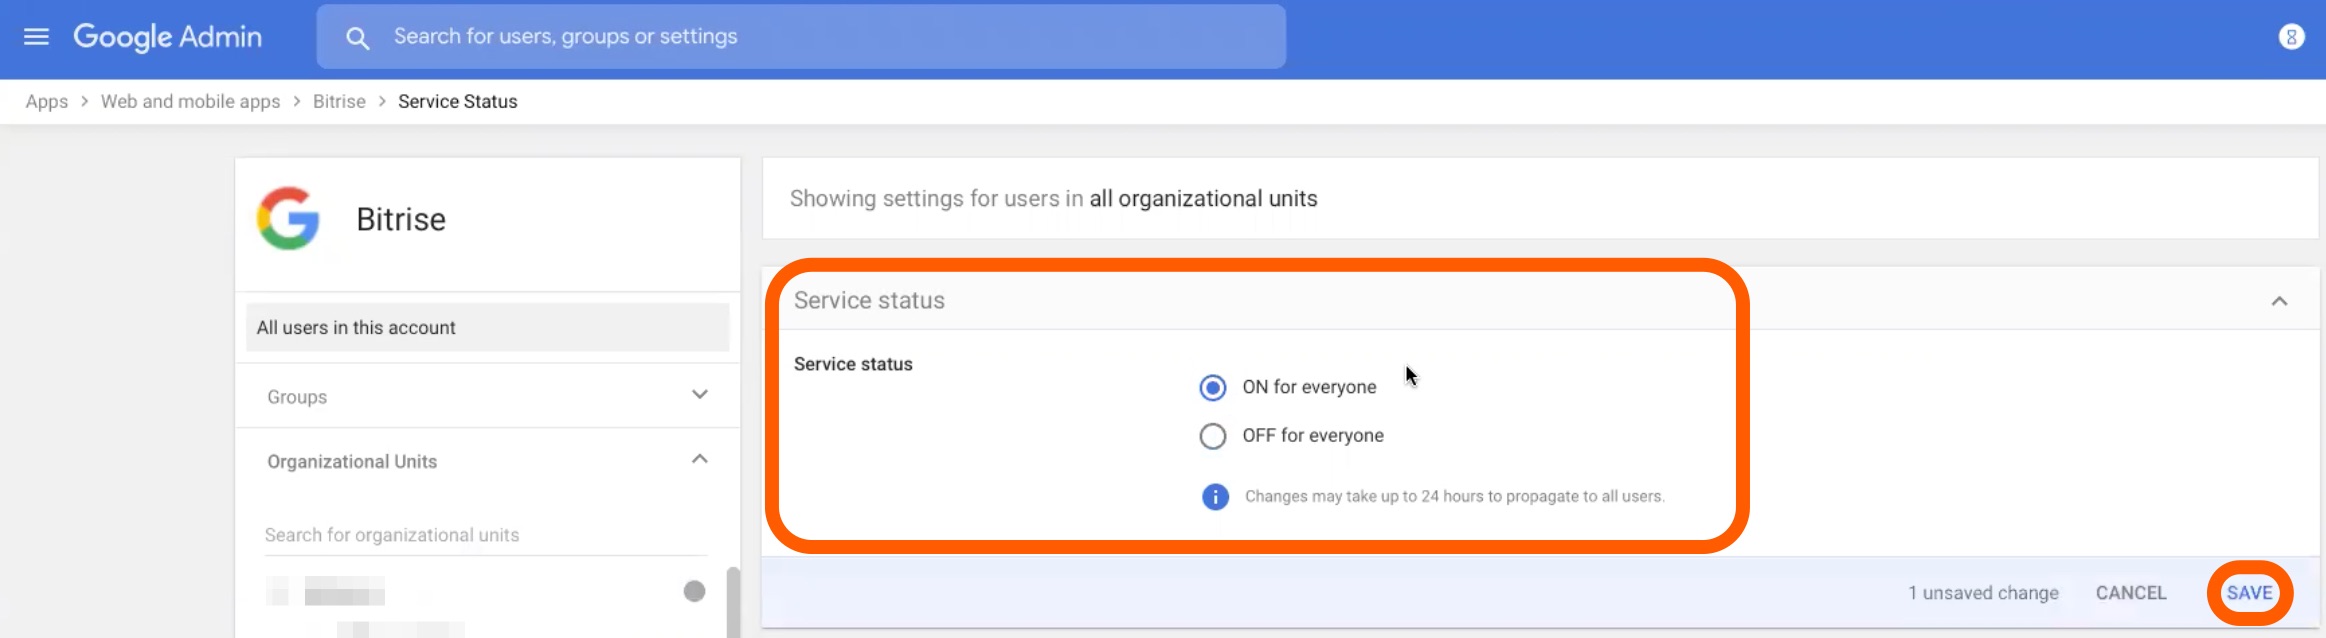
Click User access to get to the Service status page.
-
Select ON for everyone and hit Save.