Adding outgoing webhooks
You can create outgoing webhooks so that Bitrise automatically sends build event notifications to any service you would like.
You can configure Bitrise to send build event notifications to any service you would like. A build event is:
-
When a build is started.
-
When a build ends.
You can use this notification to share build statuses with your Git provider if we don’t support it yet, notify only the right team about build success or failure, or use it to automate your in-house release pipeline.
You can add, remove and edit your webhooks on the website interface.
Accessing services that are behind a firewall
If you need to access a service that is behind a firewall, you can't use outgoing webhooks: the payload won't get past the firewall. To access such a service, we recommend configuring the firewall to allow the Bitrise build machines to access it, and then make the request from within the build machine. For more information on how to do so, check out the relevant guides:
Adding an outgoing webhook to a Bitrise project
You can set up and configure the webhooks sent by Bitrise on the web UI. Let’s see how!
-
Open your project on Bitrise with a user that has the Admin role on the project.
-
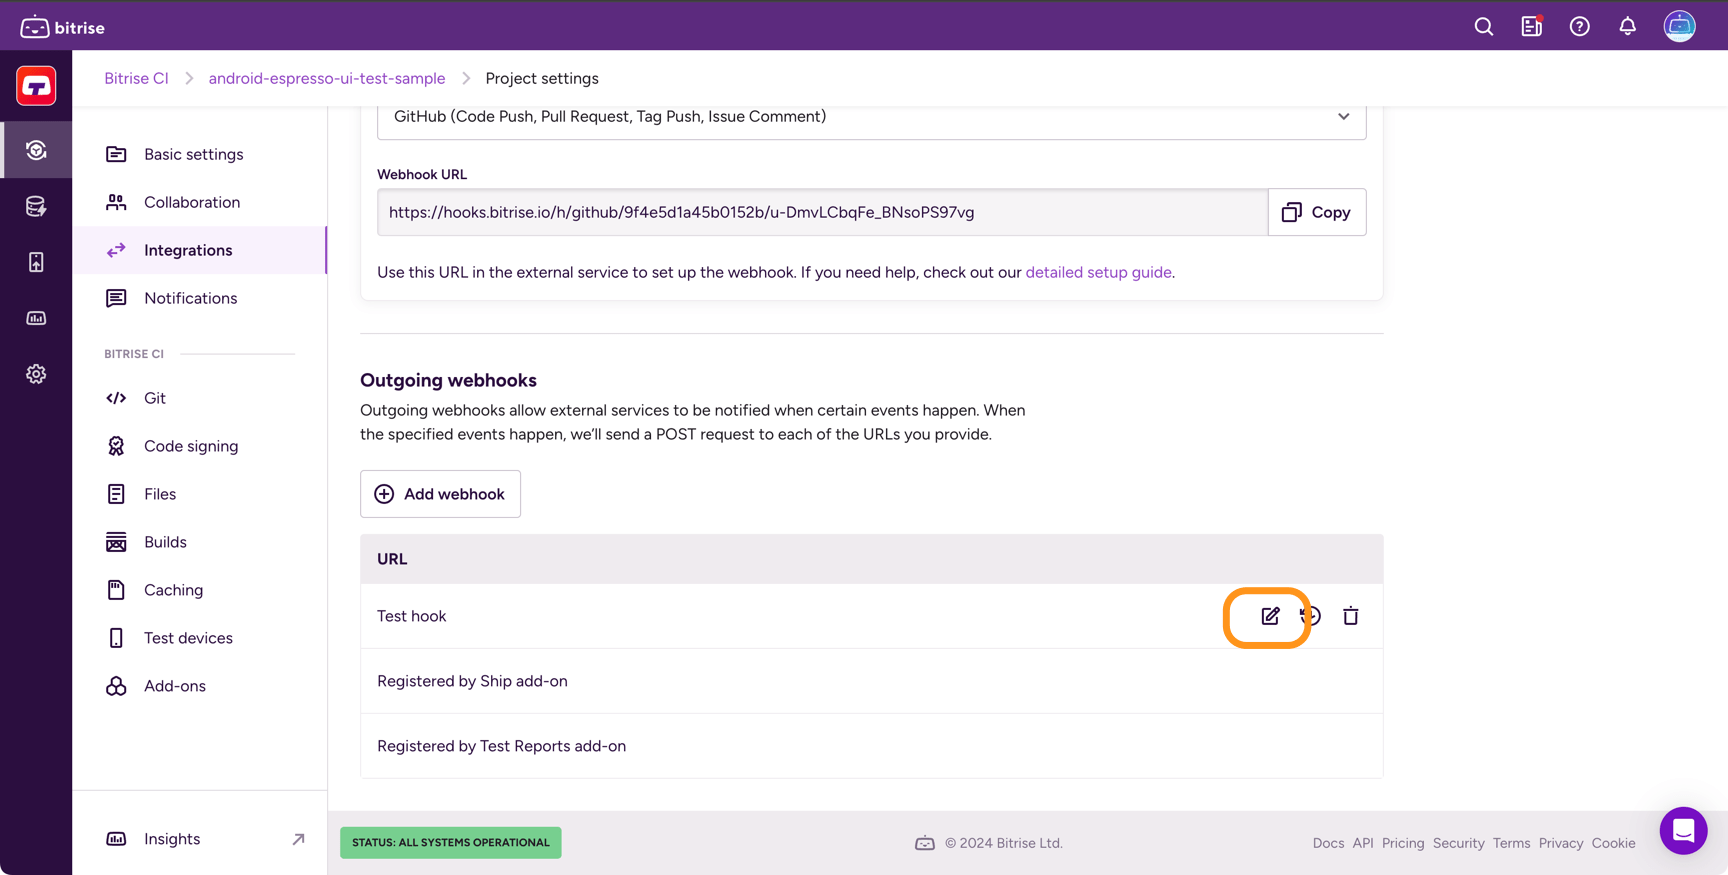
On the main page of the project, click on the Project settings button.
-
On the left, select Integrations and then select the Webhooks tab.
-
Scroll down to Outgoing Webhooks.
-
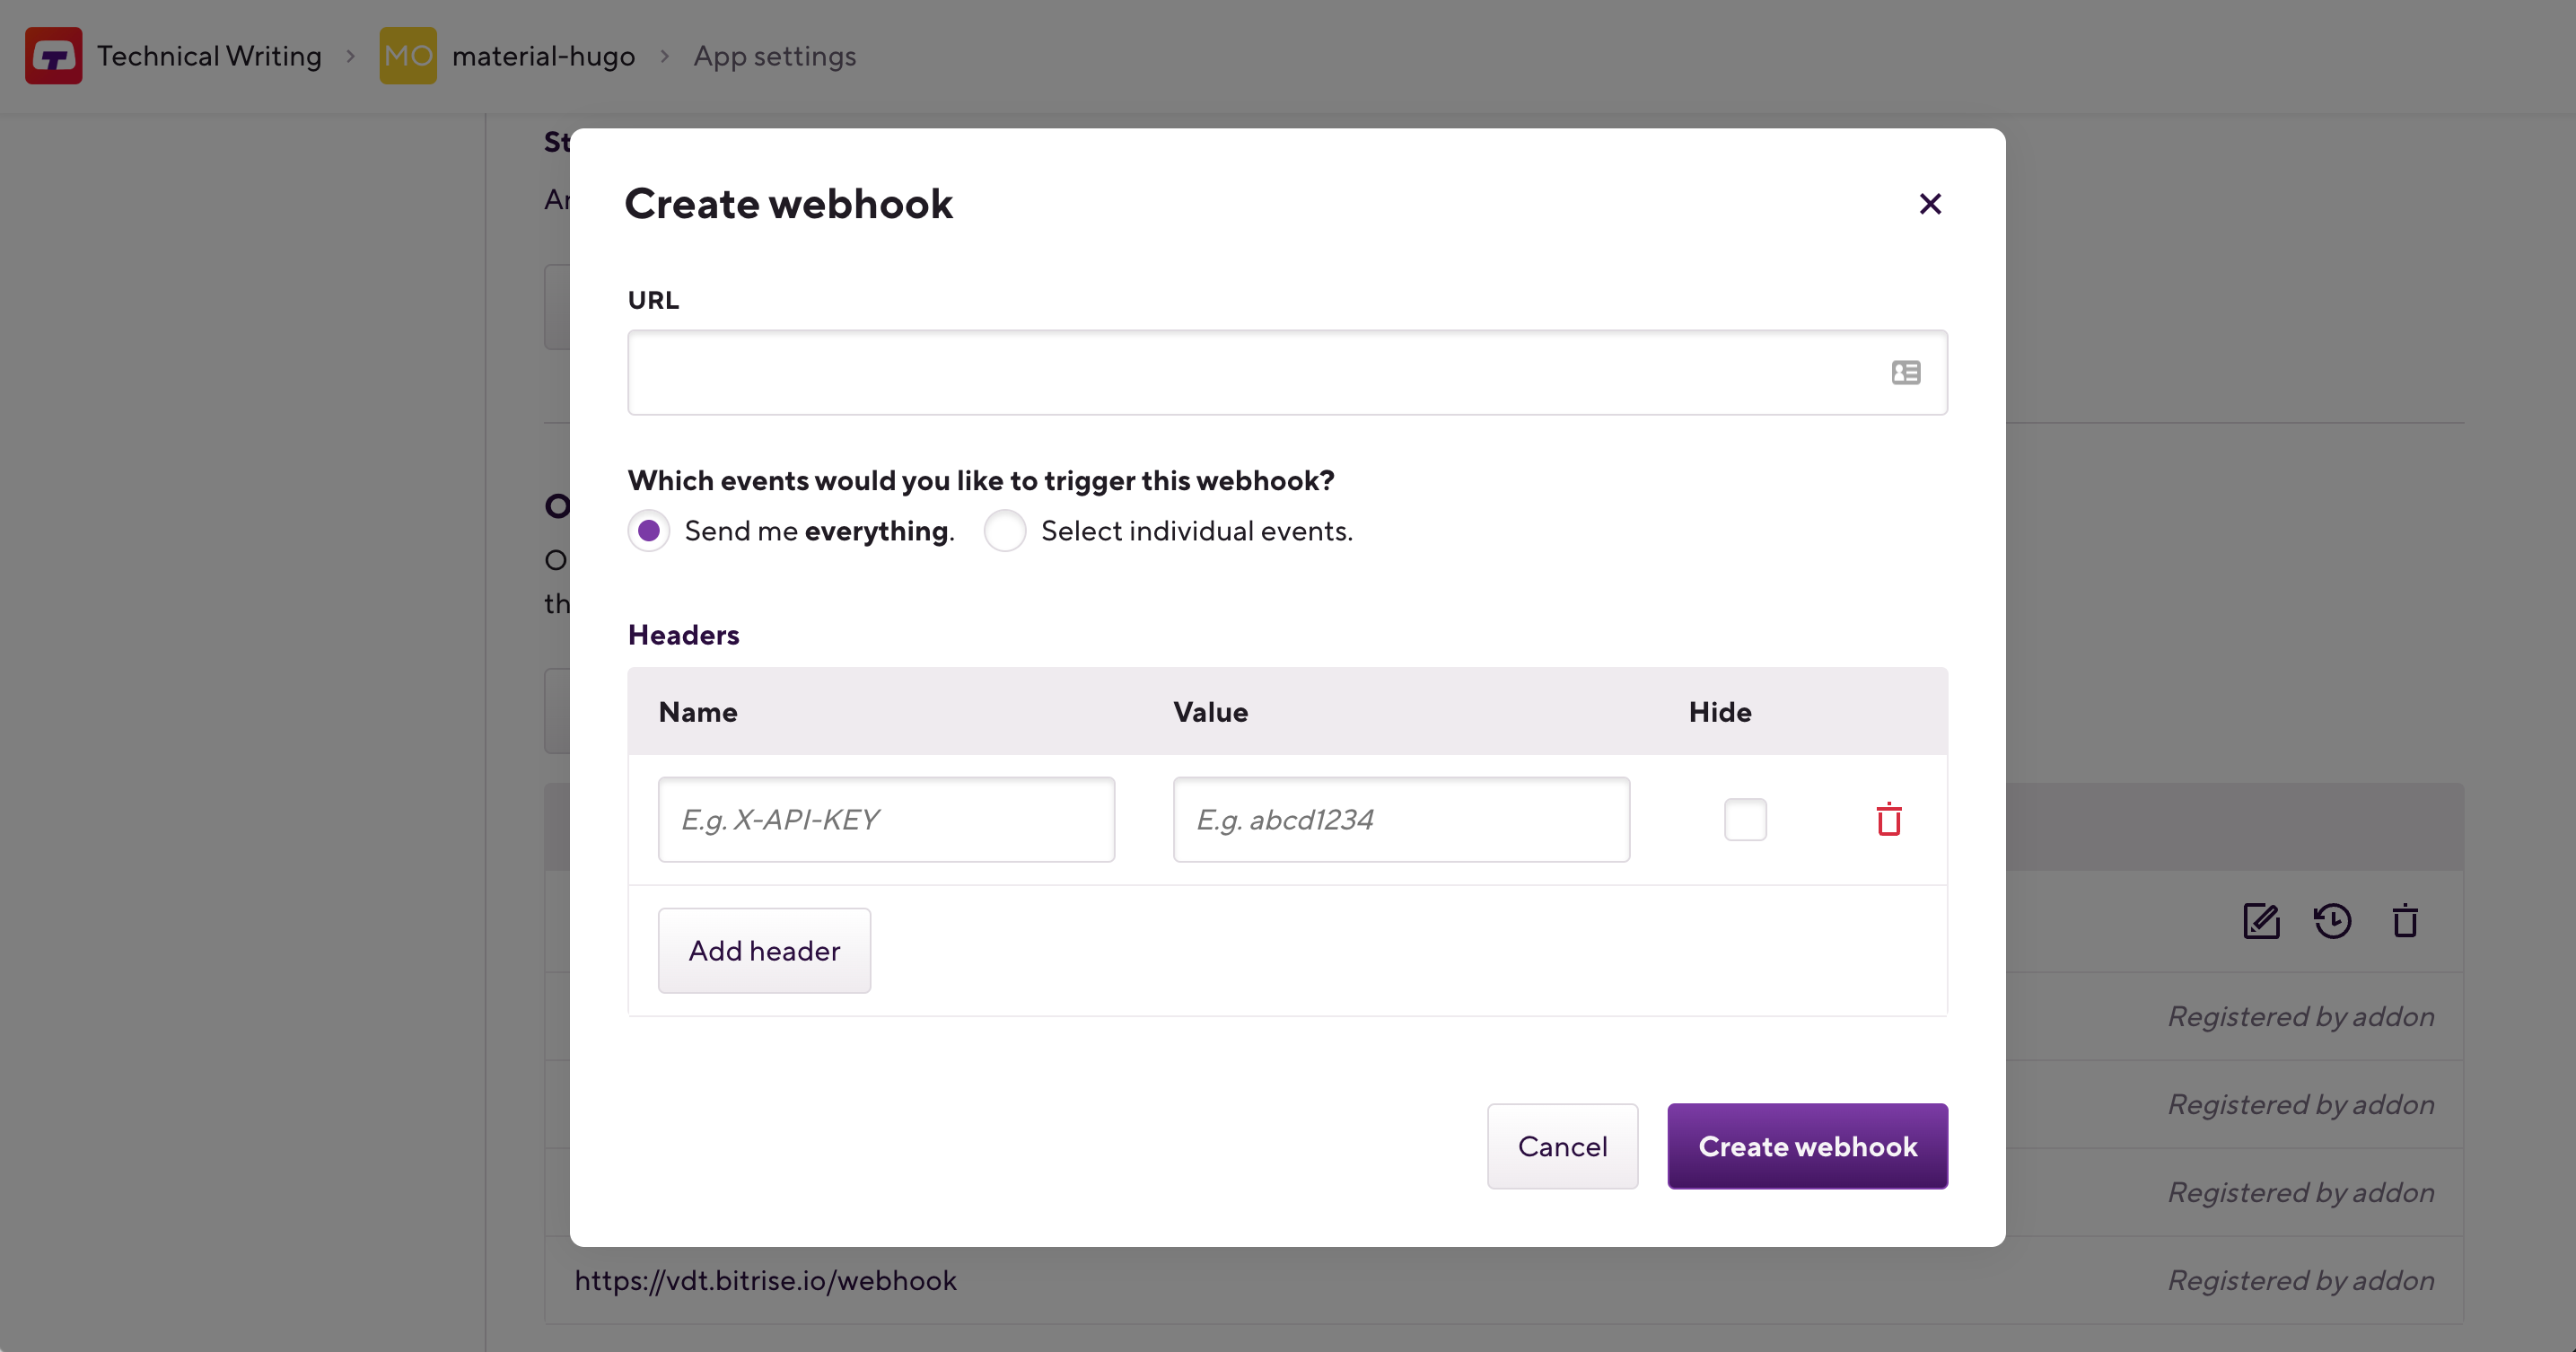
Click .
-
Enter the URL of the service where you wish to send the notification in the URL field.
-
Select either the Send me everything or the Select individual events option.
-
Send me everything: every supported event type will trigger the webhook. Currently, only build events are supported but there will be other options in the future!
-
Select individual events: you can specify the individual events that should trigger the webhook.
-
-
Optionally, add custom headers to your webhook: in the Headers section, specify a name and a value for the header. When done, click .
For example, if you have an API listening to the webhook, you can track the requests with API keys set as a custom header.
Hiding the header value
You can hide the value of your headers by checking the box under Hide. Please note that if you do this, you won't be able to view or change the value again.
-
Click Create Webhook.
And you’re done! You can modify your webhook at any time by clicking the pencil icon next to the webhook.
Adding custom headers to outgoing webhooks
You can add extra headers to your outgoing webhooks via the Code tab of the web interface. For example, if you have an API listening to the webhook, you can track the requests with API keys set as a custom header.
You can add custom headers either when:
-
Modifying an existing outgoing webhook by clicking the Edit button next to the URL.
To add the header:
-
Open your project on Bitrise with a user that has the Admin role on the project.
-
On the main page of the project, click on the Project settings button.
-
On the left, select Integrations and then go to the Webhooks tab.
-
In the Outgoing webhooks section, find your webhook and click the button.
-
In the Headers section, add a key and a value. You need both to be able to save the header.
-
Click Add header.
-
Click Update webhook.
Checking outgoing webhook deliveries
You can check the recent deliveries of your outgoing webhooks at any time, and resend them if necessary. The deliveries are marked with appropriate status code, depending on whether the delivery was successful.
-
Open your project on Bitrise with a user that has the Admin role on the project.
-
On the main page of the project, click on the Project settings button.
-
On the left, select Integrations and then the Webhooks tab.
-
Scroll down to Outgoing Webhooks.
-
Find your webhook and select the
 icon.
icon. -
Select a delivery and expand it to show the full request and the response.

-
You can redeliver the webhook payload at any time. Find the delivery you need and click the
 icon next to it.
Editing the payload
Before trying to deliver the webhook payload again, you can edit the webhook configuration. Close the Recent deliveries pop-up window and click the
 icon
next to the webhook to edit it. When finished, click .
icon
next to the webhook to edit it. When finished, click .