Setting up Idaptive SAML SSO for Bitrise
Add SAML SSO to your Bitrise Workspace using Idaptive.
This guide provides step-by-step instructions on setting up Bitrise as a SAML application on Idaptive.
SAML SSO restrictions
SAML SSO is only available for a Workspace with our paid plans.
Since the SAML SSO feature is tied to the above plans, if you decide to downgrade to a Hobby plan or remove the add-on, you will lose this feature. All Workspace members will receive an email about the downgrade and you’ll have two weeks to re-upgrade if you wish to use SAML SSO in your Workspace again.
Before connecting SAML SSO to your Workspace:
-
Be aware that only the Workspace owner can set up SAML SSO to a Bitrise Workspace.
-
Your account on Bitrise has a Workspace with the Velocity or Enterprise plan.
-
You must be logged into your Admin Portal on Idaptive to set up Bitrise as a SAML SSO app and establish the connection between Bitrise and Idaptive. If you are using the User Portal, Switch to Admin Portal by clicking your avatar on Idaptive.

-
Log into Idaptive as an Admin.
-
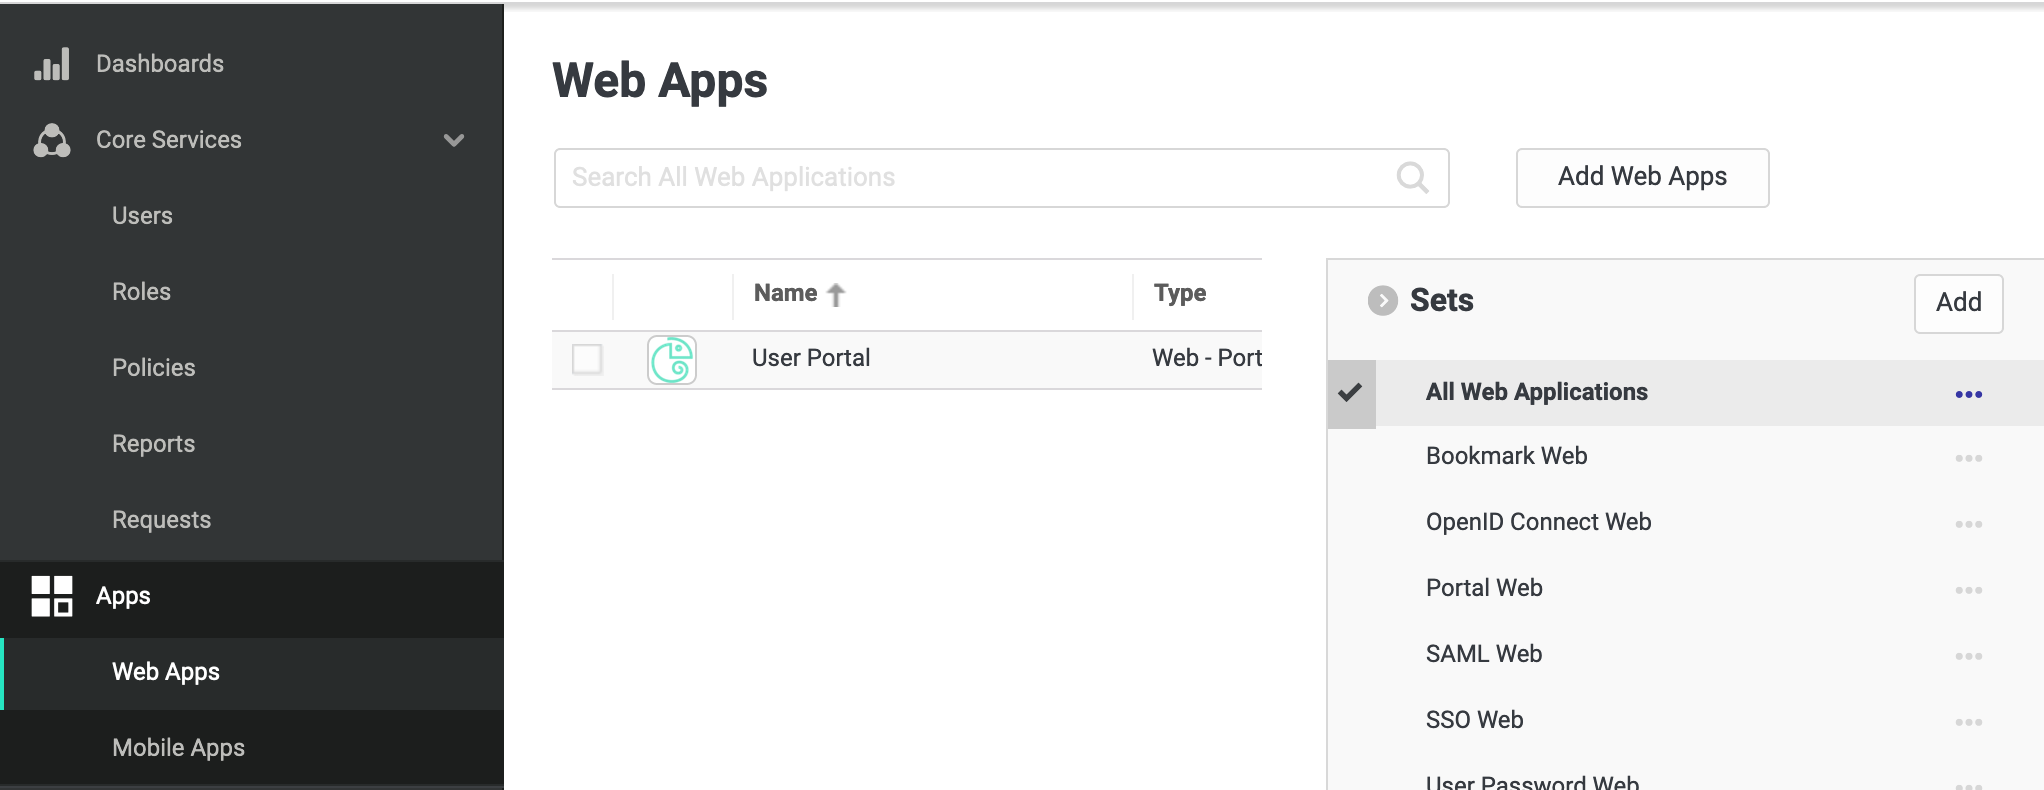
Go to Apps, then to Web Apps. Click the Add Web Apps button on the right.
-
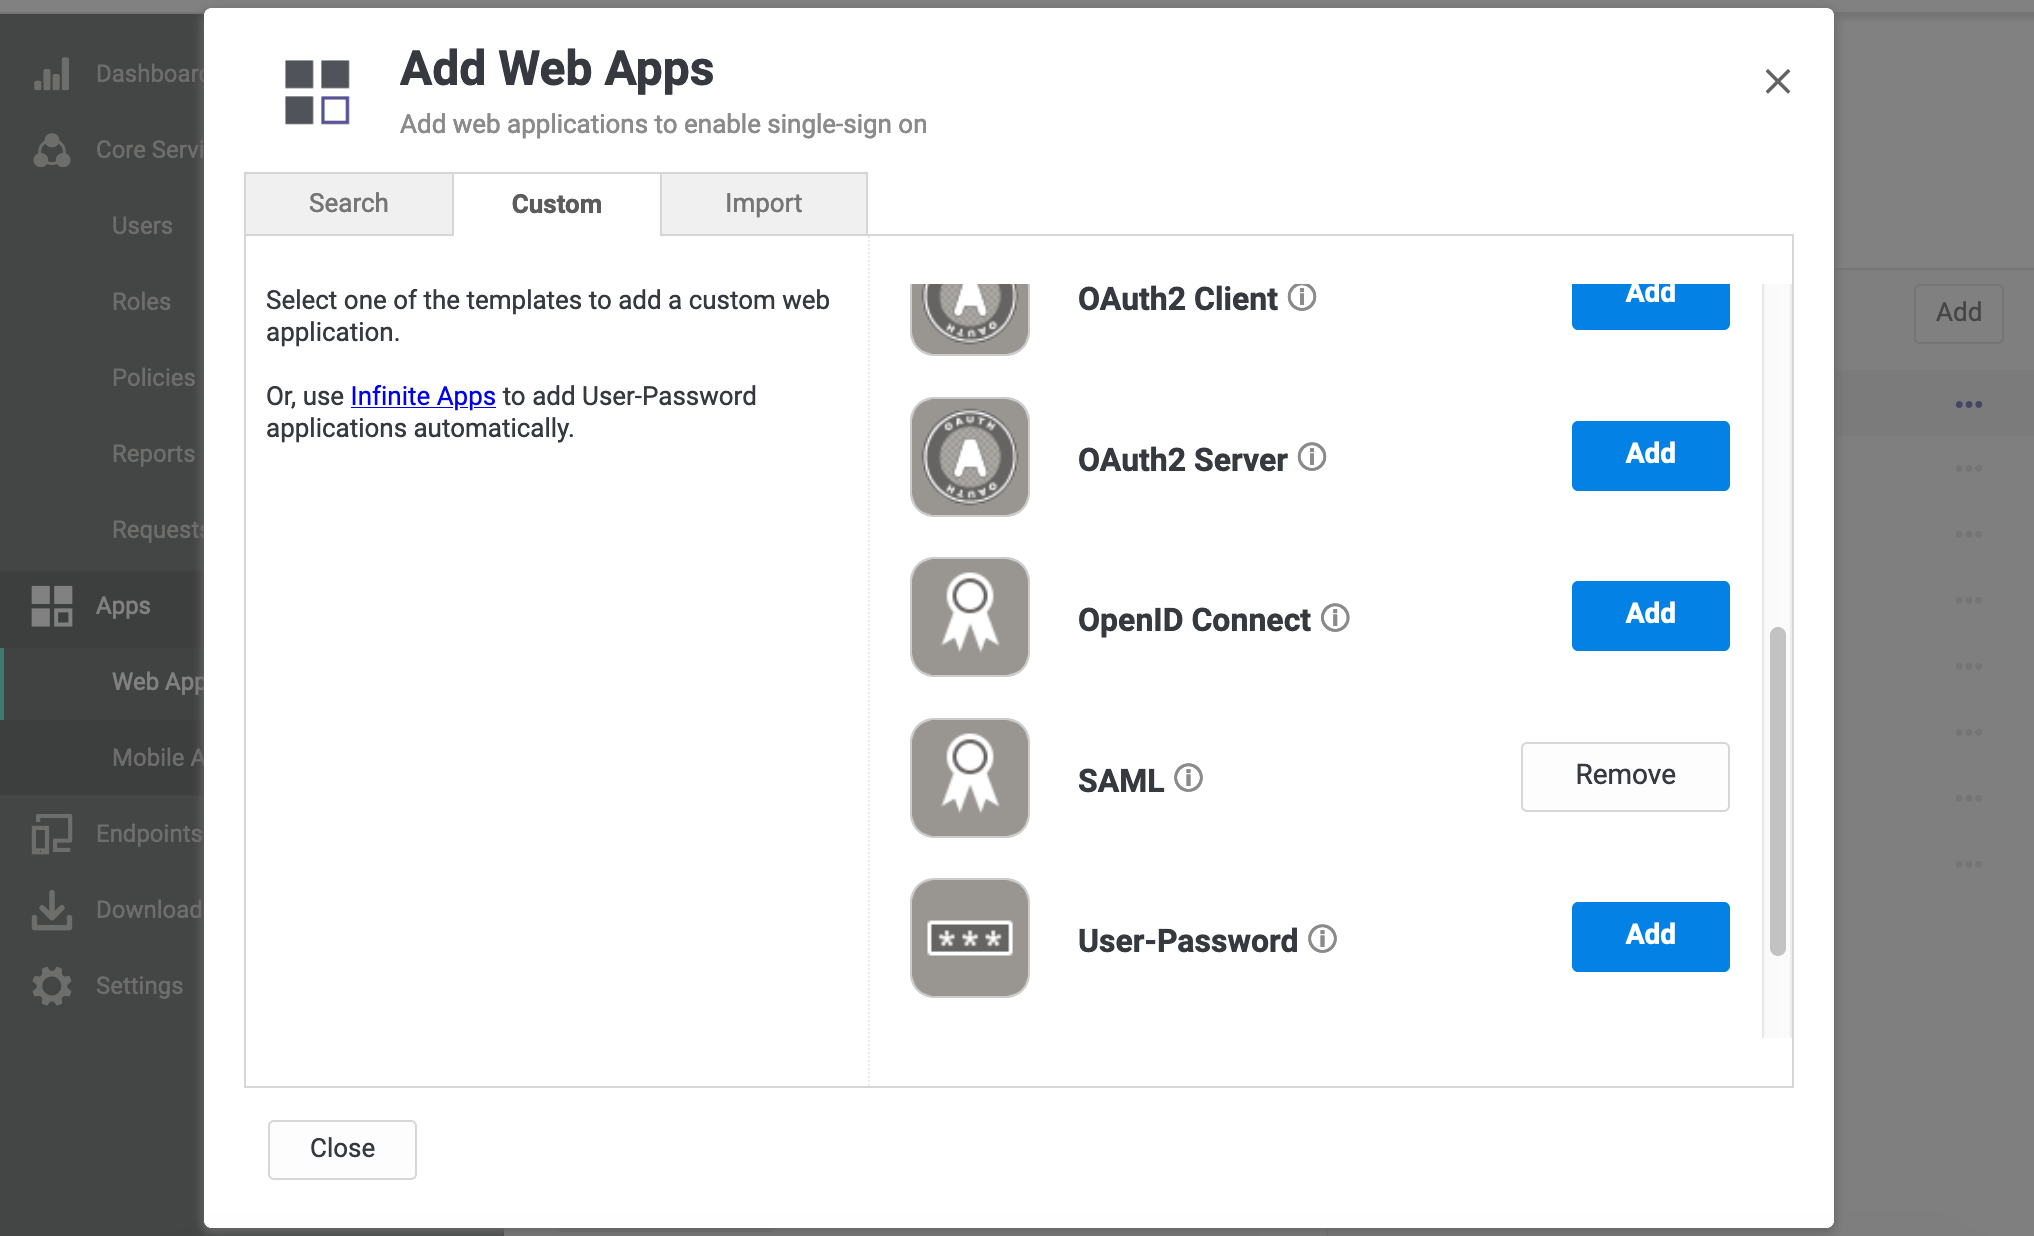
On the Custom tab and select SAML, and click Add. On the Add Web App popup hit Yes. Close the window. You will be automatically directed to the Settings page.
-
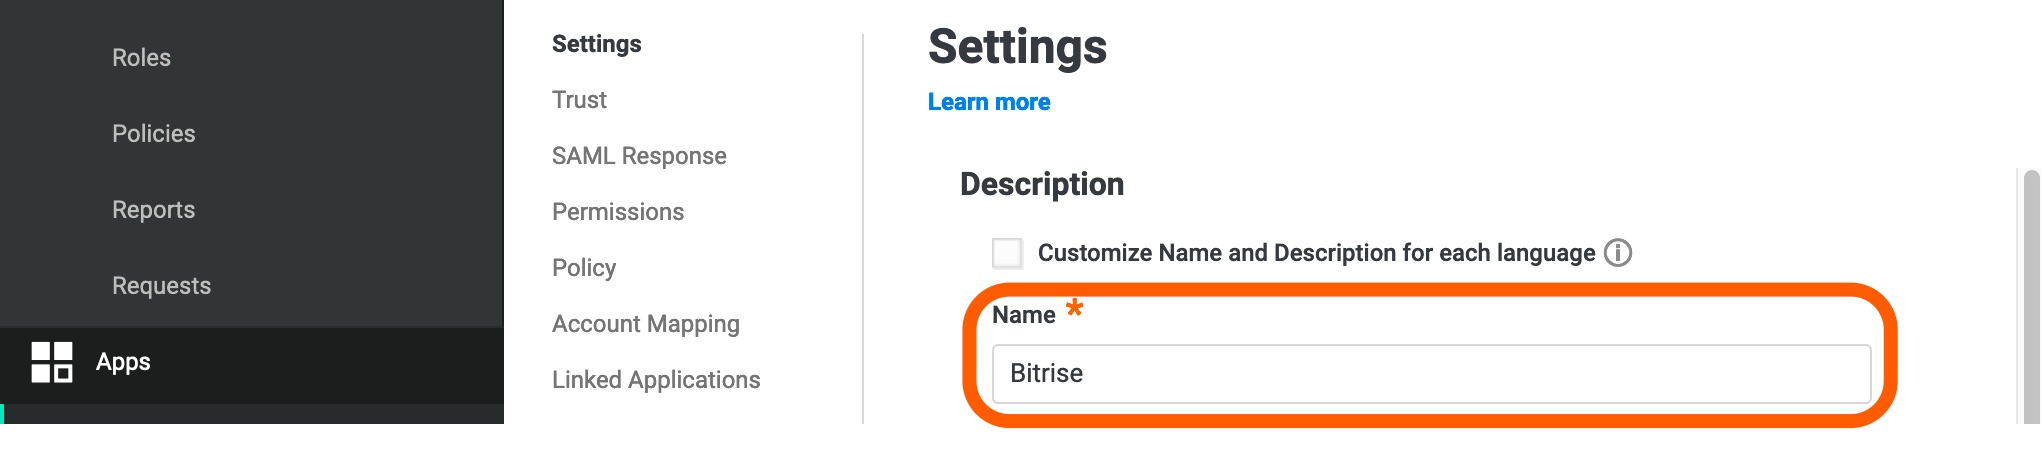
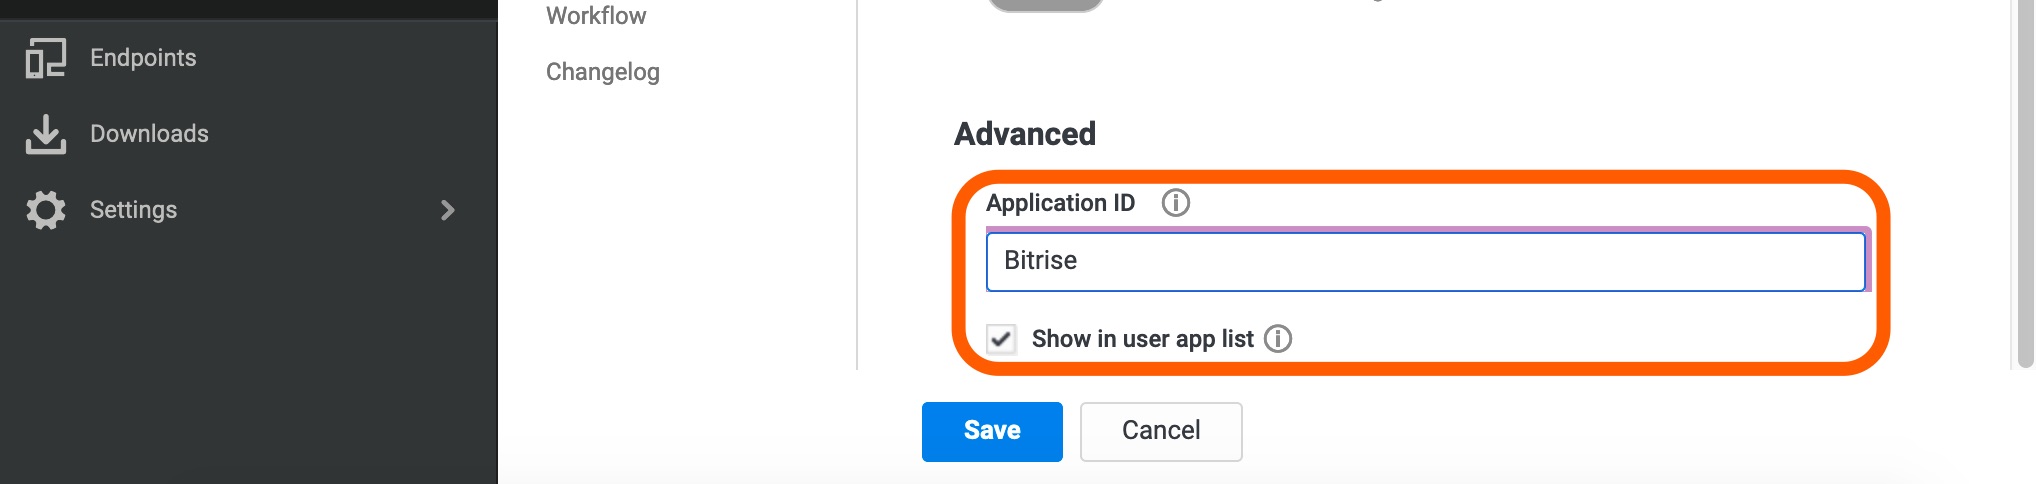
Add Bitrise to the Name and Application ID fields on the Settings page and click Save.
-
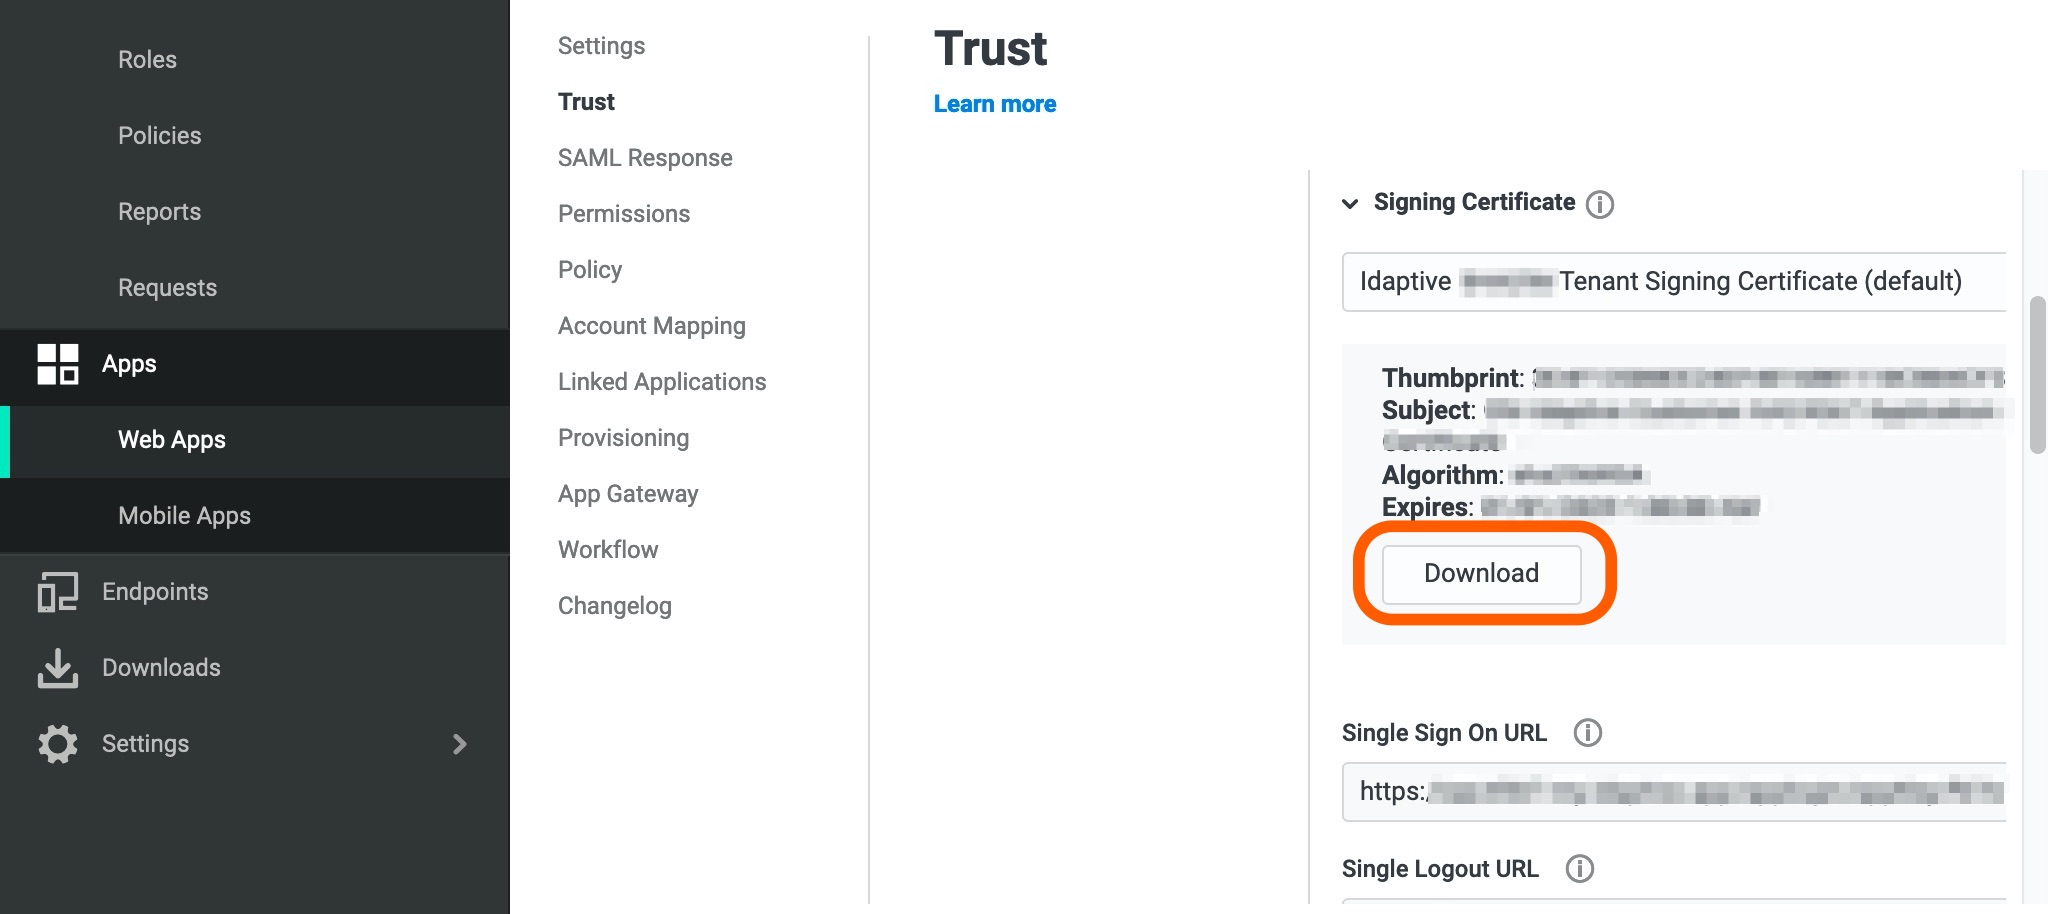
Click Trust on the left menu bar and select the Manual configuration under Identity Provider Configuration.
-
Click the Signing Certificate dropdown and download the certificate. Open it with a text editor so that you can copy the full content of the certificate. You can also upload the file.
-
Insert the content or upload the file itself in the SAML SSO provider certificate text box on the Enable Single Sign-On page of Bitrise.
-
Copy the Single Sign On URL from the Trust page of Idaptive. Insert it on the SAML SSO provider Single Sing-On URL (SSO URL) field on the Enable Single Sign-On page of Bitrise.
-
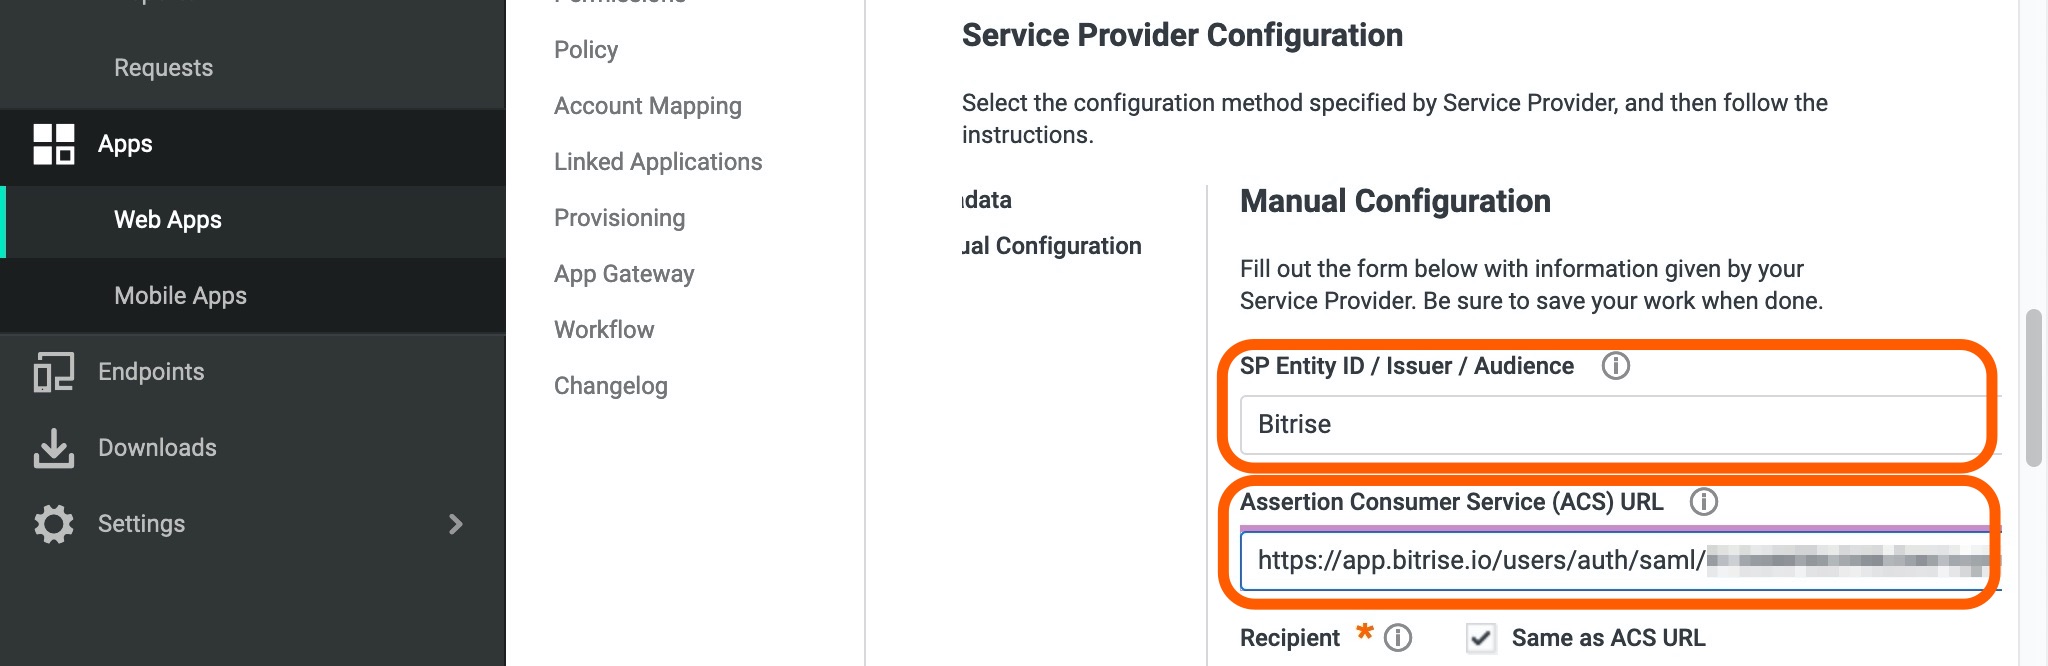
While on the Single Sign-On page of Bitrise, copy the Assertion Consumer Service URL (ACS URL) URL and click Configure SSO.
-
Now let’s head back to Idaptive! Under Service Provider Configuration click Manual Configuration. Type Bitrise in the SP Entity ID / Issuer / Audience and paste the Assertion Consumer Service URL (ACS URL) from Bitrise to the Assertion Consumer Service (ACS) URL on Idaptive.
-
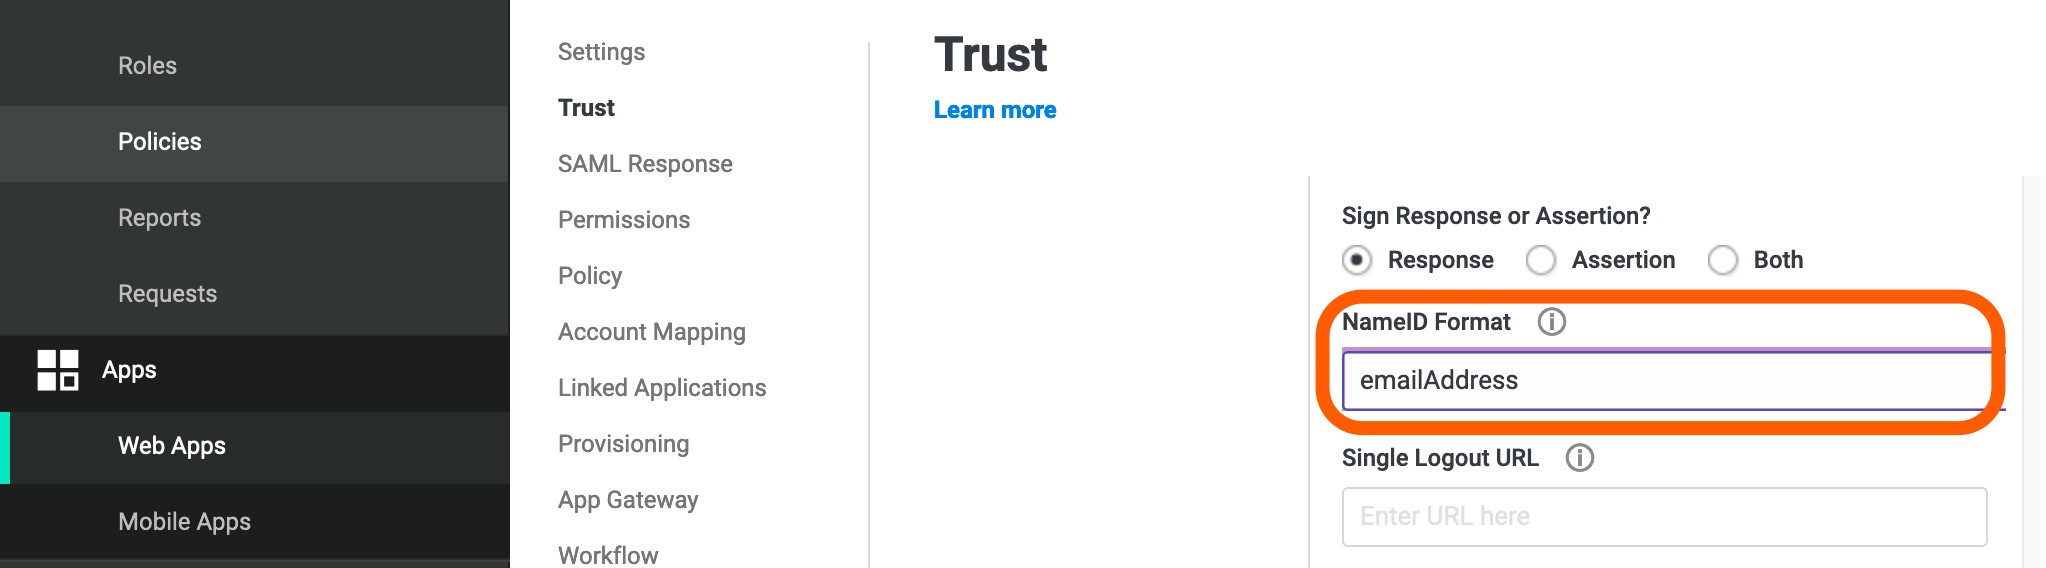
Scroll down to NameID Format and select emailAddress. Click Save.
-
Go to Permissions and click the Add button. In the Select User, Group, or Role popup, type the user name you want to add to the SAML app. Select it and hit Add. Save your changes. This will change the status of your Bitrise SAML app to Deployed.

You are now ready to use Idaptive as your SAML SSO provider on Bitrise.