TestFlight upload stage
After selecting a release candidate on Bitrise Release Management, you can upload the release candidate to TestFlight. This can be configured to happen automatically, or you can upload it manually.
After selecting a release candidate, the release process of the iOS app reaches the stages where it must access the App Store:
-
TestFlight: Upload the release candidate to TestFlight.
-
Distribute for testing: Distribute the release candidate to TestFlight testing groups.
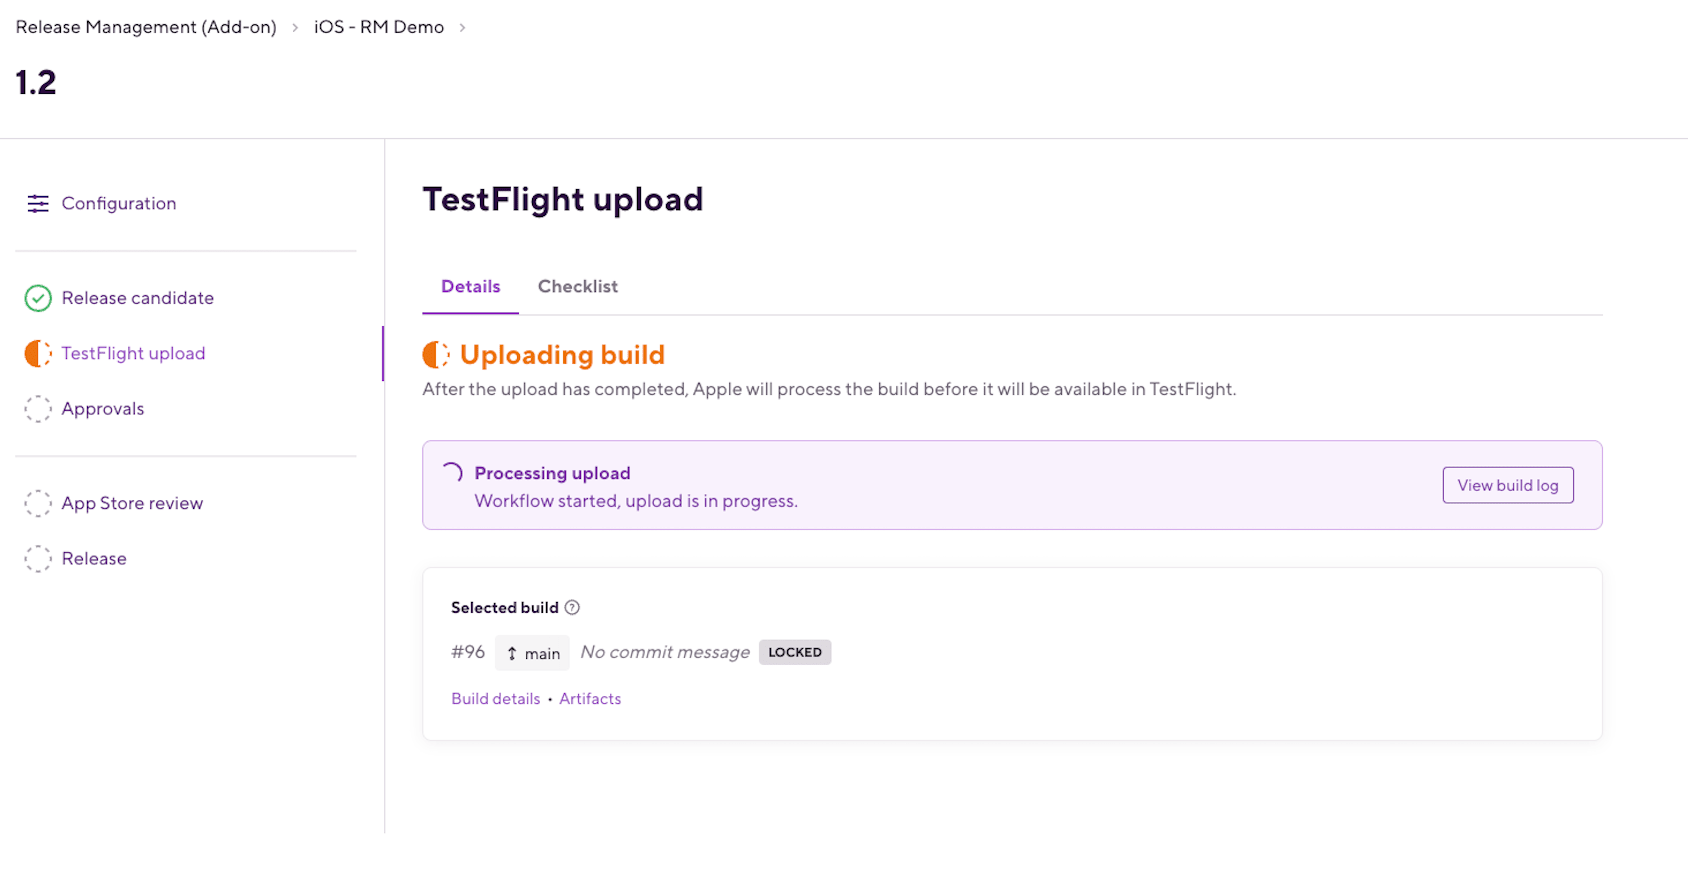
Uploading the release candidate to TestFlight
Once you selected a release candidate in Bitrise Release Management, you can continue with uploading your app to Testflight.
Automatic upload
If you set up auto-upload during the release configuration or as a release preset, this stage will be completed automatically.
To upload the selected release candidate to TestFlight (App Store Connect) manually:
-
Open your release.
-
Select TestFlight on the left navigation bar.
-
If you selected a valid release candidate, you should see Ready to upload under TestFlight. Click to start the upload.
You can see the exact build artifact that will be uploaded.
-
Wait for the upload to finish.
You can create additional tasks at the Approvals stage.
Distributing iOS release candidates for testing
Bitrise Release Management offers seamless beta testing. After uploading a release candidate to TestFlight or Google Play, you can distribute it for testing. Distribute to either Google Play testing tracks or TestFlight testing groups.
After uploading a release candidate to TestFlight, you can distribute it to TestFlight testing groups:
For TestFlight testing, you can choose between internal and external beta groups. These tester groups must be created in App Store Connect:
-
Open your release and go to the Beta testing in TestFlight section.
-
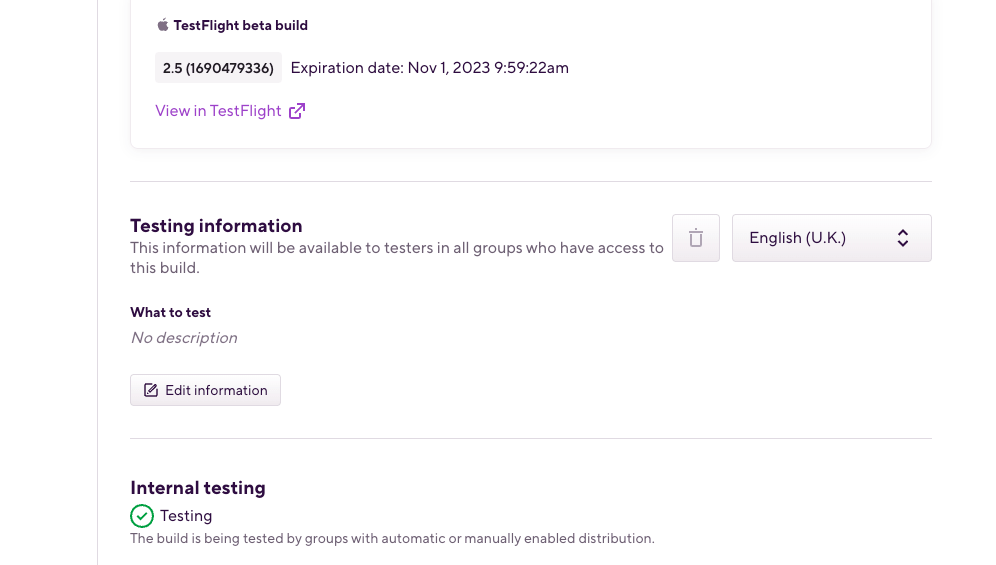
Optionally, you can fill out the What to test section for your testers. To do so, click the button.
The information will be visible on TestFlight and in the TestFlight apps. You can also localize the information: choose a language from the menu on the right to provide information for that localization.
-
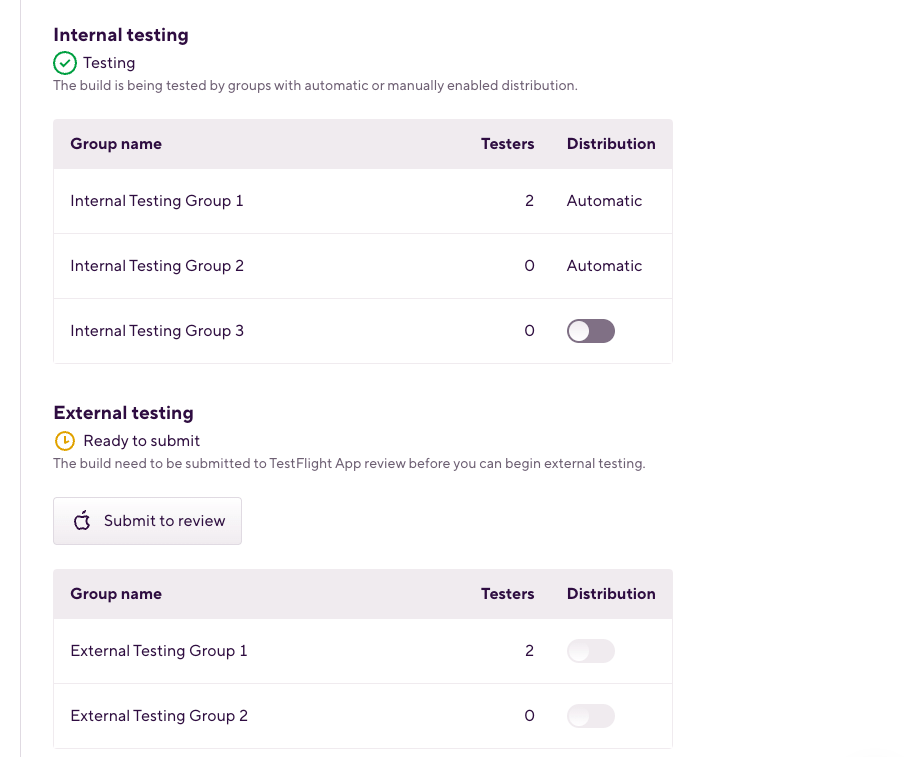
Choose testing groups, either in the Internal testing or the External testing section.
-
Internal testing groups with automatic distribution enabled will automatically have access to the release candidate. You can enable automatic distribution when creating the group in App Store Connect. If automatic distribution is not enabled, toggle Distribution for the group on to make the release candidate available.
-
For external testing groups, you must submit the release candidate for beta review: click , and in the dialog, click . External testing groups will not have access to the release candidate automatically: after the beta review submission, toggle Distribution for the group on to make the release candidate available. Optionally, you can check Automatically notify testers in the dialog: this option means external testers get an email when a new build is ready for testing.
-