Selecting a release candidate
Bitrise Release Management asks you to specify a release branch, and select a Workflow that generated an .ipa file for iOS apps, or an .aab file for Android apps in the release candidate stage.
In the release candidate stage you select an installable artifact that will be used during the release process. You have two possible sources of installable artifacts:
-
A Bitrise CI build. If you use this source, you select a branch and a Workflow and then select an artifact generated by a build using those. By default, the artifact of the latest build is used but you can change this.
-
Upload an installable artifact via API. This is particularly useful if you use a different CI service instead of Bitrise.
To select a release candidate:
-
Open your release.
-
Select Release candidate on the left navigation bar.
-
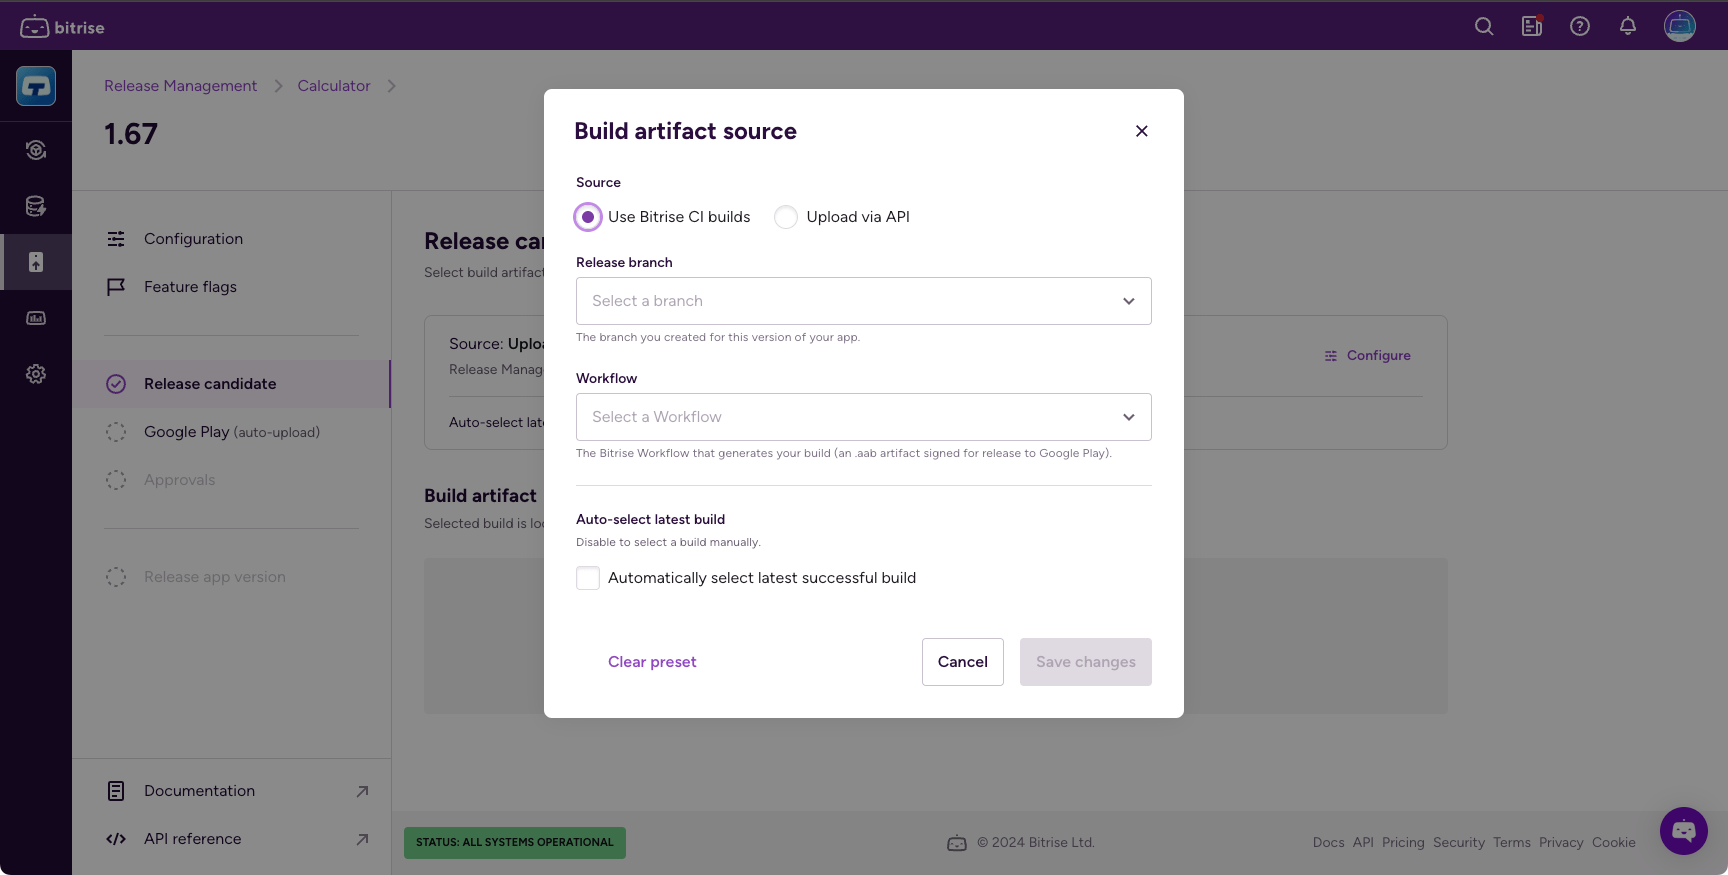
Configure the source of the build artifact: under the Configuration section, click .
This will open up the Build artifact source dialog.

-
Select from one of two options:
-
Use Bitrise CI builds: Select a branch and a Workflow to use artifacts generated by a Bitrise CI build.
-
Upload via API: To be able to select an artifact from this source, upload one using the API.
-
-
Check the Automatically select checkbox to use either the latest generated artifact or the latest file uploaded via the API.
-
Click .
-
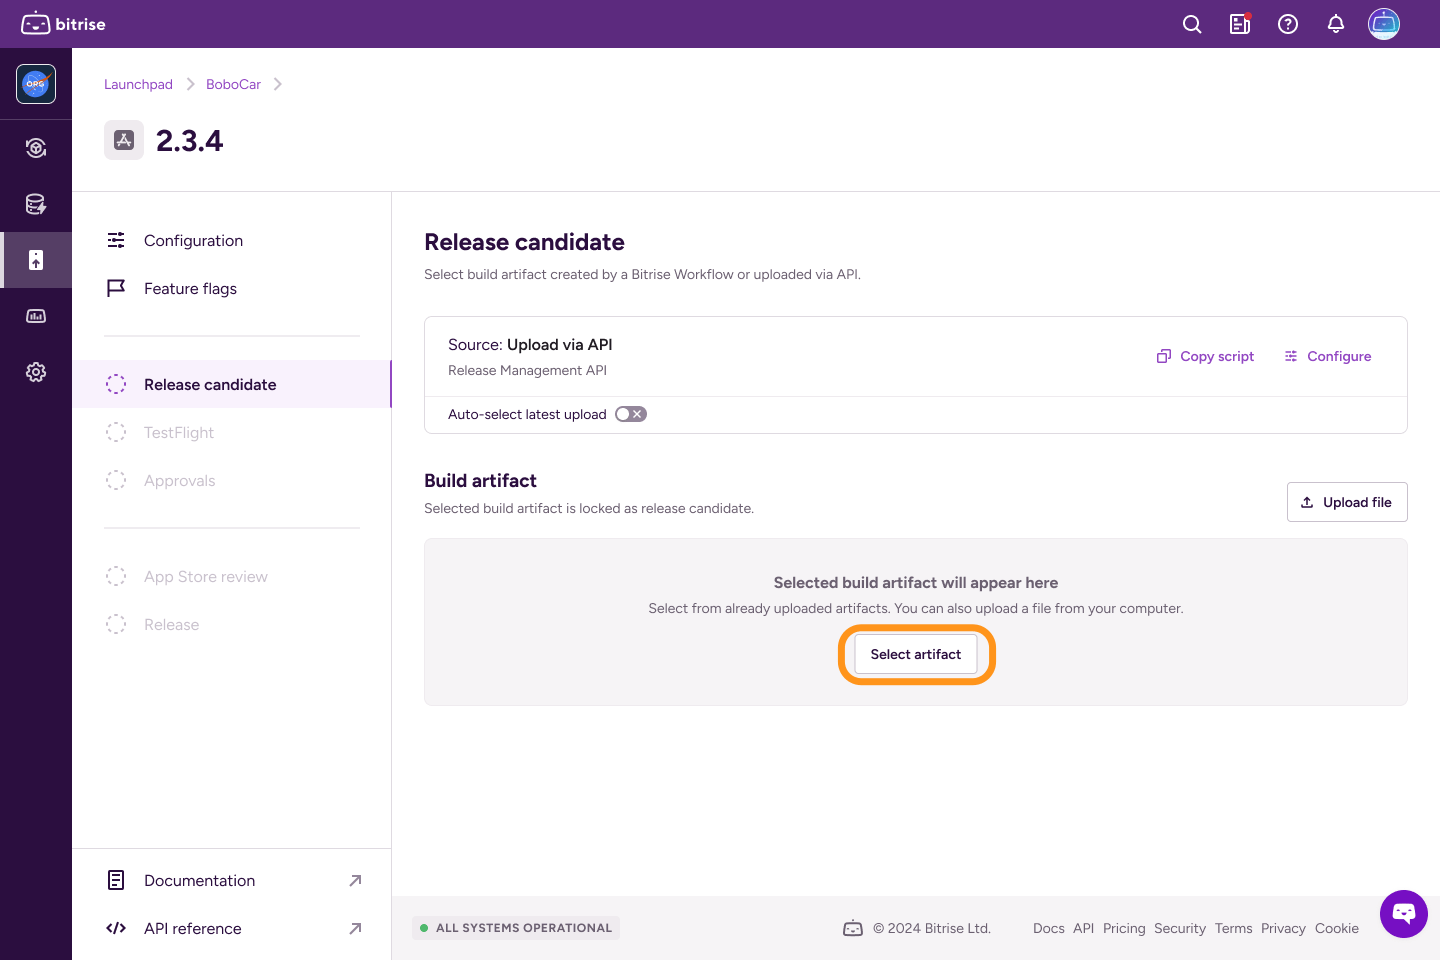
If you didn't check automatic selection, go to the Build artifact section and click .

-
Select a build artifact in the dialog and click Select artifact.
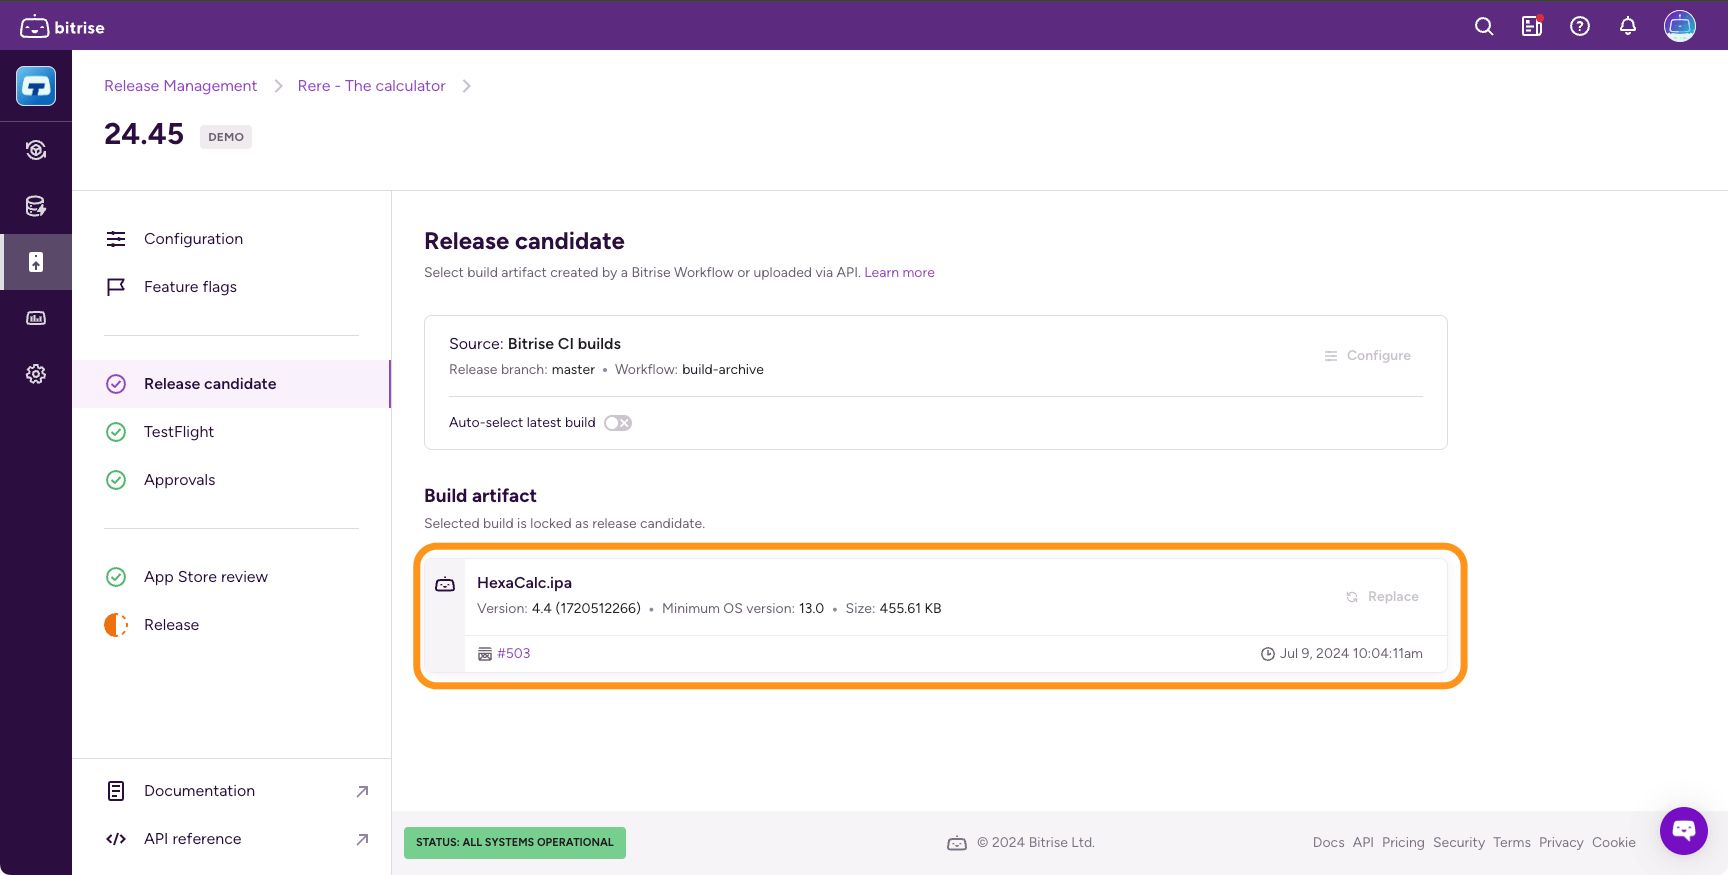
Once you selected a release candidate, you will see the details of the artifact that will be used under Build artifact:

You can proceed to:
-
The TestFlight upload stage for iOS apps.
-
The Google Play upload stage for Android apps.