Adding a new project
Adding a project to Bitrise means setting up access to your repository so that you can run builds. Our project scanner determines the platform type and generates default Workflows to build and deploy your app.
Adding a project to Bitrise means one of two things:
-
Adding a new project with a CI configuration, connecting a Git repository to the project.
During the process, we also run our project scanner that detects the platform type of the project - for example, iOS - and generate default Workflows with all the necessary Steps to build and deploy an app.
-
Adding a new project with a new Release Management app: Adding a new app.
Each Bitrise project is owned by a workspace.
The project scanner
Supporting a platform/framework means that our project scanner can detect the type of the project and set up a basic Bitrise configuration based on the type. You can add any other project, too, regardless of how it's built but you'll have to configure it manually.
In this guide, we'll go through how to add a new project to Bitrise.
-
On the Dashboard, click the button.
-
Select Configure Bitrise CI.
Release Management
You can select Add your app to proceed with adding a new app to Release Management. From this point, you can follow this guide: Adding a new app
-
Select the Workspace that will own the project.

-
Set the project to private or public. This settings can't be changed later.
-
Private projects are only accessible to the Workspace members. They need to authenticate themselves to view the project's details.
-
Public projects expose their configuration file and build logs to everyone who has the link.
-
-
Connect a repository. You can:
-
Connect your GitHub account or organization to Bitrise via the GitHub App integration and select an available repository. We strongly recommend this method if you are using a GitHub repository.
-
Connect your Git provider account to Bitrise via an OAuth application and select an available repository.
-
Enter a repository URL manually.

-
-
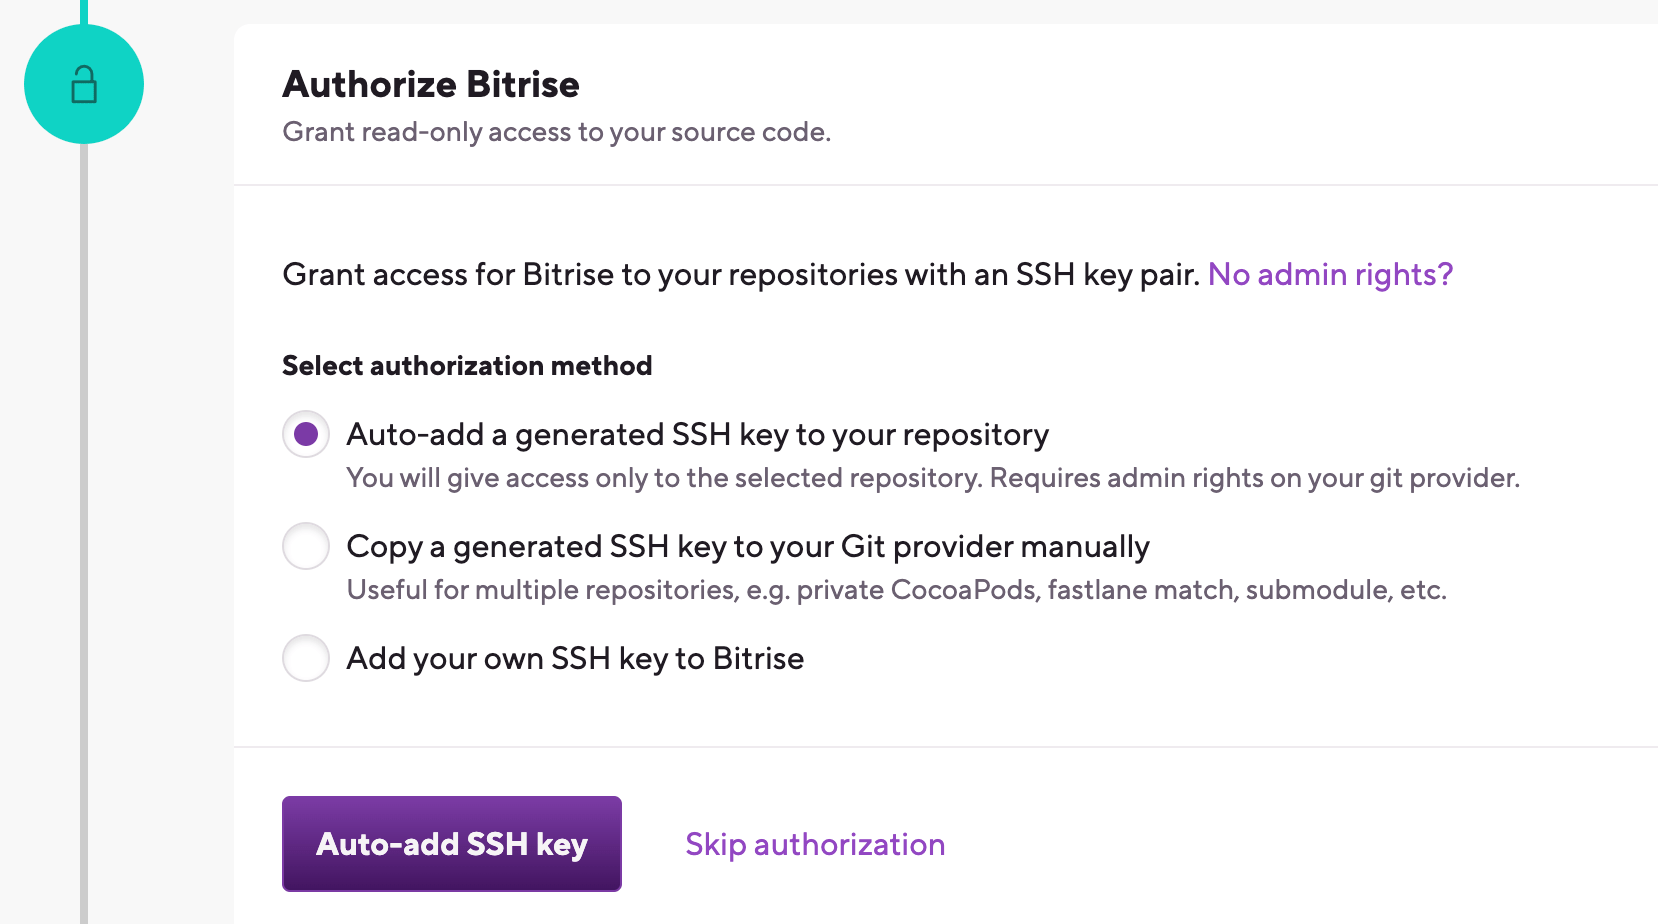
Configure authorization to allow Bitrise to access the repository. There are multiple ways to do so, depending on the type of your project:
-
Public projects don't require authorization.
-
Private projects that are accessed via the GitHub App integration don't need additional authorization.
-
Private projects with SSH URLs, accessed via OAuth applications, require configuring an SSH key. Bitrise can do this automatically or you can create and register your own SSH key pair.
-
Private projects with HTTPS URLs, accessed via OAuth applications, require HTTPS authorization with a personal access token. We recommend using a token with only read access.
-
-
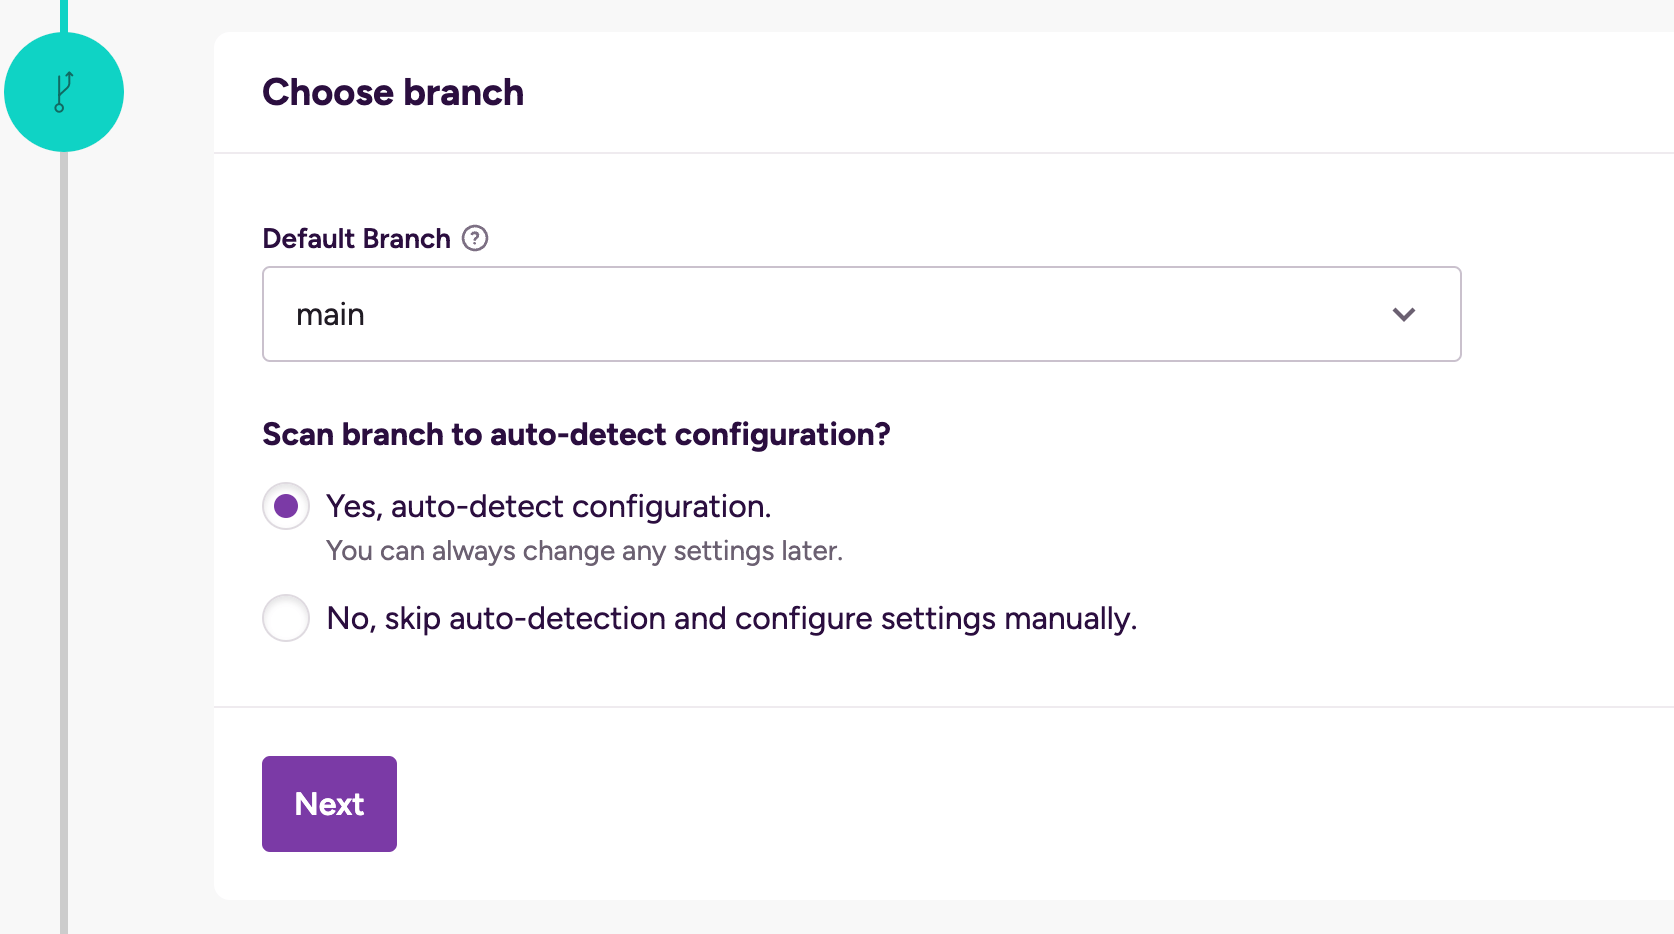
Set the default branch of the project and decide if you want our project scanner to scan the code on the branch.
-
If your repository is connected, you can select an available branch from a dropdown menu.
-
If you entered a repository URL manually, you need to type a valid branch name.
Repository URL
You will be able to change your project's repository URL later. You can also connect or disconnect your account to Git provider services at any time.
-
-
Configure the project settings. You can either modify and confirm the automatically generated settings, or create a configuration manually.
The configuration sets a stack, machine type, and a project root directory, among other things. The exact parameters to configure depends on the project type.
-
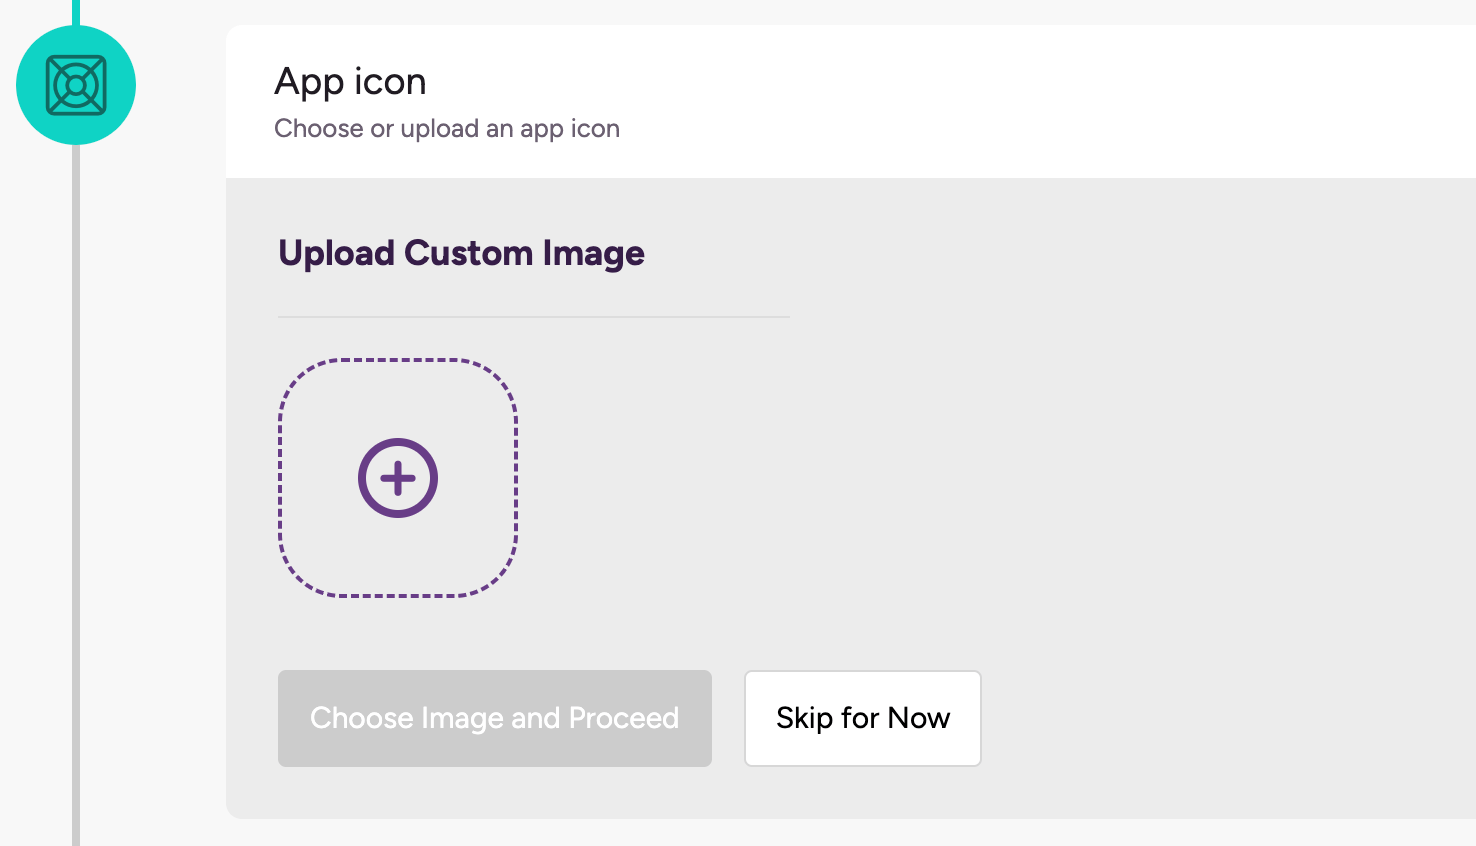
Select a project icon. You can skip this and add an icon later.
-
For apps with OAuth connections, add a webhook. A webhook is required to automatically trigger builds.
Projects with the GitHub App integration don't need a webhook.
-
Once you are done, click to go to the newly added project's home page. From there, you can start editing your Workflows and run builds.