Setting up AD FS SSO for Bitrise
Add SAML SSO to your Bitrise Workspace using Microsoft Active Directory Federation Services.
This guide provides step-by-step instructions on setting up SAML SSO using Microsoft Active Directory Federation Services (AD FS).
SAML SSO restrictions
SAML SSO is only available for a Workspace with our paid plans.
Since the SAML SSO feature is tied to the above plans, if you decide to downgrade to a Hobby plan or remove the add-on, you will lose this feature. All Workspace members will receive an email about the downgrade and you’ll have two weeks to re-upgrade if you wish to use SAML SSO in your Workspace again.
Before connecting SAML SSO to your Workspace:
-
Make sure the AD FS administrator is at hand during the SAML SSO configuration process.
-
Be aware that only the Workspace owner can set up SAML SSO to a Bitrise Workspace.
-
Your account on Bitrise has a Workspace with the Velocity or Enterprise plan.
In this tutorial we will be jumping back and forth between Bitrise and AD FS so it is recommended that both tools are available during this process.
To configure SAML SSO with AD FS, you'll need to:
Adding the identity provider sign-on URL
-
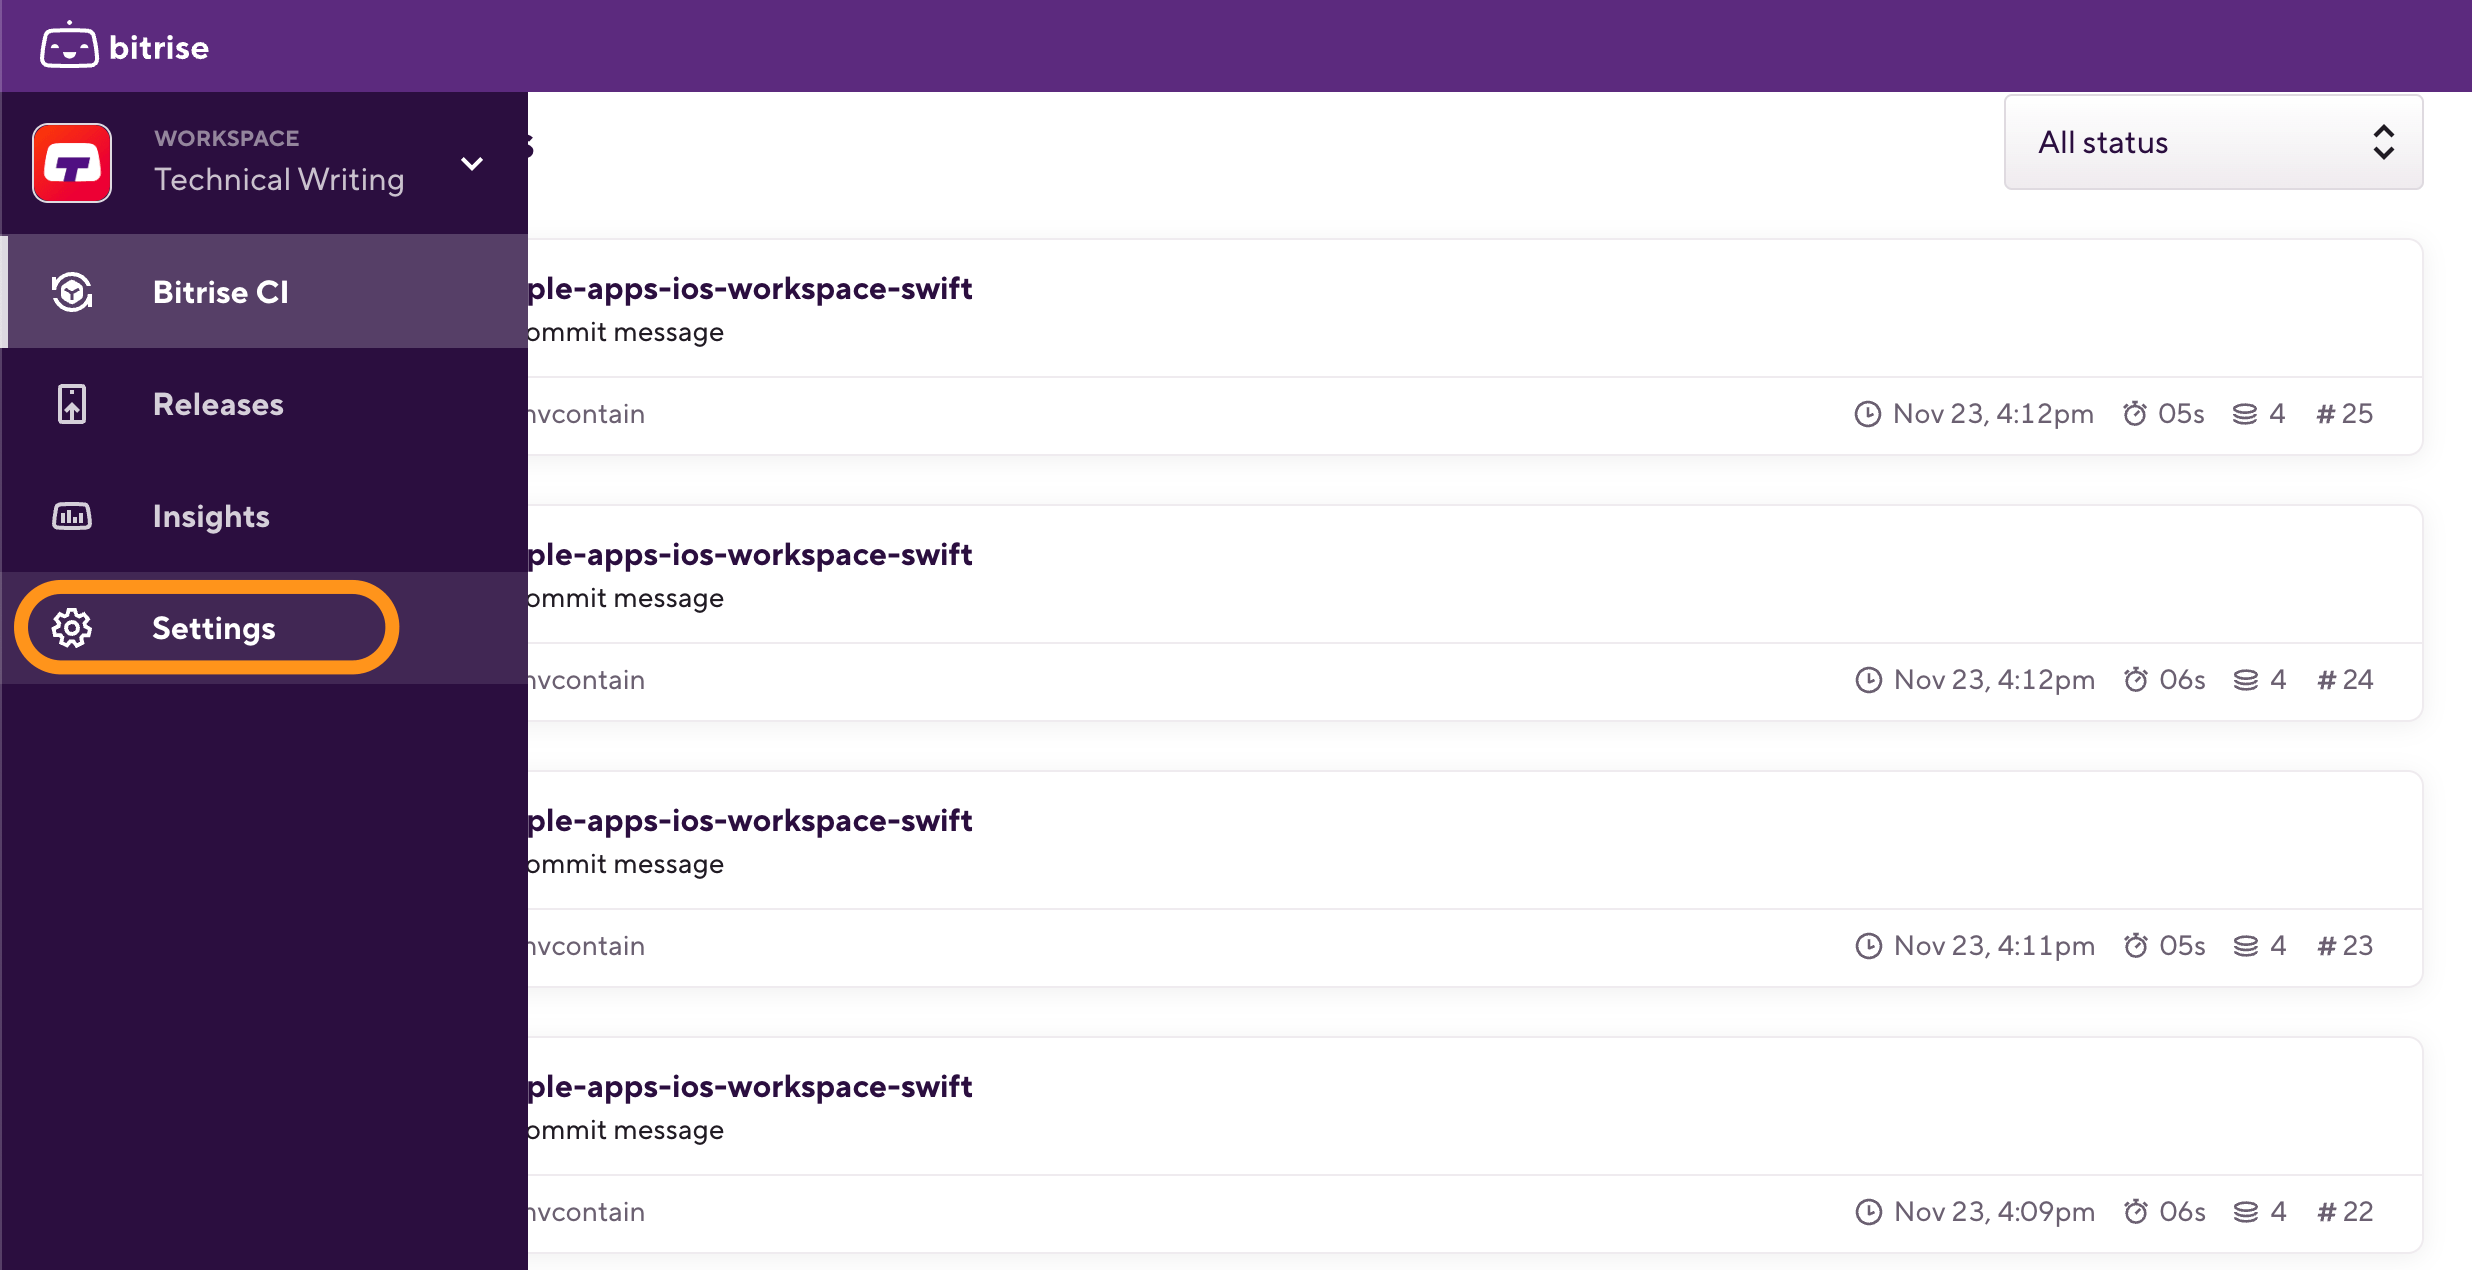
Log in to Bitrise and hover over the left navigation bar.
-
Make sure you have the right workspace selected in the Workspace menu.
-
Select Settings.
-
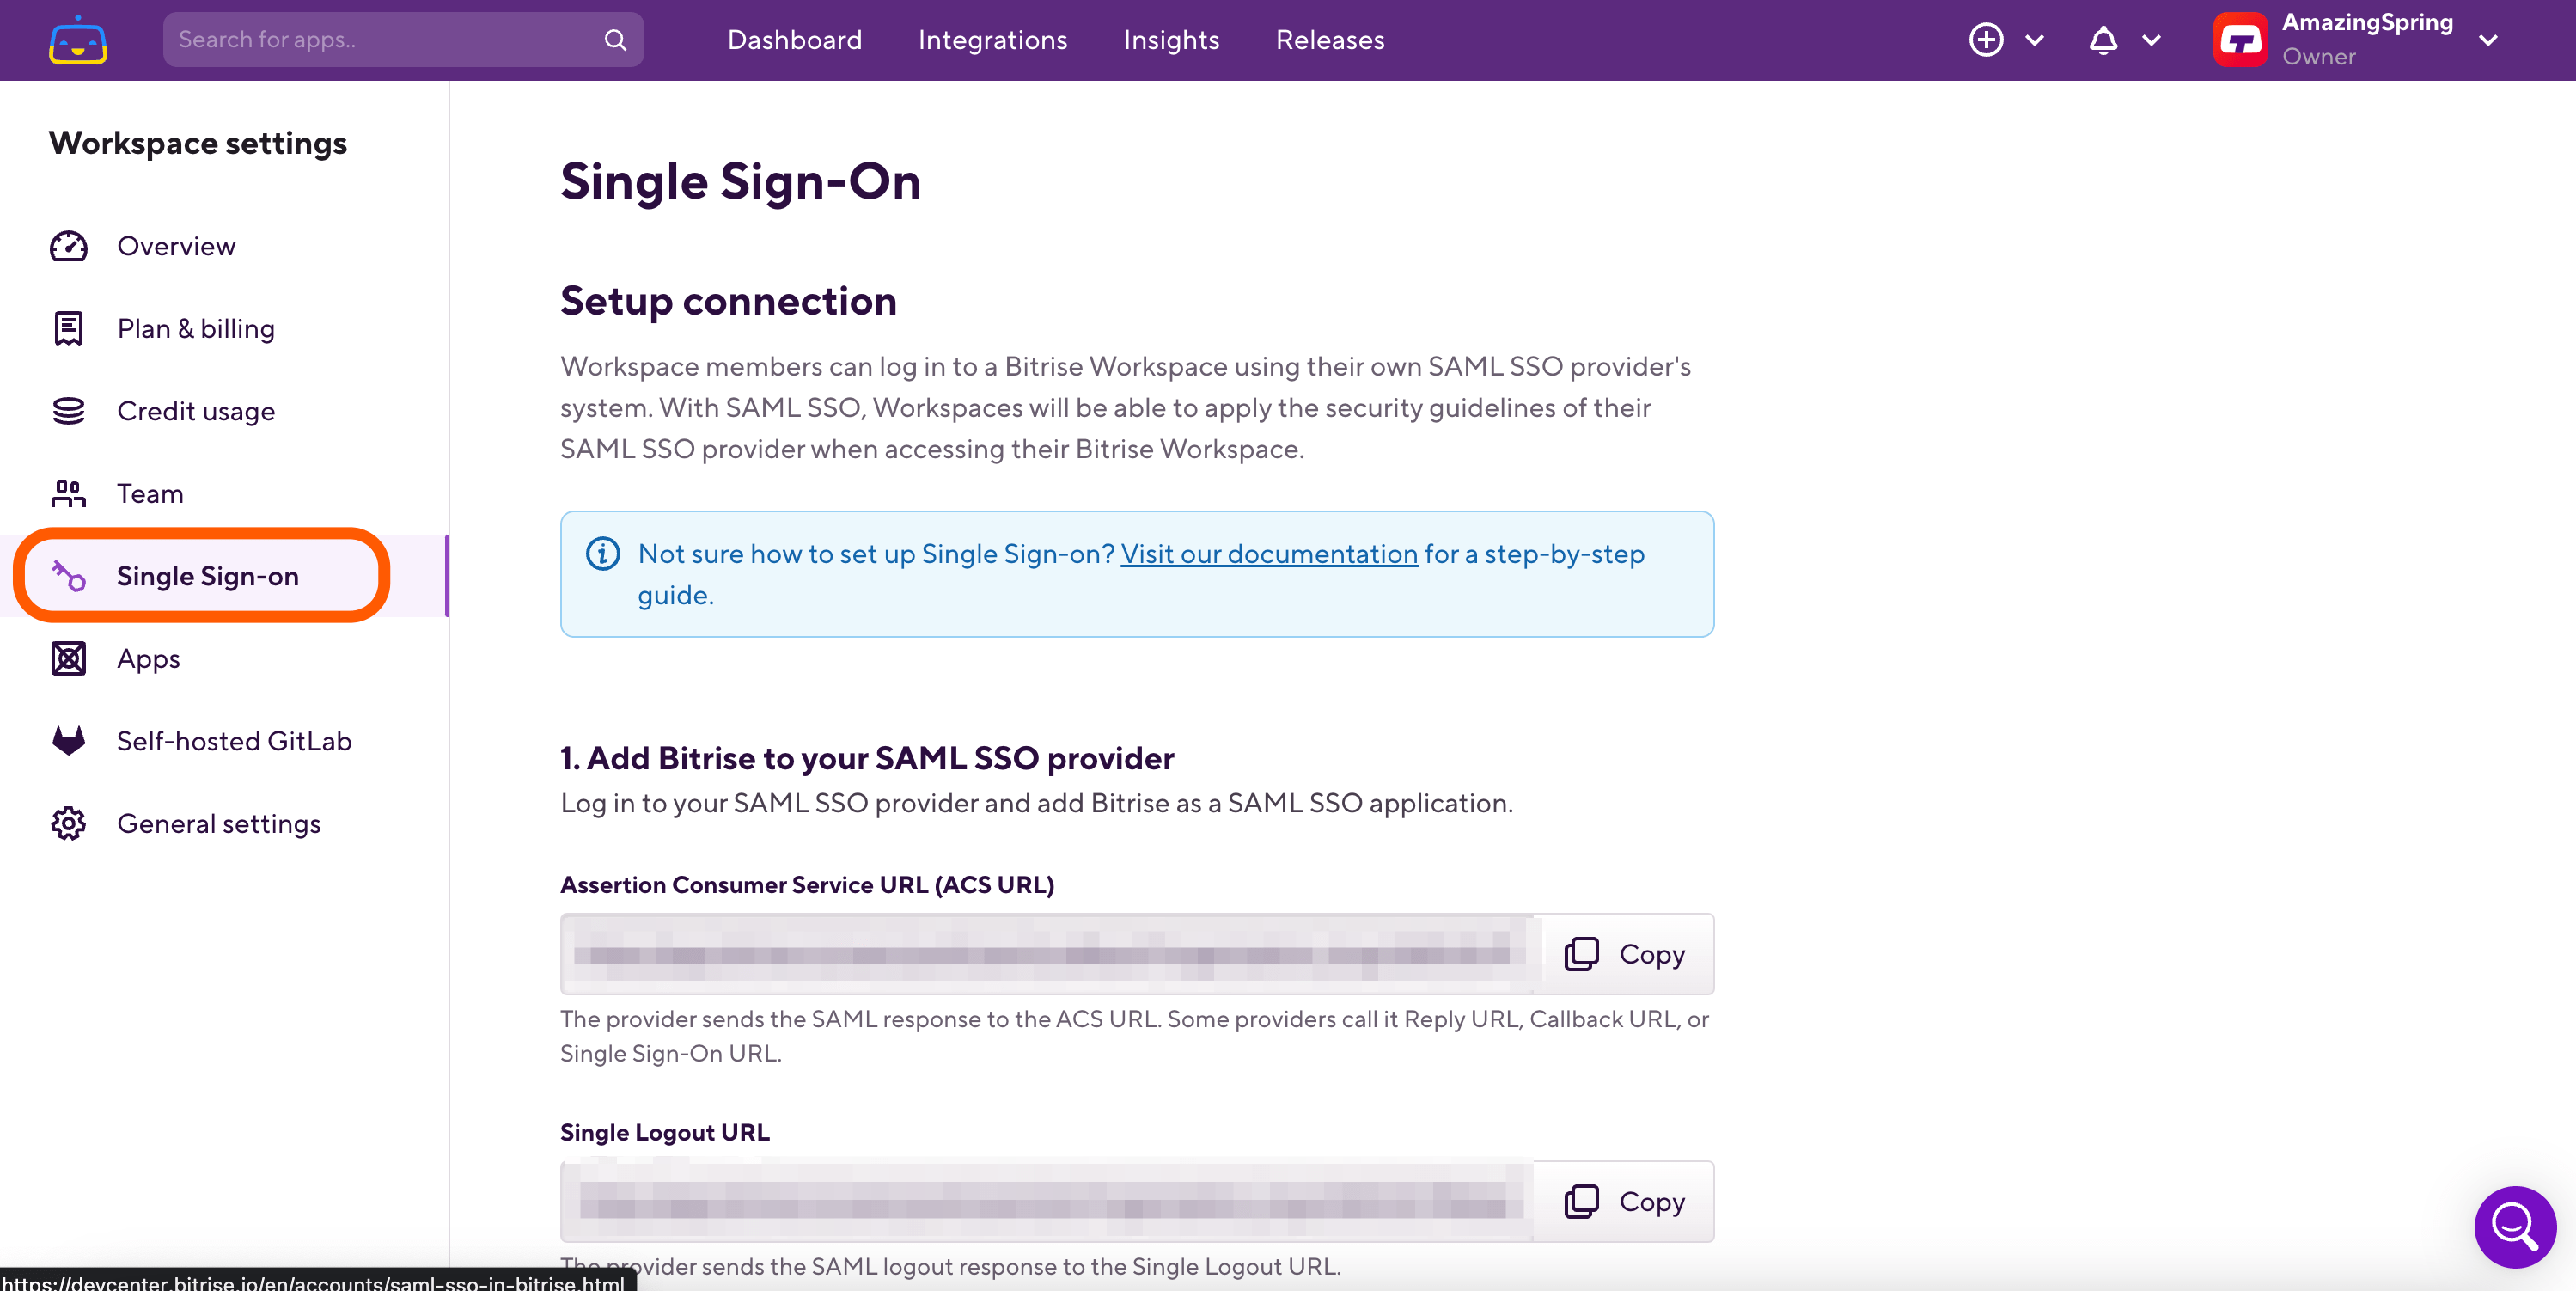
Go to the Single Sign-on tab.
-
Add the Identity provider sign-on URL from AD FS in the SAML SSO provider Single Sign-On URL (SSO URL) field.
For example, a valid value is
https://<AD FS URL>.com/adfs/ls.
Exporting an AD FS certificate
-
You have to add a certificate generated by AD FS to the SAML SSO provider certificate field of the Single Sign-On page on Bitrise. If you’ve already created a certificate on AD FS, you can export it in PEM format from the AD FS server. If you haven’t created one yet, follow the instructions: Obtain and Configure TS and TD Certificates for AD FS.
-
In Server Manager, click Tools, and select AD FS Management.
-
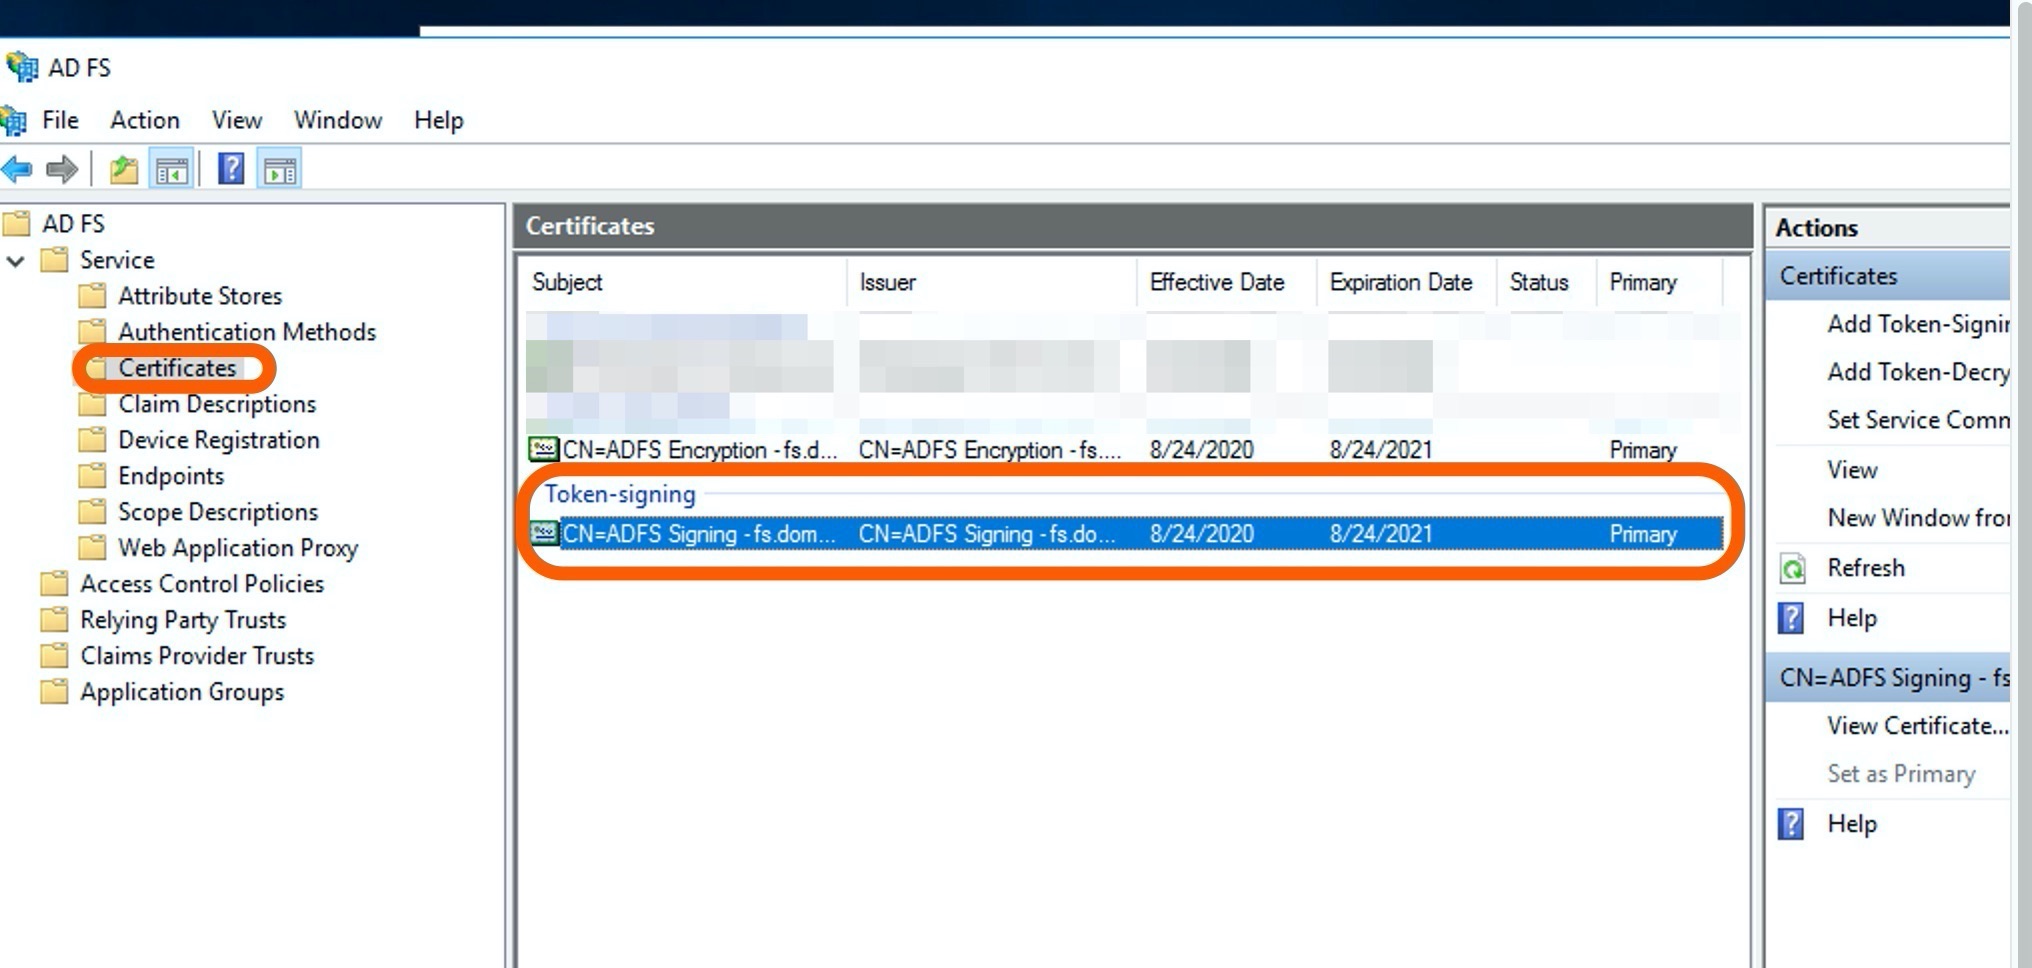
Select the Certificates folder on the left menu pane.
-
Click a certificate under Token-signing. This brings up the Certificates window.
-
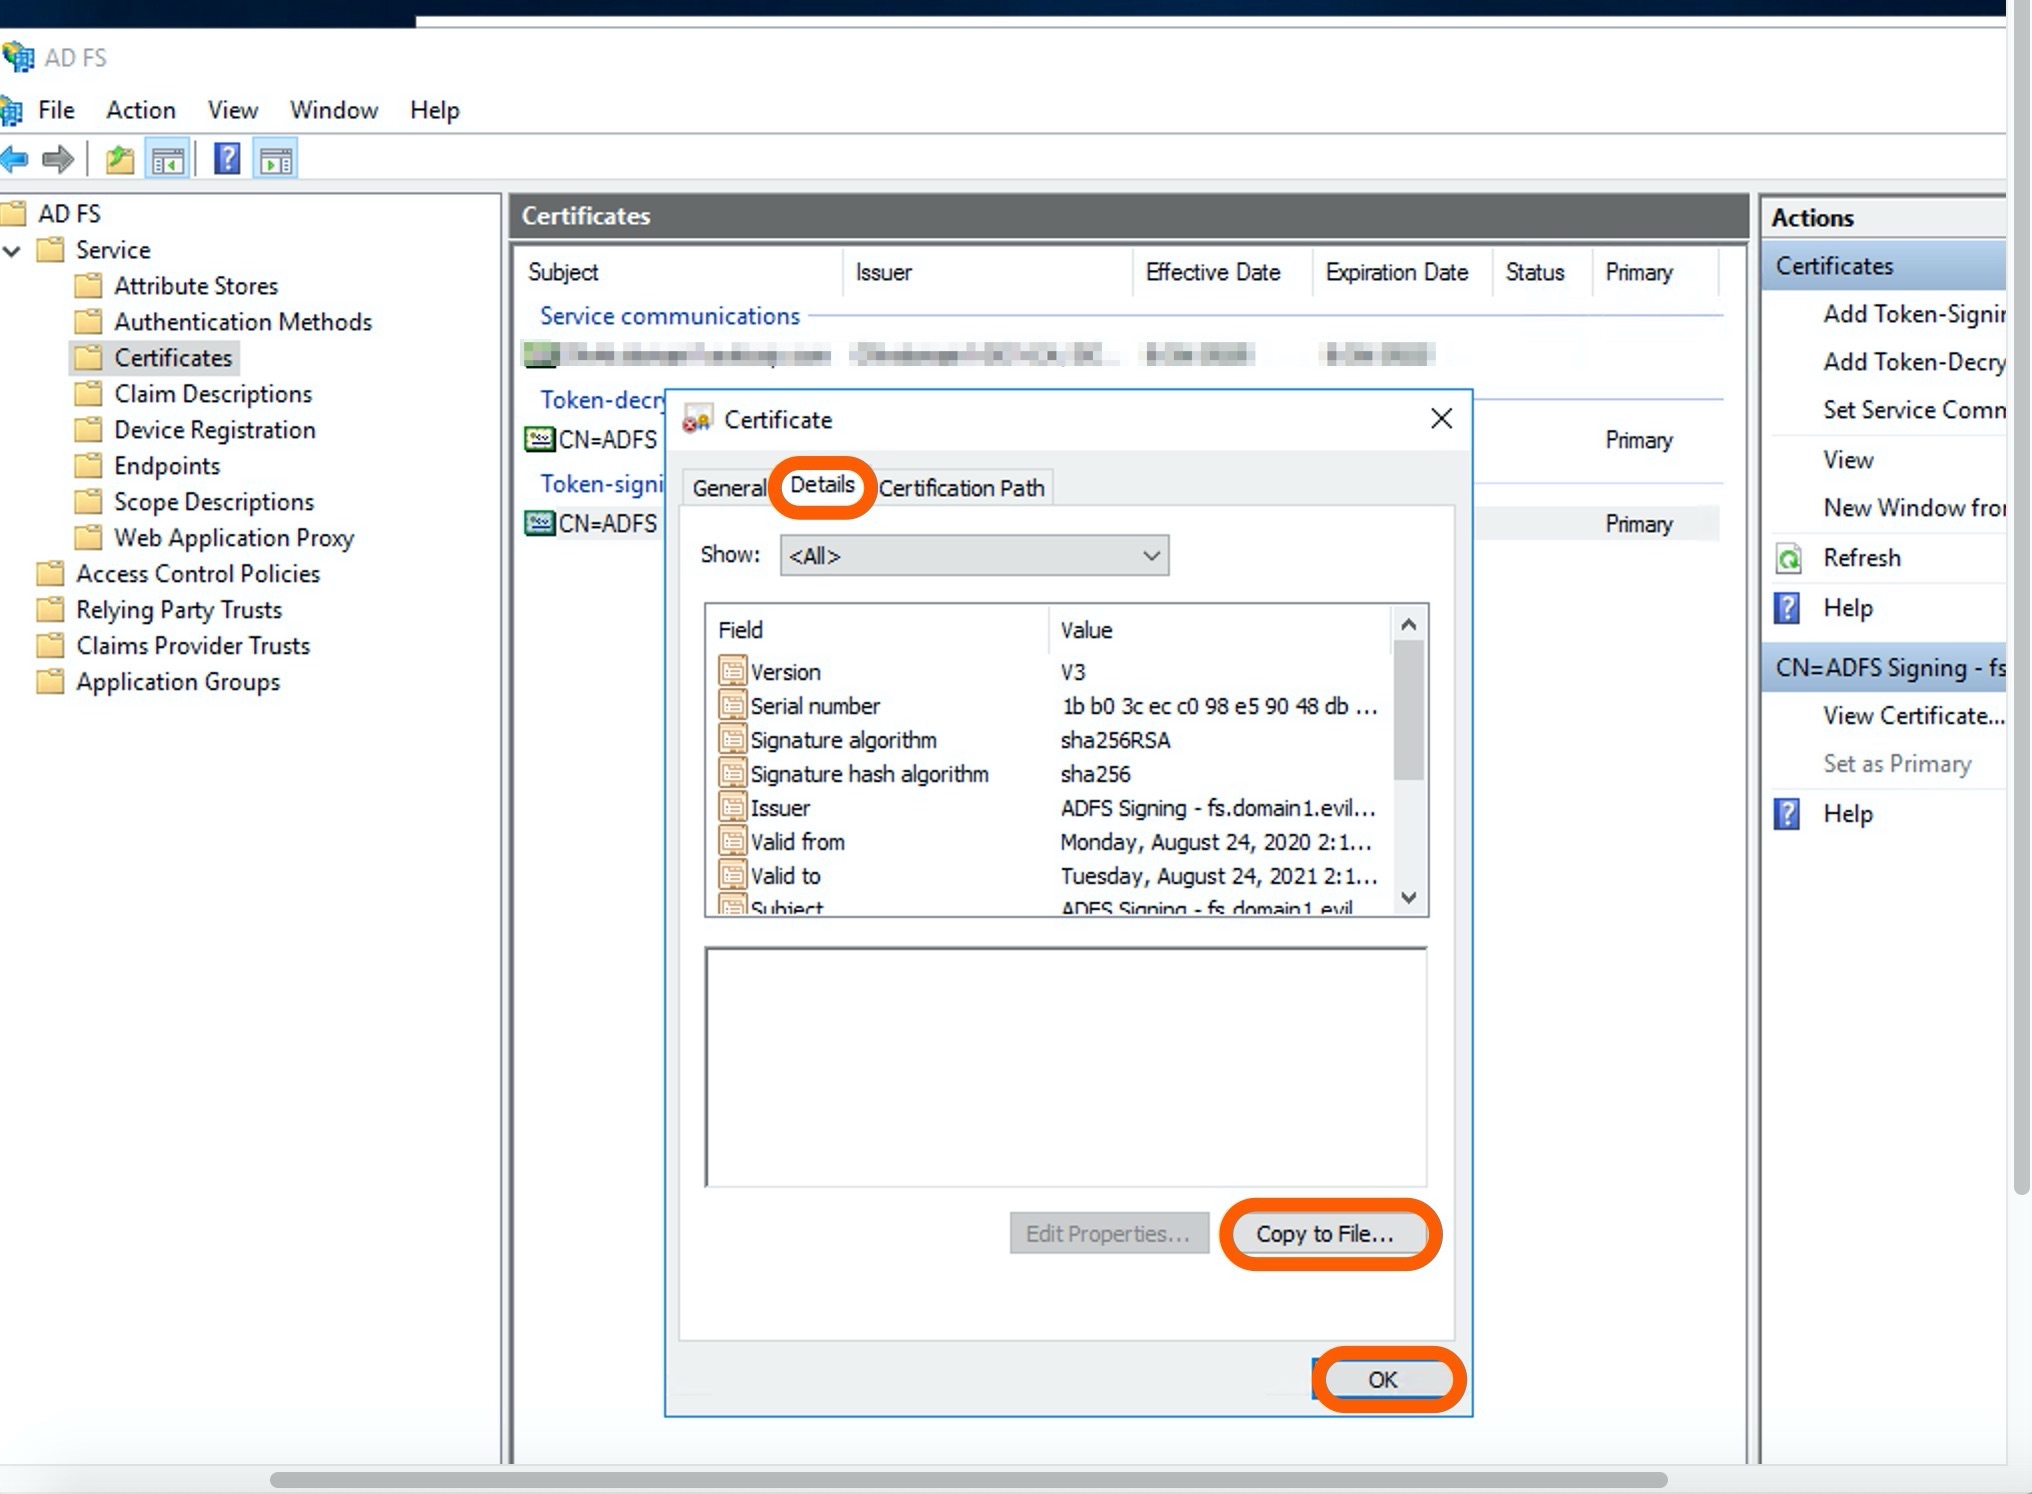
Click Details tab on the Certificate page.
-
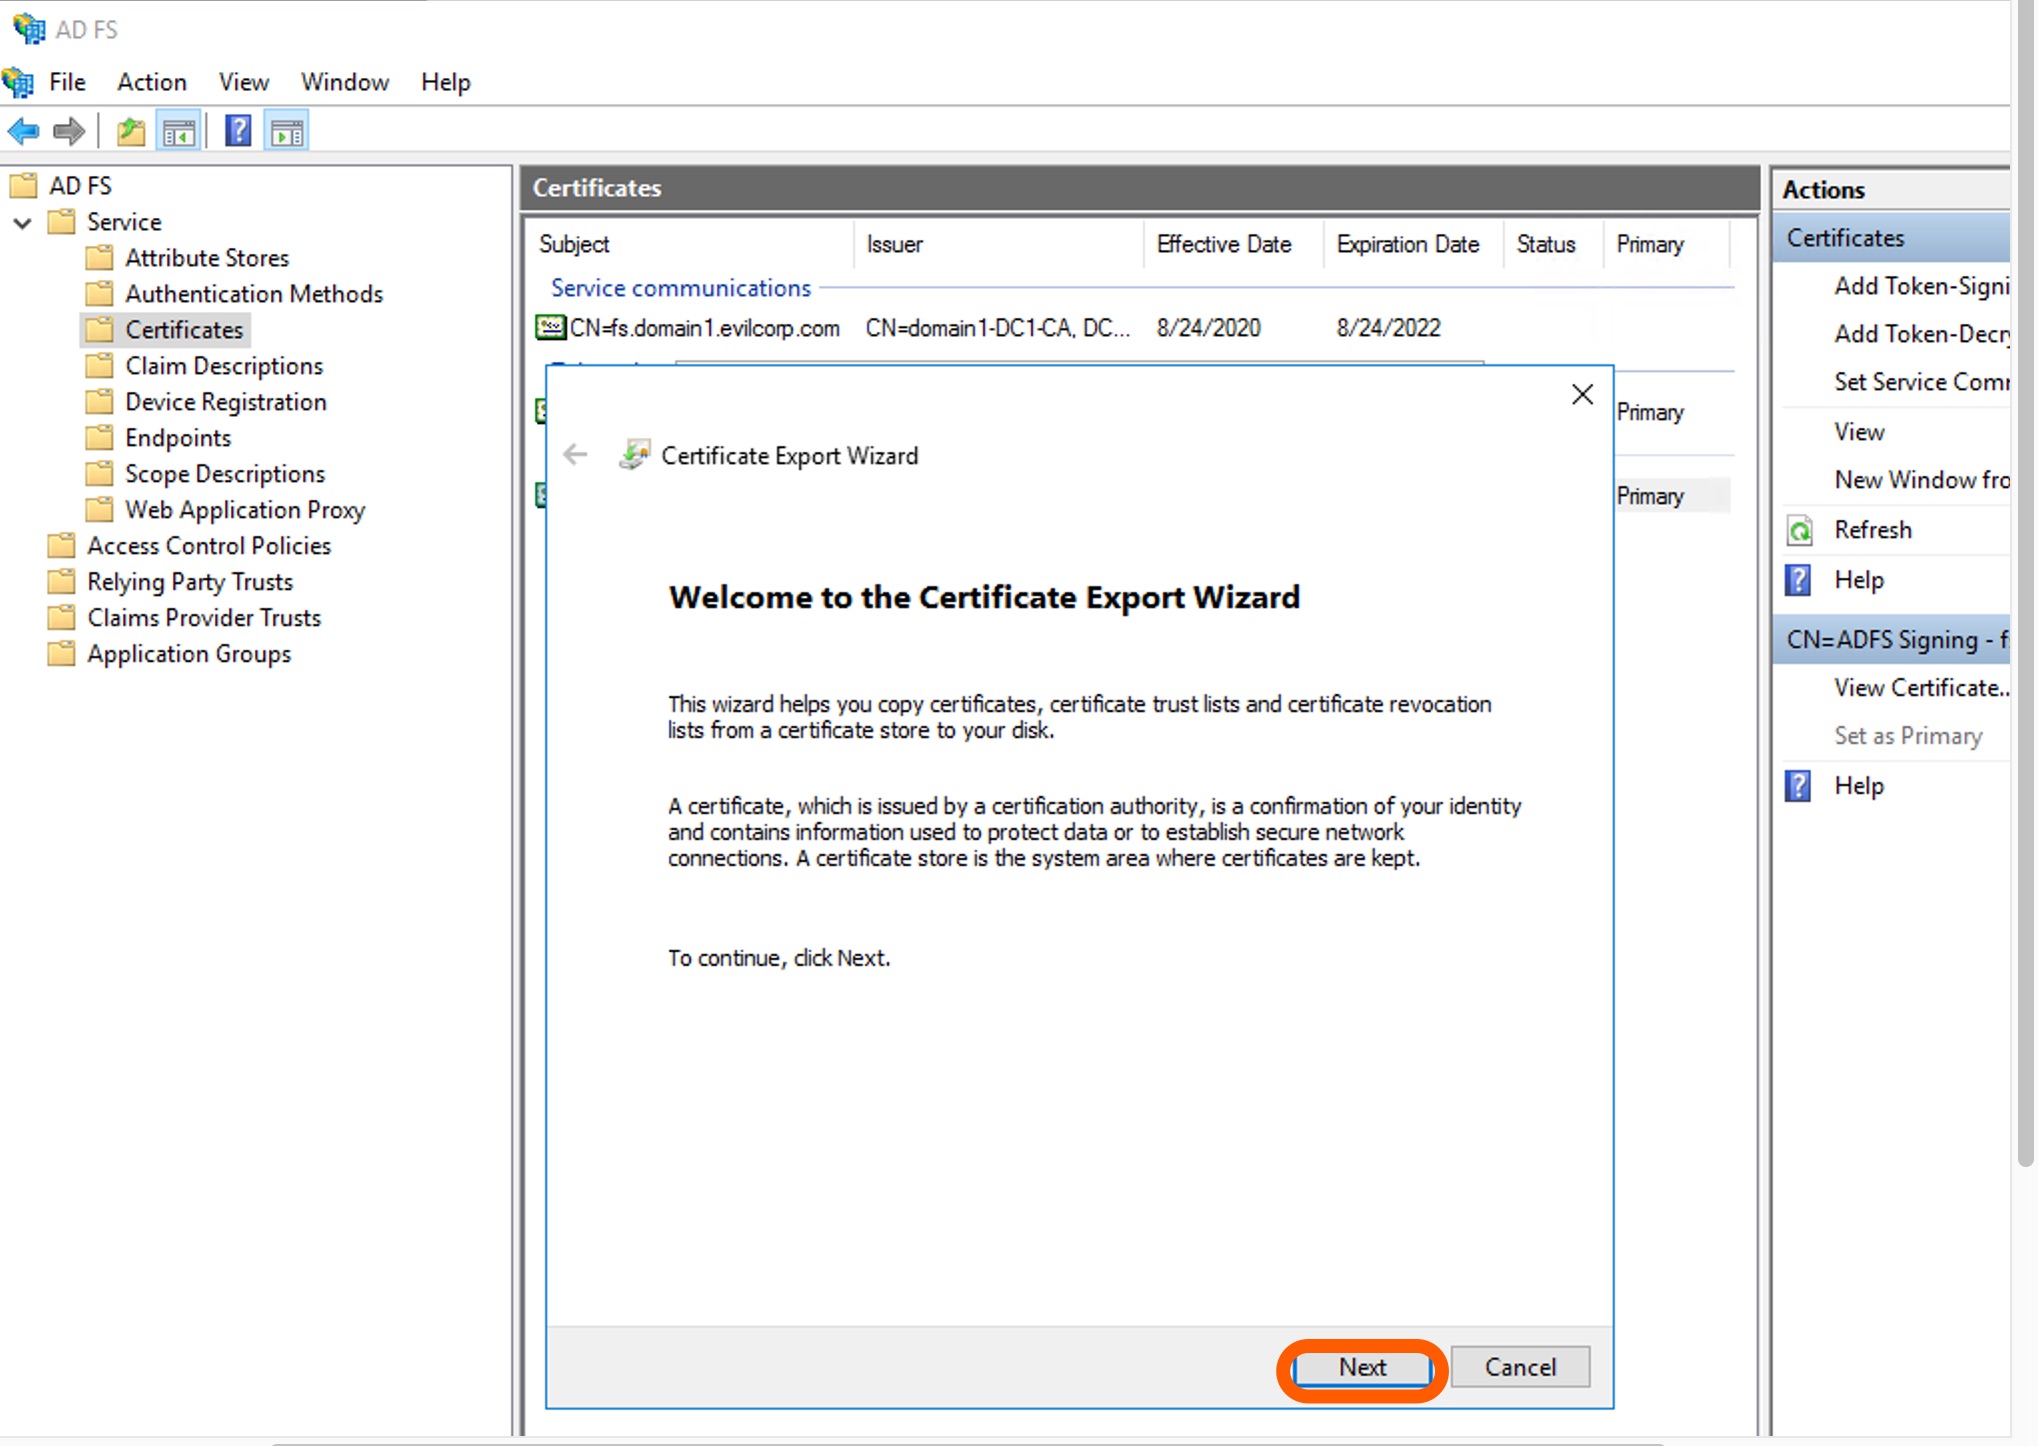
Hit Next on the Certificate Export Wizard window.
-
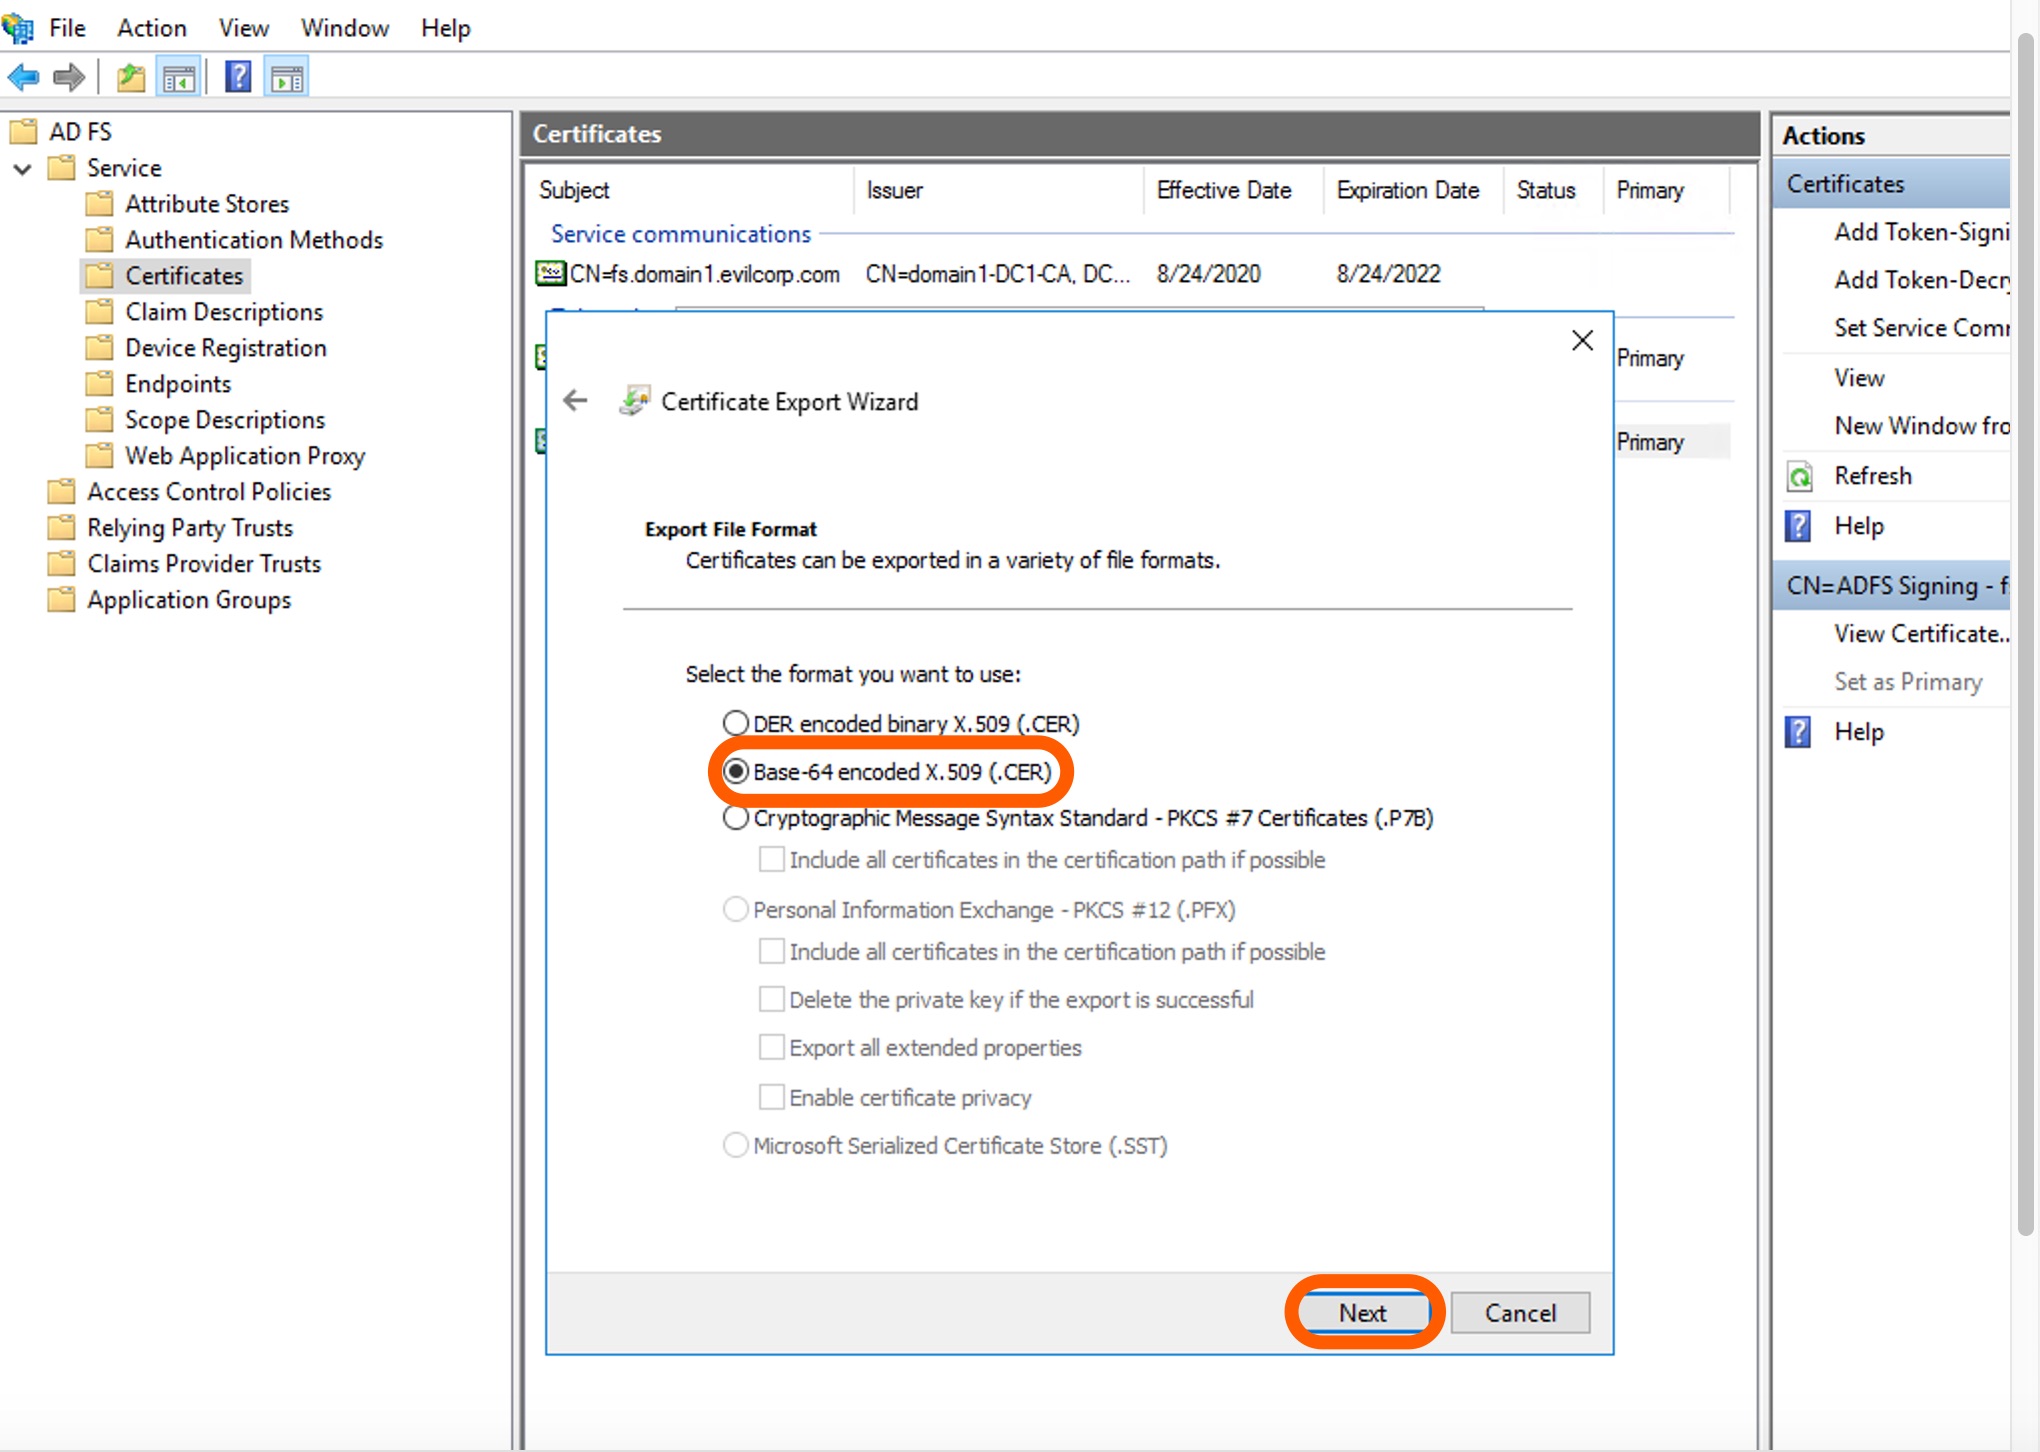
Select the Base-64 encoded X.509 (.CER) the export file format. Click Next.
-
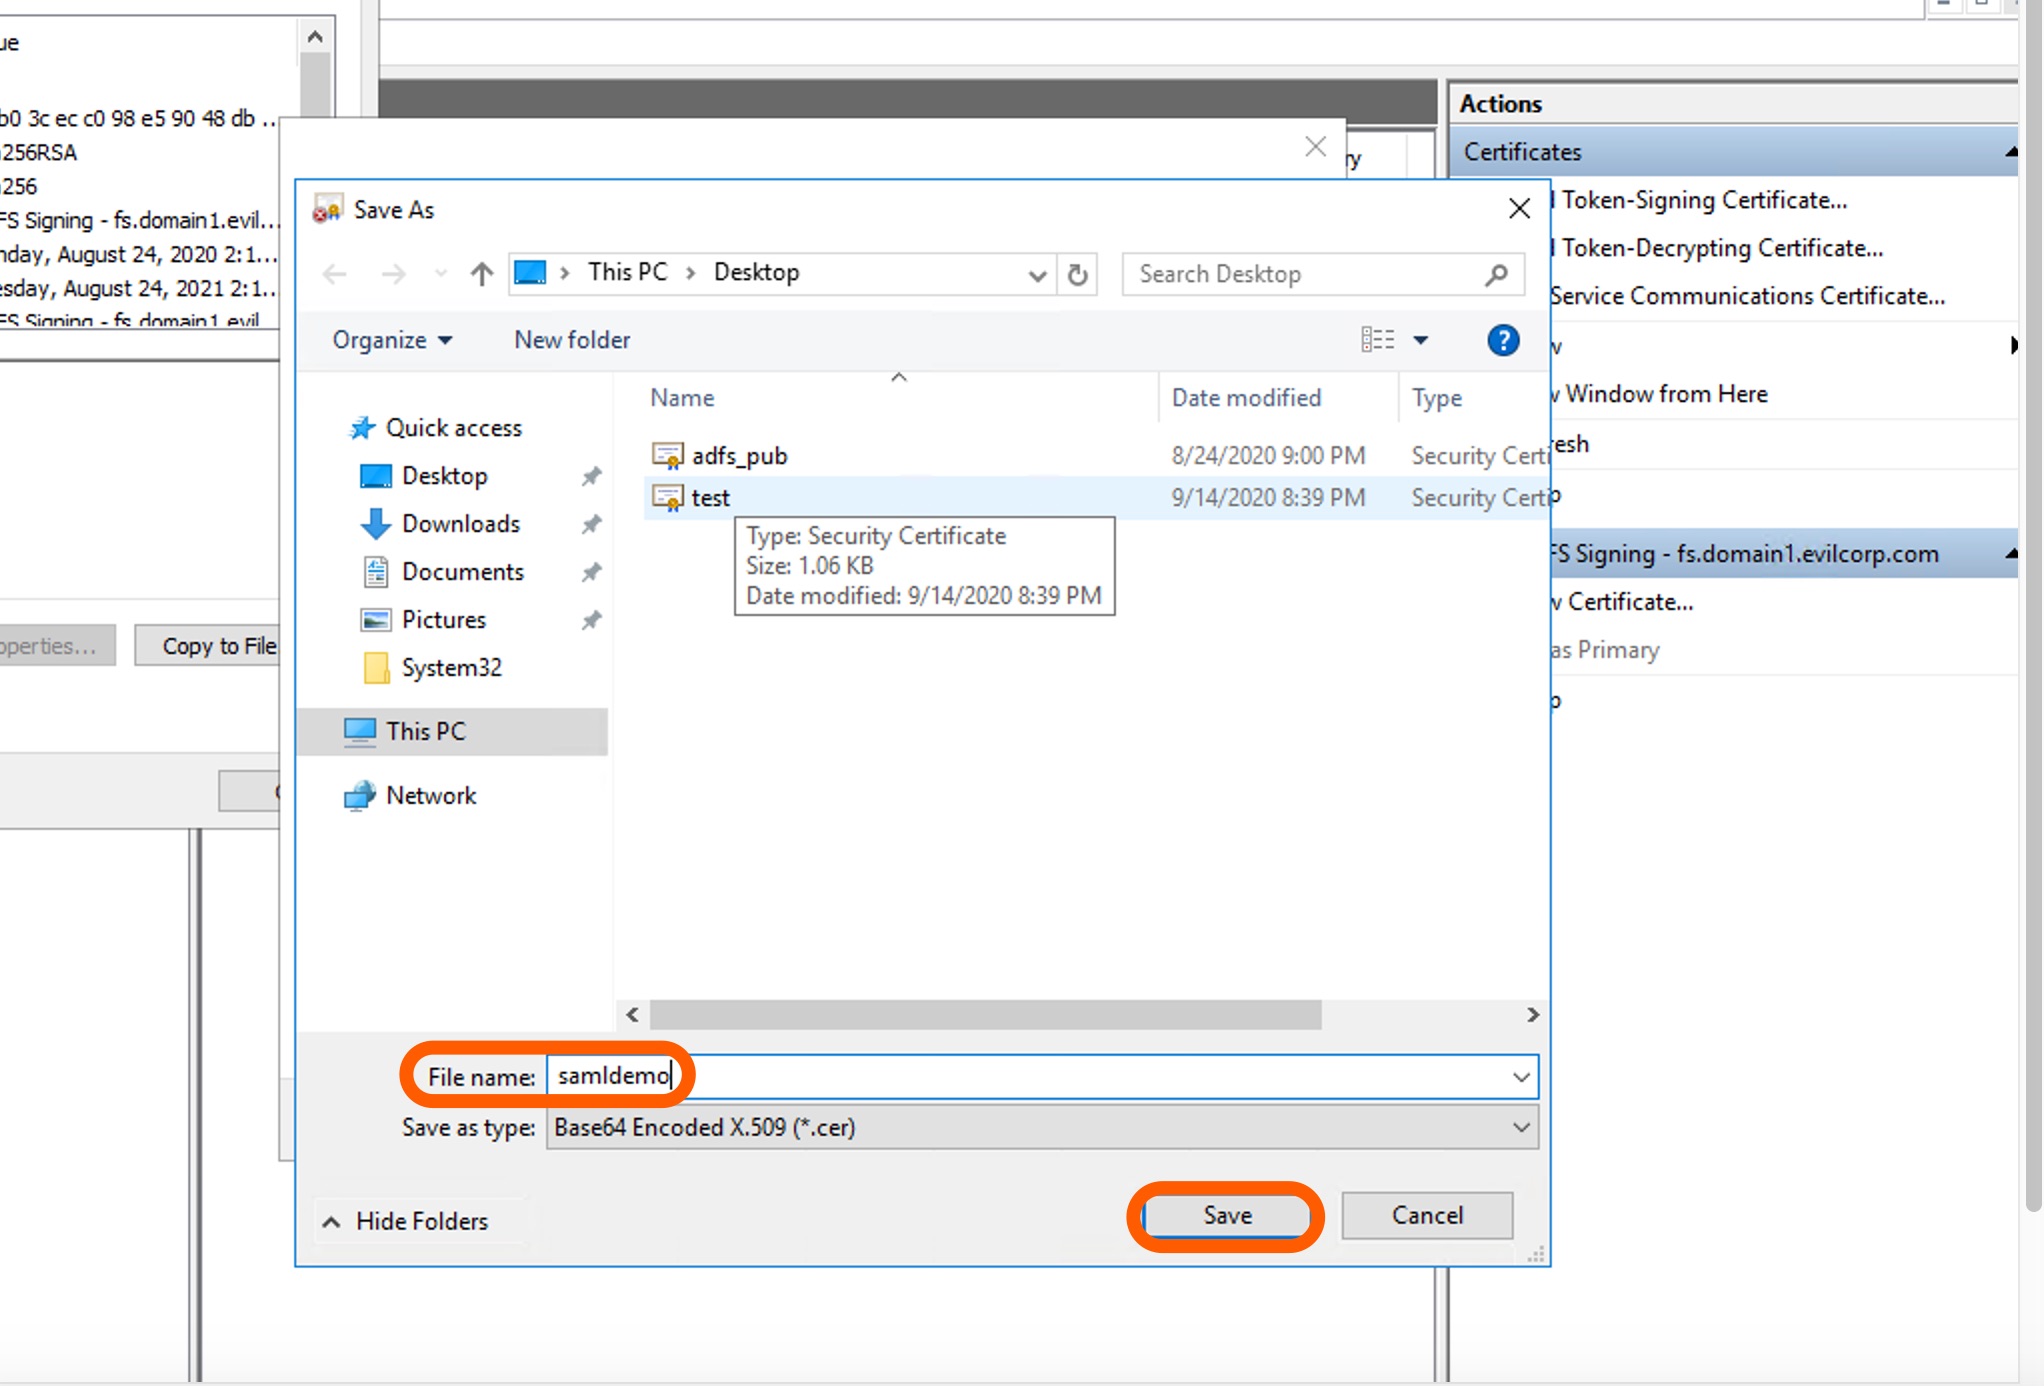
Give it a name in the File name field and hit Save.
-
Have a final look at your certificate settings. If you need to modify any of those, click the backward arrow next to Certificate Export Wizard. Otherwise, click Finish. Make sure you leave the AD FS window open as you will need it in a minute.

-
Open the exported certificate by a text editor and copy/paste its content to the SAML SSO provider certificate field or upload the file itself from your local computer.
-
Save the settings by clicking Configure SSO on Bitrise.
Let’s continue the SAML SSO configuration on AD FS by adding Bitrise.
Adding Bitrise as a relying party trust to AD FS
Once you are finished with exporting the certificate, you can continue with adding Bitrise as a relying party trust to AD FS. The Add Relying Party Trust Wizard guides you through the steps.
-
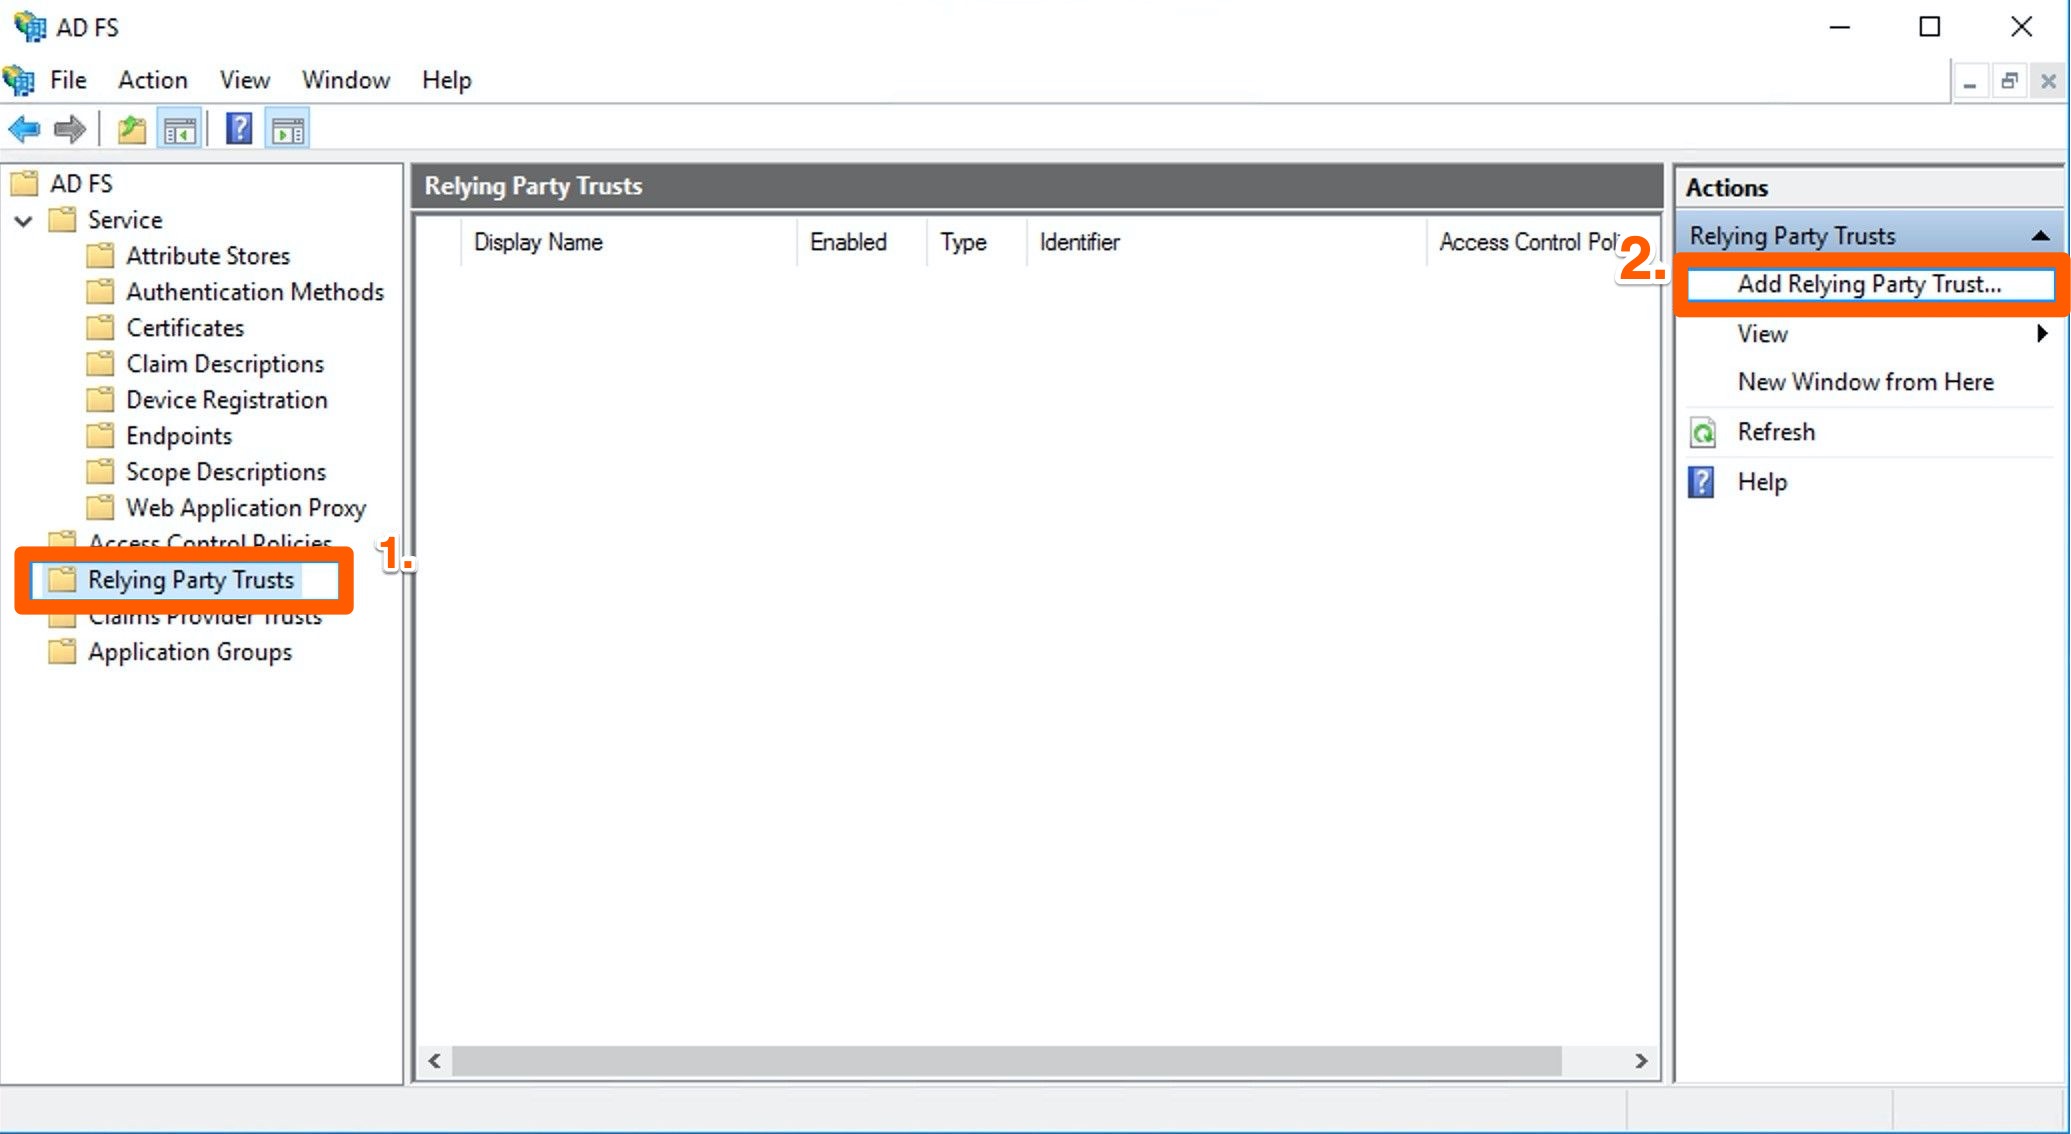
On AD FS, click Relying Party Trust on the left menu bar, then click Relying Party Trust.
-
Select Add Relying Party Trust under Actions.
-
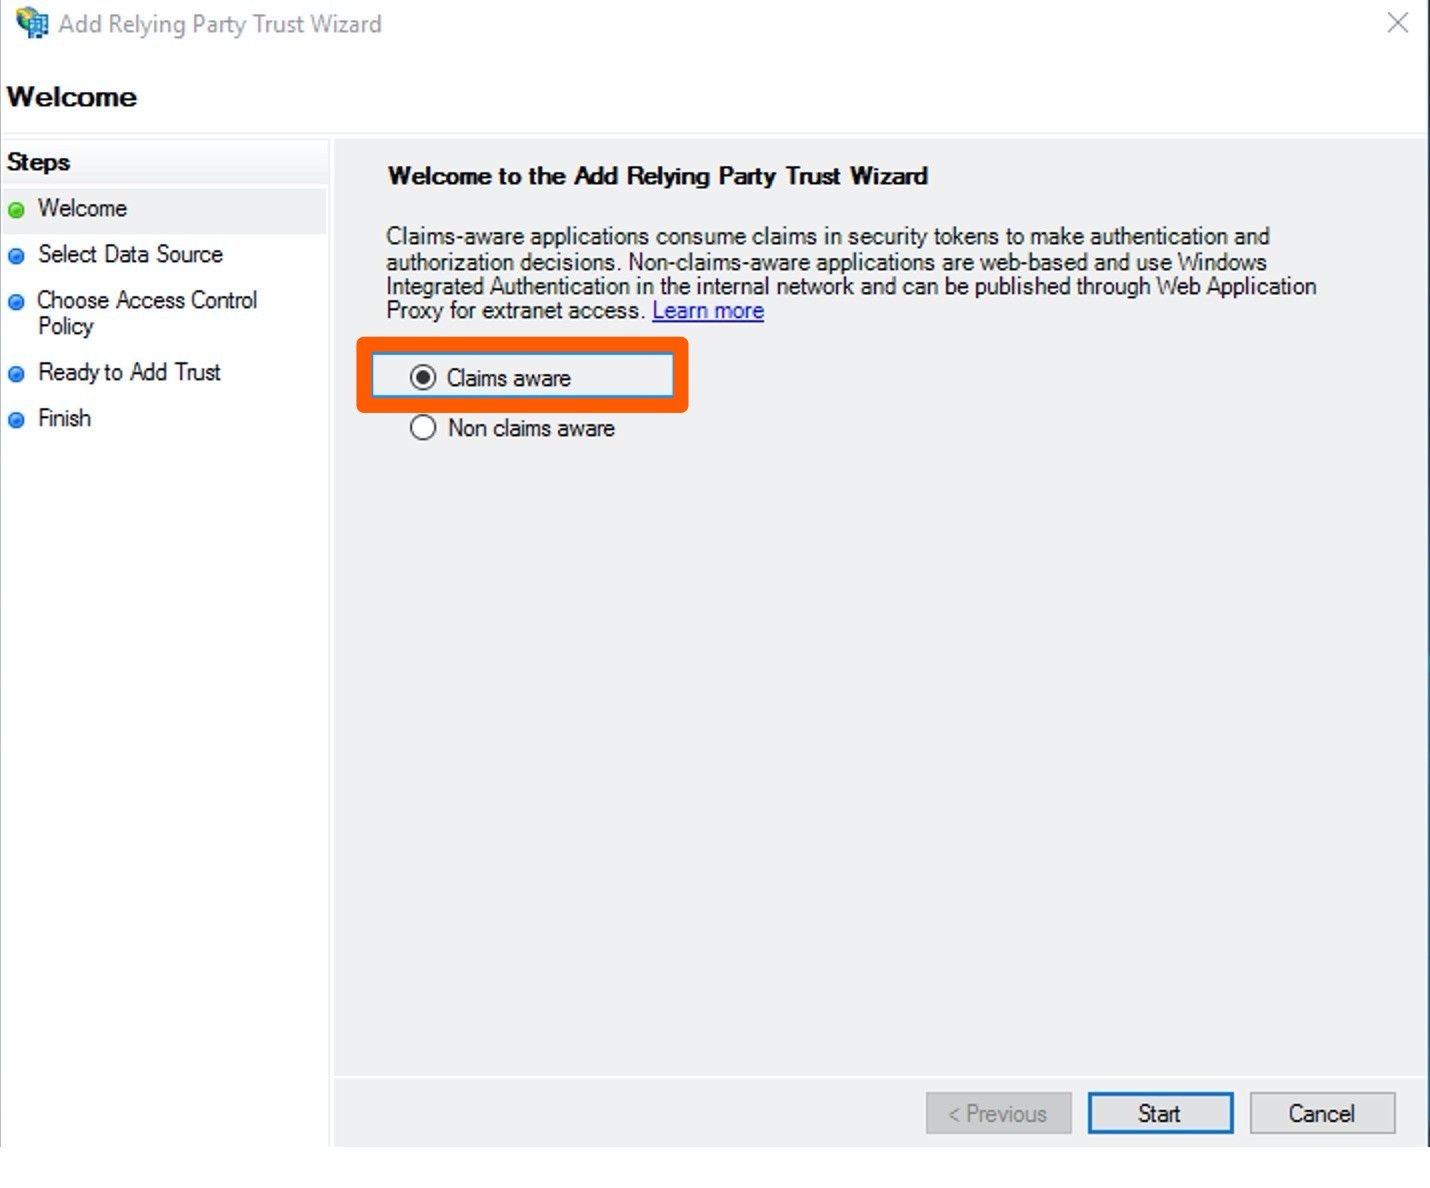
On the Welcome page, select the Claims aware option and hit Start.
-
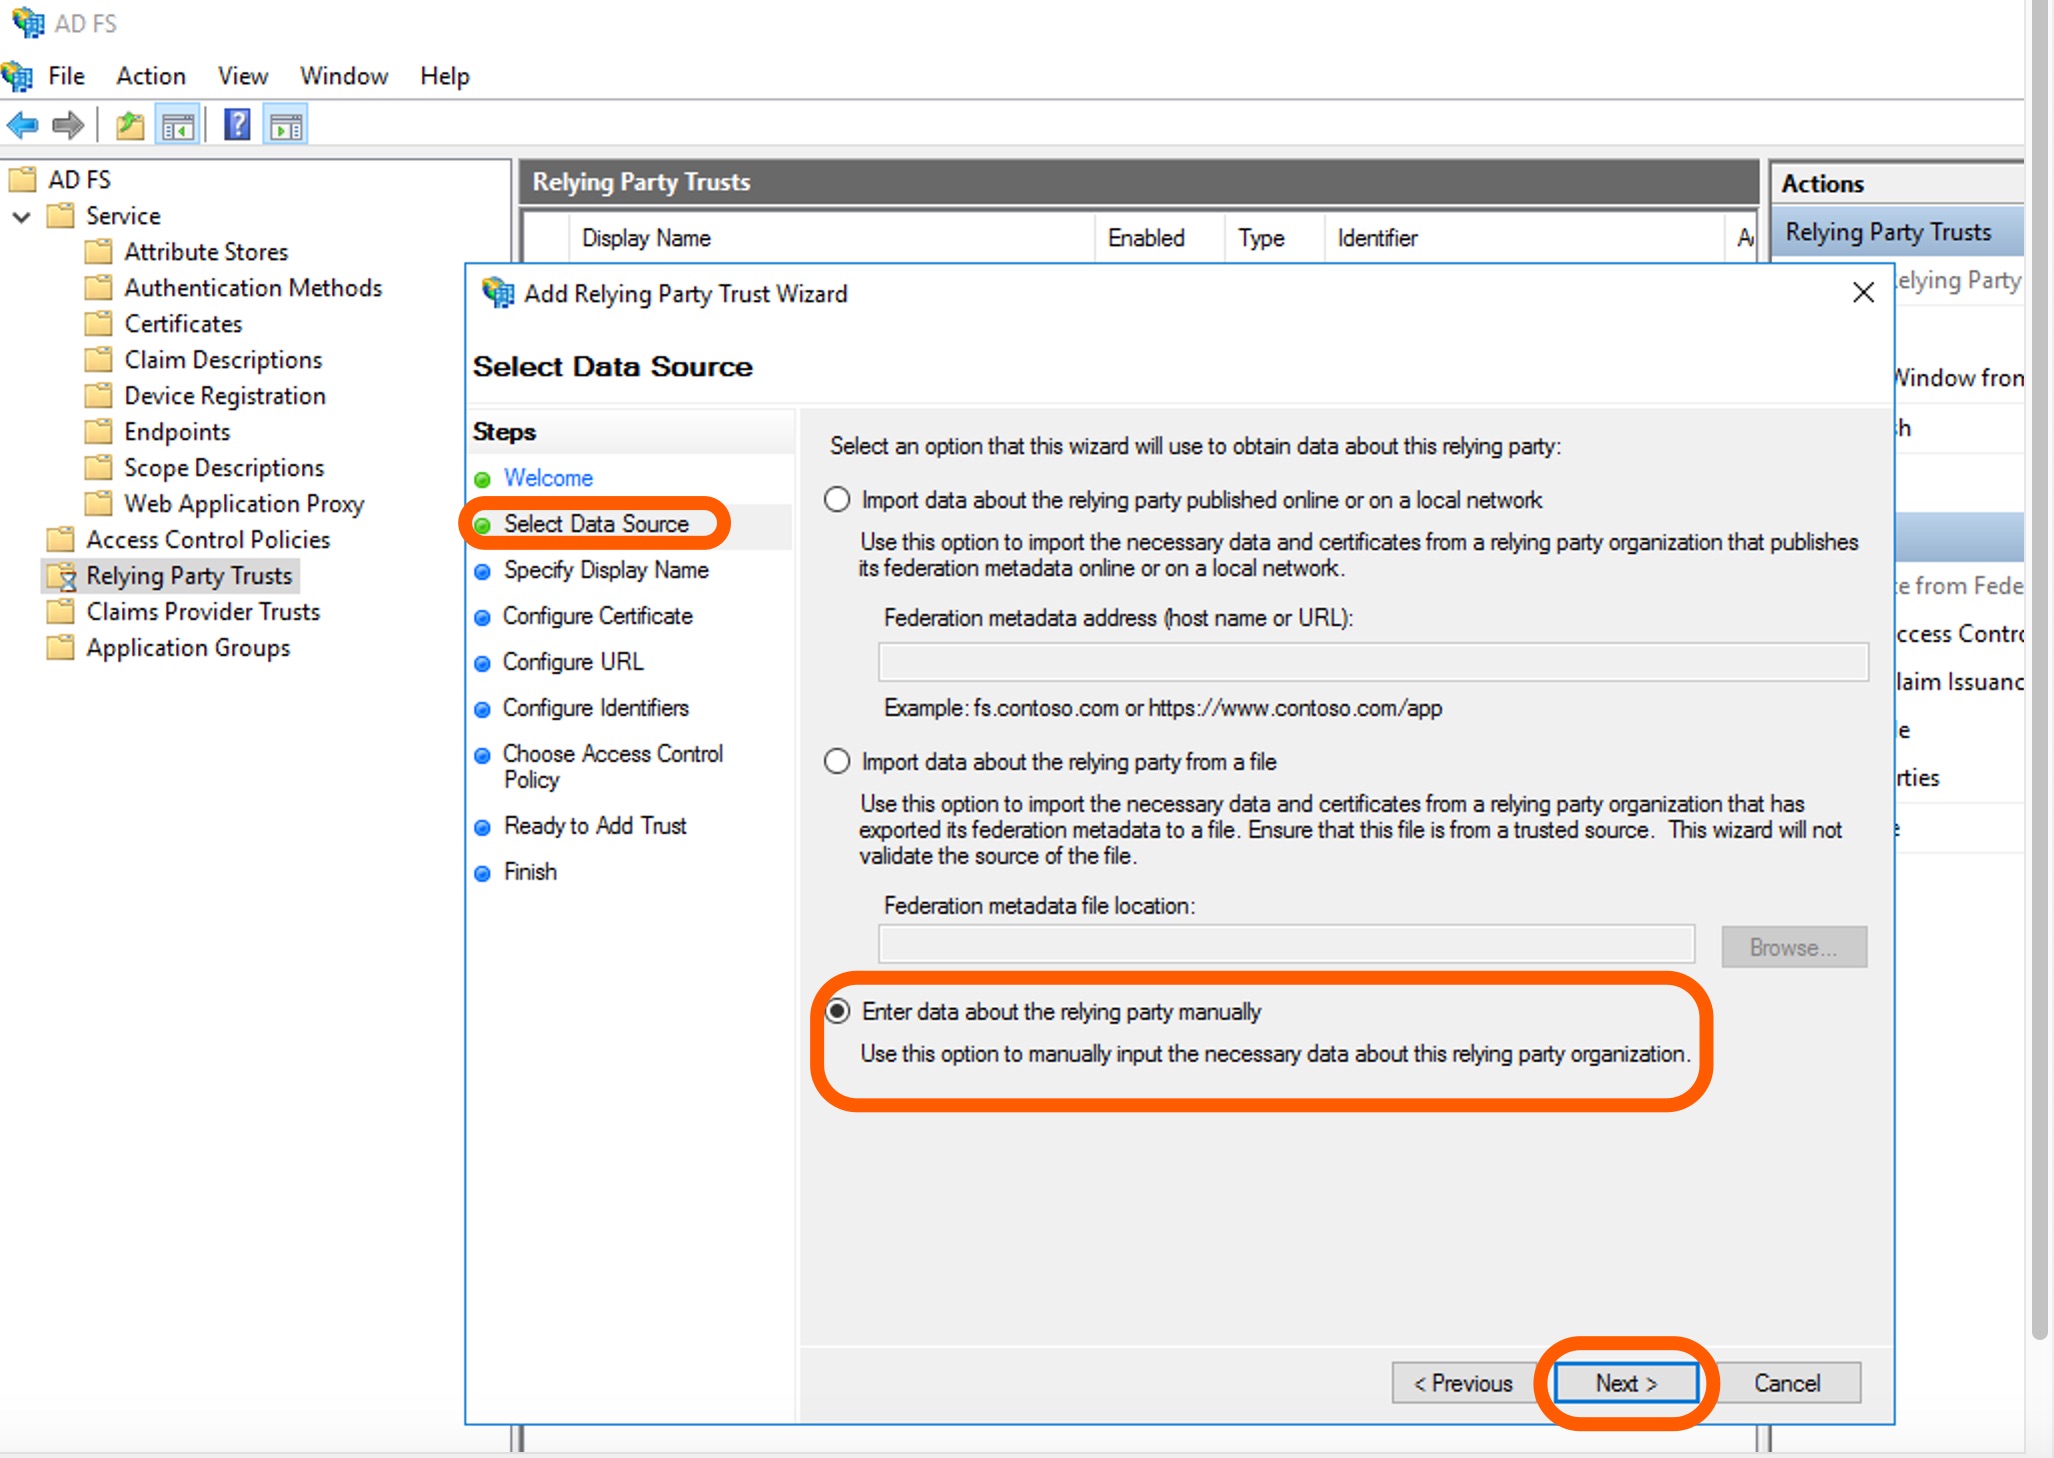
On the Select Data Source page, click the Enter data about the relying party manually option on the bottom of the page. Click Next.
-
On the Specify Display Name page, add a Display name, for example
MyCorp. Click Next.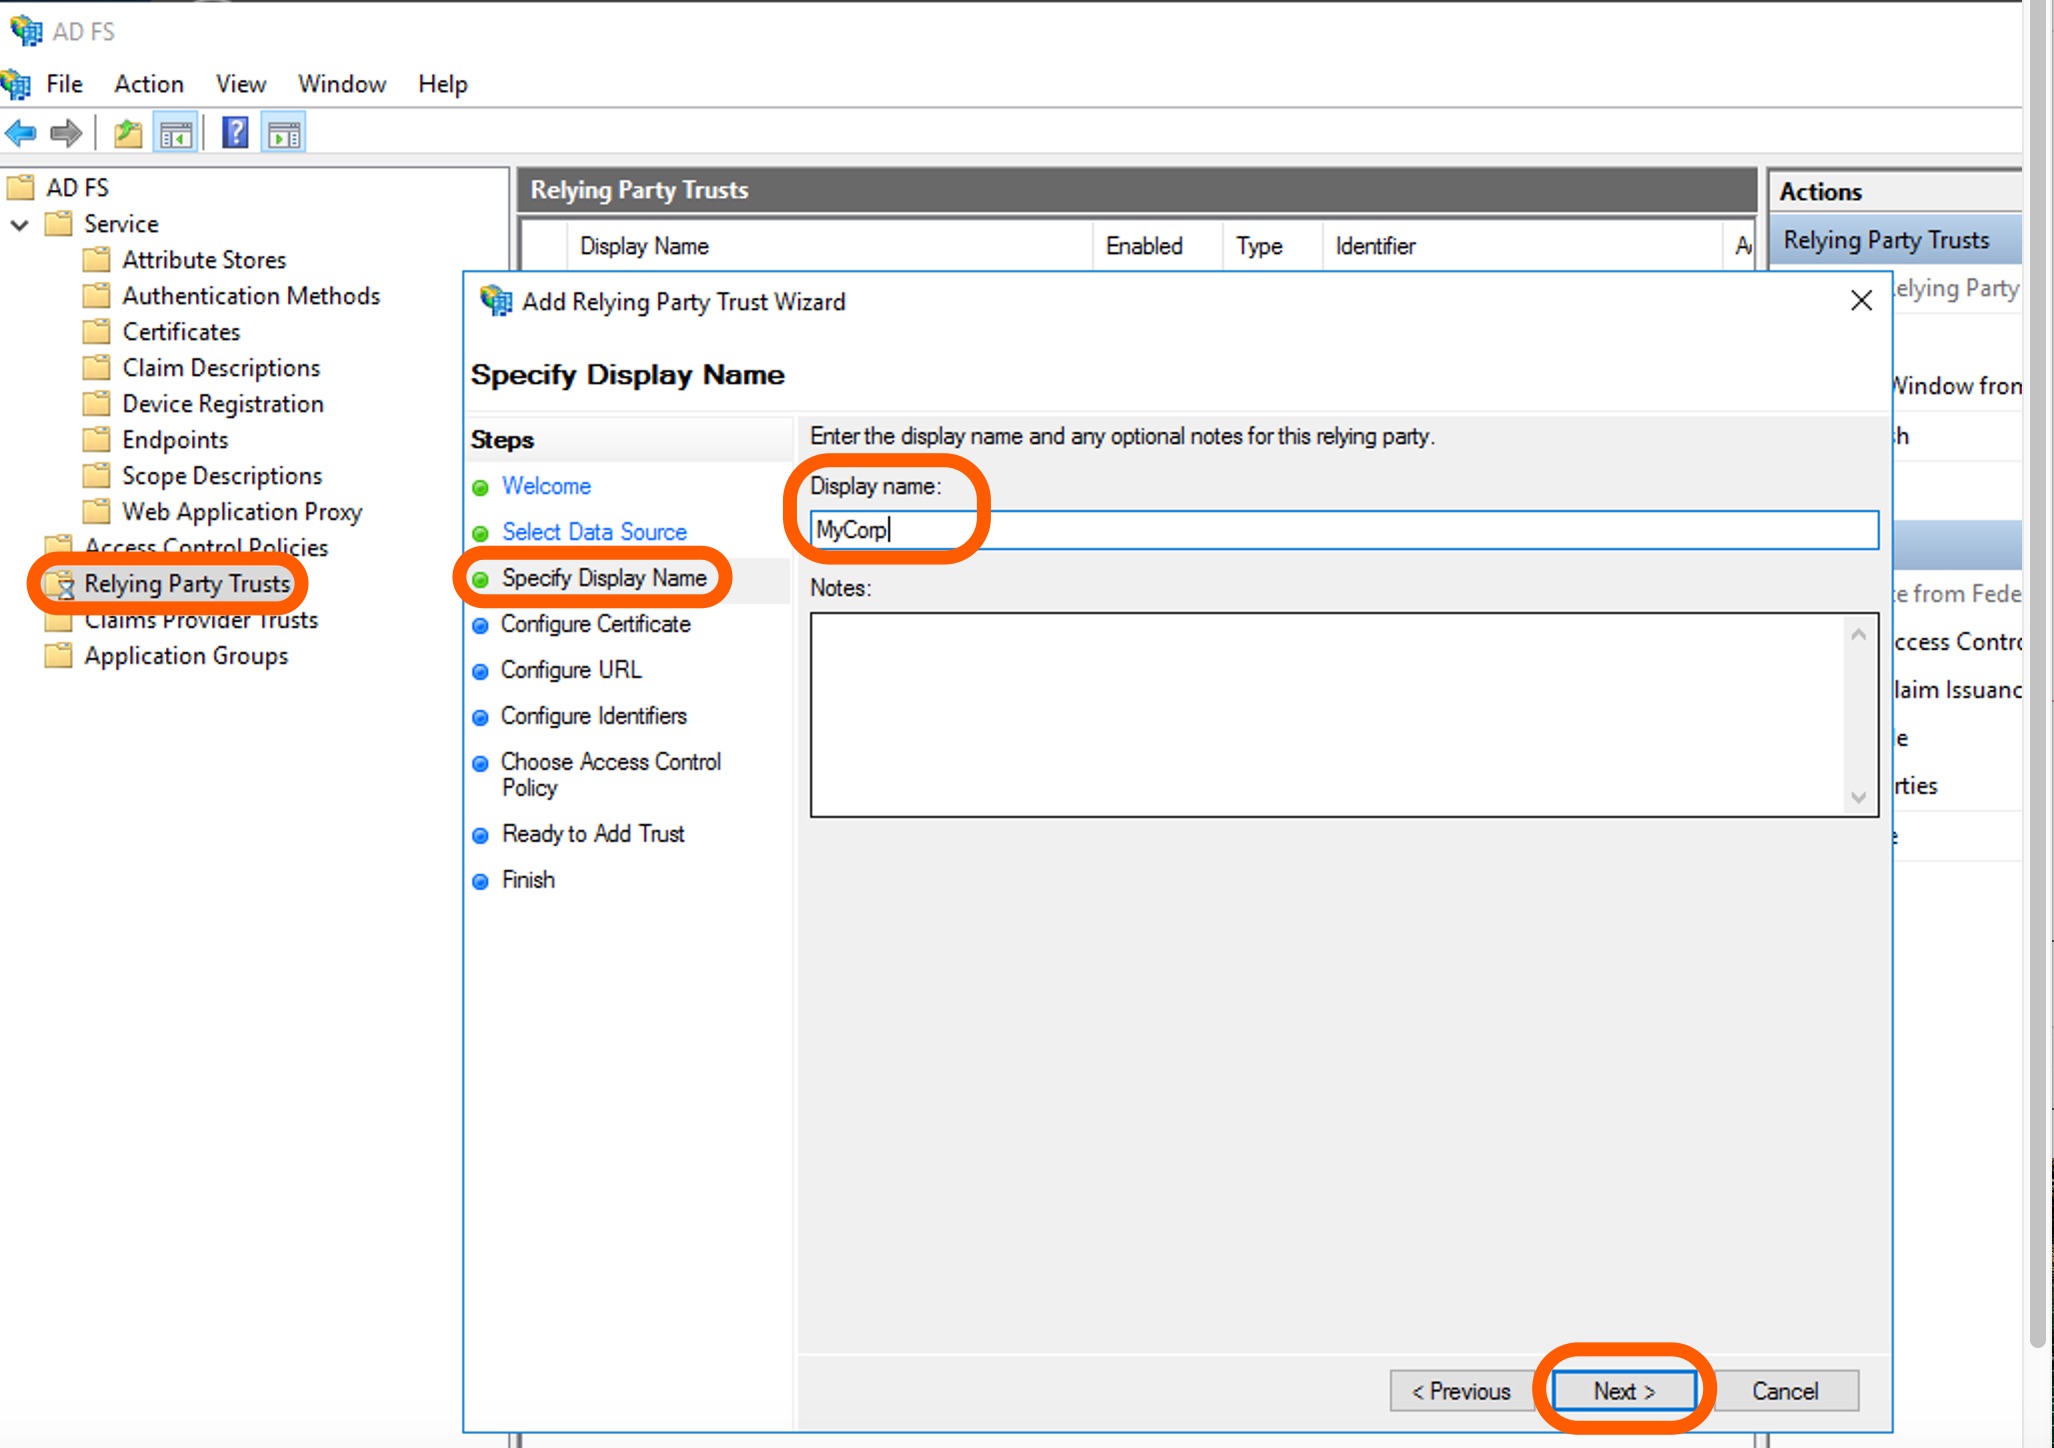
-
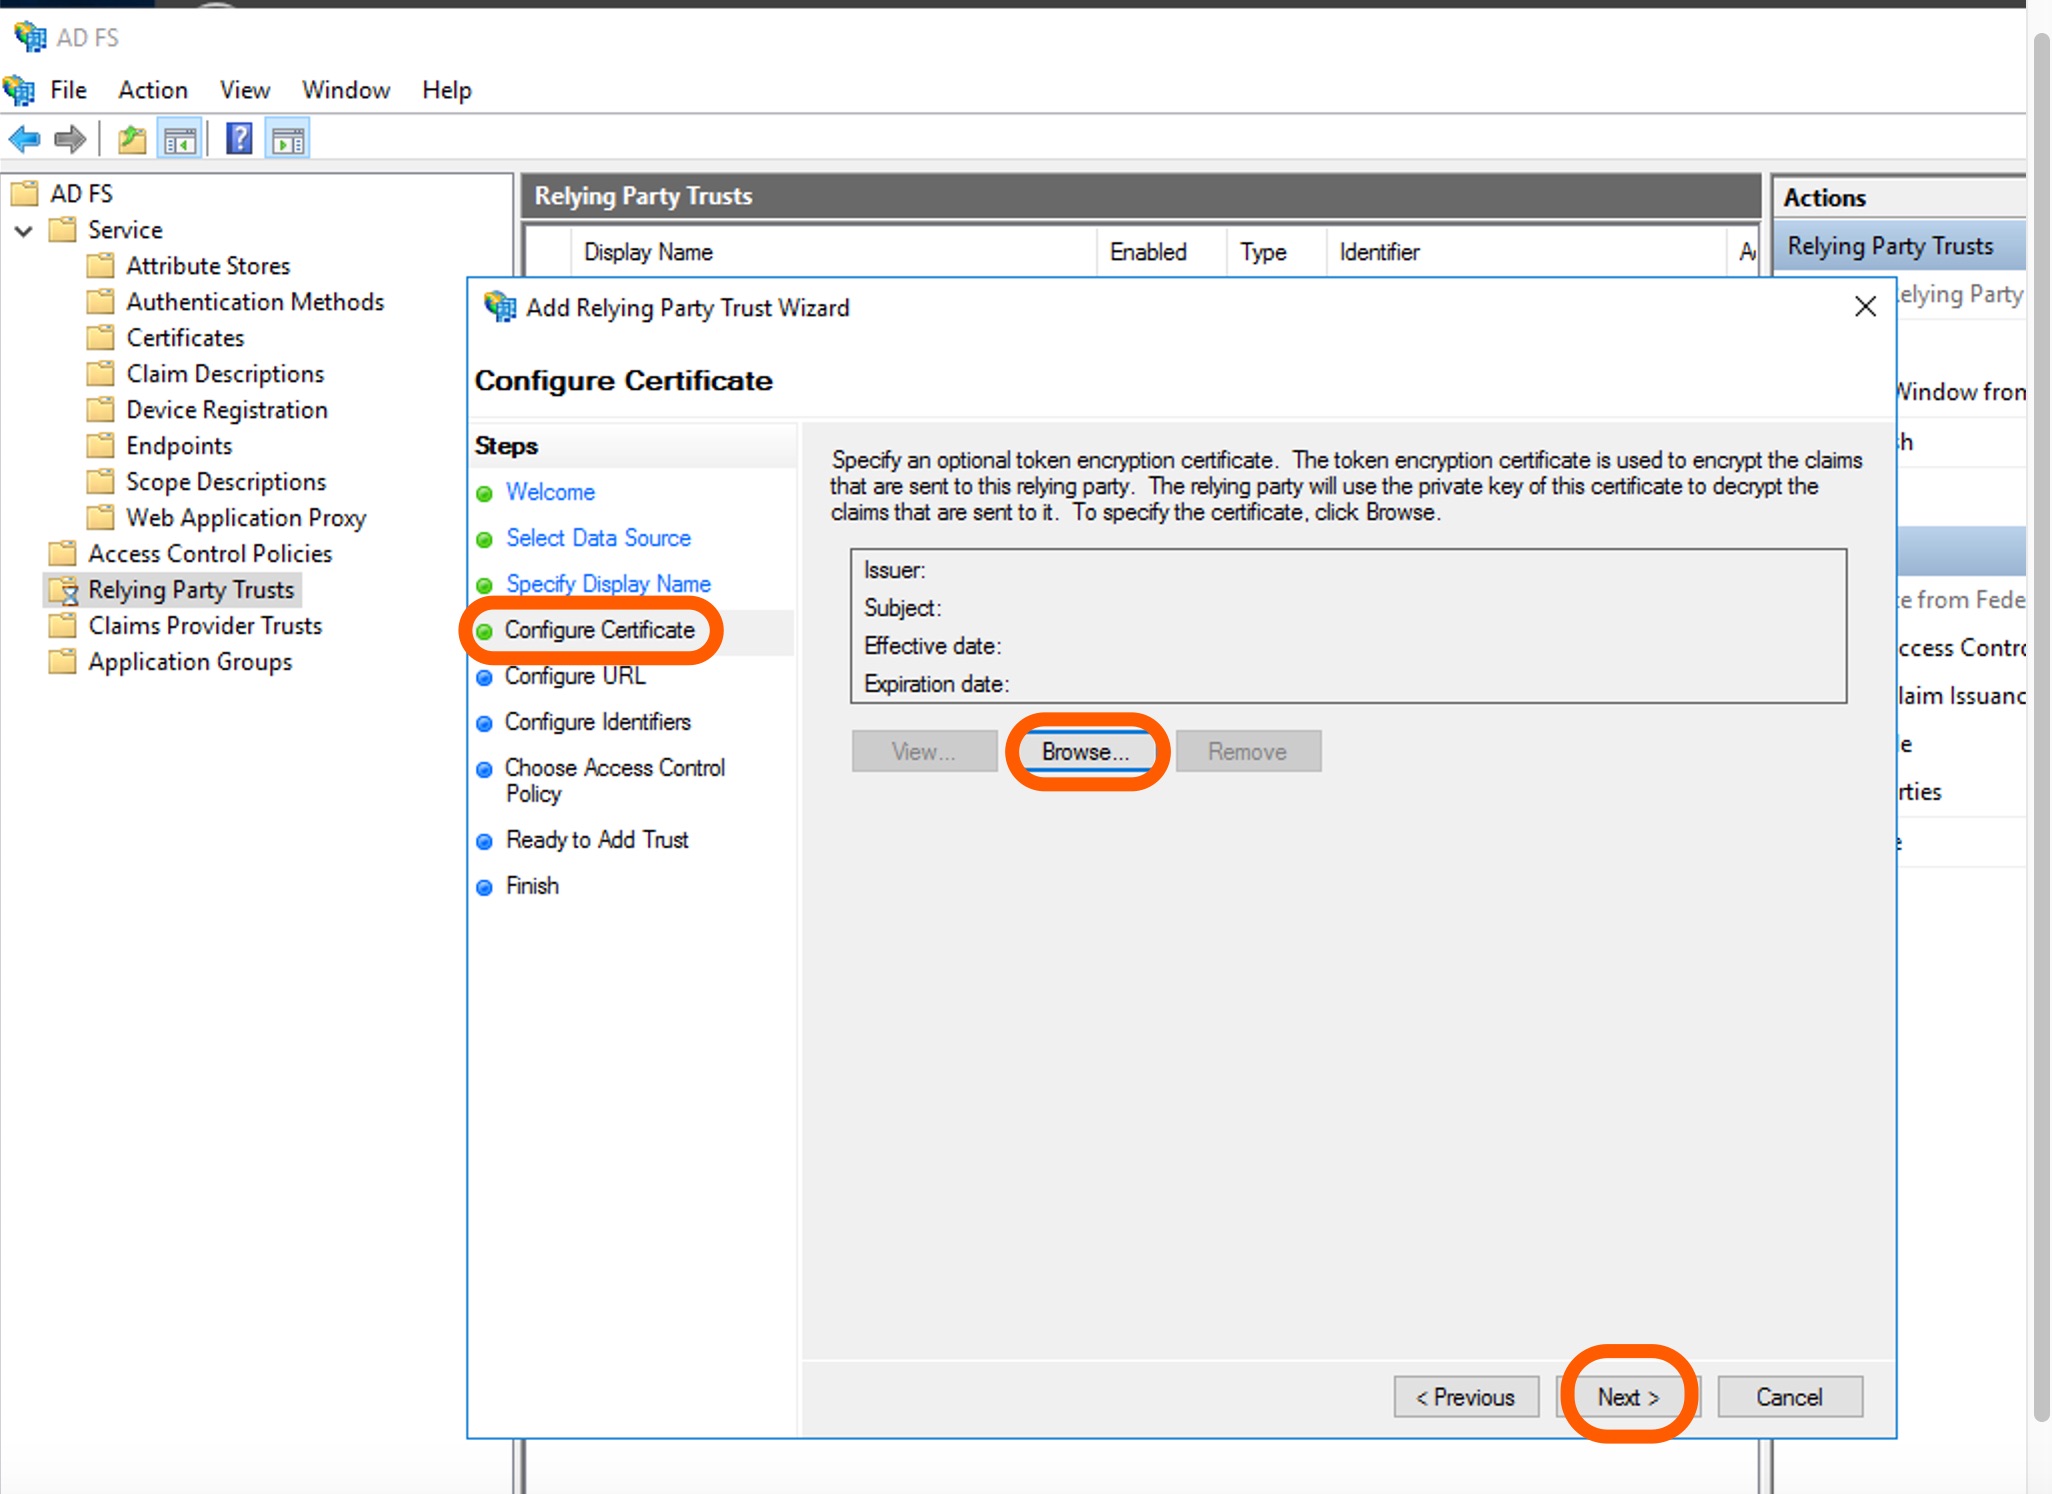
Specify a token encryption certificate on the Configure Certificate page is optional. Click Next.
-
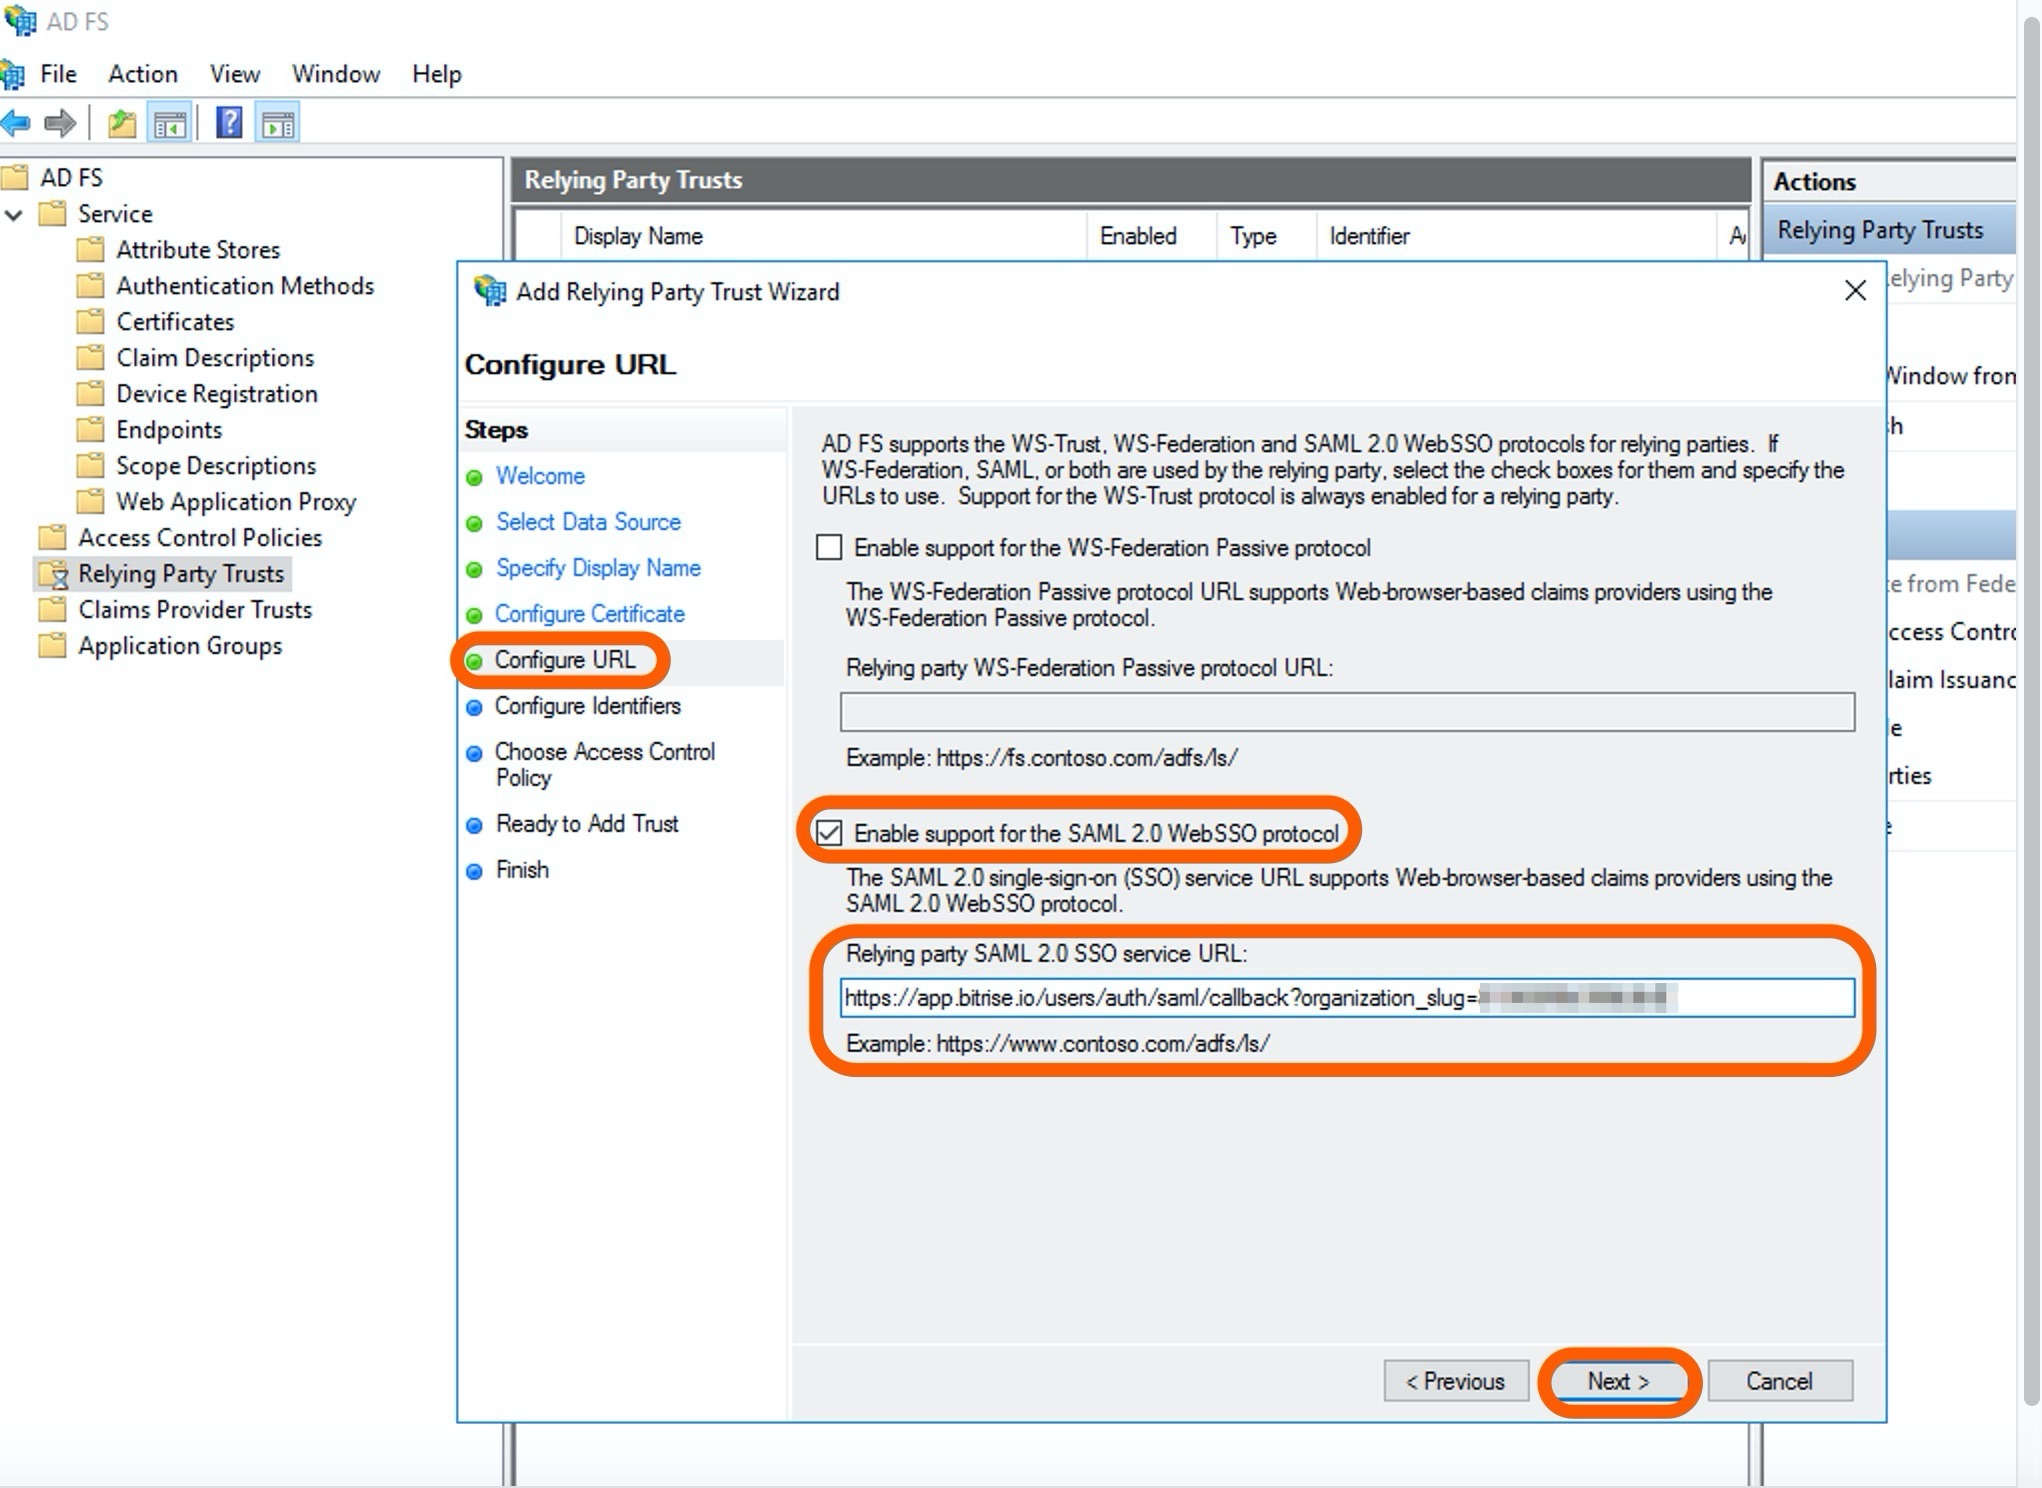
On the Configure URL page, select Enable support for the SAML 2.0 WebSSO protocol and copy paste the Assertion Consumer Service URL (ACS URL) from Bitrise to the Relying party SAML 2. 0 SSO service URL field on AD FS. Click Next.
-
On the Configure Identifiers page, add
Bitrisein the Relying party trust identifier field. Click Add, then hit Next.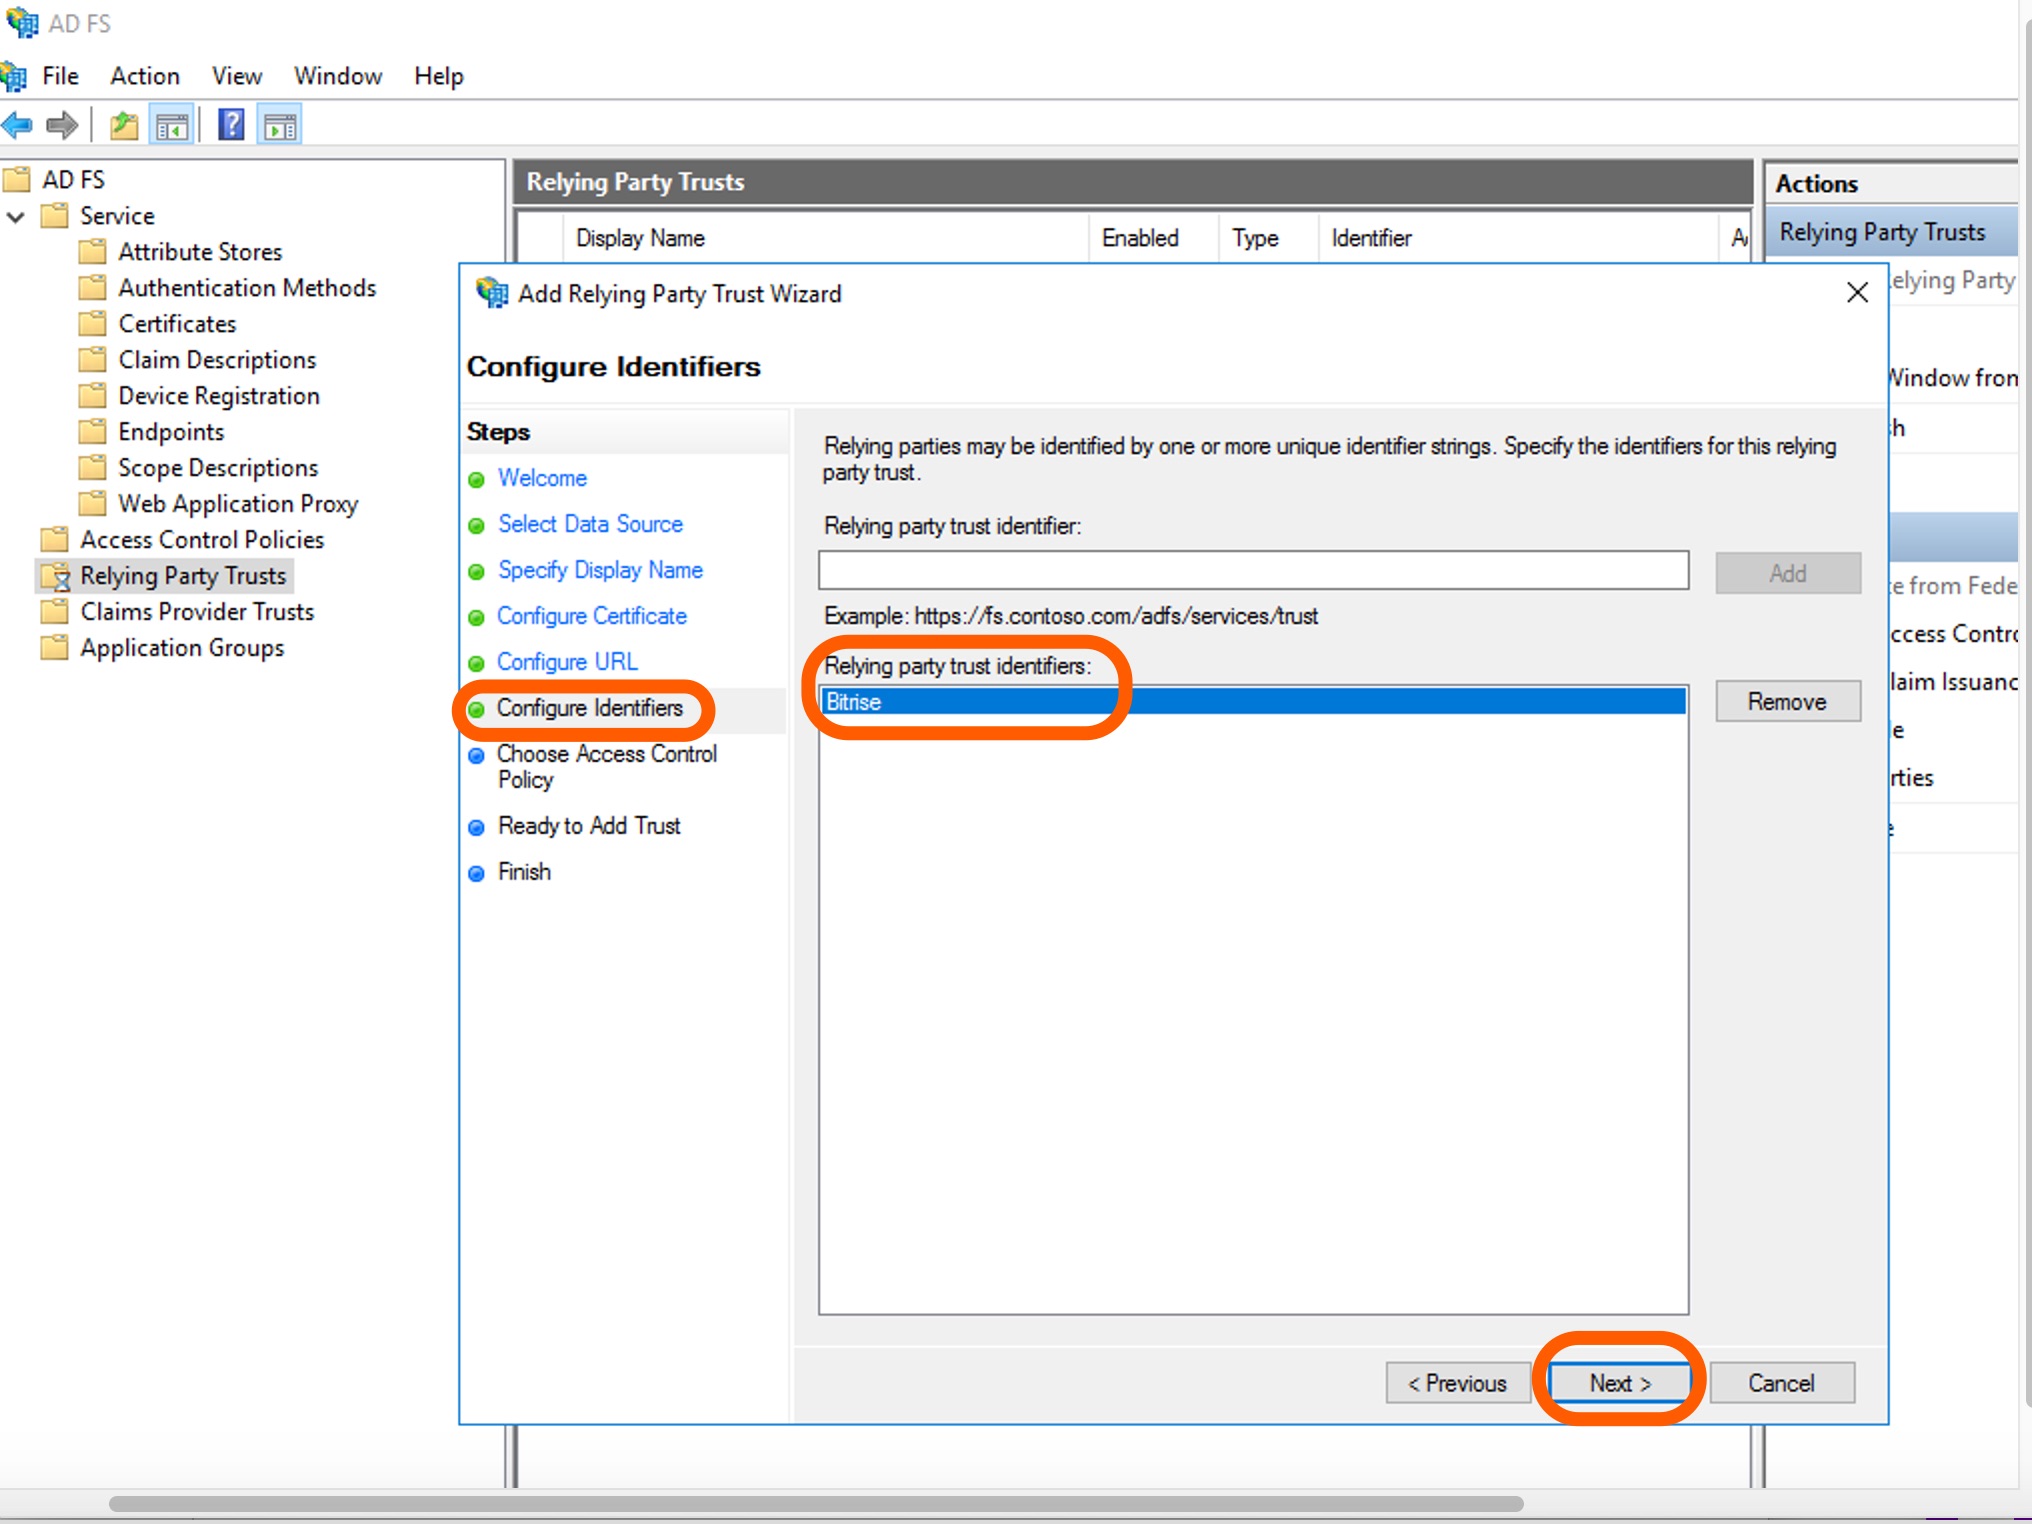
-
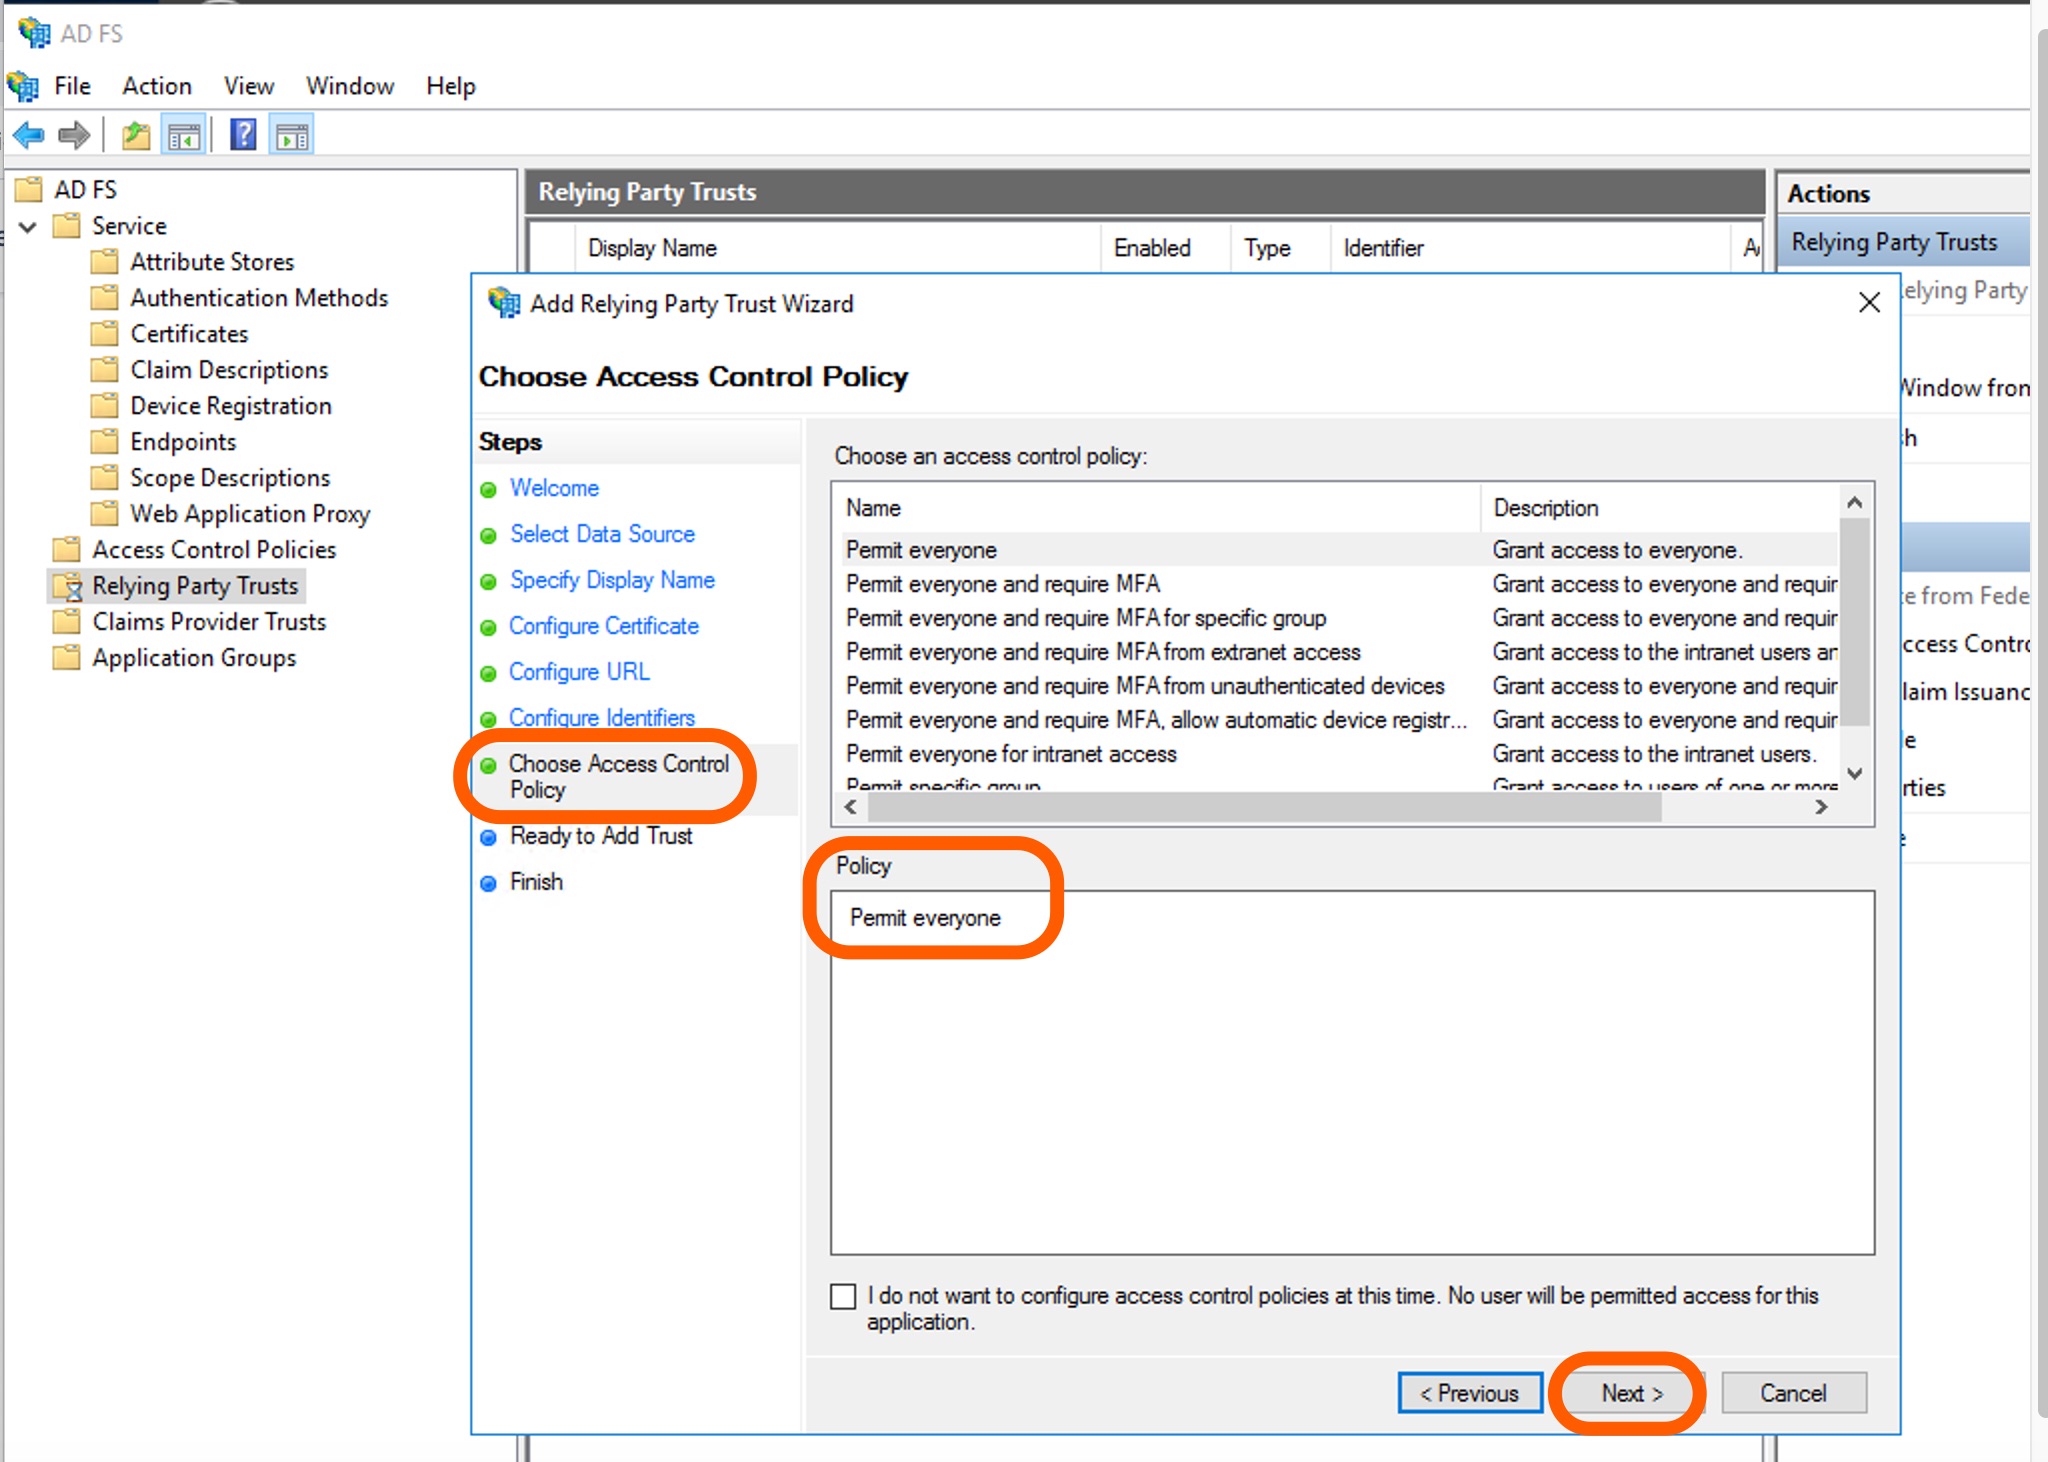
Do not modify the default access control policy on the Choose Access Control Policy page so that everyone can access this SAML SSO connection. Click Next.
-
On the Ready to Add Trust page, review the settings and click Next.
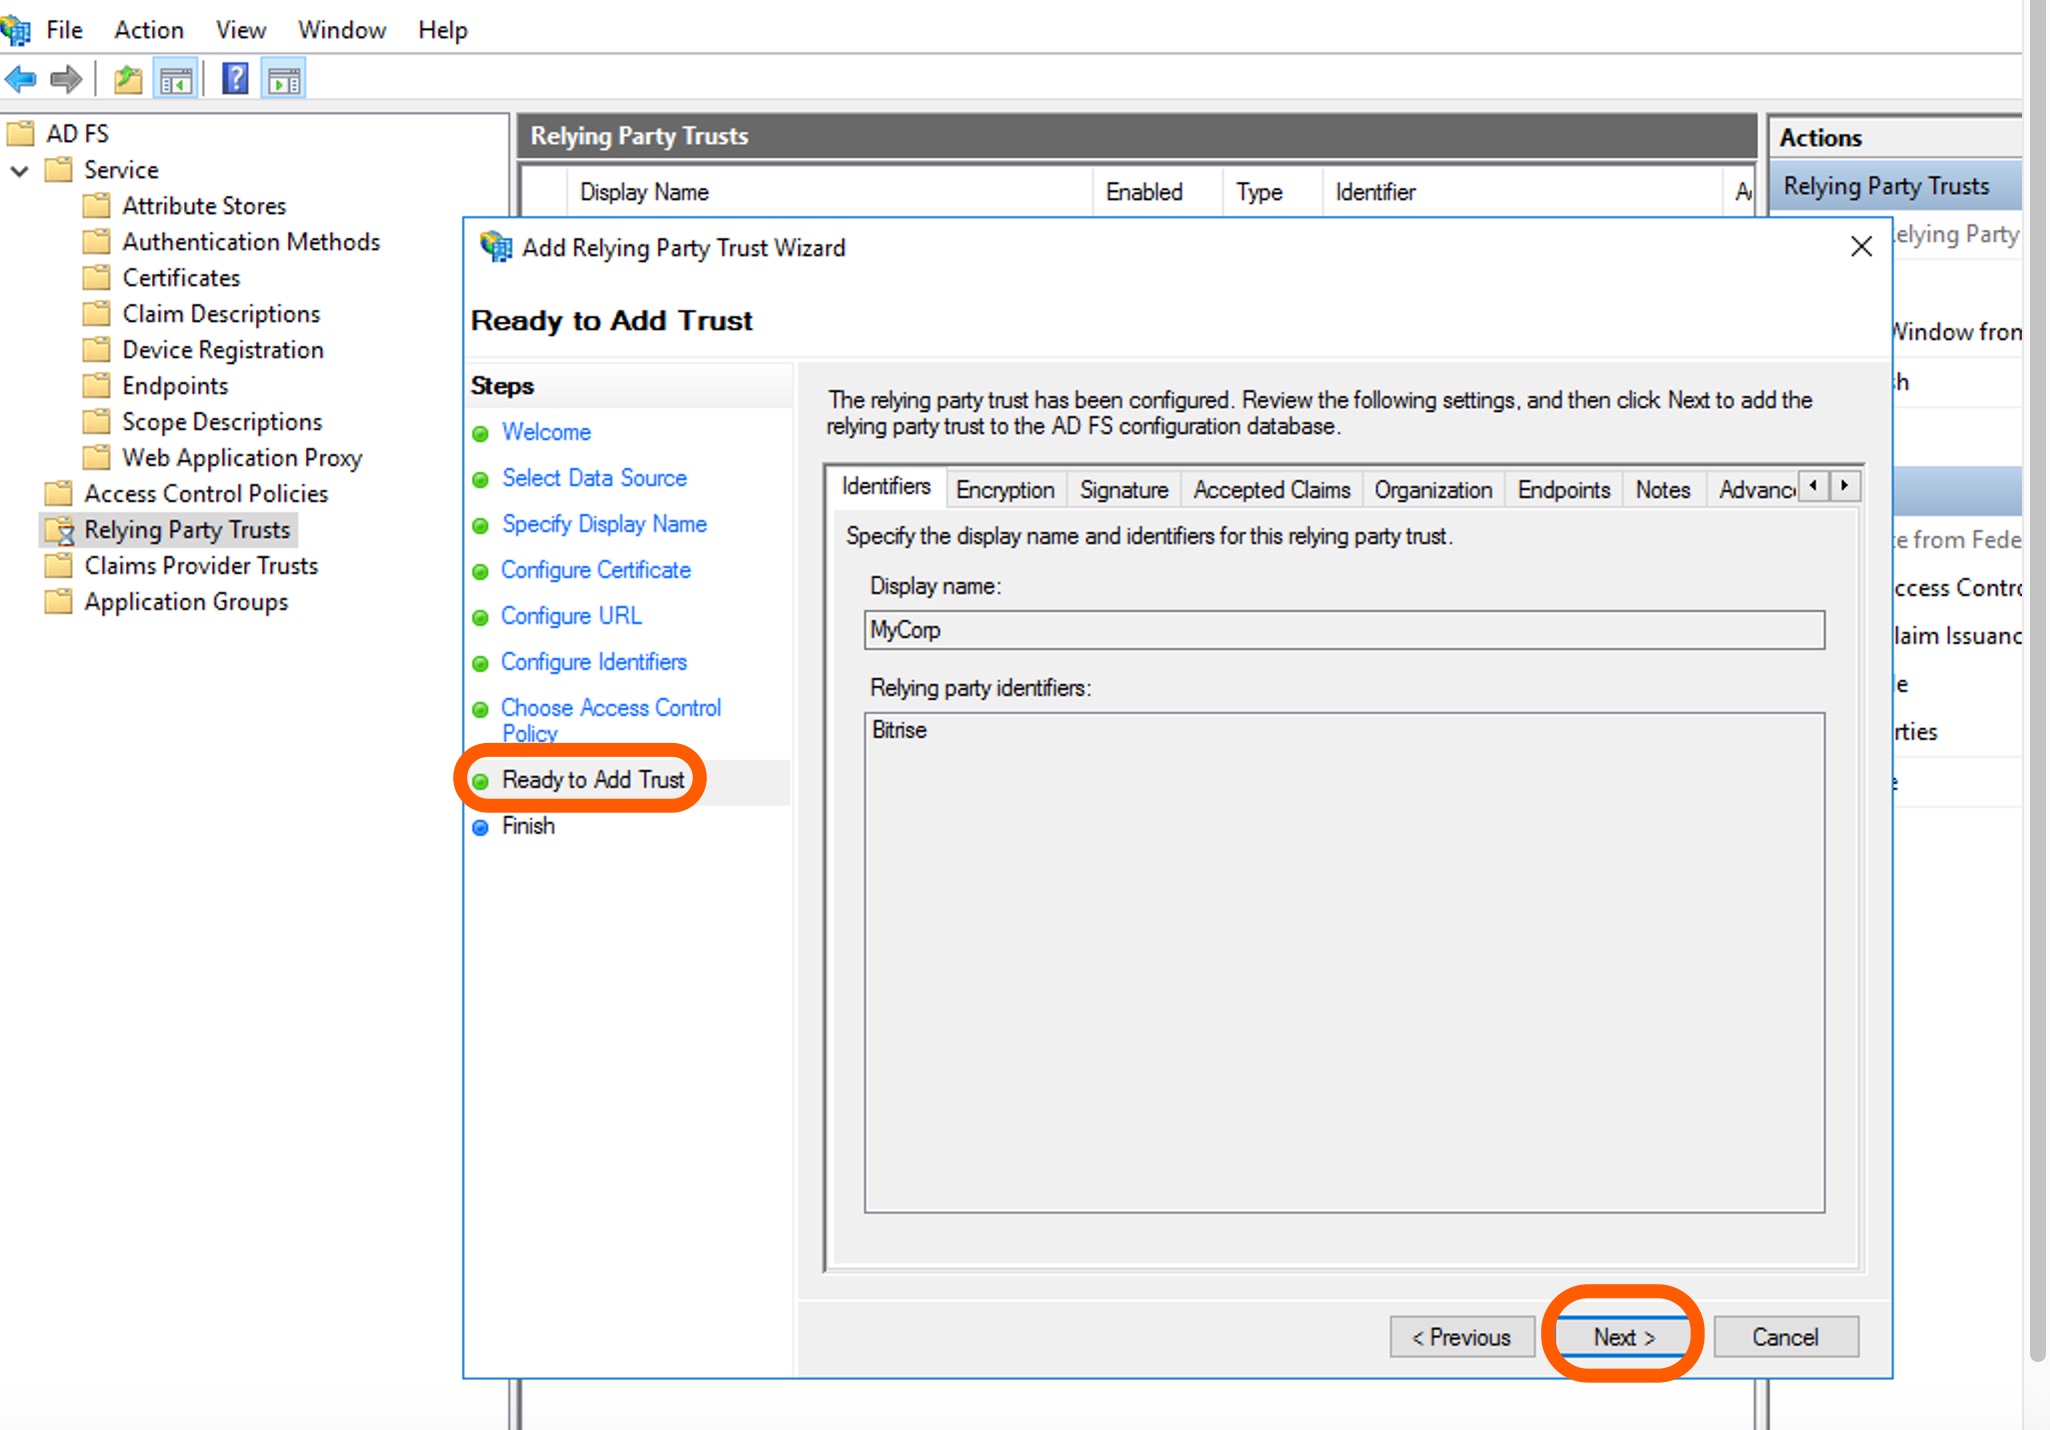
-
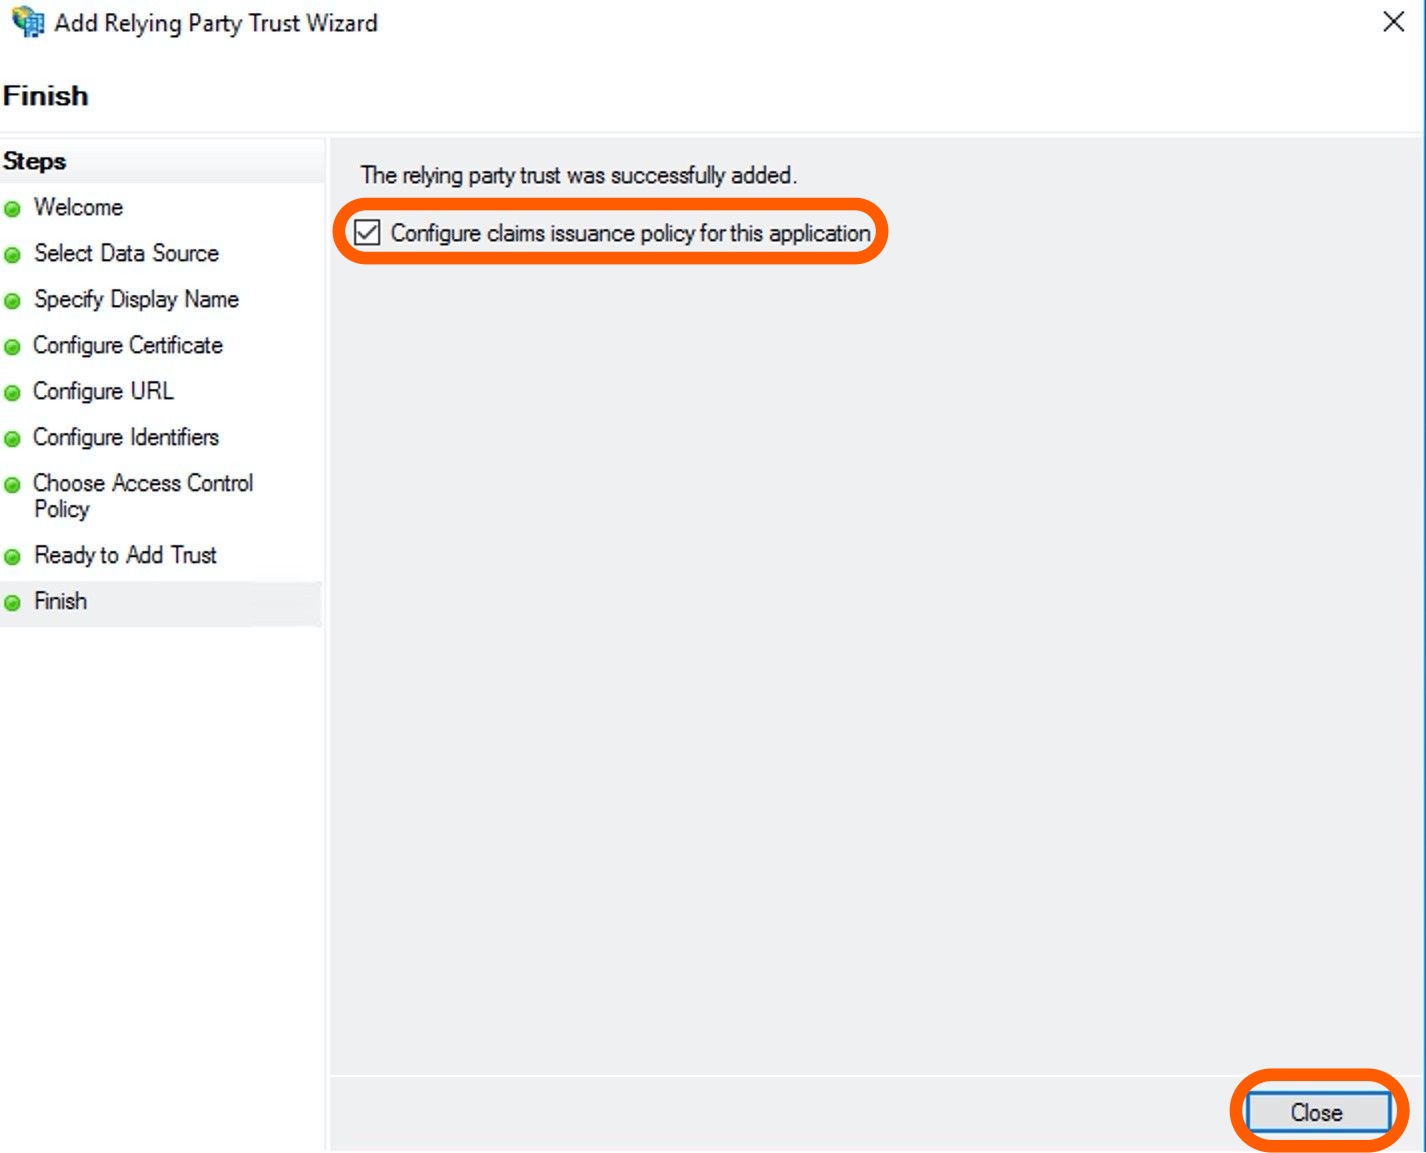
On the Finish page, tick the checkbox to edit claims issuance policy for Bitrise. Click Close.
-
On AD FS, click Relying Party Trust on the left menu bar, then click Relying Party Trust.
-
Select Add Relying Party Trust under Actions.
-
On the Welcome page, select the Claims aware option and hit Start.
-
On the Select Data Source page, click the Enter data about the relying party manually option on the bottom of the page. Click Next.
-
On the Specify Display Name page, add a Display name, for example
MyCorp. Click Next. -
Specify a token encryption certificate on the Configure Certificate page is optional. Click Next.
-
On the Configure URL page, select Enable support for the SAML 2.0 WebSSO protocol and copy paste the Assertion Consumer Service URL (ACS URL) from Bitrise to the Relying party SAML 2. 0 SSO service URL field on AD FS. Click Next.
-
On the Configure Identifiers page, add
Bitrisein the Relying party trust identifier field. Click Add, then hit Next. -
Do not modify the default access control policy on the Choose Access Control Policy page so that everyone can access this SAML SSO connection. Click Next.
-
On the Ready to Add Trust page, review the settings and click Next.
-
On the Finish page, tick the checkbox to edit claims issuance policy for Bitrise. Click Close.
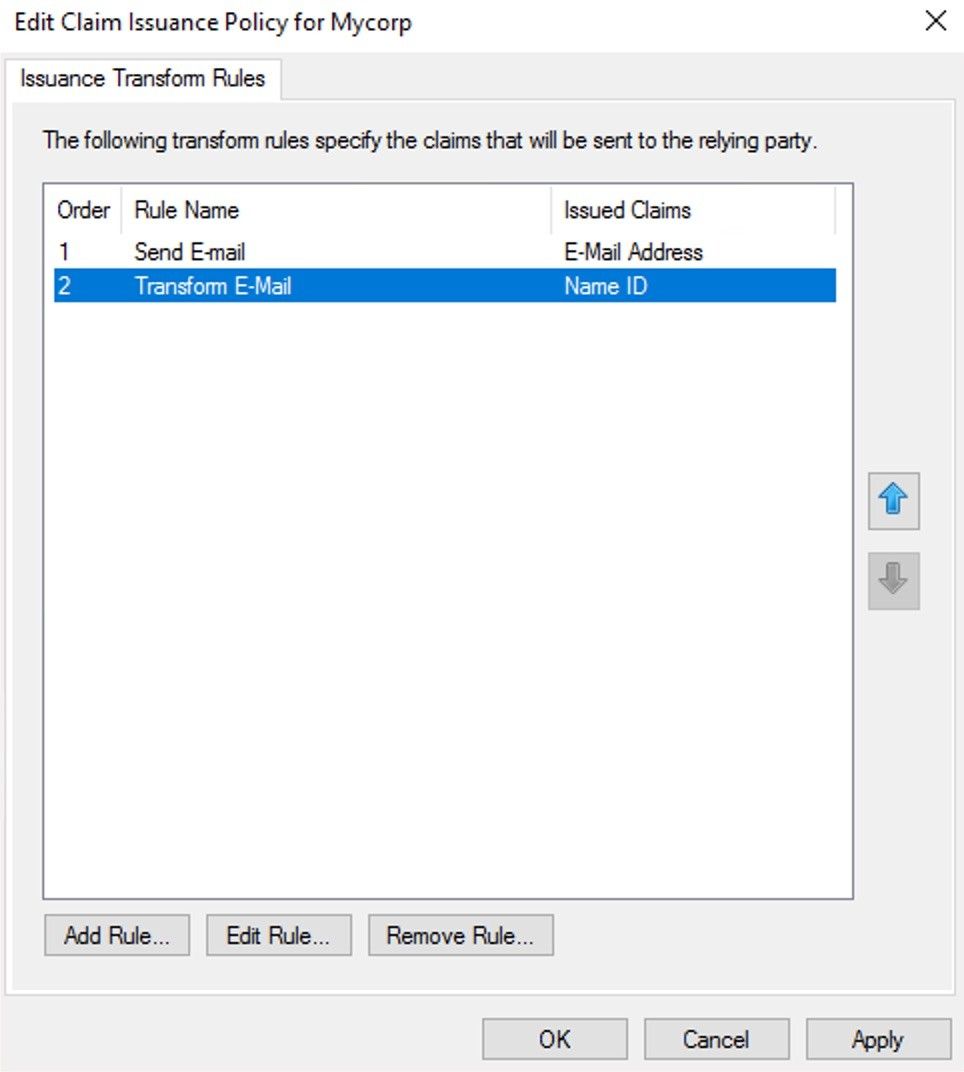
Configuring claim rules
-
On the Edit Claim Issuance Policy page, click the Add Rule button and hit OK.

-
Create a Send LDAP Attributes as Claims claim rule and click Next.
-
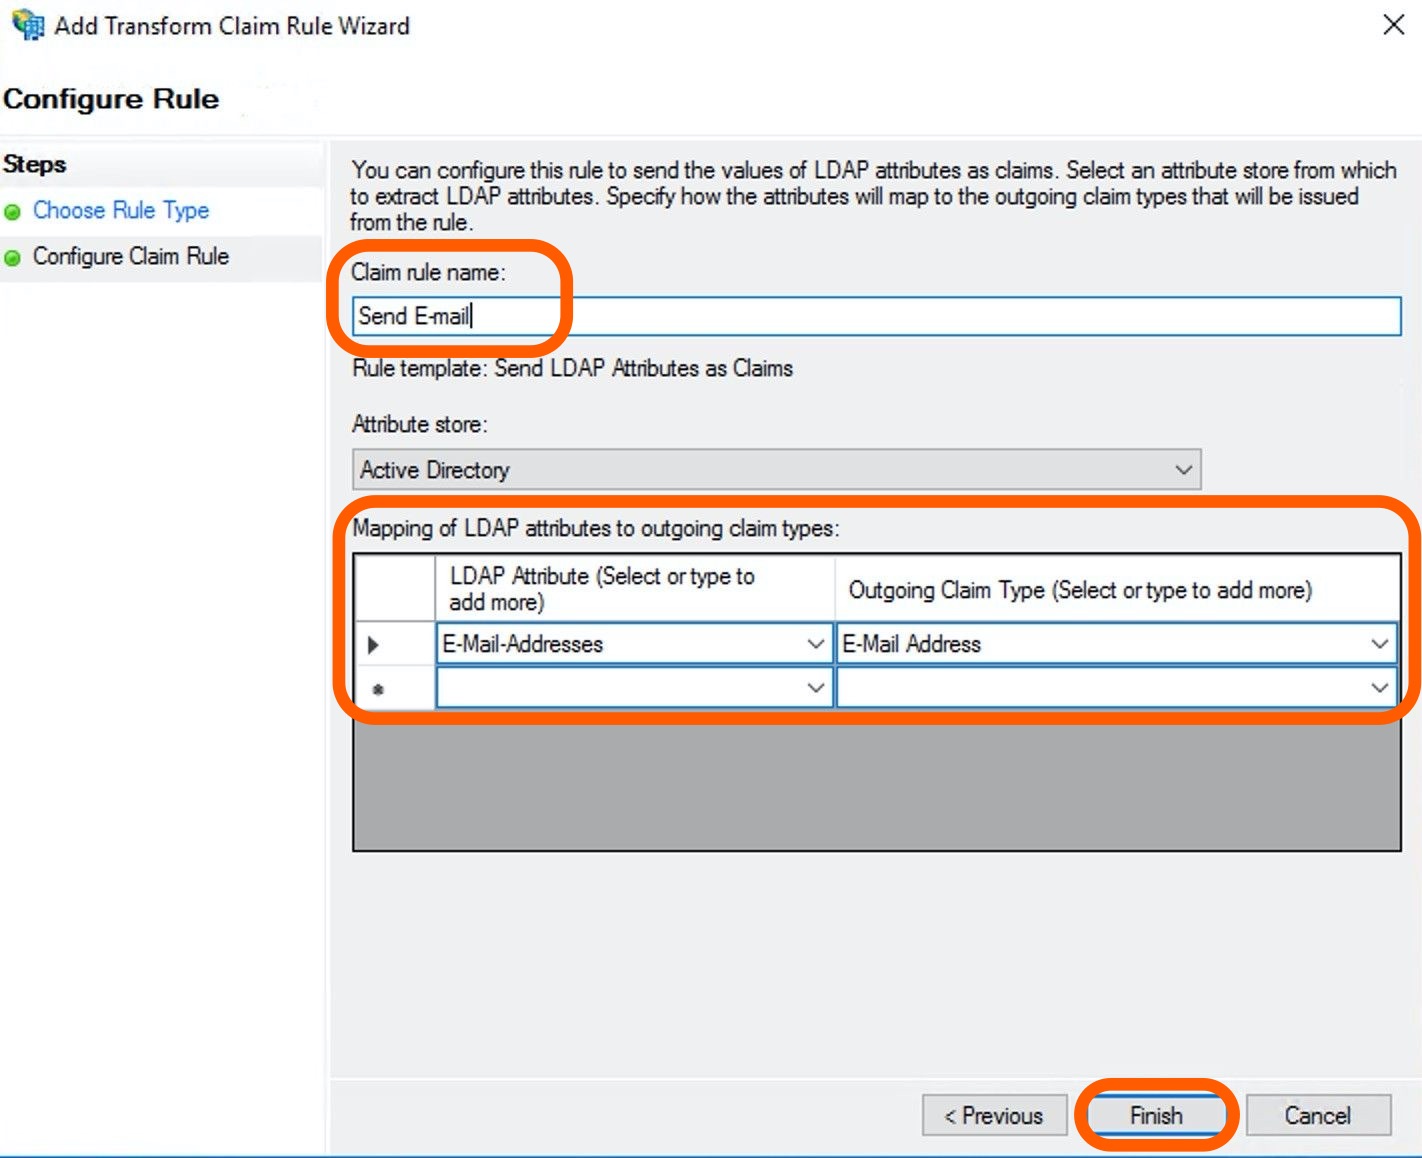
On the Configure Claim Rule page:
-
Add a rule name, for example Send E-mail, in the Claim rule name field.
-
Select an Attribute Store which is most likely the Active Directory.
-
In the Mapping of LDAP attributes to outgoing claim types field select E-mail Addresses.
-
-
Click Finish.
-
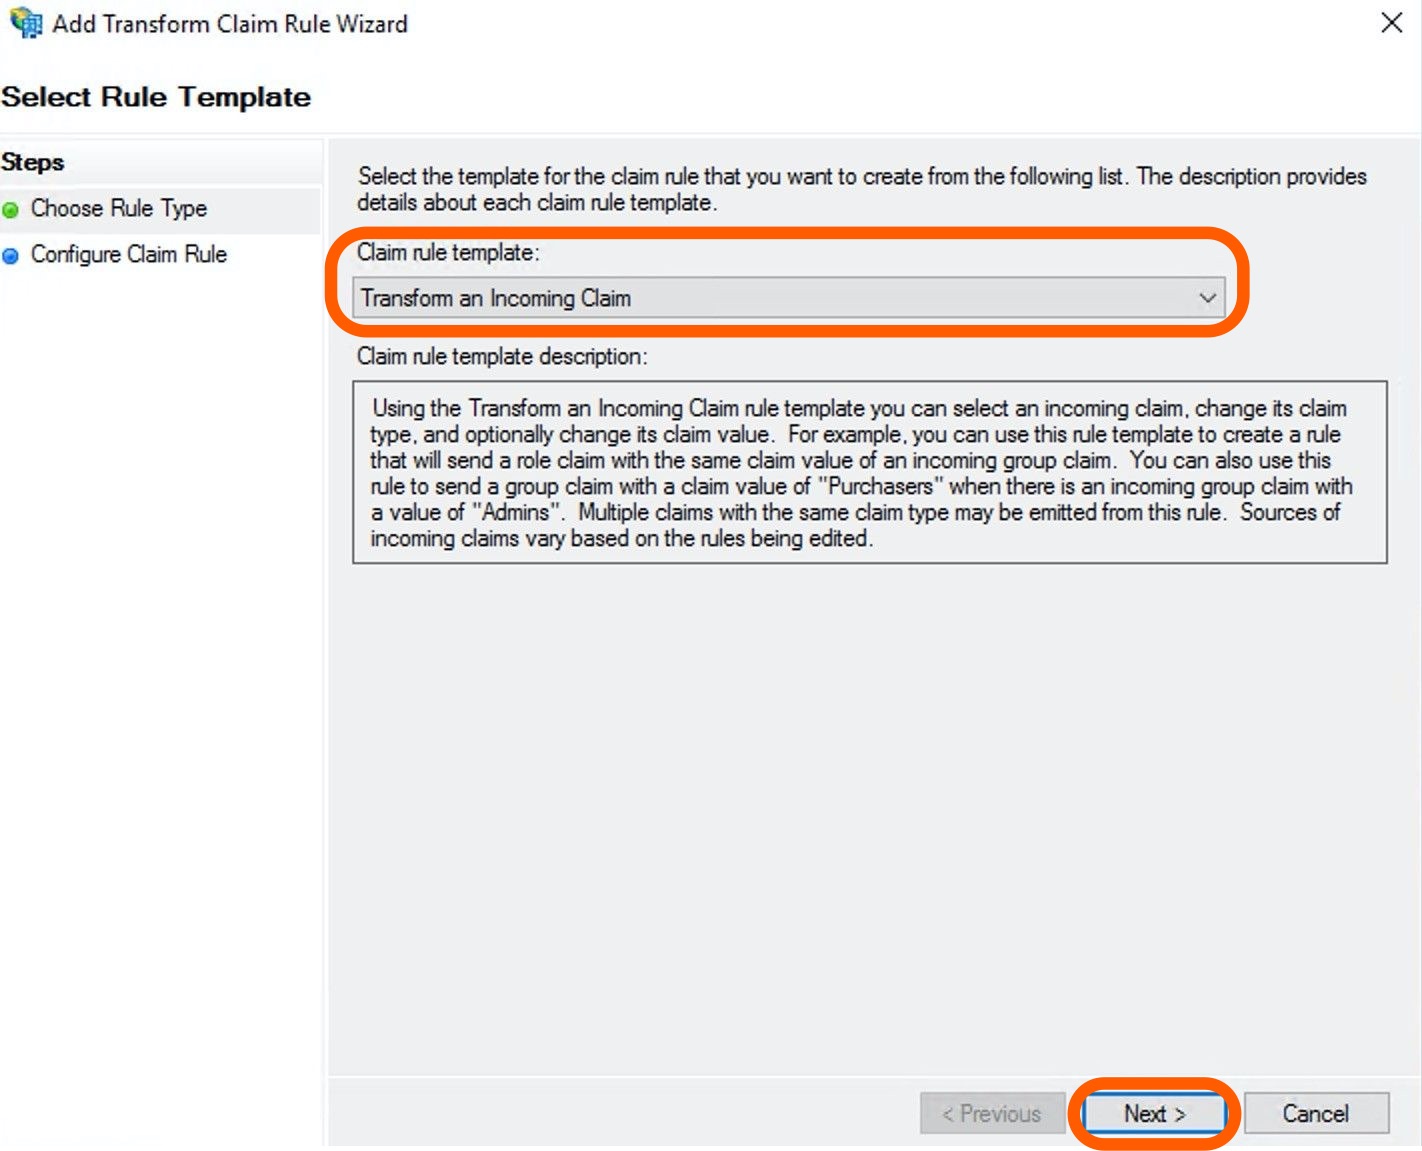
Add another new rule that turns an E-mail to a formatter NameID. To do so, click Add rule in the Edit Claim Issuance Policy page again.
-
On the Select Rule Template, select Transform an Incoming Claim option in the Claim rule template dropdown. Click Next.
-
Give a name to the new rule, for example,
Transform E-mail. -
Select E-Mail Address as the Incoming Claim Type.
-
Select NameId as the Outgoing claim type.
-
Choose Email as the Outgoing name ID format.
-
Hit OK to finish the process.