Repository access with the GitHub App
The Bitrise GitHub App allows users to connect their Bitrise Workspace to a GitHub account or organization with a GitHub App that provides granular access with increased security and automatic status updates.
Supported for GitHub Cloud users
The Bitrise GitHub app is supported for all GitHub Cloud users. GitHub Enterprise Server users need to create and install a different GitHub app, as described in our GH Enterprise integration guide.
The best way to connect your Bitrise account to your GitHub repositories is by integrating with a GitHub app. The Bitrise GitHub app has a number of features that make integration easier:
-
The app eliminates the need for an SSH key, a Personal Access Token, and a service credential user. For access, it generates a temporary access token before every build, significantly increasing security.
-
It provides granular access to your repositories: no need to grant access to an entire GitHub organization, instead select the specific repositories the app can access.
-
With the app installed, you automatically receive Bitrise status updates directly on GitHub with the GitHub Checks app. No need for configuring status reports separately. Note that while only one GitHub account can be connected to a Bitrise Workspace, GitHub Checks can still be configured for repositories owned by other GitHub accounts.
HTTPS URL required
Please note that the GitHub App requires an HTTPS URL for your repository instead of an SSH one. Normally, you don't have to worry about this: setting up the GitHub App connection changes the URL of your project. If there's an issue, you can change the URL manually: Changing the repository URL.
Installing the GitHub App integration
This guide is intended for GitHub Cloud users, including GitHub Enterprise Cloud users, who wish to install the Bitrise GitHub App and connect their Bitrise Workspace to a GitHub account or organization with the app.
For GitHub Enterprise Server users, we have a separate guide: Integrating self-hosted GitHub Enterprise Server with Bitrise
You can connect via the GitHub App integration in two ways:
-
From the Workspace settings page.
-
When adding a new Bitrise project.
GitHub App installations per Workspace
Note that:
-
A maximum of ten GitHub App installations can be connected to a Workspace.
-
A GitHub App installation cannot be connected to multiple Workspaces.
-
The GitHub Checks functionality of the app is available for repositories owned by other GitHub accounts.
Connecting a GitHub App from the Workspace settings page
A Bitrise GitHub App installation is tied to a Workspace. You can always install and check its connection from the Workspace settings page.
SSO on GitHub
If you install the GitHub App integration for a GitHub organization that requires SAML SSO, you need to have an active SAML SSO session on GitHub to be able to connect to the organization's repositories.
If your installed GitHub app can't access all repositories it should, you might to need to revoke the app and authorize it again on GitHub while you have an active SAML SSO session.
For more information and the detailed procedure, check GitHub's documentation.
-
On the Bitrise main page, select your Workspace from the dropdown menu.
-
From the navigation menu on the left, select Settings.
-
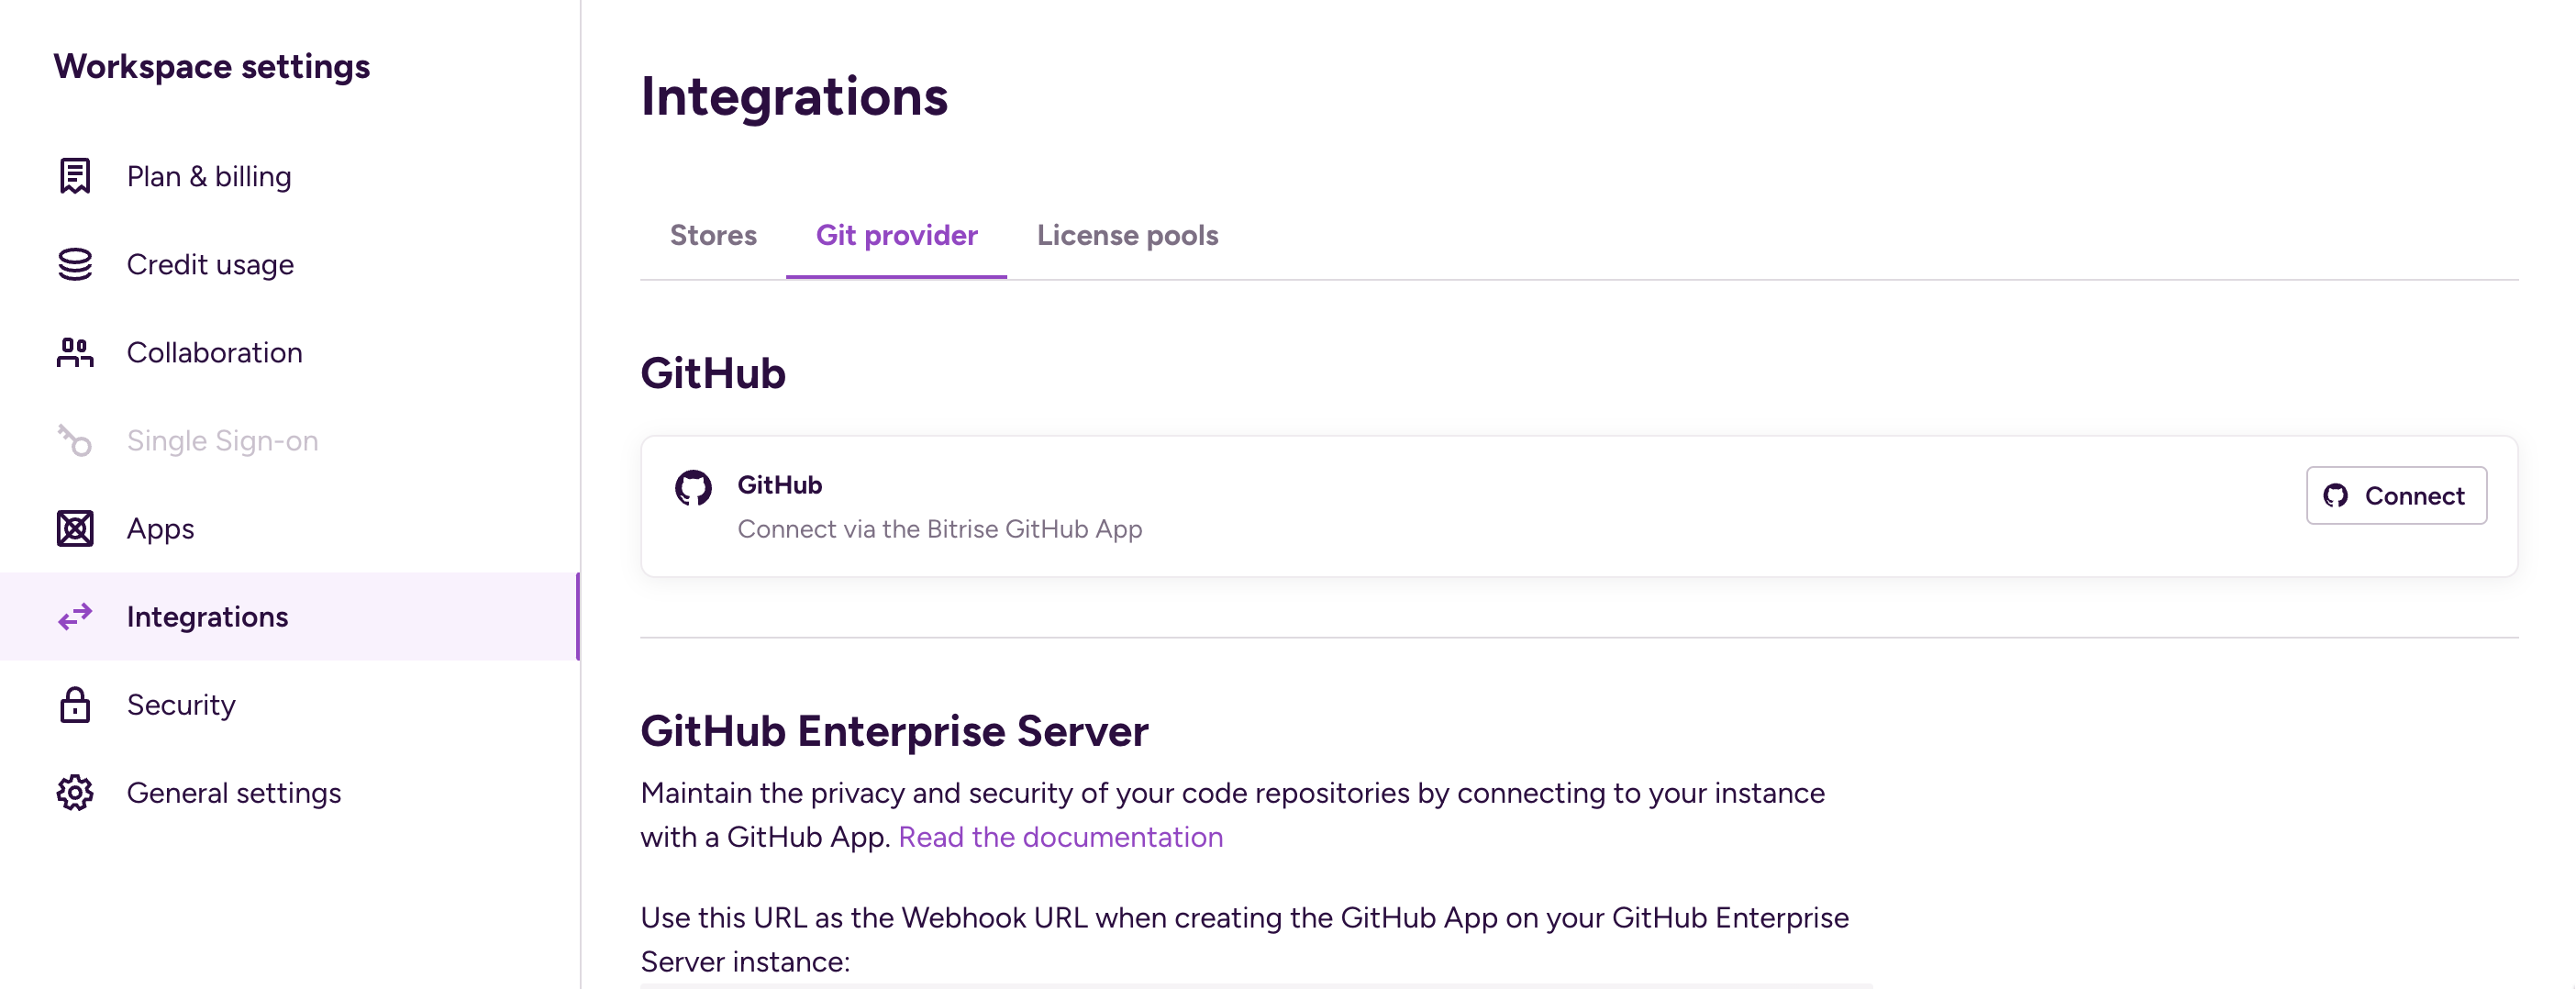
On the Workspace settings page, select Integrations.
-
Select GitHub and click .
-
If you haven't authorized the Bitrise GitHub App before, you will be prompted for authorization at this point.
-
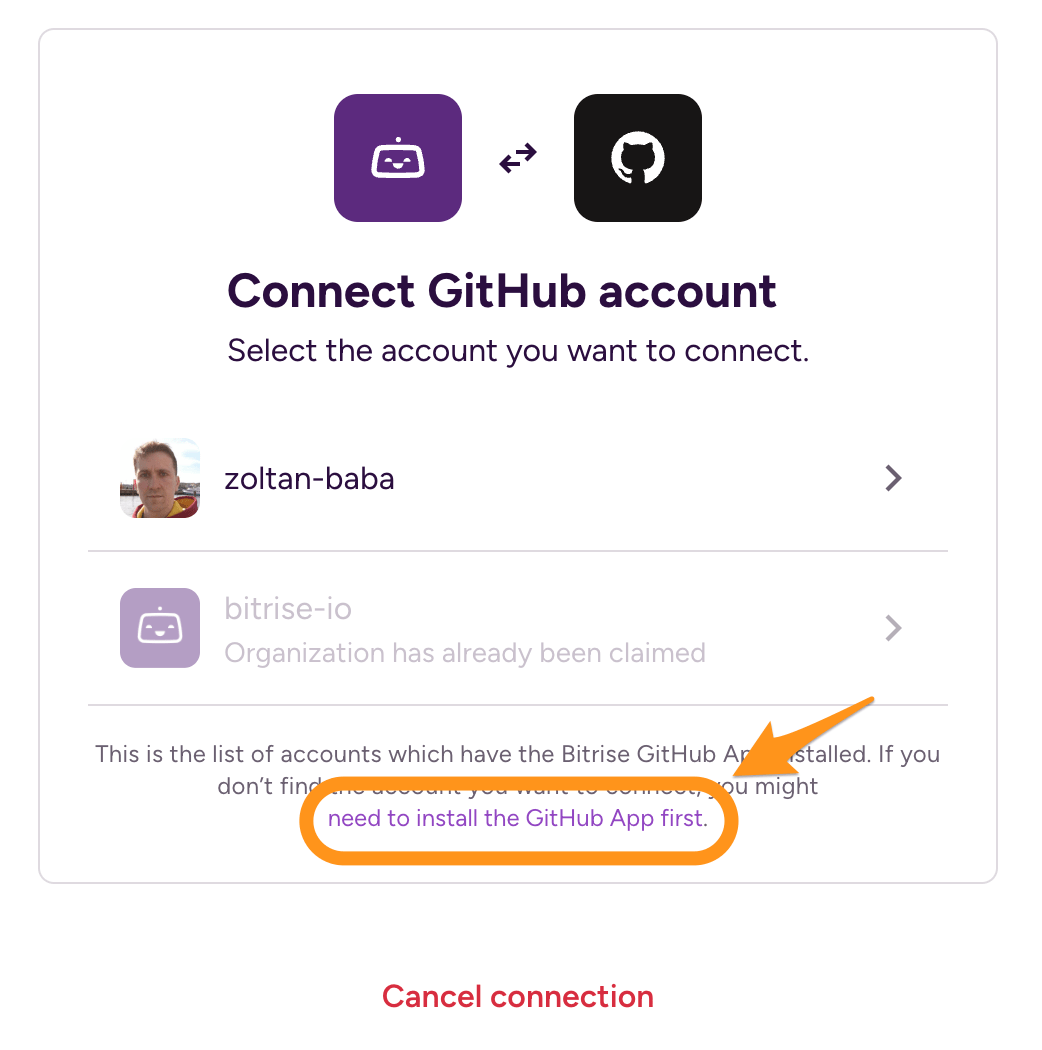
You will be prompted to select the GitHub account or organization you want to connect. If you don't find the one you need in the list, you need to install the App to that account or organization first: click the link below the list of accounts.
-
Once you click the link, you will be prompted to select an account or organization. After selecting one, you will be transferred to the Install & Authorize page.
-
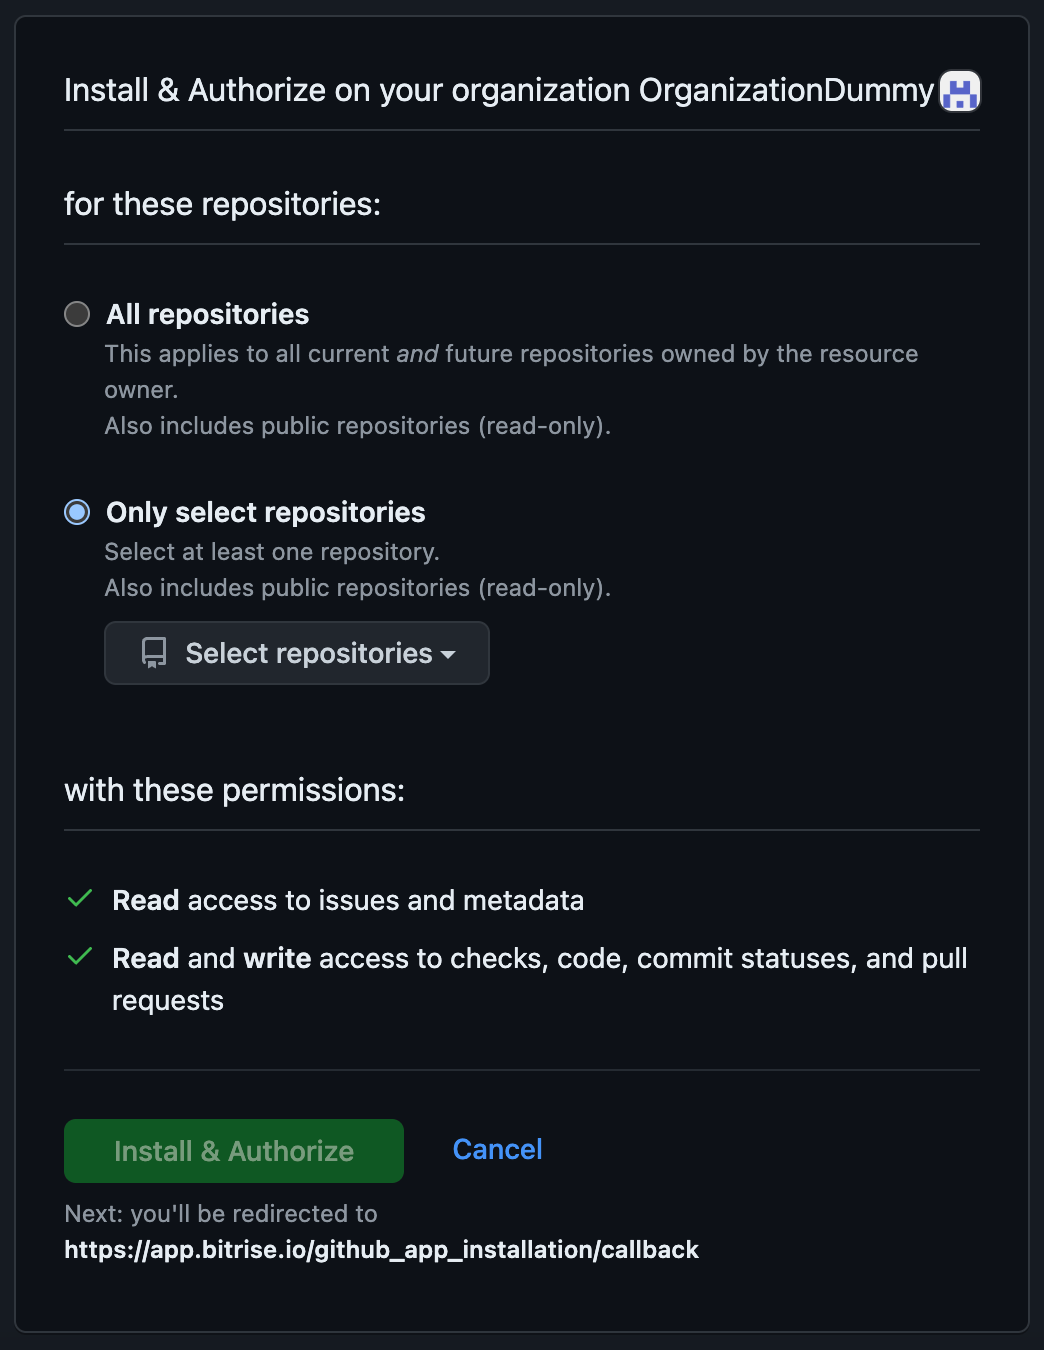
On the Install & Authorize page, select the access type:
-
All repositories: the Bitrise GitHub App will have access to all repositories belonging to the account or organization, including future ones.
-
Only select repositories: Select one or more repositories that Bitrise will be able to access. You can add more later but to do so, you will need to reconfigure your repository access on the GitHub App's page.
-
-
When done, click . You will be redirected to the Workspace settings page.
Authorization
If you are not authorized on GitHub to install the app, you can still request the installation. Once a GitHub Admin approves the installation, you can come back and select the App installation from the list.
-
If you have existing apps with OAuth connection, we recommend switching them over to the GitHub App connection.
Connecting a GitHub App when adding a new project
SSO on GitHub
If you install the GitHub App integration for a GitHub organization that requires SAML SSO, you need to have an active SAML SSO session on GitHub to be able to connect to the organization's repositories.
If your installed GitHub app can't access all repositories it should, you might to need to revoke the app and authorize it again on GitHub while you have an active SAML SSO session.
For more information and the detailed procedure, check GitHub's documentation.
During the process of adding a new project on Bitrise, you have to select how Bitrise can access your repository. This process allows connecting the project via the GitHub App.
-
Start the process of adding a new project.
-
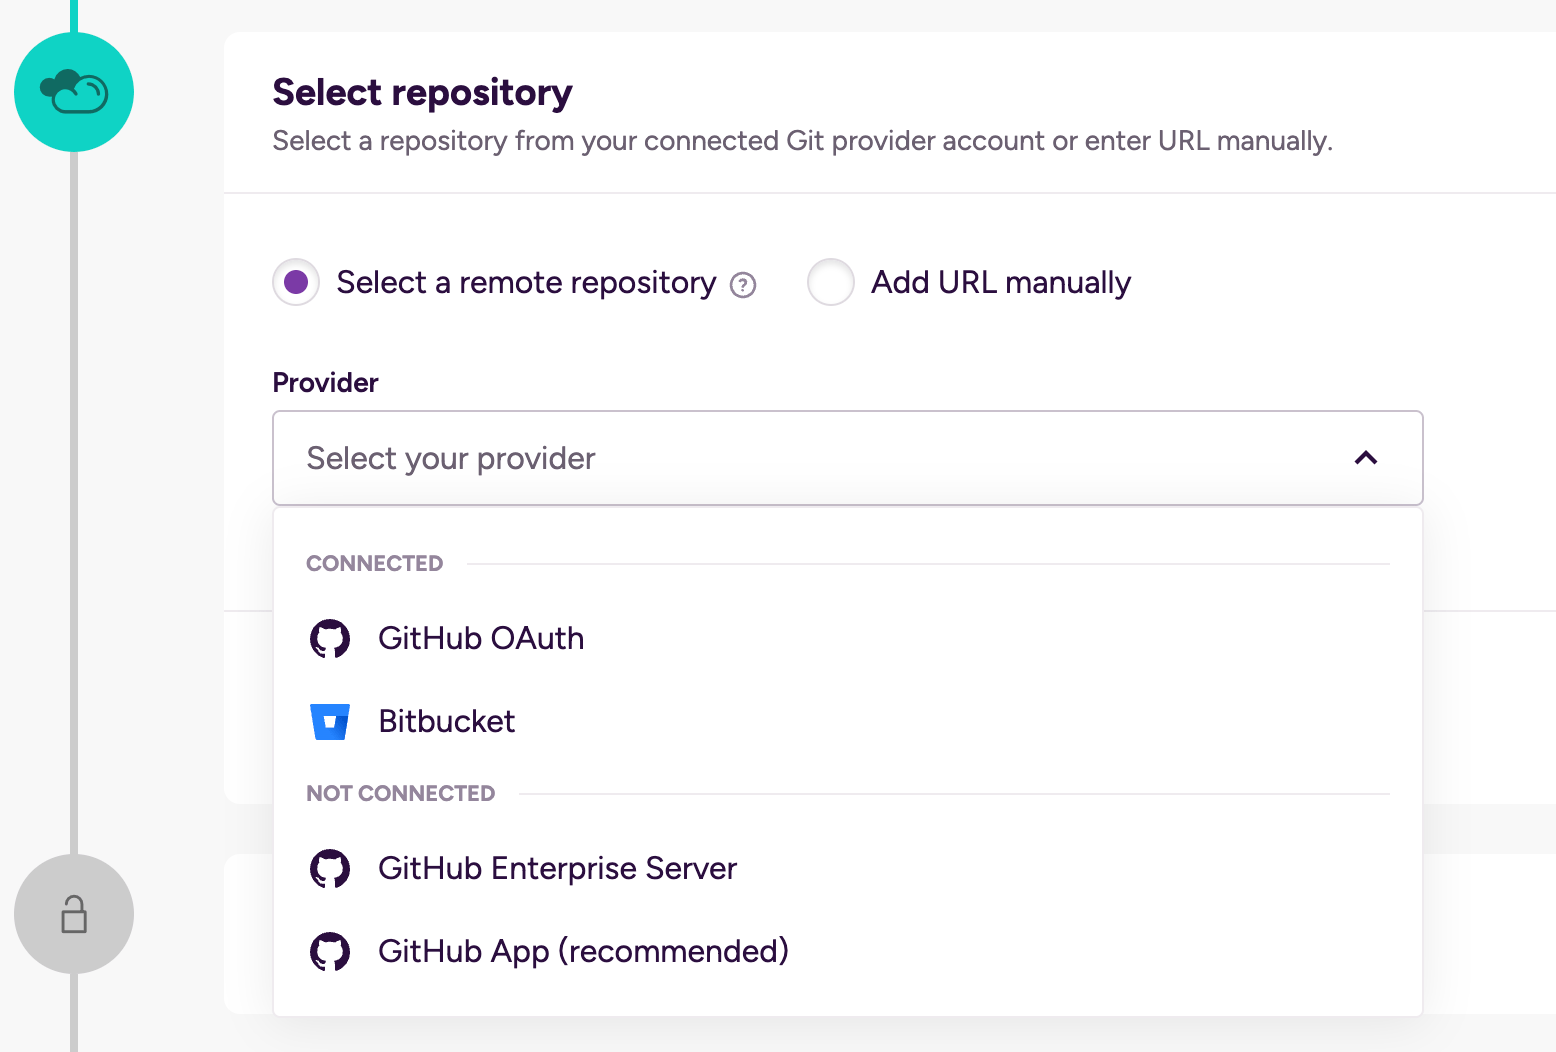
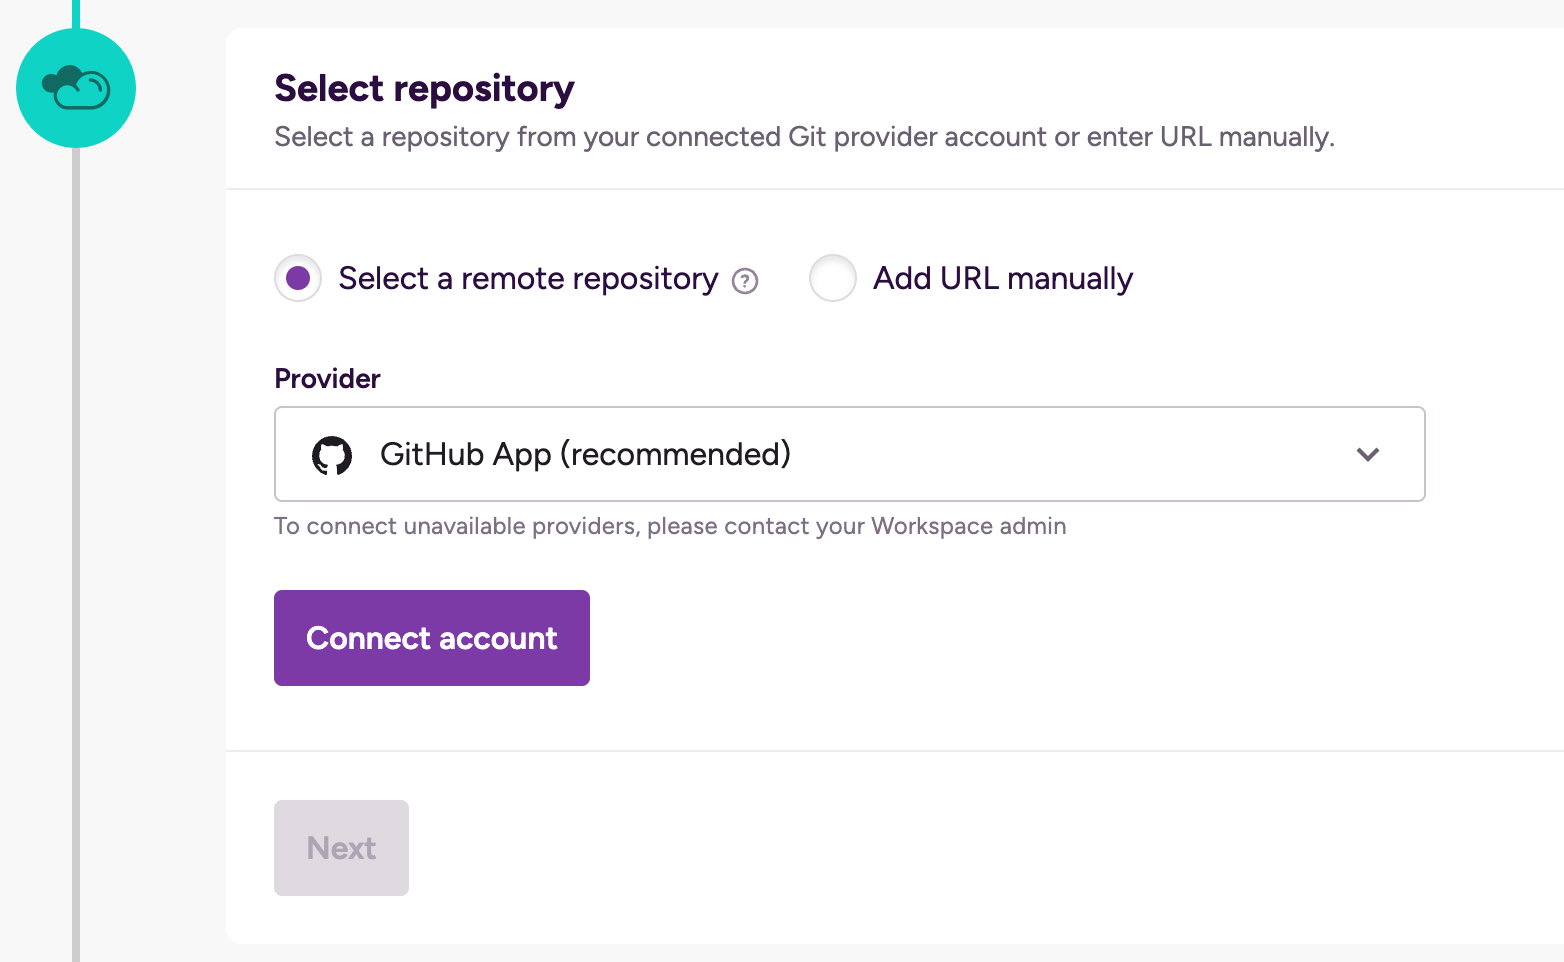
At the Select a repository section, select from the dropdown menu.
-
Click .
-
You will be prompted to select the GitHub account or organization you want to connect. If you don't find the one you need in the list, you need to install the App to that account or organization first: click the link below the list of accounts.
-
Once you click the link, you will be prompted to select an account or organization. After selecting one, you will be transferred to the Install & Authorize page.
-
On the Install & Authorize page, select the access type:
-
All repositories: the Bitrise GitHub App will have access to all repositories belonging to the account or organization, including future ones.
-
Only select repositories: Select one or more repositories that Bitrise will be able to access. You can add more later but to do so, you will need to reconfigure your repository access on the GitHub App's page.
-
-
When done, click . You will be redirected to continue adding your new Bitrise project.
Extending GitHub App permissions to the builds
The Bitrise GitHub App generates a short-term, temporary token for each build that is triggered via the app. This token has only one permission by default: content:read. This means the build can access the GitHub repository but can't do anything else.
You can extend these permissions so that you can perform other operations during a build. For example, this can enable users to push Git tags from their builds, create custom status reports, put a label on a pull request, or push a new version number.
Linked repositories
When extending permissions, you extend permissions to all additional linked repositories as well!
The exact permissions you can extend depends on your GitHub account:
-
On GitHub Cloud, the GitHub App has the following permissions:
-
Read access to issues and metadata
-
Read and write access to checks, code, commit statuses, and pull requests
-
-
GitHub Enterprise Server users define their GitHub App permissions when creating the app.
To extend the permissions:
-
Open your project on Bitrise with a user that has the Admin role on the project.
-
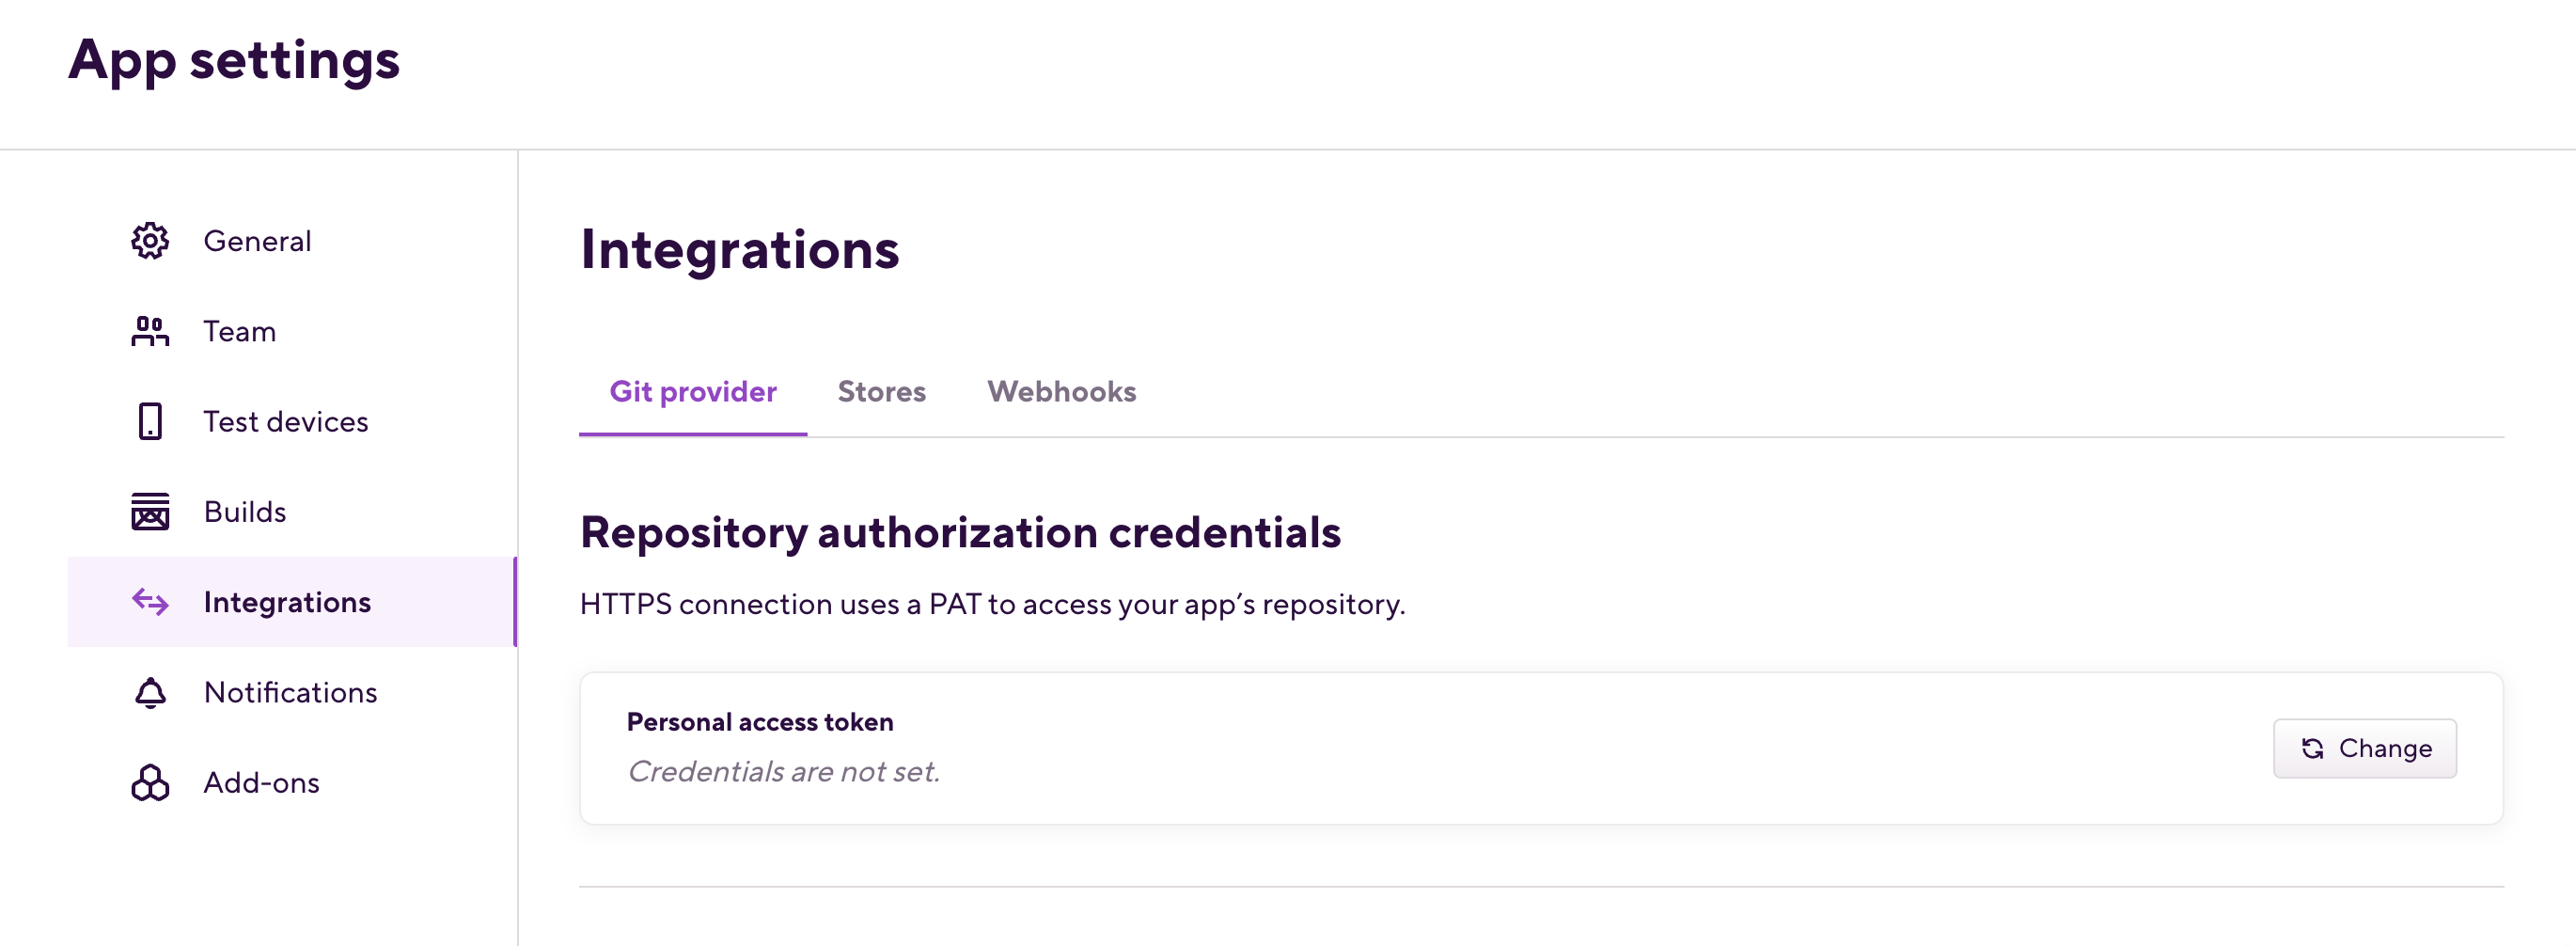
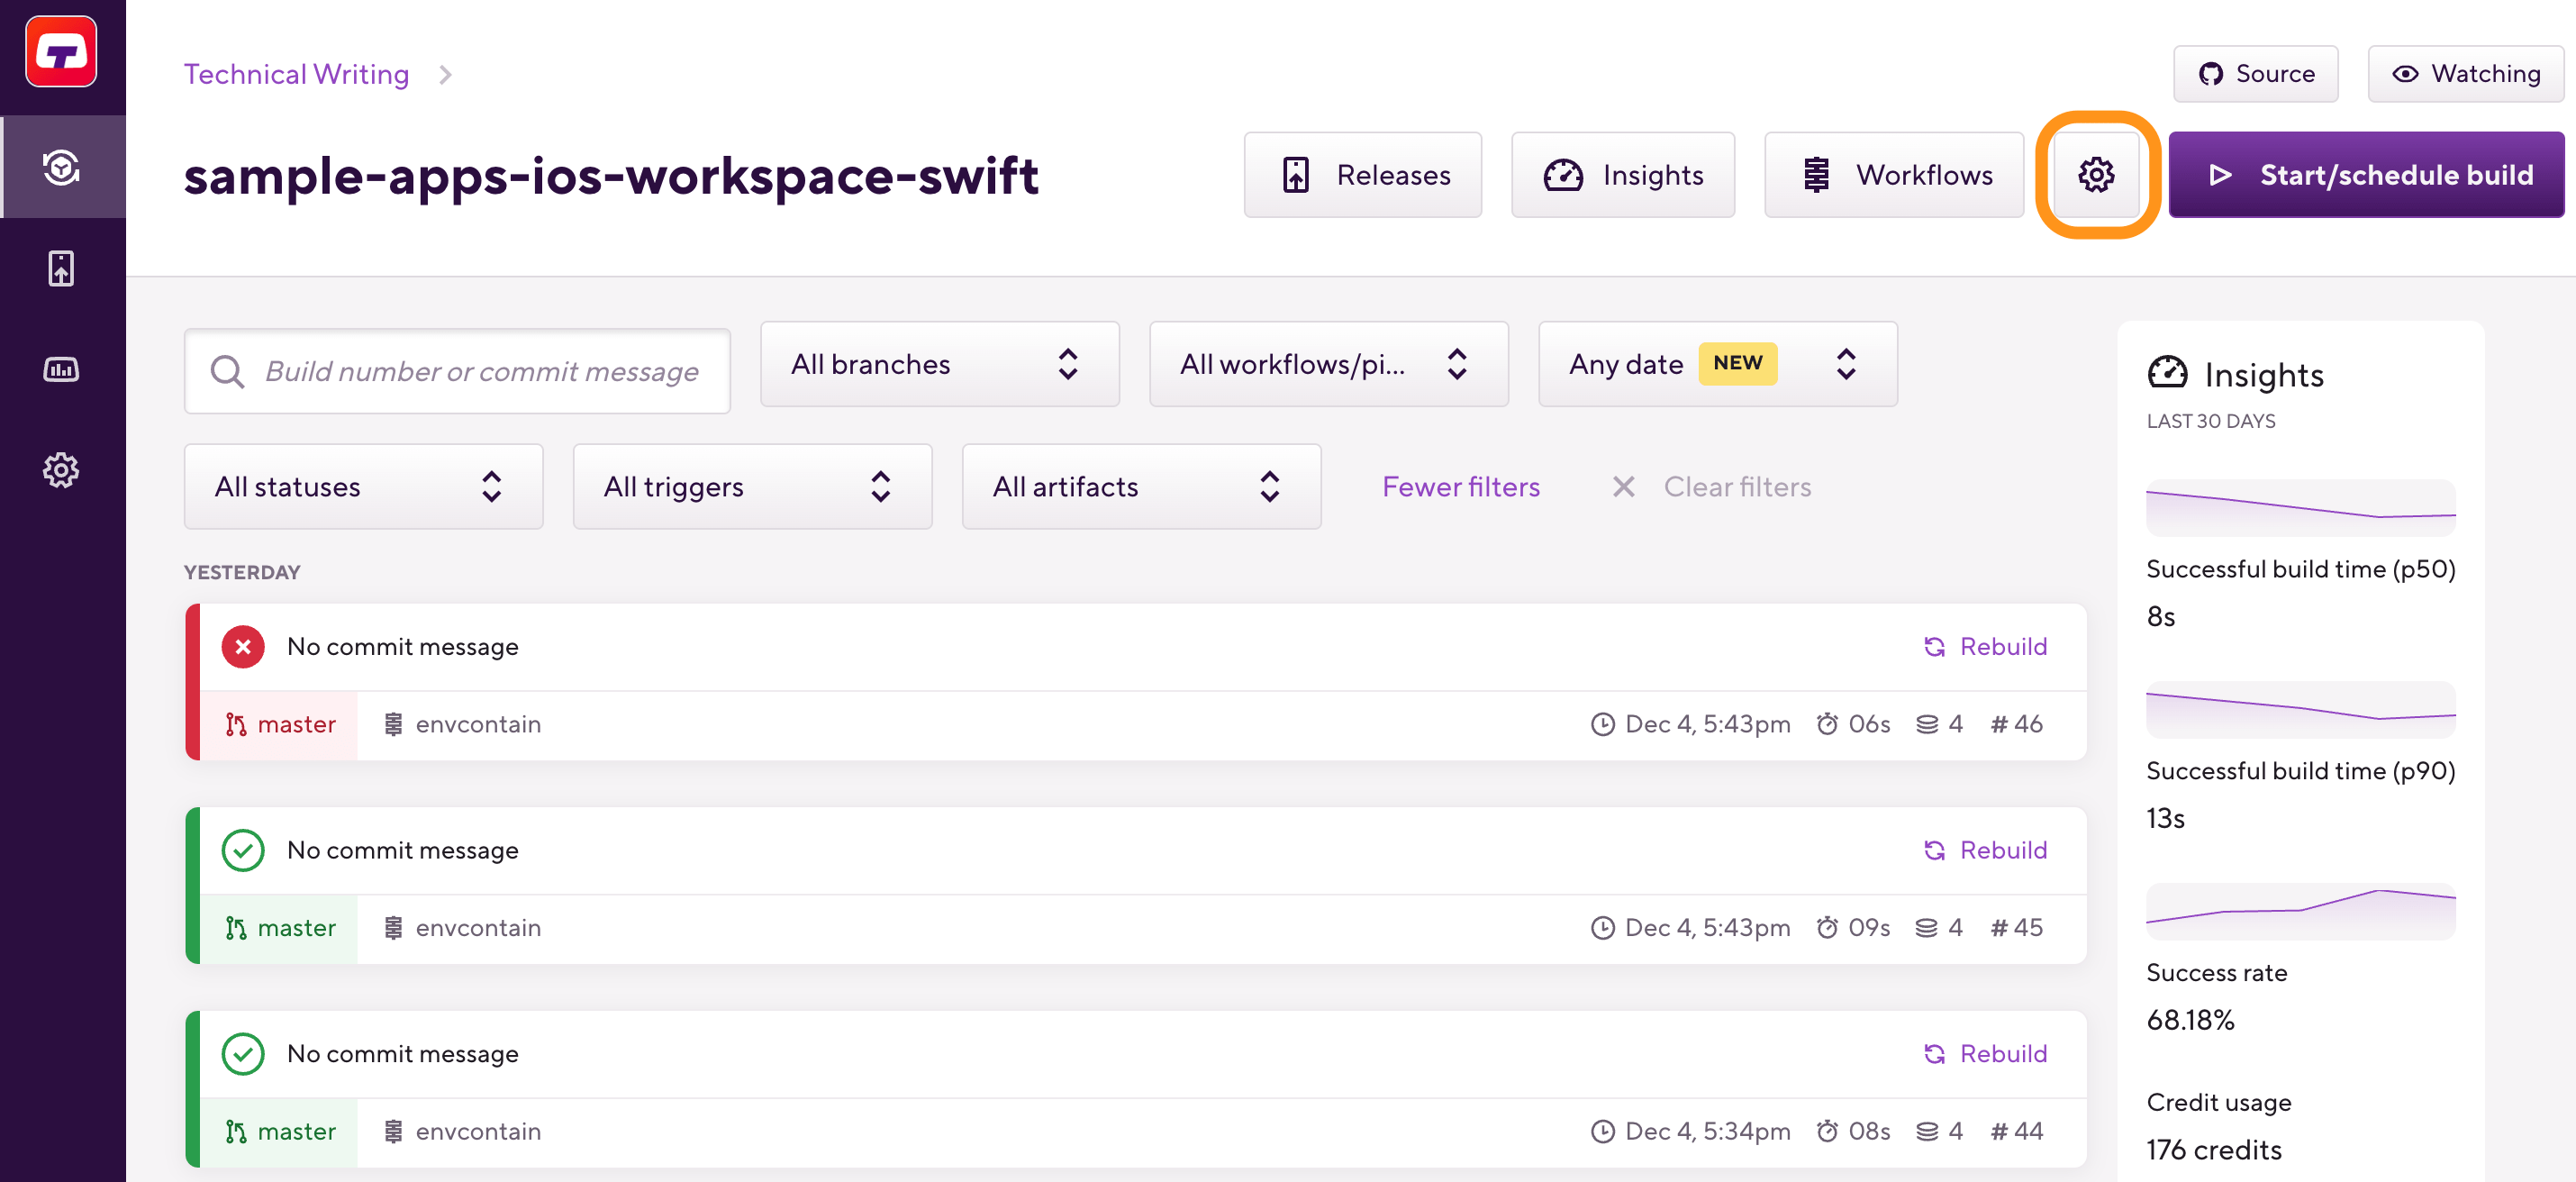
On the main page of the project, click on the Project settings button.
-
Select the Git provider tab.
-
Find the Extend GitHub App permissions to builds option and toggle it on. This extends permissions to the default repository and all additional linked repositories, too.
Additional linked repositories via a GitHub App
Each Bitrise project has a primary Git repository. This is where your project's code is stored and this repository is cloned when we start a build. By default, a Bitrise project can't access other repositories.
However, your project might require other repositories. For example, it might have private submodules that it must access during a build. If you use the GitHub App, you can do this via linking additional repositories. The feature is available on both GitHub Cloud and GitHub Enterprise Server.
Other connection methods
If you are not using the Bitrise GitHub App, you can still configure access to additional repositories: Projects with submodules or private repo dependencies.
A linked repository is a repository that a Bitrise project can access using a GitHub App installation but it's not the project's primary repository.
When running a build of a project connected via a GitHub App installation, Bitrise generates a temporary token that, by default, can only access the primary repository. Once an additional repository is linked, the tokens generated for the build can access the additional repository.
To be able to link a repository, all of the following conditions must be met:
-
The GitHub App is installed to the account or organization that owns the repository on GitHub.
-
The app installation is enabled for the repository.
-
The user attempting to link the repository can access the repository on GitHub. If your GitHub user account doesn't have access to a repository, you can't link it on Bitrise.
GitHub Enterprise Server
If you use a GitHub App to connect to a GitHub Enterprise Server instance, the app doesn't check user access. You can link any repository that your GitHub App has access to.
Linking additional repositories
To link additional repositories to a project with an established GitHub App connection:
-
Open your project on Bitrise with a user that has the Admin role on the project.
-
On the main page of the project, click on the Project settings button.
-
On the left, select Integrations and then on the Integrations page, select the Git provider tab.
-
Find the Git integration status card and click .
-
In the Enable additional repositories dialog, select the repositories you want to link.
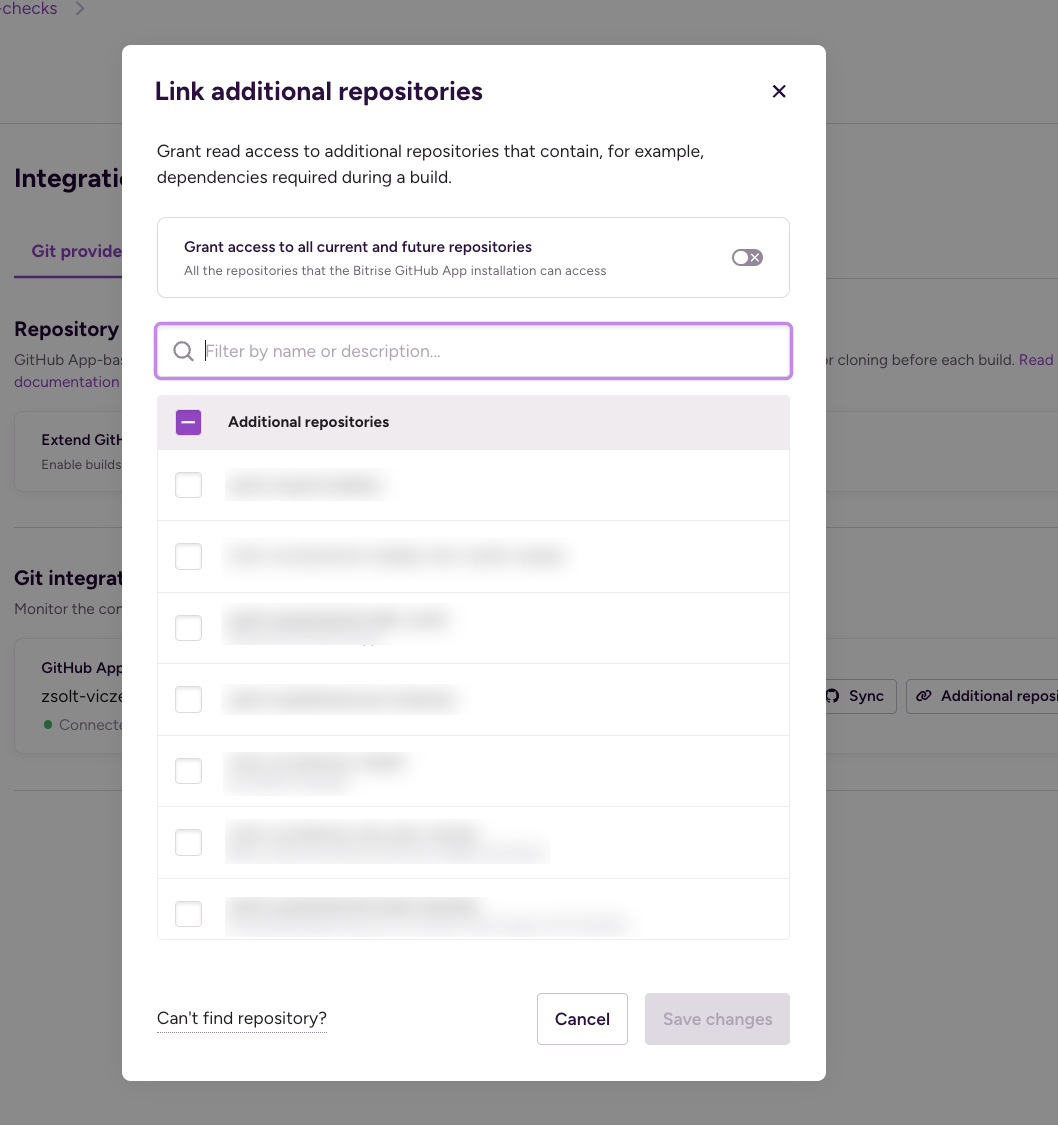
You can link a maximum of 50 additional repositories.
You will see a list of repositories. To see a repository on the list:
-
On GitHub Cloud, your GitHub user needs to have access to it. If you use GitHub Enterprise Server, user permissions are not checked.
-
The GitHub App installation has access to it.
Disabling repositories
If you already have repositories linked, please note that users who otherwise don't have access to those repositories can disable them but cannot add them back!
-
-
When done, click .
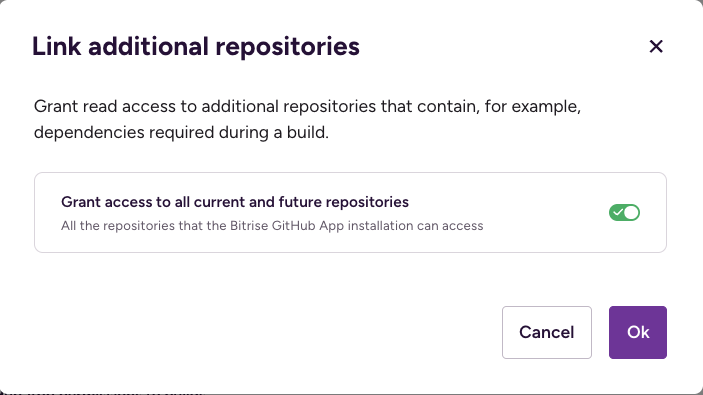
Linking all repositories automatically
GitHub admins can switch the Grant access to all current and future repositories toggle so that Bitrise builds can have access to every GitHub repository your GitHub App is allowed to access, including any new repositories added in future.
Accessing the Grant access to all current and future repositories toggle
To successfully use this functionality:
-
For security reasons, you have to be logged in as a Bitrise user who is also the GitHub admin for your organization.
-
Make sure you configured the GitHub App to have access to necessary repositories.
-
In Bitrise, go to the Project Settings page of your project.
-
On the left, select Integrations.
-
Under Git integration status click the Additional repositories button.
-
Toggle the Grant access to all current and future repositories switch to the right.
Your project's build will now have access to all current and future GitHub repositories the Bitrise GitHub App has access to.
GitHub email notification about allowing permission
When Bitrise released this feature, Bitrise GitHub App users will have received an email from GitHub on a new permission which is needed to use the Grant access to all current and future repositories toggle. Bitrise GitHub App requests additional permission which is called: read organization membership. Only GitHub admins have the necessary rights to follow the link in the email and to make this functionality available for their teams.
This is a standard and legitimate message from GitHub and allowing this permission will not have any detrimental effect on Bitrise builds. You can read more about the new permission Bitrise requires here.
Using a private Step library via the GitHub App
Each Bitrise project has a default Step library: a repository of Steps. If the exact source of a Step is not specified in the configuration, the Bitrise CLI pulls the Step data from the default library.
This library can be a private Step library. To access such a library via the GitHub App, you need to add the Authenticate host with netrc Step as the very first Step which will run in your Workflow:
format_version: "13"
default_step_lib_source: https://github.com/my-private-org/my-bitrise-steplib.git
project_type: ios
workflows:
  example:
    steps:
    - https://github.com/bitrise-io/bitrise-steplib.git::authenticate-host-with-netrc@0:
Note that the Authenticate host with netrcStep has a full source identifier to ensure it is pulled from the official Bitrise Step library, not your private library.
Using the Step requires specifying three inputs: the host, the Git username, and the Git password. The Bitrise GitHub App integration uses token-based authentication: each build receives a one time token under the GIT_HTTP_PASSWORD Environment Variable. This Env Var can be used as the password. The
username can't be empty because the Step will fail but it is not used so it doesn't matter what you put there.
format_version: '13'
default_step_lib_source: https://github.com/tothszabi/steplib.git
project_type: ios
workflows:
  example:
    steps:
    - https://github.com/bitrise-io/bitrise-steplib.git::authenticate-host-with-netrc@0:
        inputs:
        - host: github.com
        - username: username
        - password: "$GIT_HTTP_PASSWORD"
    - private-script@1: {}
Running git clone with linked repositories
If you attempt to run git clone or other git commands for a linked repository, your build might fail with an
authentication error. This is because the authentication credentials are stored in a local netrc file. This file is automatically generated by the official Git Clone Step.
However, if you use your own script to perform git clone, or you use any other Git command requiring authentication before the Git Clone Step, you need to create the netrc file. You have two ways:
-
You can do it manually.
-
You can use the Authenticate host with netrc Step. It should be the first Step of your Workflow.
HTTP URLs
Make sure you always use HTTP URLs when cloning private repository dependencies.
Using the Step requires specifying three inputs: the host, the Git username, and the Git password. The Bitrise GitHub App integration uses token-based authentication: each build receives a one time token under the GIT_HTTP_PASSWORD Environment Variable. This Env Var can be used as the password. The
username can't be empty because the Step will fail but it is not used so it doesn't matter what you put there.
workflows:
  example:
    steps:
    - authenticate-host-with-netrc@0:
        inputs:
        - host: github.com
        - username: "username"
        - password: "$GIT_HTTP_PASSWORD"
Switching from OAuth connection to the GitHub App
If your Bitrise project has an OAuth connection set up to your GitHub account, you can change it to the Bitrise GitHub App at any time without losing any functionality. We strongly recommend doing the switch: with the Bitrise GitHub App installed, you no longer need the service credential user, an SSH key, or a webhook to run Bitrise builds.
HTTPS URL required
Please note that the GitHub App requires an HTTPS URL for your repository instead of an SSH one. Normally, you don't have to worry about this: setting up the GitHub App connection changes the URL of your project. If there's an issue, you can change the URL manually: Changing the repository URL.
Can't switch back
Once you switch a Bitrise project from the OAuth connection to the GitHub App, you won't be able to switch back!
To switch:
-
Install the Bitrise GitHub App as described in the relevant guide: Connecting a GitHub App from the Workspace settings page.
-
Open your project on Bitrise with a user that has the Admin role on the project.
-
On the main page of the project, click on the Project settings button.
-
On the left navigation menu, select Integrations and go to the Git provider tab.
-
In the Git integration status section, you can see a blue card with information about GitHub App support. To switch, click .