Integrating fastlane to Bitrise
You can run your fastlane lane on Bitrise with the same commands you would use locally. Bitrise’s automated Steps provide extra functionality to your lane and speed up your builds.
Here is how you can benefit from integrating fastlane into Bitrise.
-
Our Fastlane Match Step takes care of code signing your project by cloning your private certificate/profile repository and registering the certificates and profiles in the keychain.
-
On Bitrise, you can run separate lanes for separate branches automatically. For example, you can run a lane for every code push onto the main branch to update screenshots and metadata on the App Store and to release the distribution version. You can run a separate lane for the develop branch to run your automated tests and deploy your test releases for your QA team. You can simply clone the Workflow multiple times, specify the lane to run for the given Workflow in a Workflow Specific Environment Variable, and use automatic triggers to define which Workflow should be selected for this branch / tag / pull request.
Running fastlane on Bitrise is as simple as adding one Step to your Workflow and setting some options. Let’s see how!
Connect to Apple services
Do not forget to connect to Apple services if you use this Step in your Workflow.
-
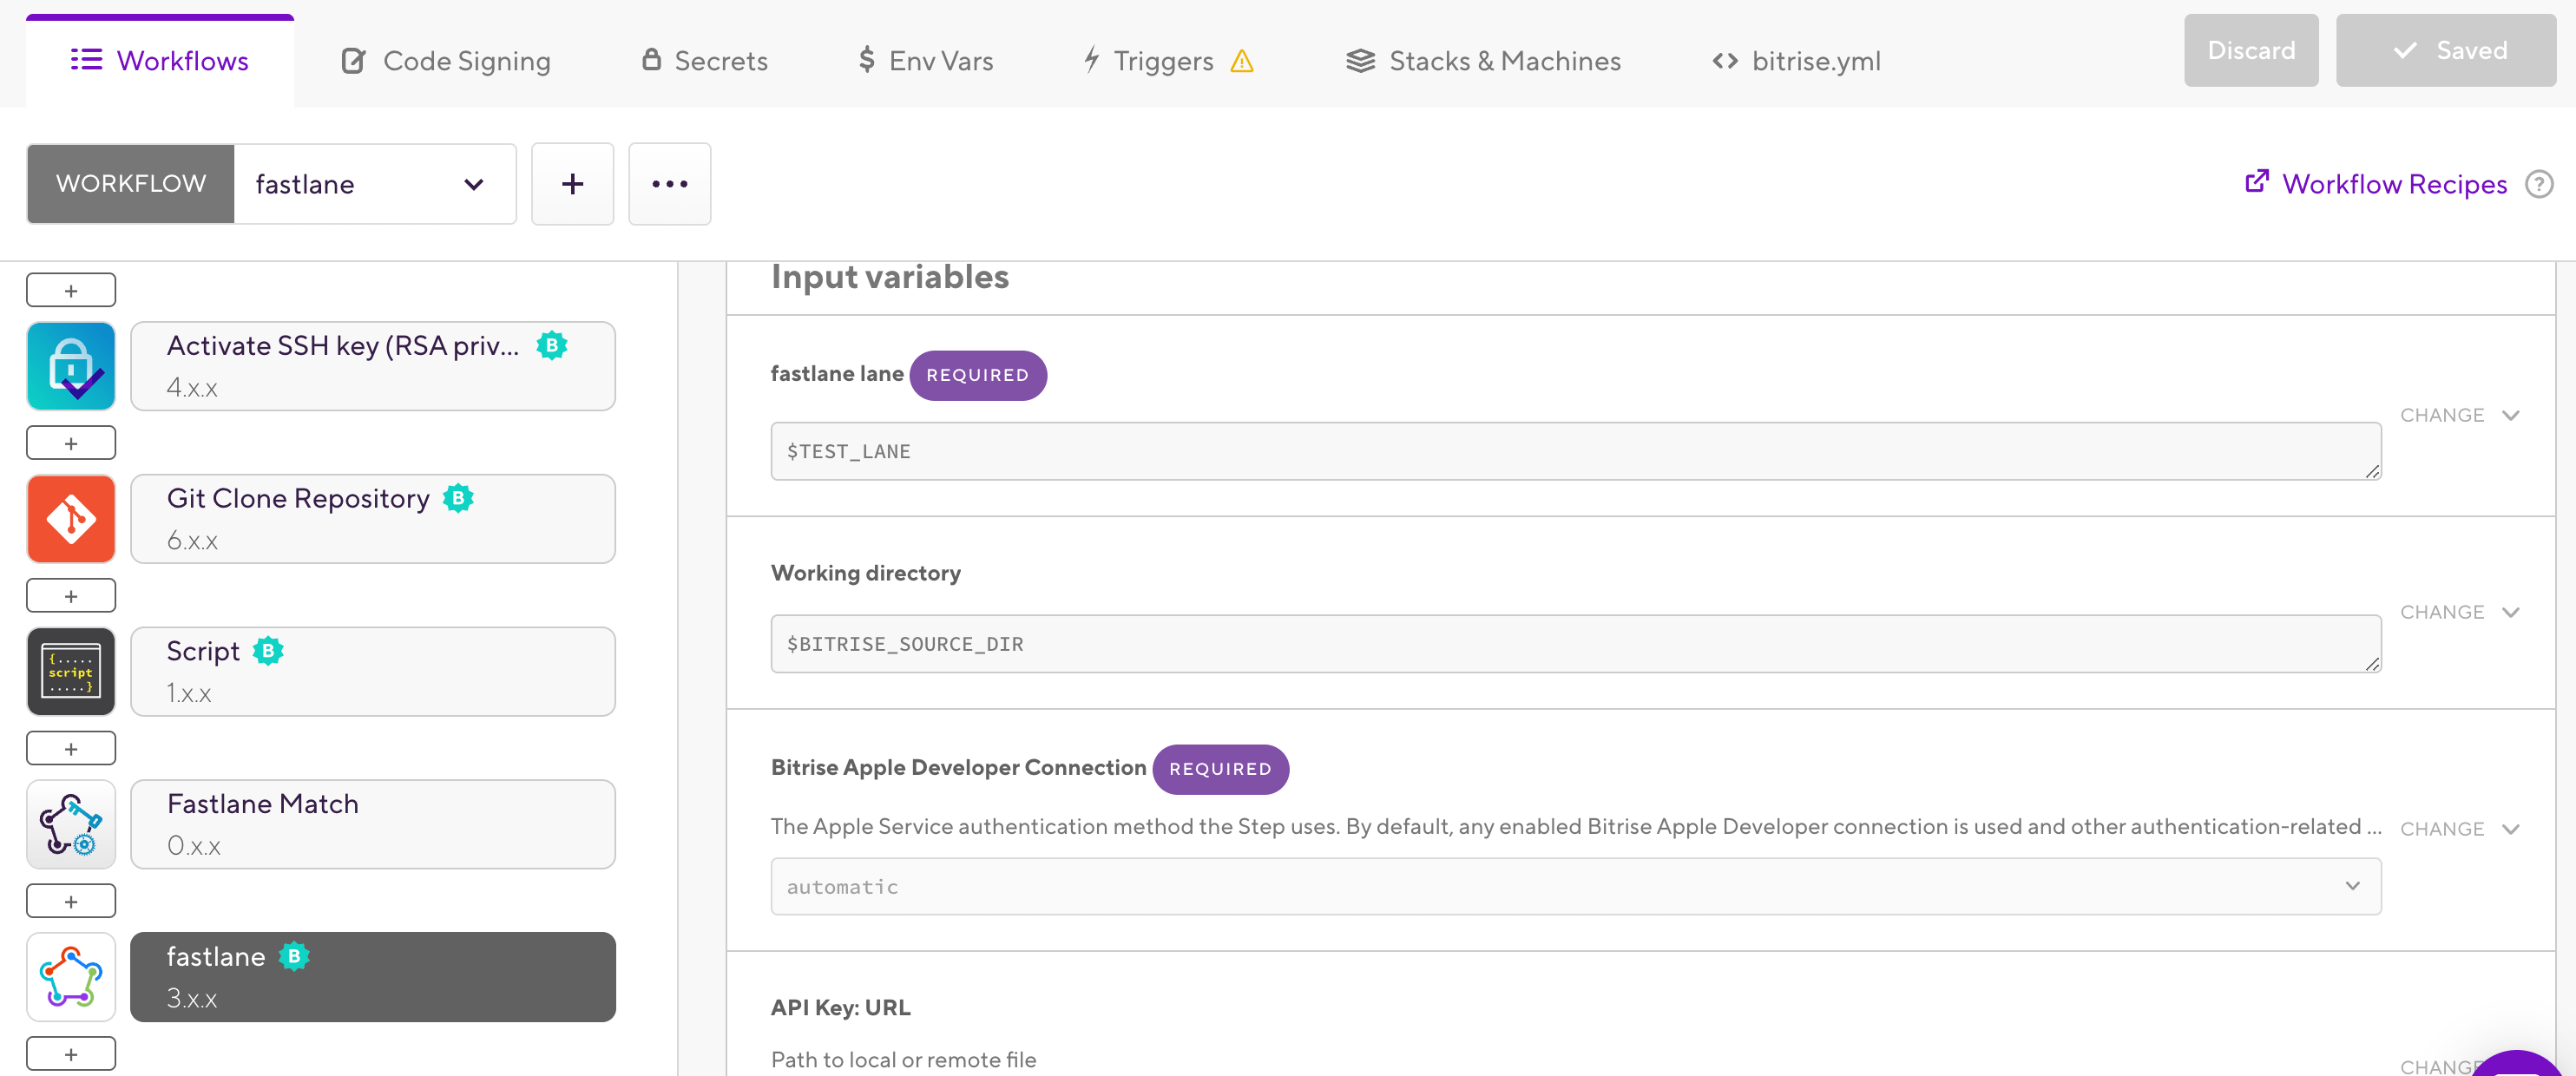
Add the Fastlane Step to your Workflow.
Make sure it is inserted after the Git Clone Step. Since fastlane is pre-installed on all Bitrise’s virtual machines, the Fastlane Step ensures that you can always use the required fastlane version.
-
To code sign your project, you have a couple of options to choose from:
Add one of Bitrise’s code signing Steps to your Workflow, such as: Certificate and profile installer, Manage iOS Code Signing, and Fastlane Match. For more information, check out our Code signing guides.
Alternatively, use fastlane match inside your fastlane lane instead of a code signing Step. Make sure you either use the Fastlane Match Step or set up fastlane match in your lane but don’t try to do both.
-
Click the Fastlane Step to fill out the required fields.

-
Add your lane in the fastlane lane input.
-
Use Working directory field if the fastlane directory is not in your repository’s root.
The working directory should be the parent directory of your
Fastfile’s directory. For example, if the Fastfile path is./here/is/my/fastlane/Fastfile, then theFastfile’s directory is./here/is/my/fastlane, so the Working Directory should be./here/is/my. -
The Should update fastlane gem before run? option will be skipped if you have a
Gemfilein thework_dirdirectory.If you don’t have a
Gemfileand this option is enabled, then the Step tries to use and run the latest fastlane version. -
Set the Enable verbose logging? to
yesif you wish to get more detailed logs on your failed builds. -
If the Enable collecting files to be included in build cache is set to
yes, the Step adds the following cache items (if they exist):-
Pods -
Podfile.lock -
Carthage -
Cartfile.resolved -
Android dependencies
-
That’s it! Start a build so that Bitrise can run your lane.
Reducing dependency on fastlane
Check out some of our Steps, which you can use to enhance your Bitrise experience, increasing the speed of your builds and simplifying processes while reducing your dependency on fastlane:
-
Xcode Archive & Export for iOS: This Step archives your Xcode project into an .ipa file that can be shared, installed on test devices, or uploaded to the App Store Connect. This Step also sets up code signing automatically with nearly zero configuration.
-
Xcode test for iOS: This Step runs all Xcode tests that are included in your project.
-
Xcode build for testing for iOS, iOS Device Testing, and Virtual Device Testing for Android: These Steps take care of all your device, unit, or UI testing needs. You can run tests using either a simulator or a physical device.
-
Google Play Deploy: You can use this Step to upload your Android app to Google Play.