GitHub Checks with the Bitrise GitHub App
The Bitrise GitHub app provides an extended version of the classic status checks Bitrise sends back to GitHub.
GitHub App integration
If you use the Bitrise GitHub App to connect a Bitrise Workspace to a GitHub account or organization, you don't need to do anything described in this section: GitHub Checks will automatically work for you to provide status updates.
You can, however, continue to use the OAuth connection for your apps and use GitHub Checks with our GitHub App.
The Bitrise GitHub App provides, among other things, an extended version of the classic build status checks that Bitrise sends back to GitHub. This extended version includes a Bitrise build summary and a check status. You can view the checks if you click the Details link of a pull request on GitHub. It unfolds the detailed build summary and build status our GitHub app attaches to your pull request on the Checks tab of GitHub.
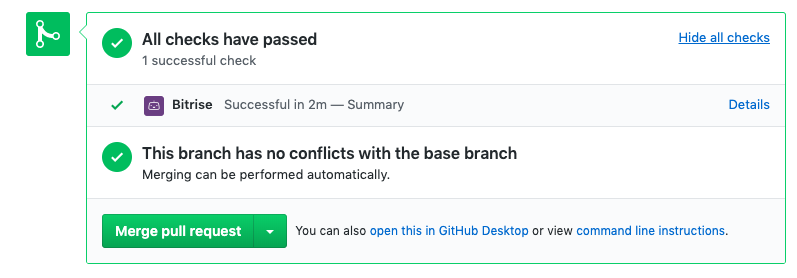
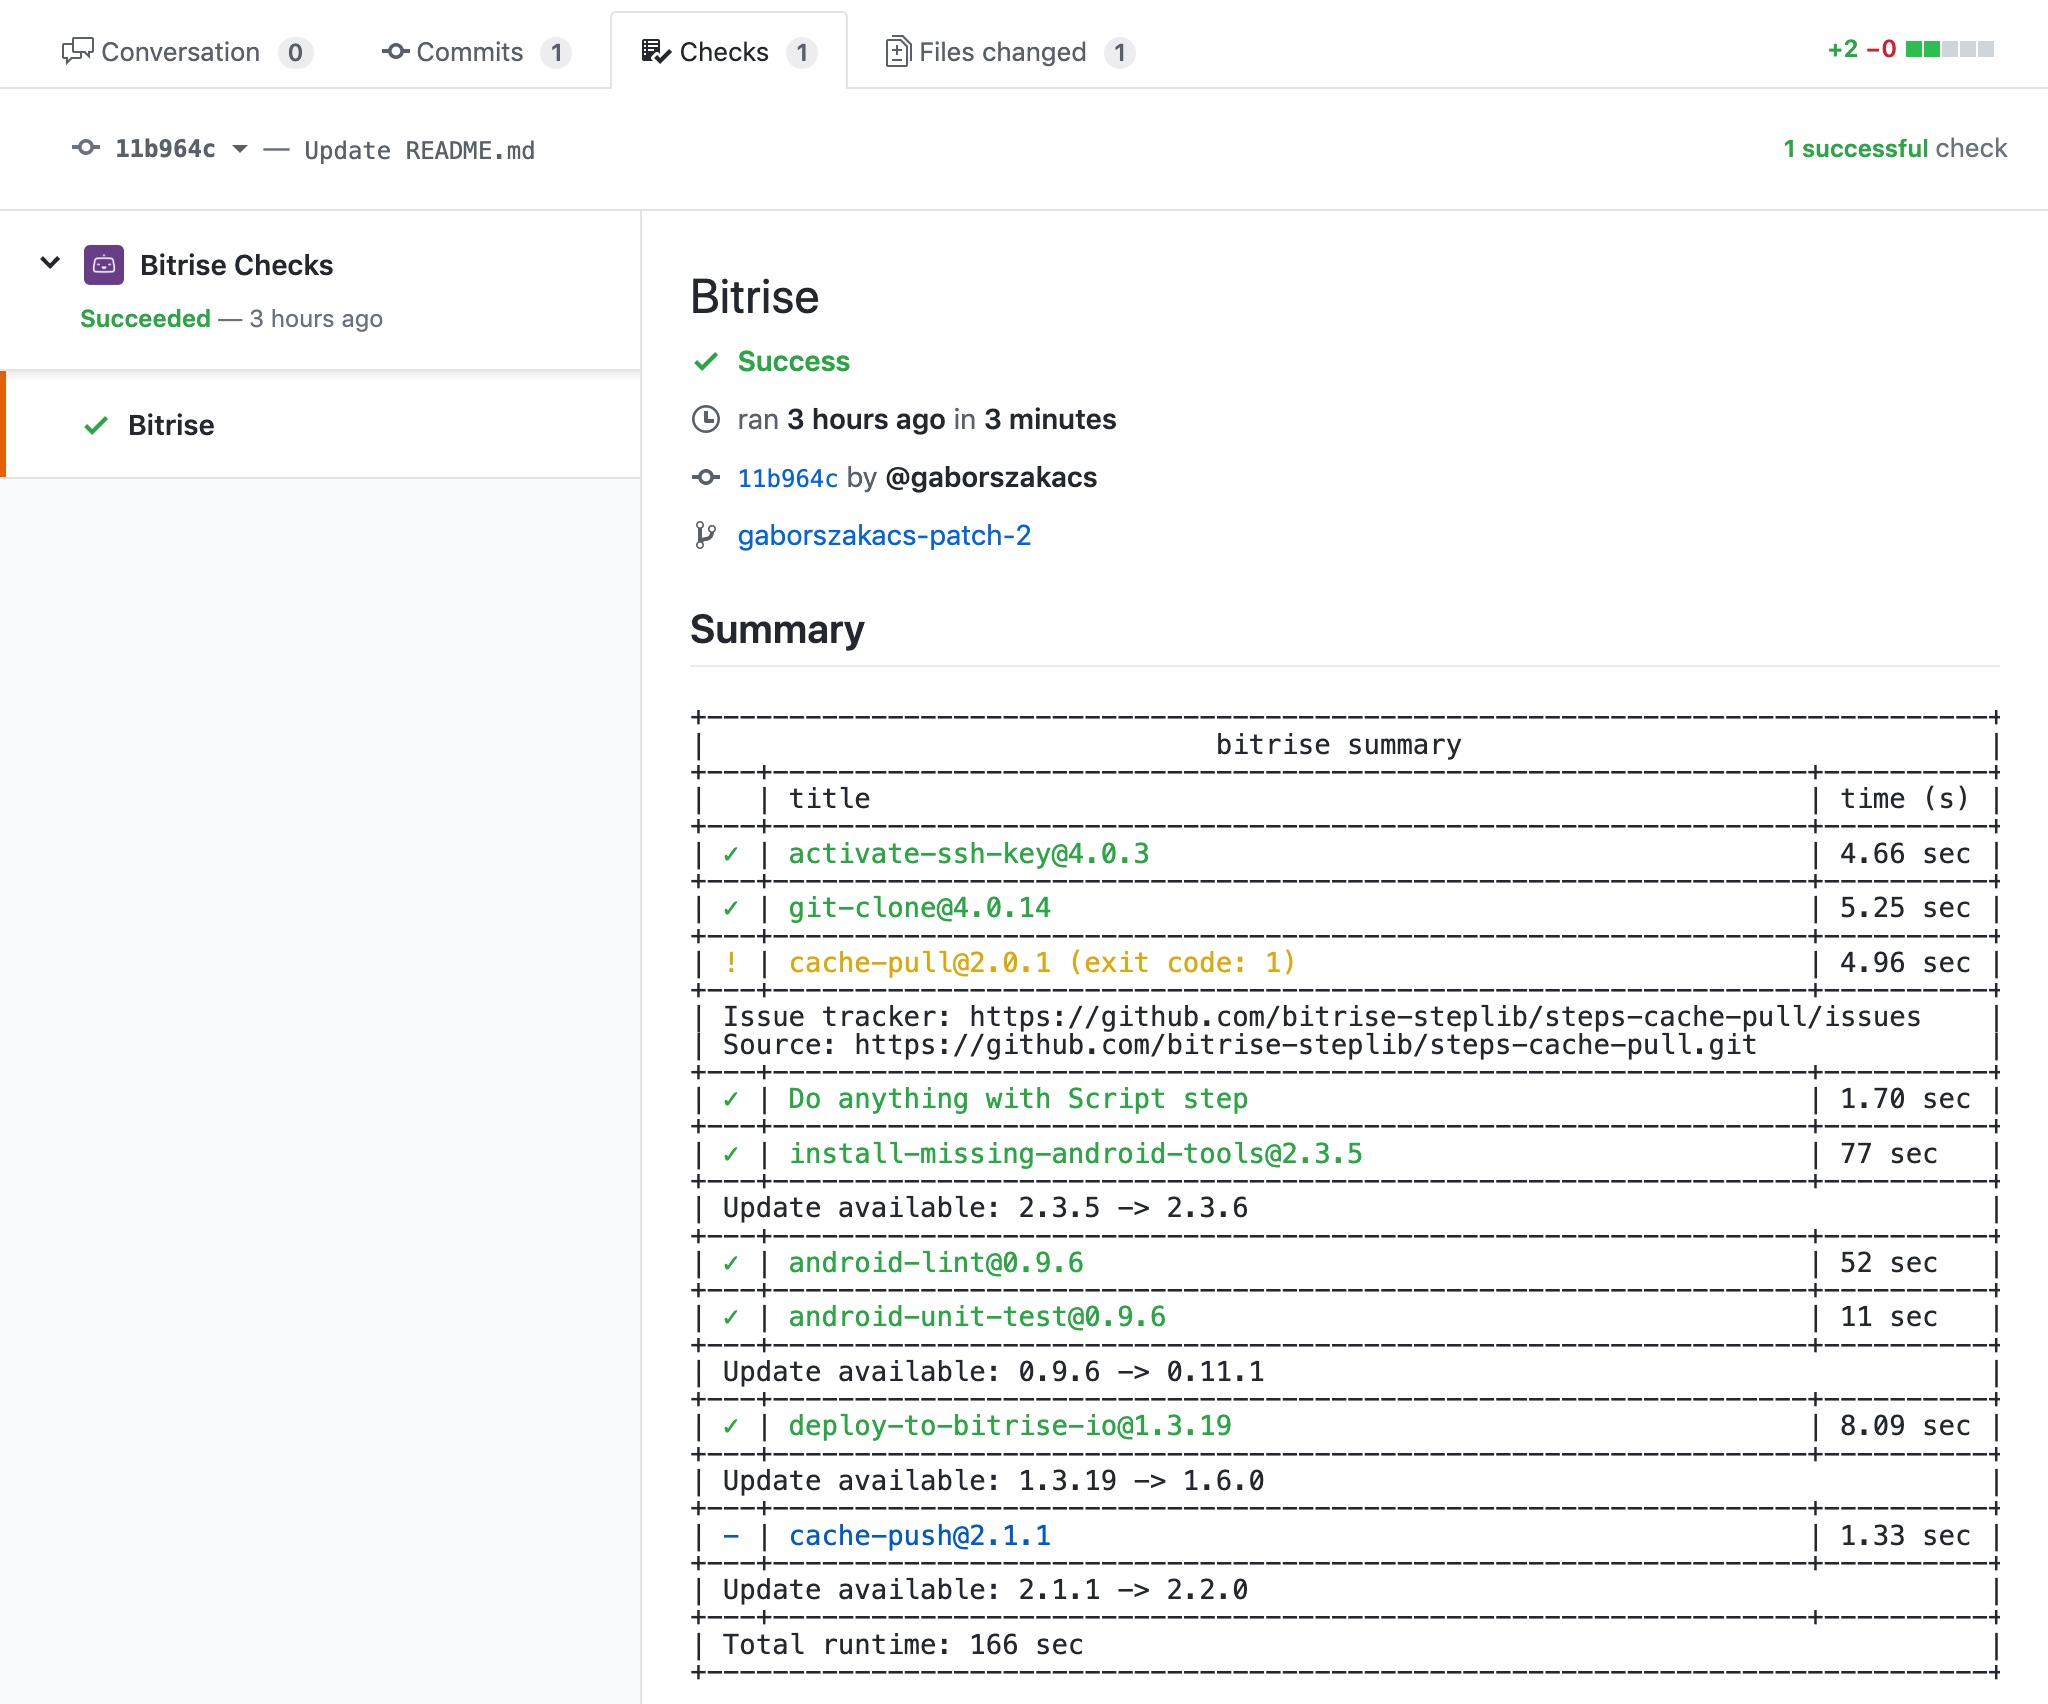
There can be three different check statuses:
-
Success.
-
Failed.
-
Action required (in the case of manual pull request approval).
To start using the Bitrise app to send status checks, you need to perform two separate actions:
-
Install the Bitrise app: This is only necessary for GitHub.com users. GitHub Enterprise Server users who already set up the integration can proceed to enable the status checks with the app.
-
Enable the Bitrise app: Turn on the feature on the Bitrise website and run a first build to be able to select the Bitrise app in your branch protection rules.
Installing the Bitrise GitHub app for GitHub Checks
To use Bitrise Checks as a GitHub.com user, you need to install it as a GitHub app.
If the workspace that owns the Bitrise project has the Bitrise GitHub App connected and granted access to the Bitrise project's repository, you can skip the procedure described here and start using GitHub Checks.
GitHub.com users only
If you are a GitHub Enterprise Server user, you don't need to do this procedure. To enable GitHub Checks, you need to:
-
Open your project on Bitrise with a user that has the Admin role on the project.
-
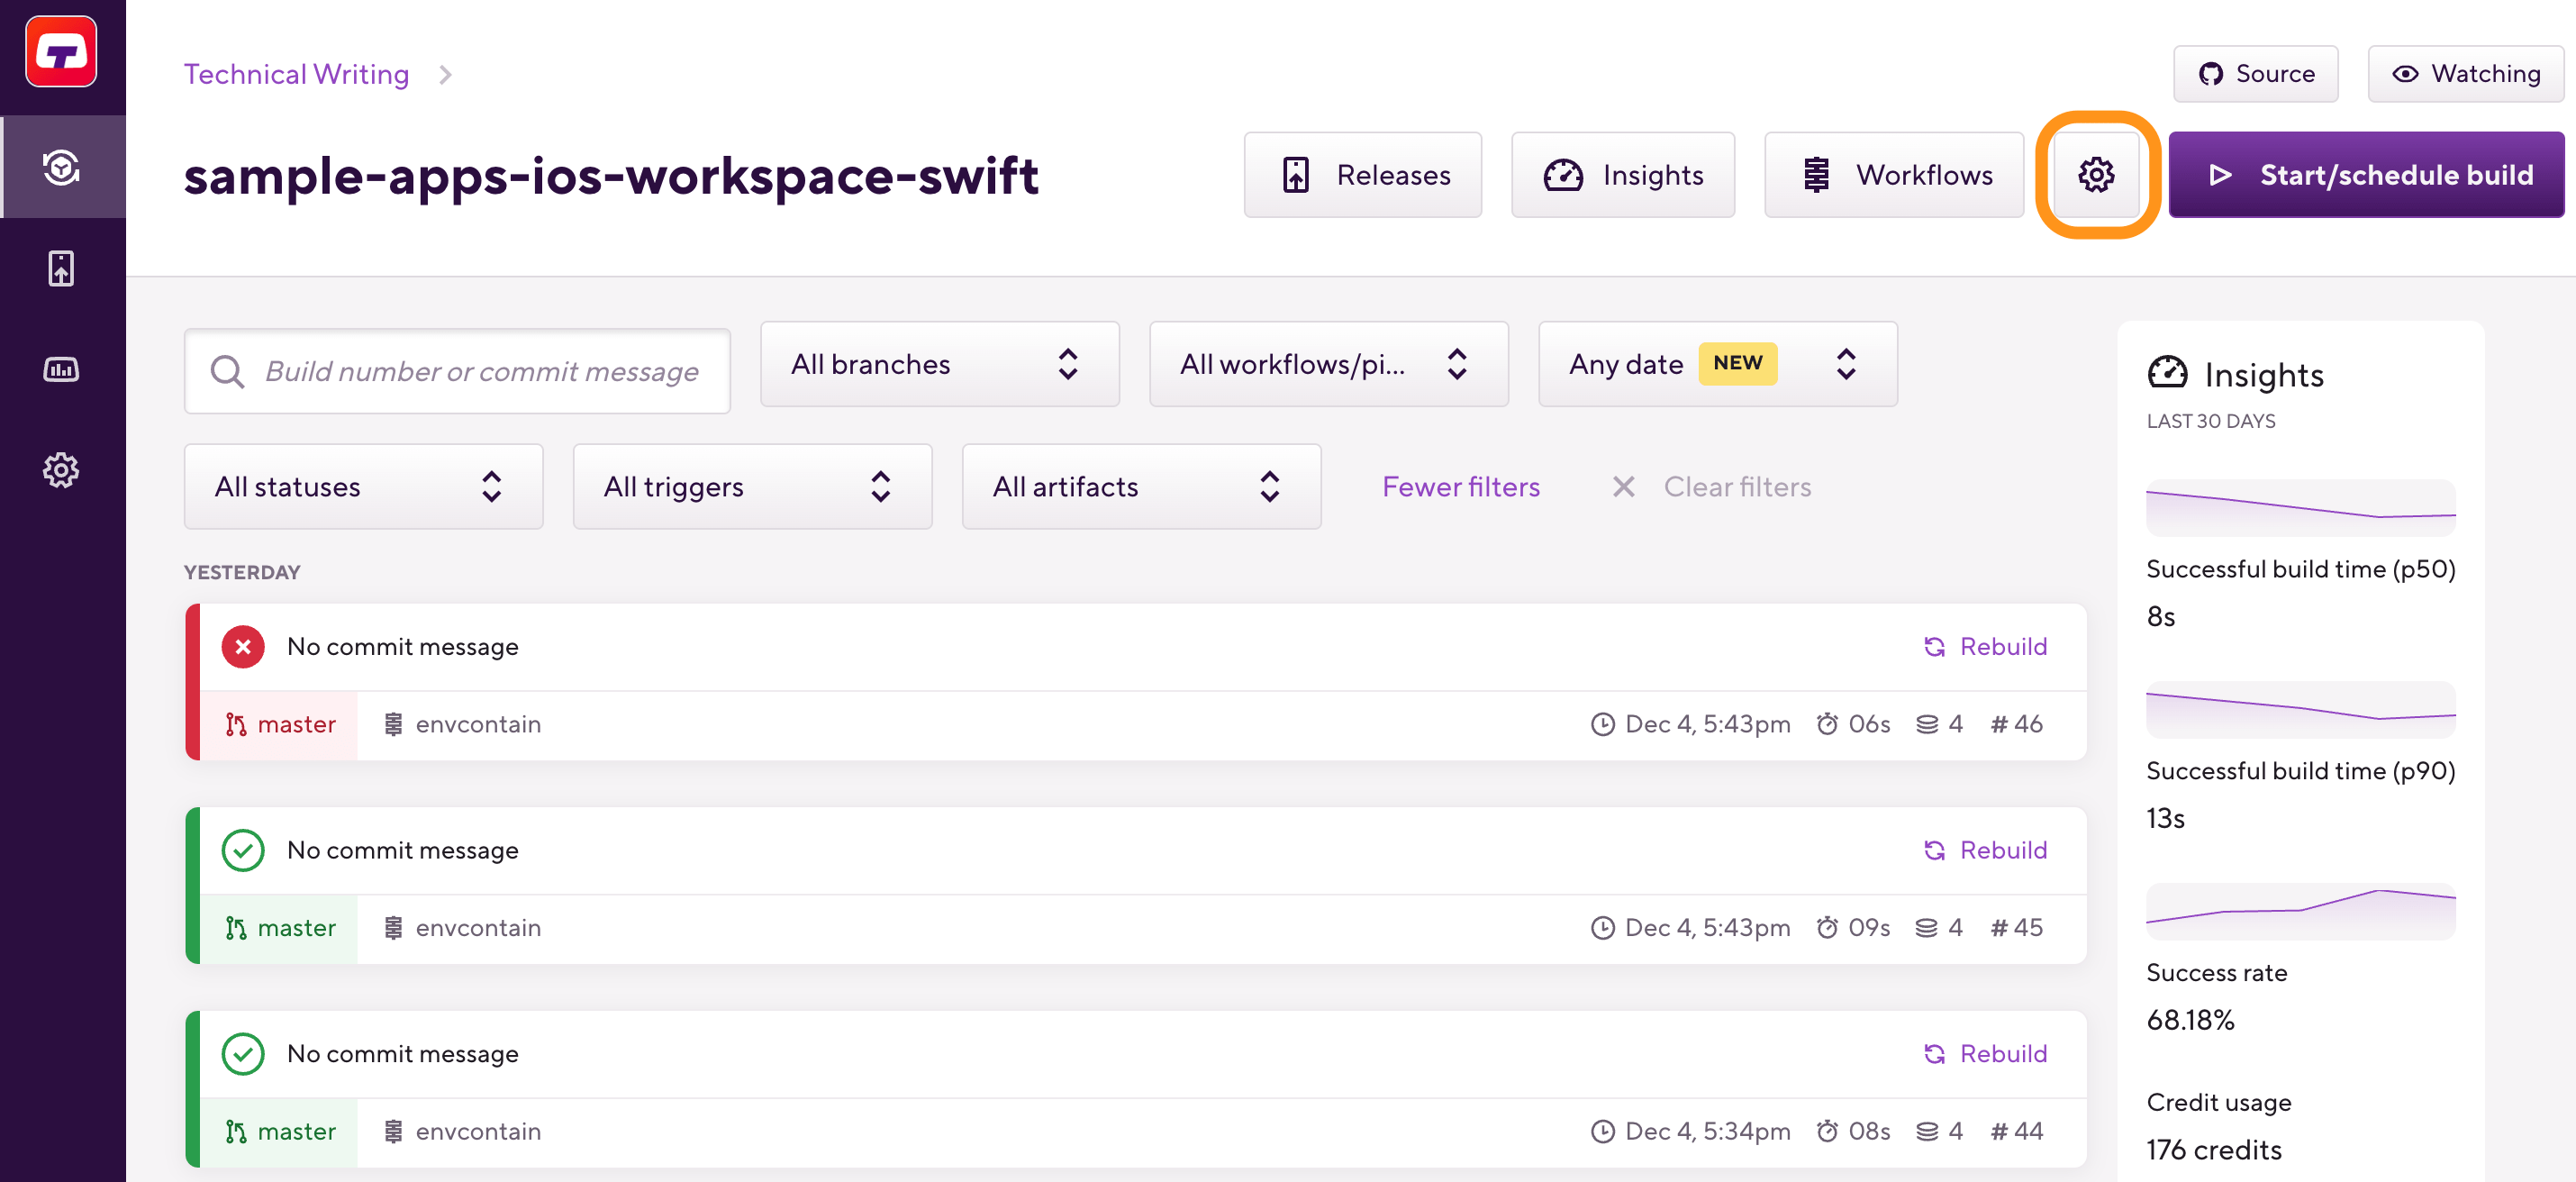
On the main page of the project, click on the Project settings button.
-
On the left, select Integrations from the menu options.
-
Click the link under the toggle. Don’t toggle the switch just yet, since you first need to install the Bitrise app.
This link will take you to GitHub's Bitrise installation page.

-
Select the user or GitHub Organization you want to add the Bitrise app to.
-
Select an option to install the GitHub app to:
-
: Applies to all current and future repositories.
-
: Select the repositories that you need.
With this, you authorize Bitrise to act on your behalf; for example, to check which repos you have access to, and use GitHub Checks to display check results.
-
-
Click .
-
In the GitHub prompt, provide your GitHub password.
If all goes well, you land on the Bitrise page of GitHub. You should see a blue note at the top-left corner of the page that Bitrise has been successfully installed on your GitHub account.
Enabling GitHub Checks on Bitrise
Once the Bitrise app is installed on GitHub, you need to enable GitHub Checks on the project settings page on Bitrise.
Enabling GitHub Checks is limited
Please note that only workspace owners and project admins can enable this toggle on the Project settings page of the project.
-
Open your project on Bitrise with a user that has the Admin role on the project.
-
On the main page of the project, click on the Project settings button.

-
On the left, select Integrations and then go to the Git provider tab.
-
Scroll down and toggle on the switch.
Can't toggle the switch?
If you can't toggle the switch, check out Can't enable GitHub Checks.
-
Trigger a build. You can do so either automatically or manually. If you trigger a build manually, provide a specific commit hash to build.
This build is necessary to perform the first Bitrise check. Once there is a finished check, you can select Bitrise Checks in your branch protection rules.
And you’re done! Now any pull request you open to your project on GitHub will be validated with Bitrise Checks and a build will get automatically started on Bitrise (if the pull request trigger is properly set on Bitrise).
Can't enable GitHub Checks
There are two main reasons why you might not be able to toggle the switch to enable GitHub Checks:
-
You cannot toggle the switch unless you install the Bitrise GitHub app FIRST. Once it’s done, you can go ahead and toggle the switch to the right to enable it.
-
If you have renamed or moved the GitHub repository of an app which has already been added to Bitrise and you have installed Bitrise Checks on it. The repository’s GitHub URL has obviously changed. GitHub Checks switch can only work if the URL on Github and on Bitrise fully match (no redirect URL is allowed). So in this case, you have to manually update the Repository URL of your app.
Switching to the Bitrise GitHub app from previous CI checks
If you have been already using status checks on pull requests prior to merging, it must have been the ci/bitrise/... check system. To be able to use the Bitrise GitHub app, you have to manually switch from ci/bitrise/... to Bitrise
to access those detailed checks. Let’s see how!
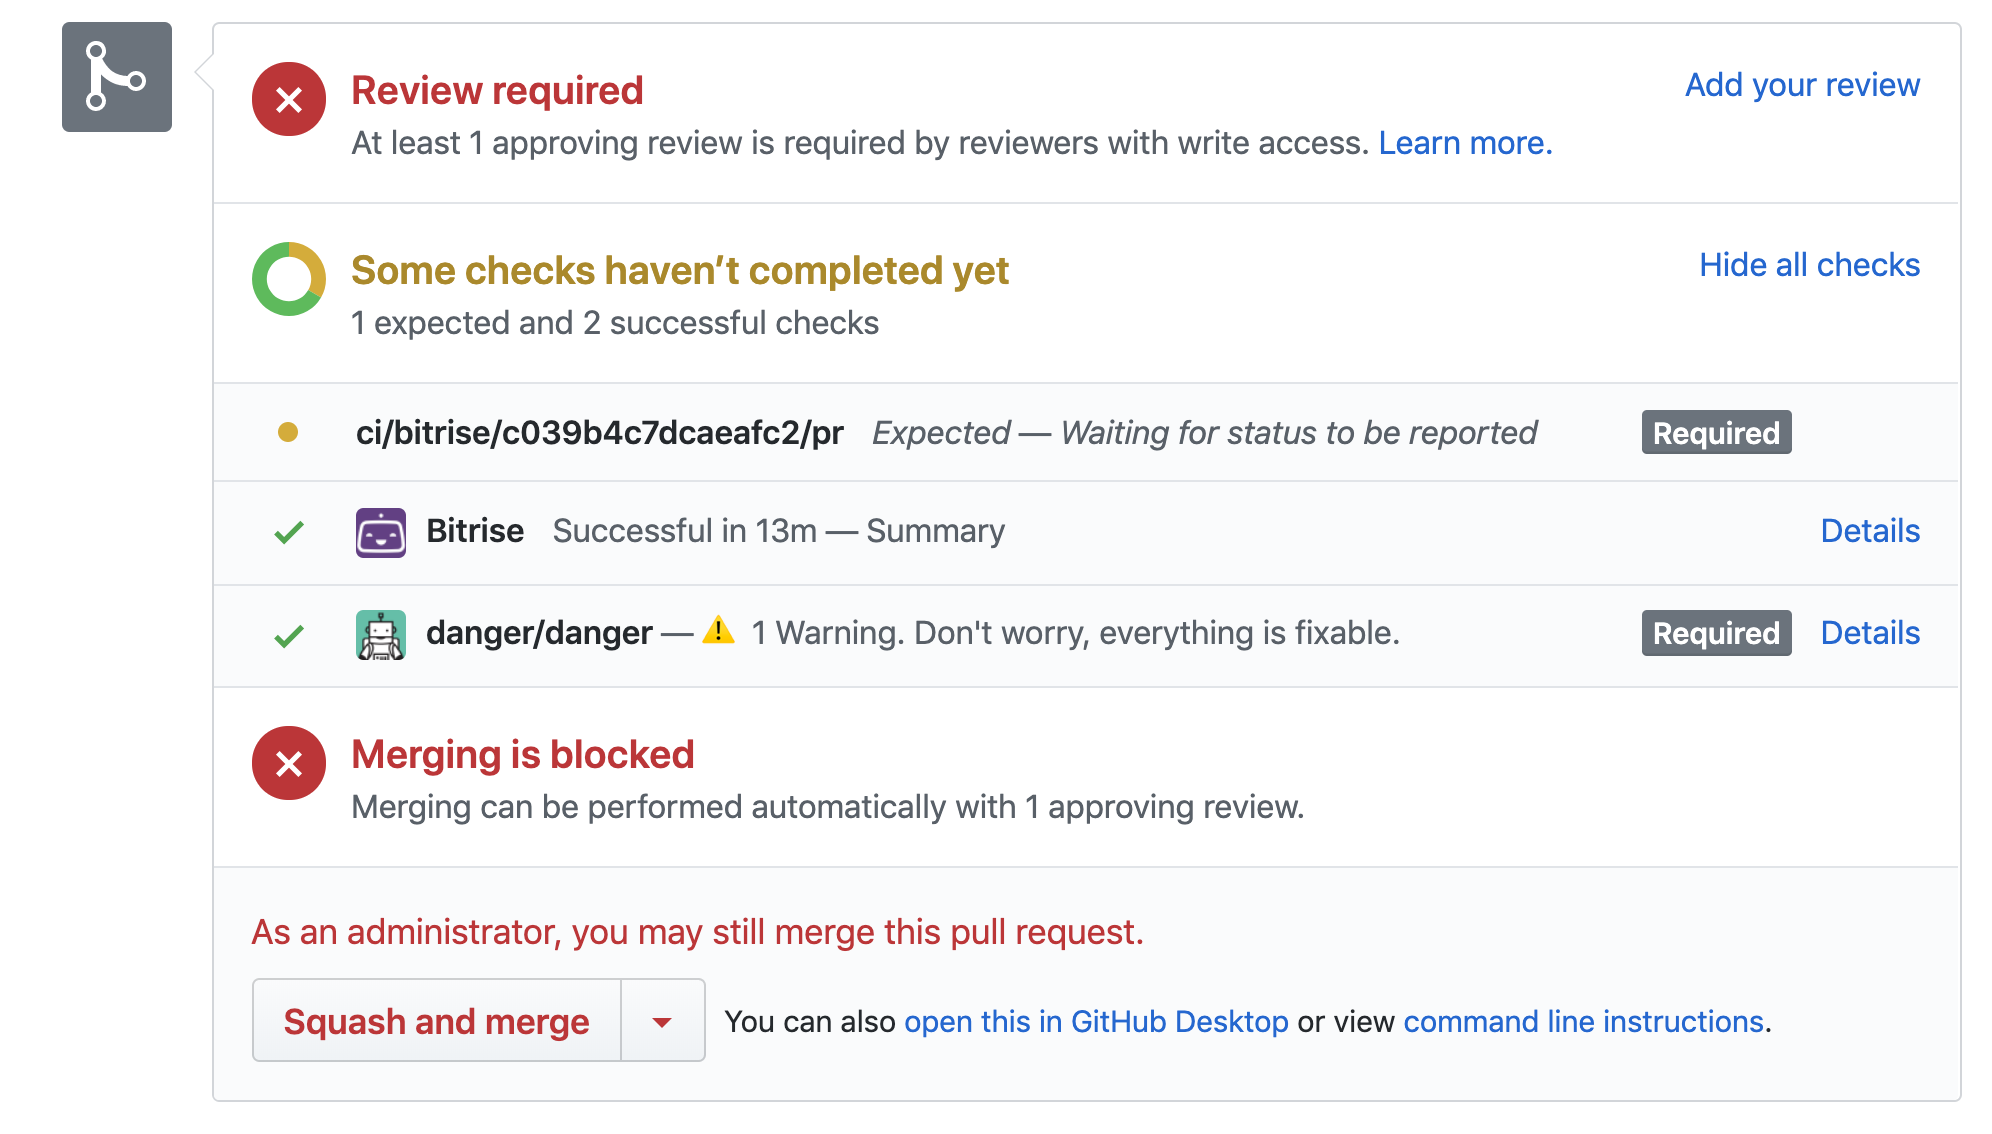
-
Go to the Settings tab of your repository.
-
Click Branches on the side menu. Under Require status checks to pass before merging, you can see
ci/bitrise/...as the selected checks system.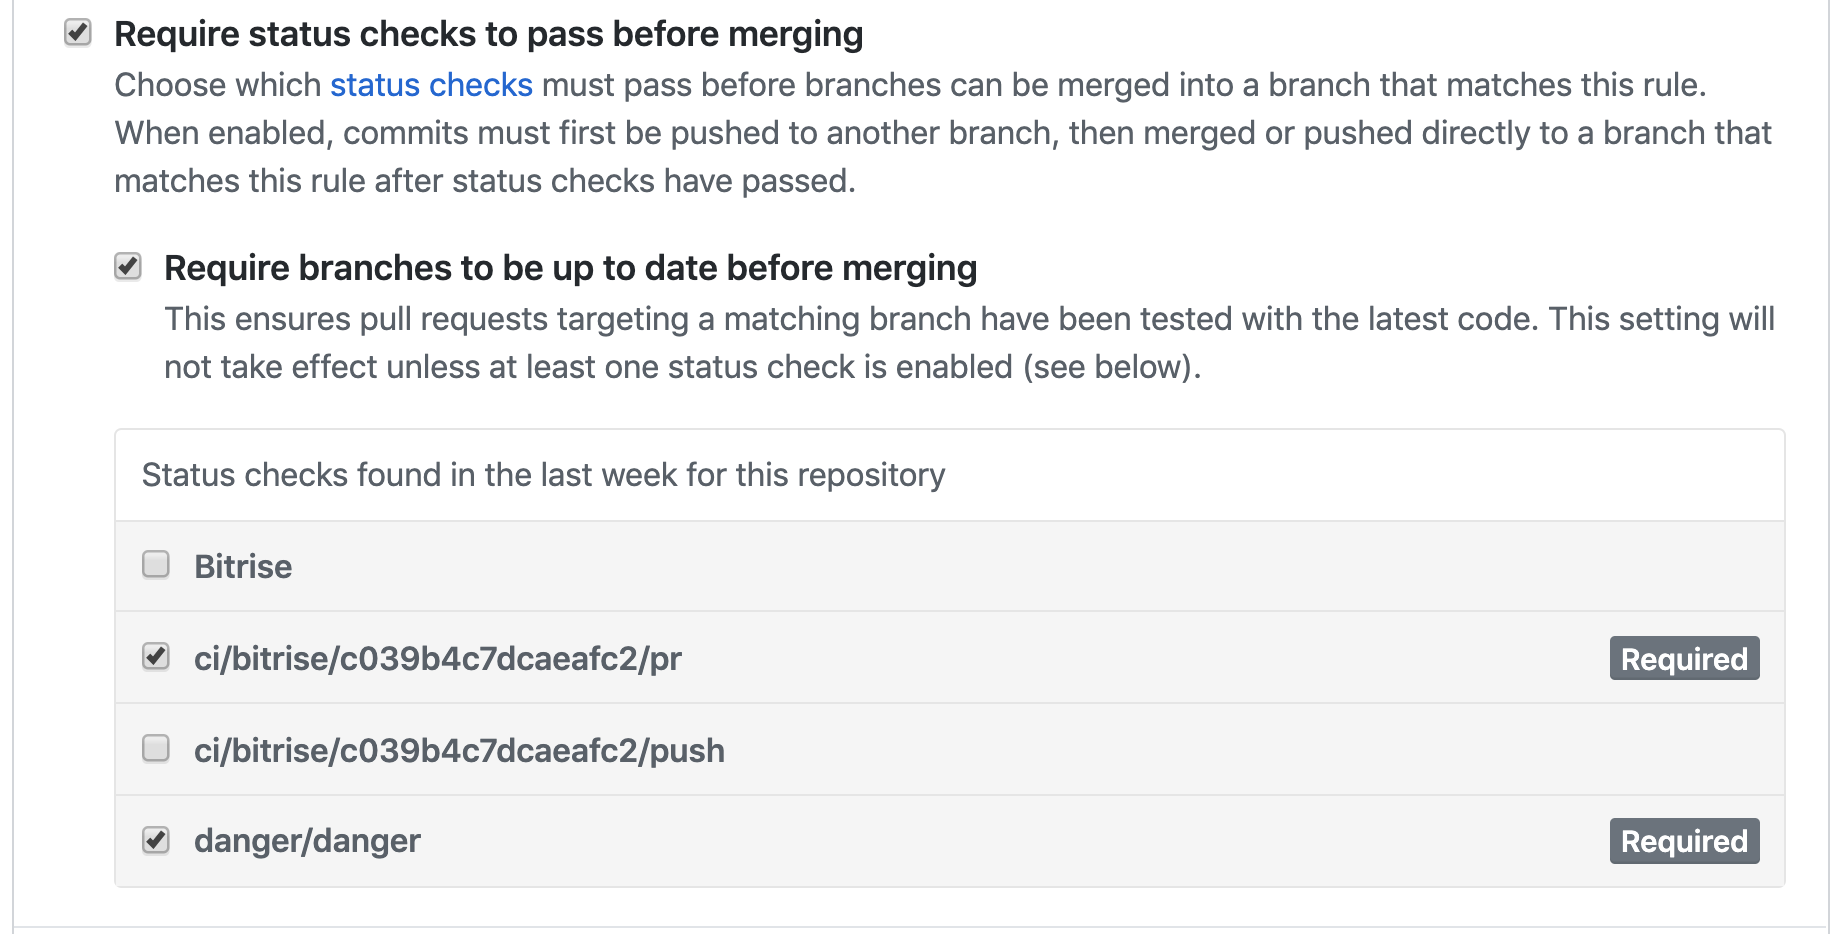
-
Select Bitrise instead of
ci/bitrise/.... -
Merge a pull request.
Disabling GitHub Checks
To disable GitHub Checks for your project:
if you toggle the ENABLE GITHUB CHECKS switch to the left on the Settings page of the project.
-
Open your project on Bitrise with a user that has the Admin role on the project.
-
On the main page of the project, click on the Project settings button.

-
Select Integrations on the left and then go to the Git provider tab.
-
Under GitHub Checks, disable the GitHub Checks toggle.
GitHub Checks test summary
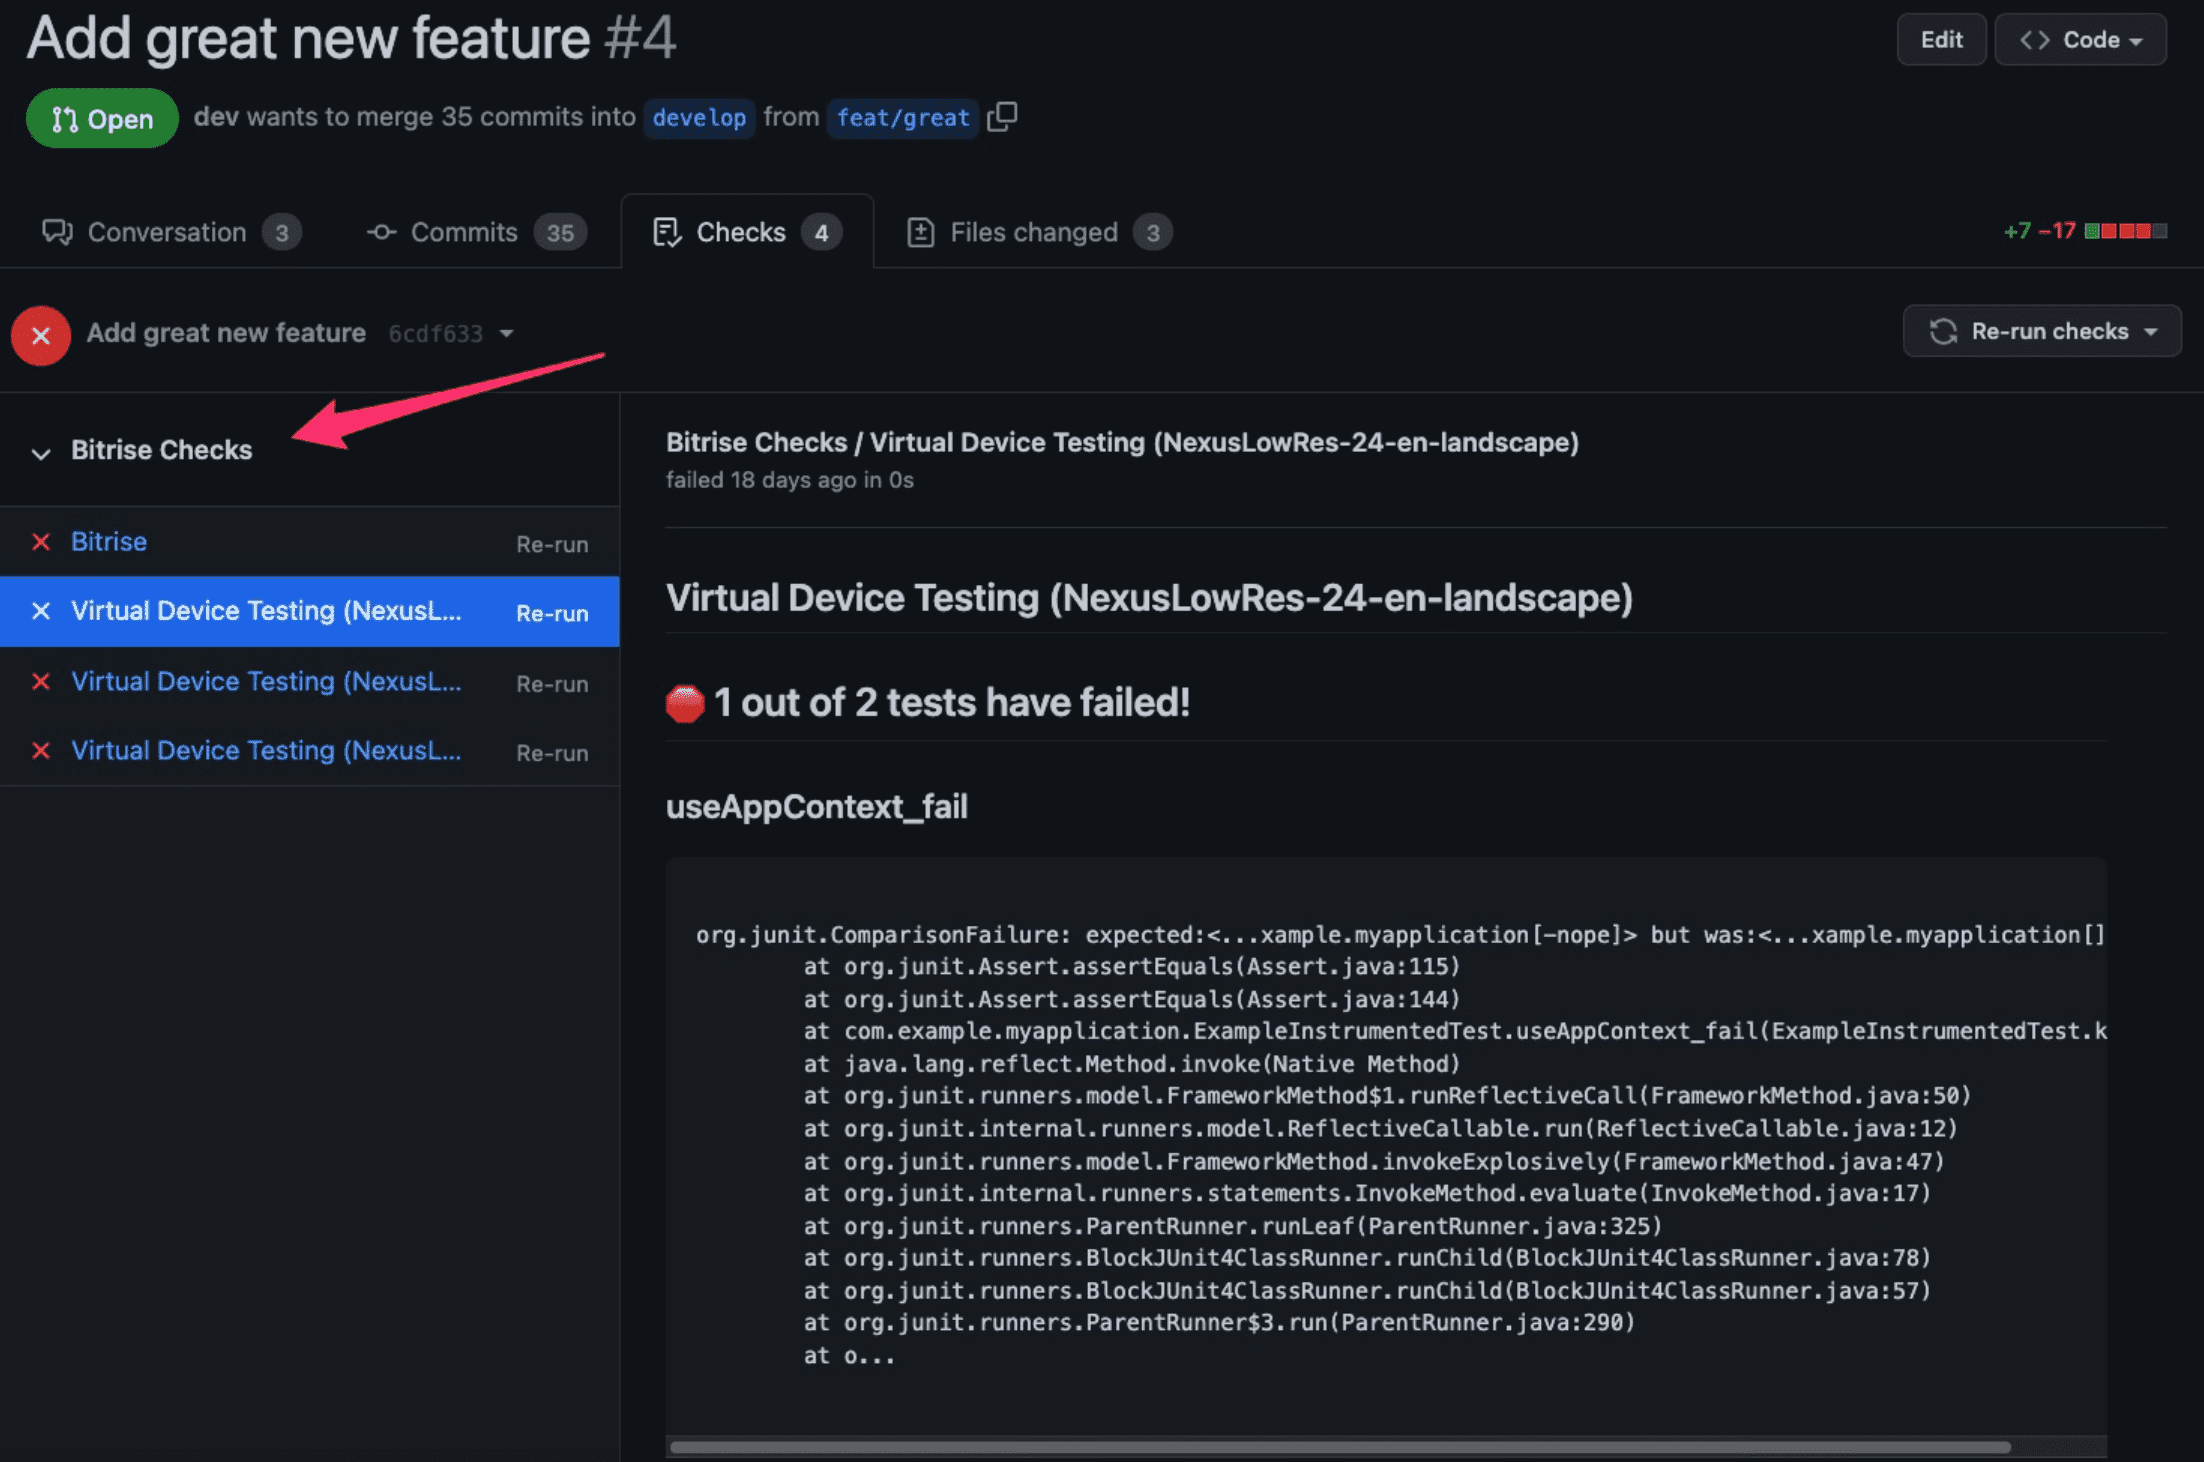
If your app’s repository contains any UI or unit tests, you can run those tests by using the appropriate testing Steps in your Workflow, and if you add the Deploy to Bitrise.io Step, your test results will be displayed in our Test Reports page and you can also see them on GitHub Checks, too.
For example, if you have an Android app, you can use the Virtual Unit Testing for Android Step to be able to see all your test results on GitHub Checks.
 |
Step by Step error report
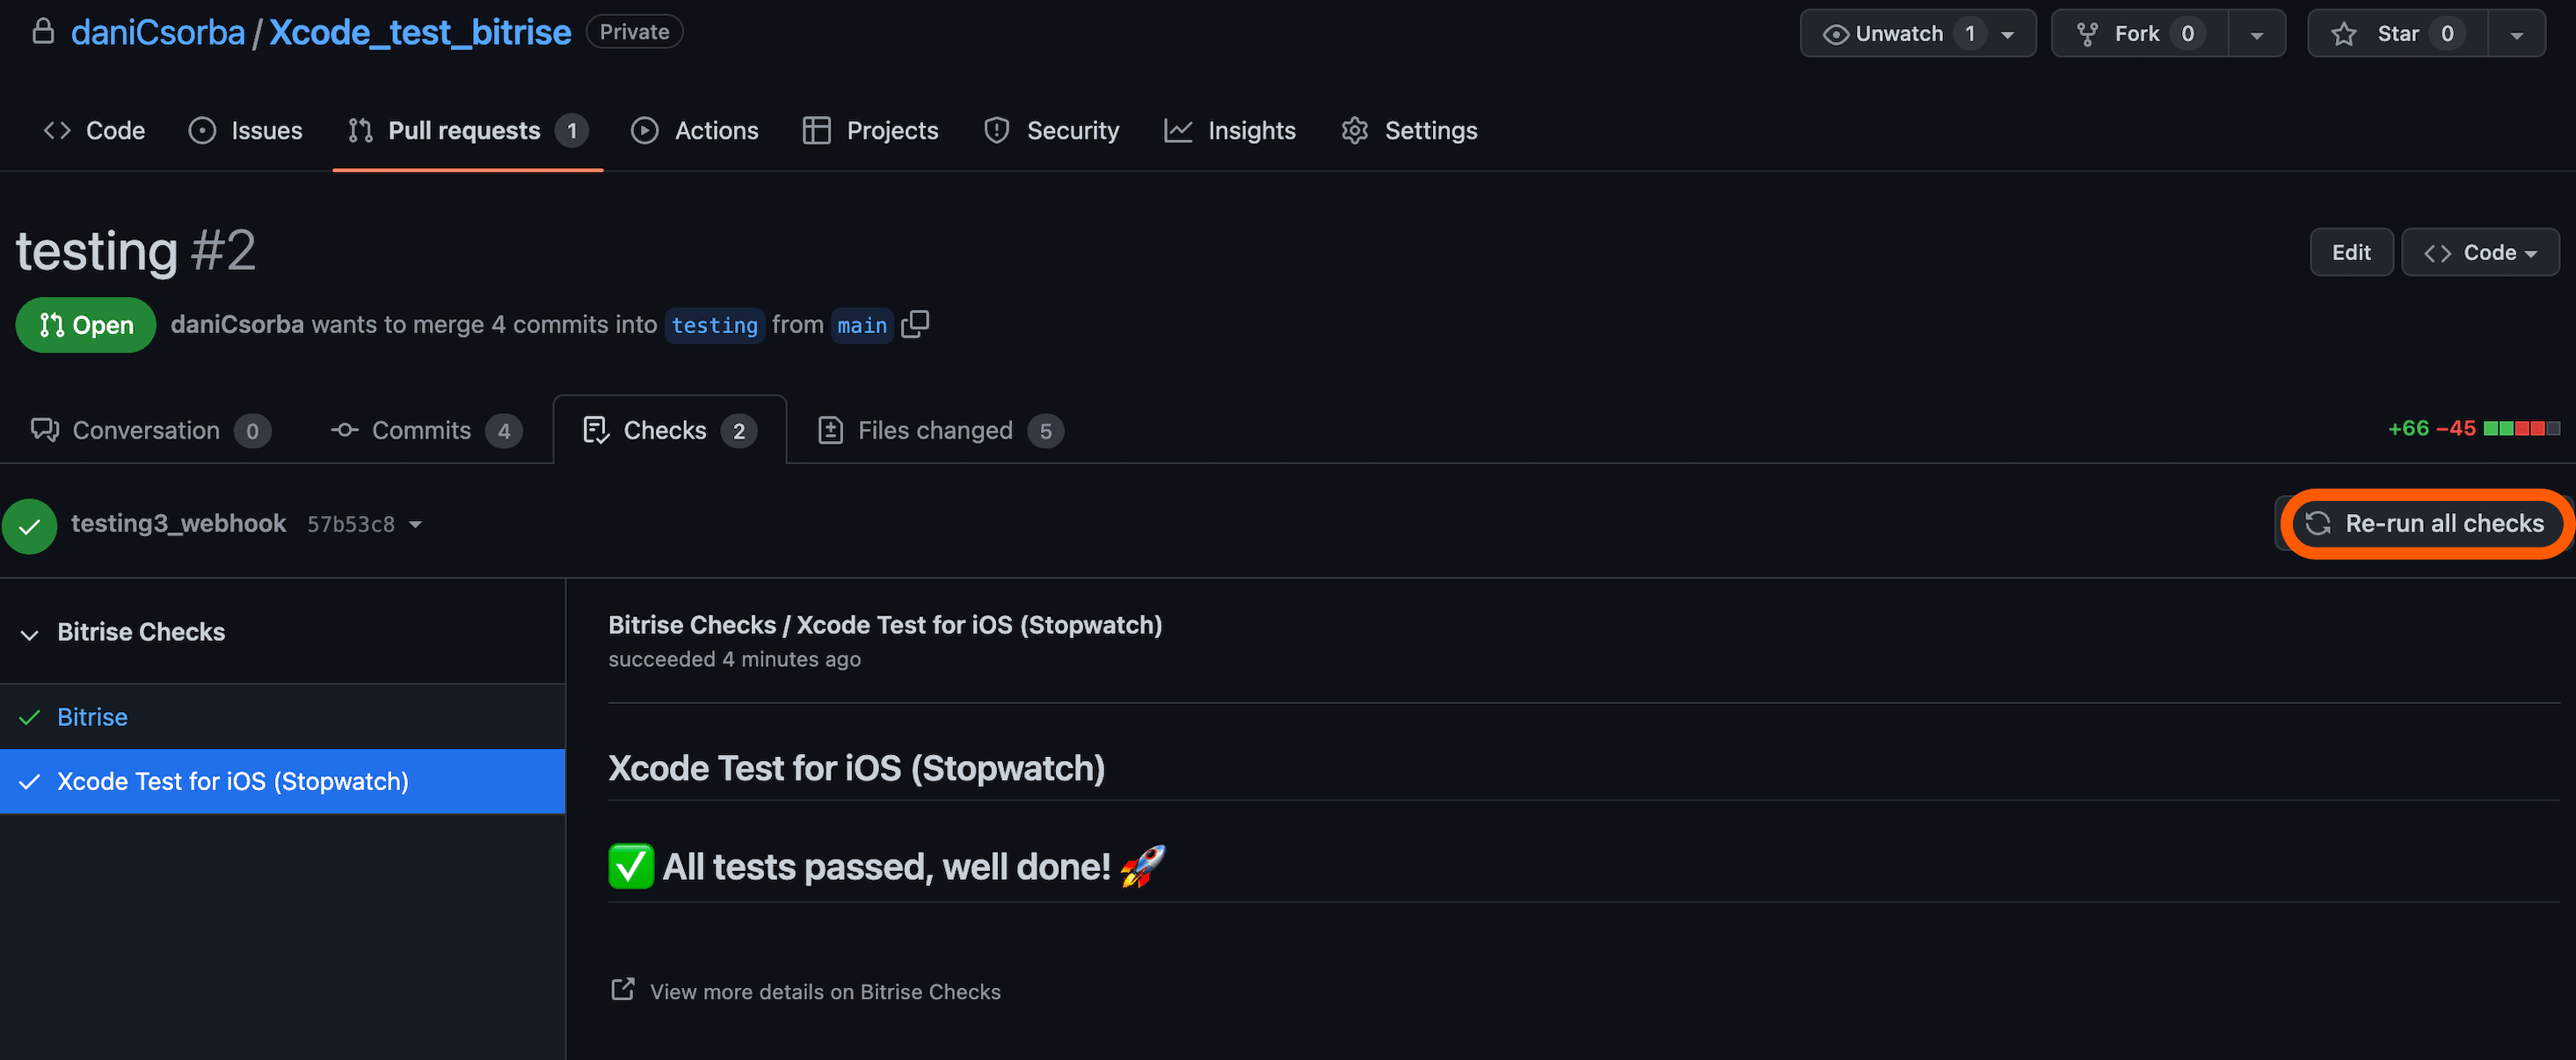
If a CI build runs, GitHub Checks' test summary displays the Steps' successful and failed tests in separate tabs on the left sidebar. If you click on a Step, a more detailed report summary comes up where a number of tests are listed with actionable error report. The build summary is available on the Bitrise tab.
Please note that GitHub Checks' test summary can only print detailed information of the following Steps:
-
Xcode Test for iOS
-
Android Unit Test
-
iOS Device Testing
-
Virtual Device Testing for Android
-
Flutter Test
You can export test results generated by any other Step to the Deploy to Bitrise.io Step in two ways:
-
We strongly recommend using our Export test results to the Test reports add-on Step: this Step locates the test results based on your inputs.
-
You can configure your own custom Script Step that creates and exports the necessary files.
Checking the test results of a failed Step
If your build has some failed tests, here is how to access them in GitHub Checks:
-
Click the Bitrise Checks dropdown.
-
Click on a Step and view the error report of the specific Step.
You can click on other Steps from here or the build summary. The View more details on Bitrise Checks link takes you to the build page on Bitrise.
Re-running a build using GitHub checks
Role requirement
To re-run a build using GitHub Checks, your GitHub account must connected to Bitrise, and you need to have at least Developer role in your app's team. If these conditions are not met, re-run checks will fail without an error.
For a complete list of user roles and role cheatsheets, check User roles on app teams.
If you would like to re-run a build using GitHub Checks:
-
Open the pull request on GitHub where you would like to re-run checks.
-
Open the Checks tab.
-
Click .
