Registering test devices for iOS apps
You can register a test device easily by opening Safari on your iOS device and accessing the Test devices page from your Profile. With other browsers, you can manually register one using the Register device manually button.
You have multiple options to register test devices on bitrise.io:
After registering your device on Bitrise, make sure to register it on the Apple Developer Portal as well. We recommend using the Xcode Archive & Export for iOS Step which can:
Apple Developer Portal device limit
There is a limit on registrable devices on the Apple Developer Portal, so make sure to check the list of available test devices of an app before you use the Xcode Archive & Export for iOS Step to register devices!
Register an iOS device using Safari
The most comfortable way to register your iOS test device on bitrise.io is to open bitrise.io with Safari. This way we can open your device’s Settings and create a temporary profile to get your Unique Device Identifier (UDID). This way you don’t have to look for it and manually copy/paste it.
Clear the cache
When trying to install an app from the public install page, you should clear the cache: click the link appearing in the If you synced your settings from your old device, you need to clear the cache and register your new device line. The link redirects to the Profile settings page where you can follow the procedure described below.
Read more about installing an app from the public install page in our Deploying an iOS app to Bitrise.io guide.
-
Open Safari in non-incognito mode on your iOS device and log into bitrise.io.
-
Go to your .
-
Tap .
-
Tap on the left.
-
Tap .
-
In the pop-up window, Tap so that bitrise.io can show your configuration profile.
-
Tap when the Install Profile dialog appears.
-
Enter your devices’s passcode.
-
Tap on the Install Profile again. Now you can see your UDID and your iOS device name in the Register device dialog.
-
Tap .
-
Register this test device to the Apple Developer Portal with the correct provisioning profile added to your device or use our Auto Provisioning step with enabling profile generation.
If you go back to Test devices, you can see the registered device:
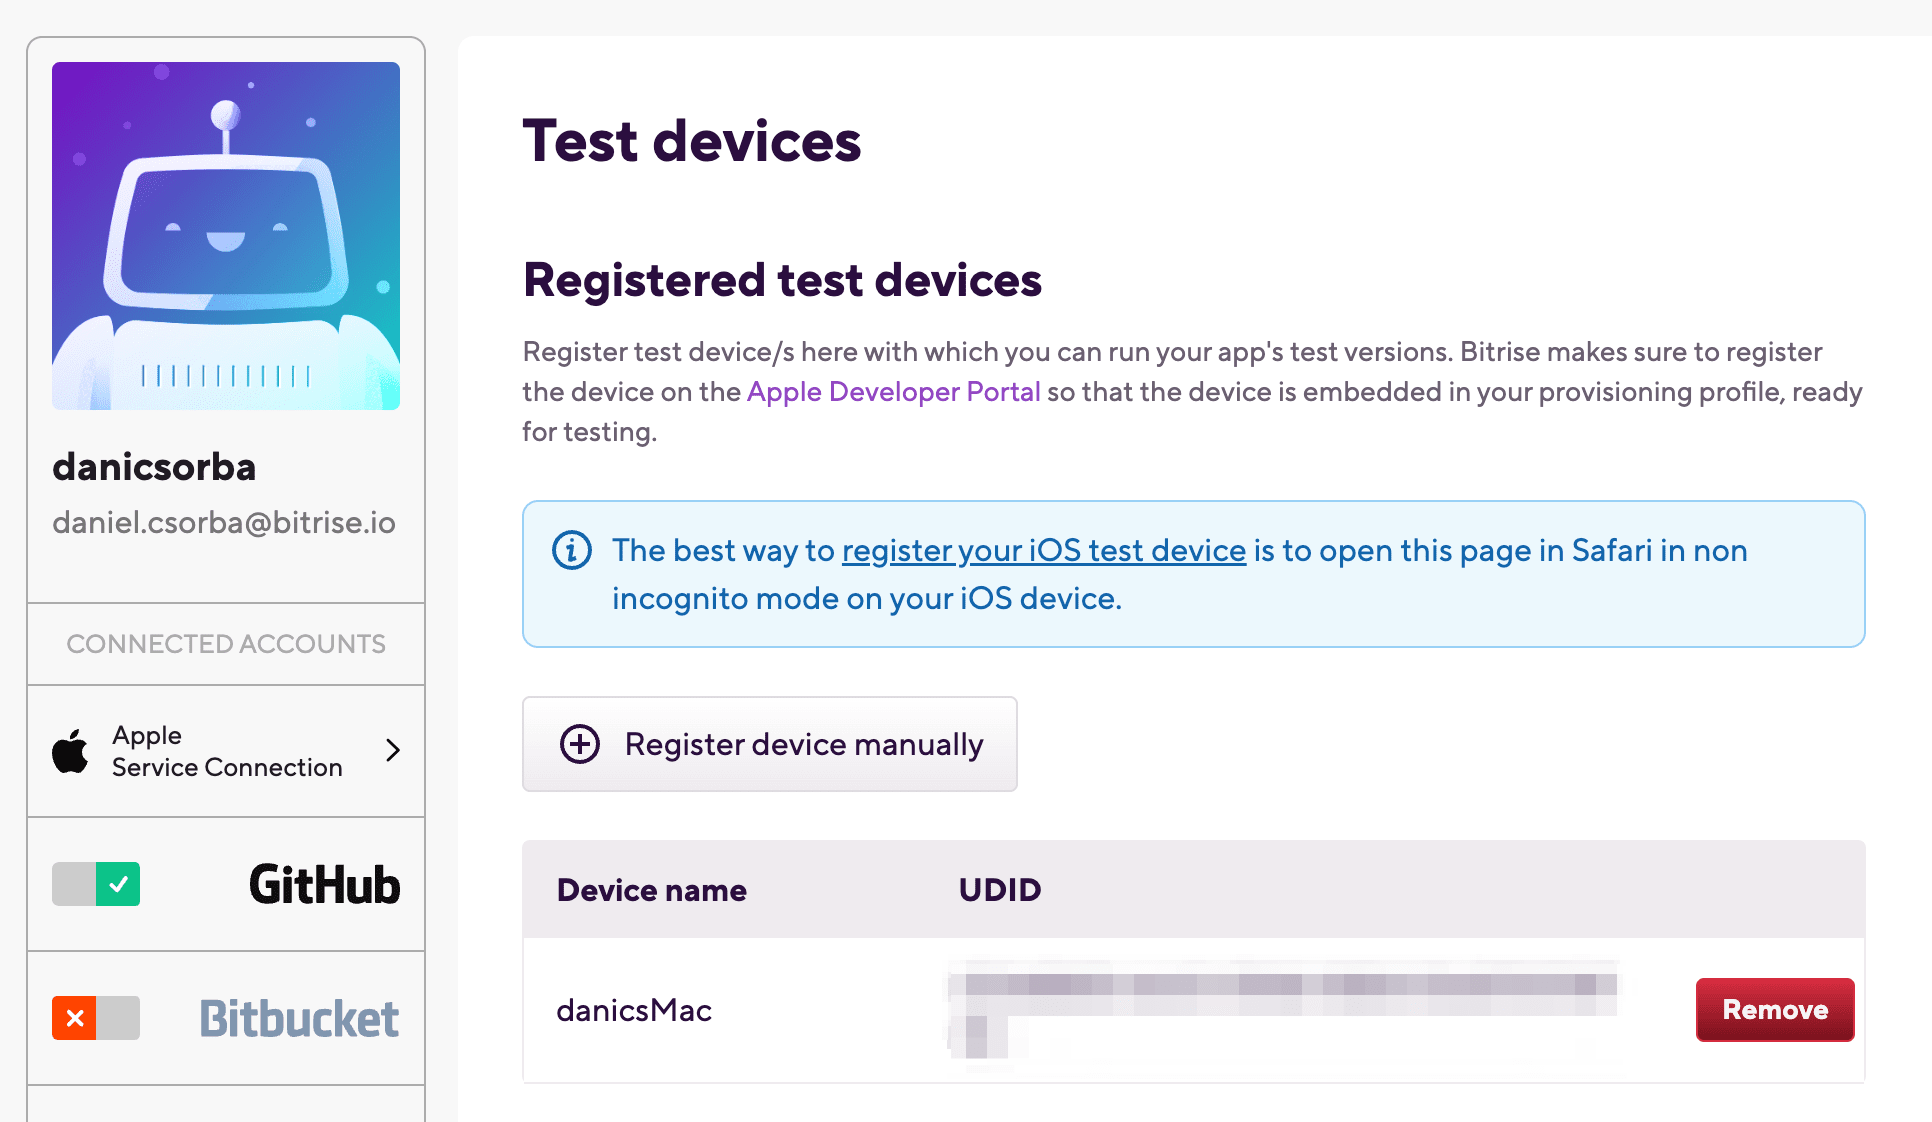 |
You can delete the registered device any time if you click on the button.
Safari as default browser
If you encounter any issues with your registered device, we recommend you make Safari your default browser.
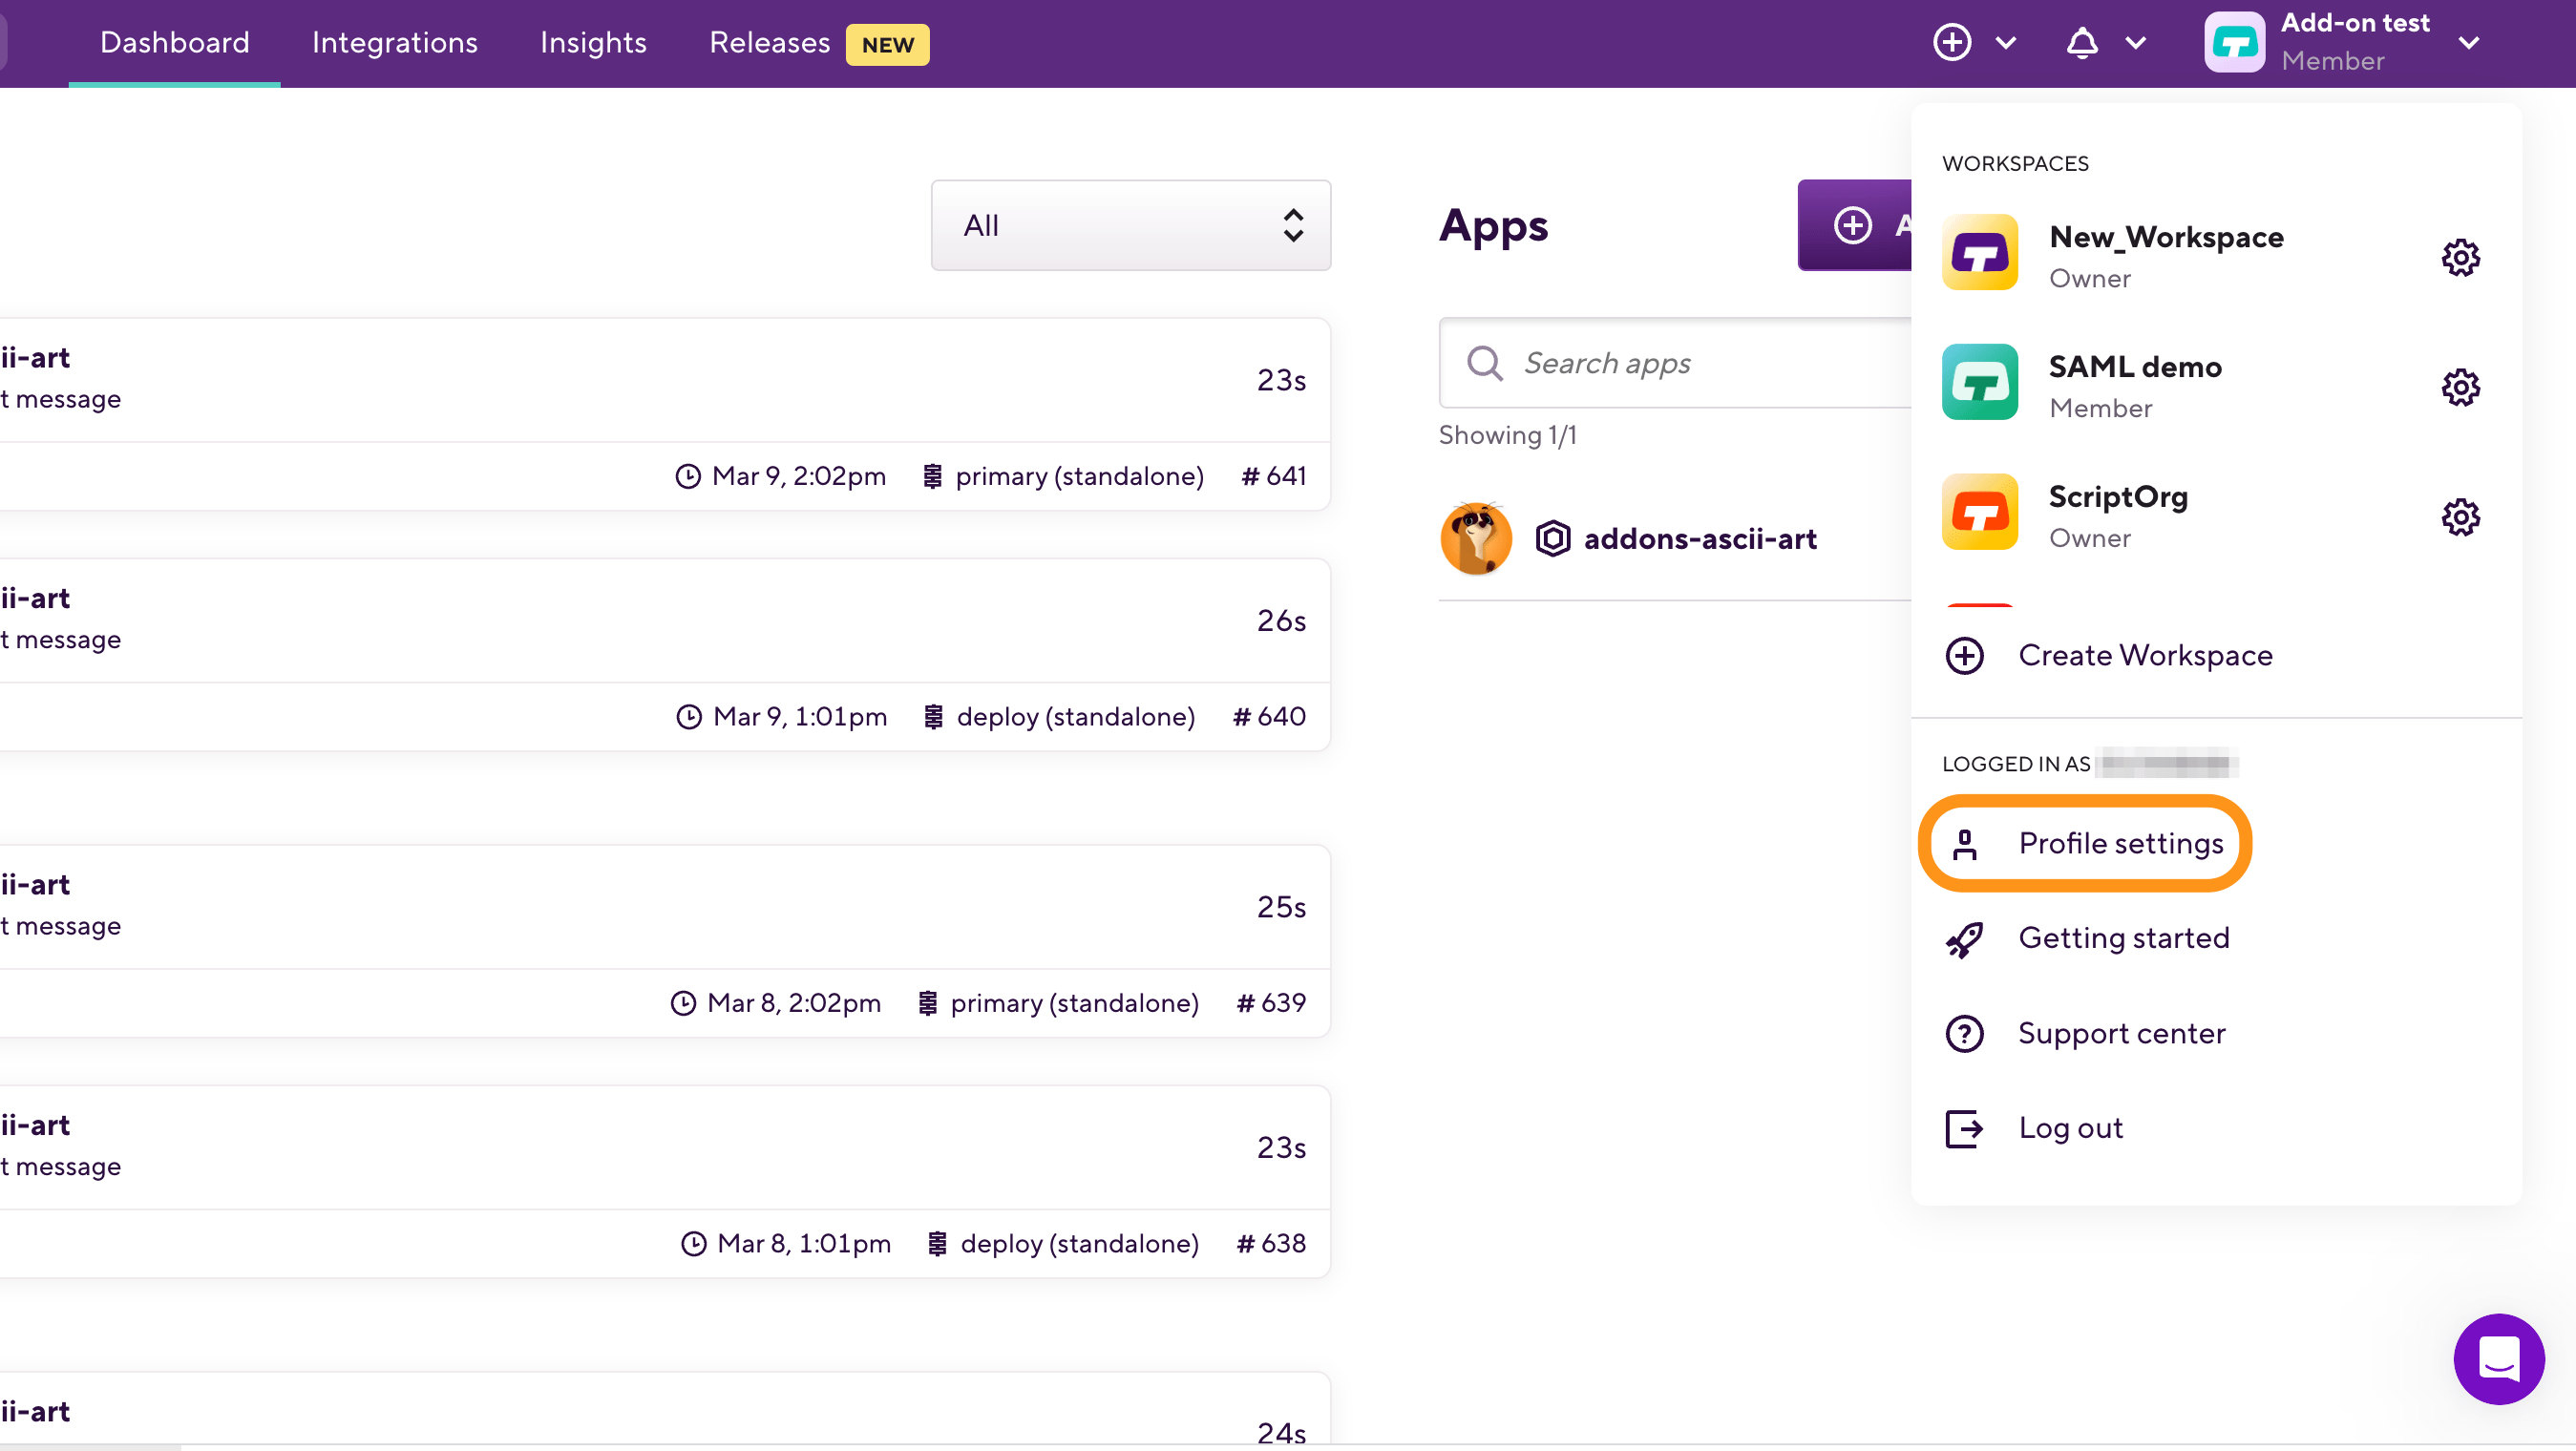
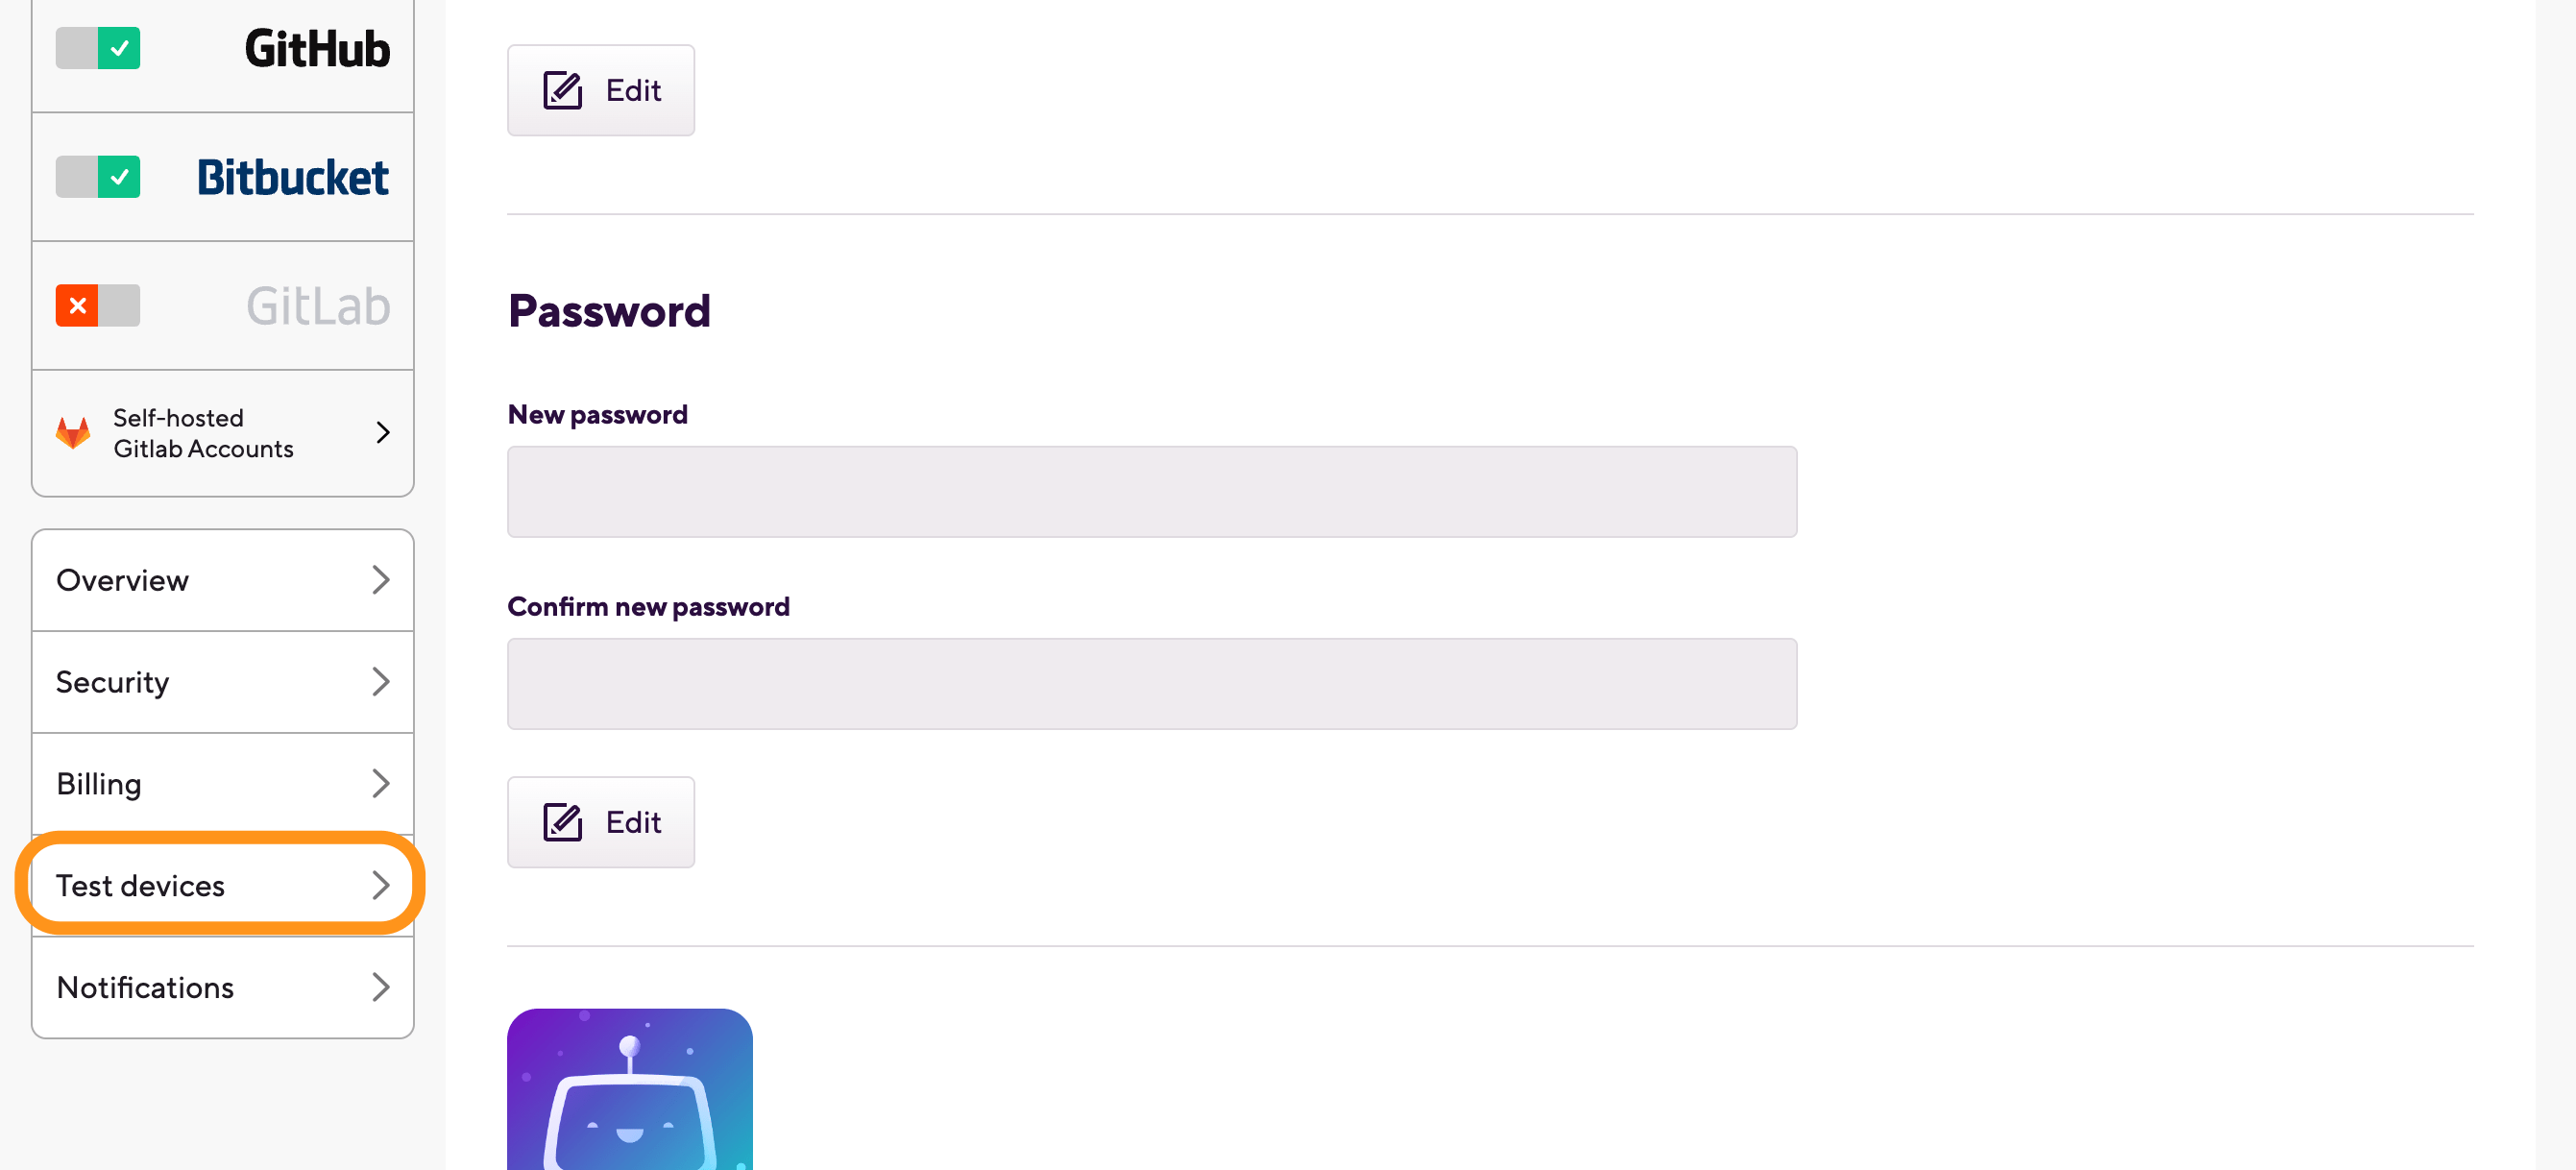
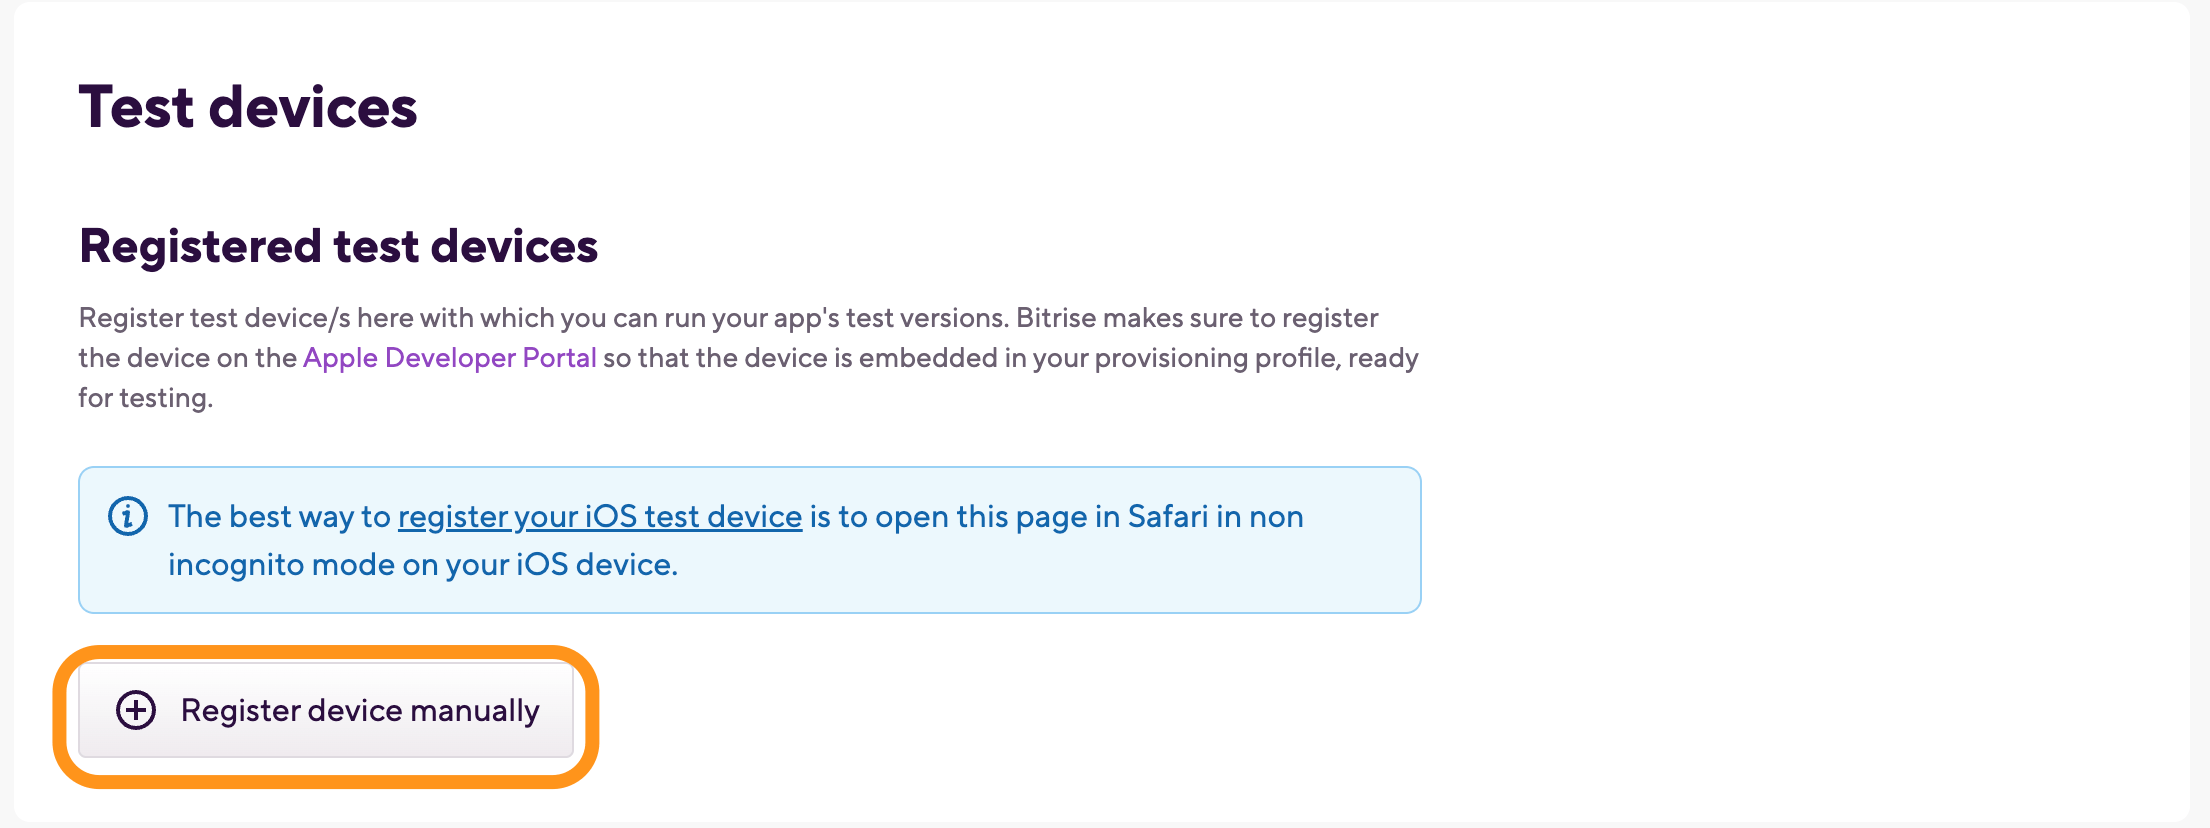
Register a test device manually
-
On bitrise.io, open the account selector menu on the top right and select Profile settings.
-
On the menu on the left side, select .
-
Click on .
-
In the Register device dialog, fill out the Title field and the Identifier field with your device’s UDID.
-
Click .
You can get your UDID if you plug your device into a computer, and open iTunes. Under Summary, you should see a Serial Number. If you click on it, it will reveal your device’s UDID which you can paste into the Identifier field on our Test Devices.
-
Register this test device to the Apple Developer Portal with the correct provisioning profile added to your device or use our Auto Provisioning Step with enabling profile generation.
Now you can see your registered test device under the Registered test devices section.
You can remove this registered device any time if you click the orange icon.
Checking the available test devices for an app
For any Bitrise app, you can check out the registered test devices available on the App Settings page. This will show an aggregated list of all registered test devices associated with users who have access to your app, regardless of their role. You can use any of those devices to run tests of your app.
You can also download the list of registered devices as a .json file.
-
Open your project on Bitrise with a user that has the Admin role on the project.
-
On the main page of the project, click on the Project settings button.
-
On the menu on the left side, select .
-
Optionally, you can download the entire list as a
.jsonfile: click the button.
Registering devices on the Apple Developer Portal with the Xcode Archive Step
The Xcode Archive & Export for iOS Step allows you to automatically register your test devices on the Apple Developer Portal. By default, the Step registers all test devices that you registered to your Bitrise account but you can configure it to only register a specific selection of devices.
Apple Developer Portal limit
Please note that the Apple Developer Portal has a limit for devices registered for testing purposes, typically set at 100 devices per account. Devices registered with the Xcode Archive & Export for iOS Step count towards this limit and you can only remove registered devices once a year.
Registering all devices on the Apple Developer Portal
Workflow Editor
Configuration YAML
-
Register your devices on Bitrise.
-
Log in to Bitrise and select Bitrise CI on the left, then select your project.
-
Click the button on the main page.
-
Add the Xcode Archive & Export for iOS Step to your Workflow.
-
In the Automatic code signing input group, set the Register test devices on the Apple Developer Portal input to
yes.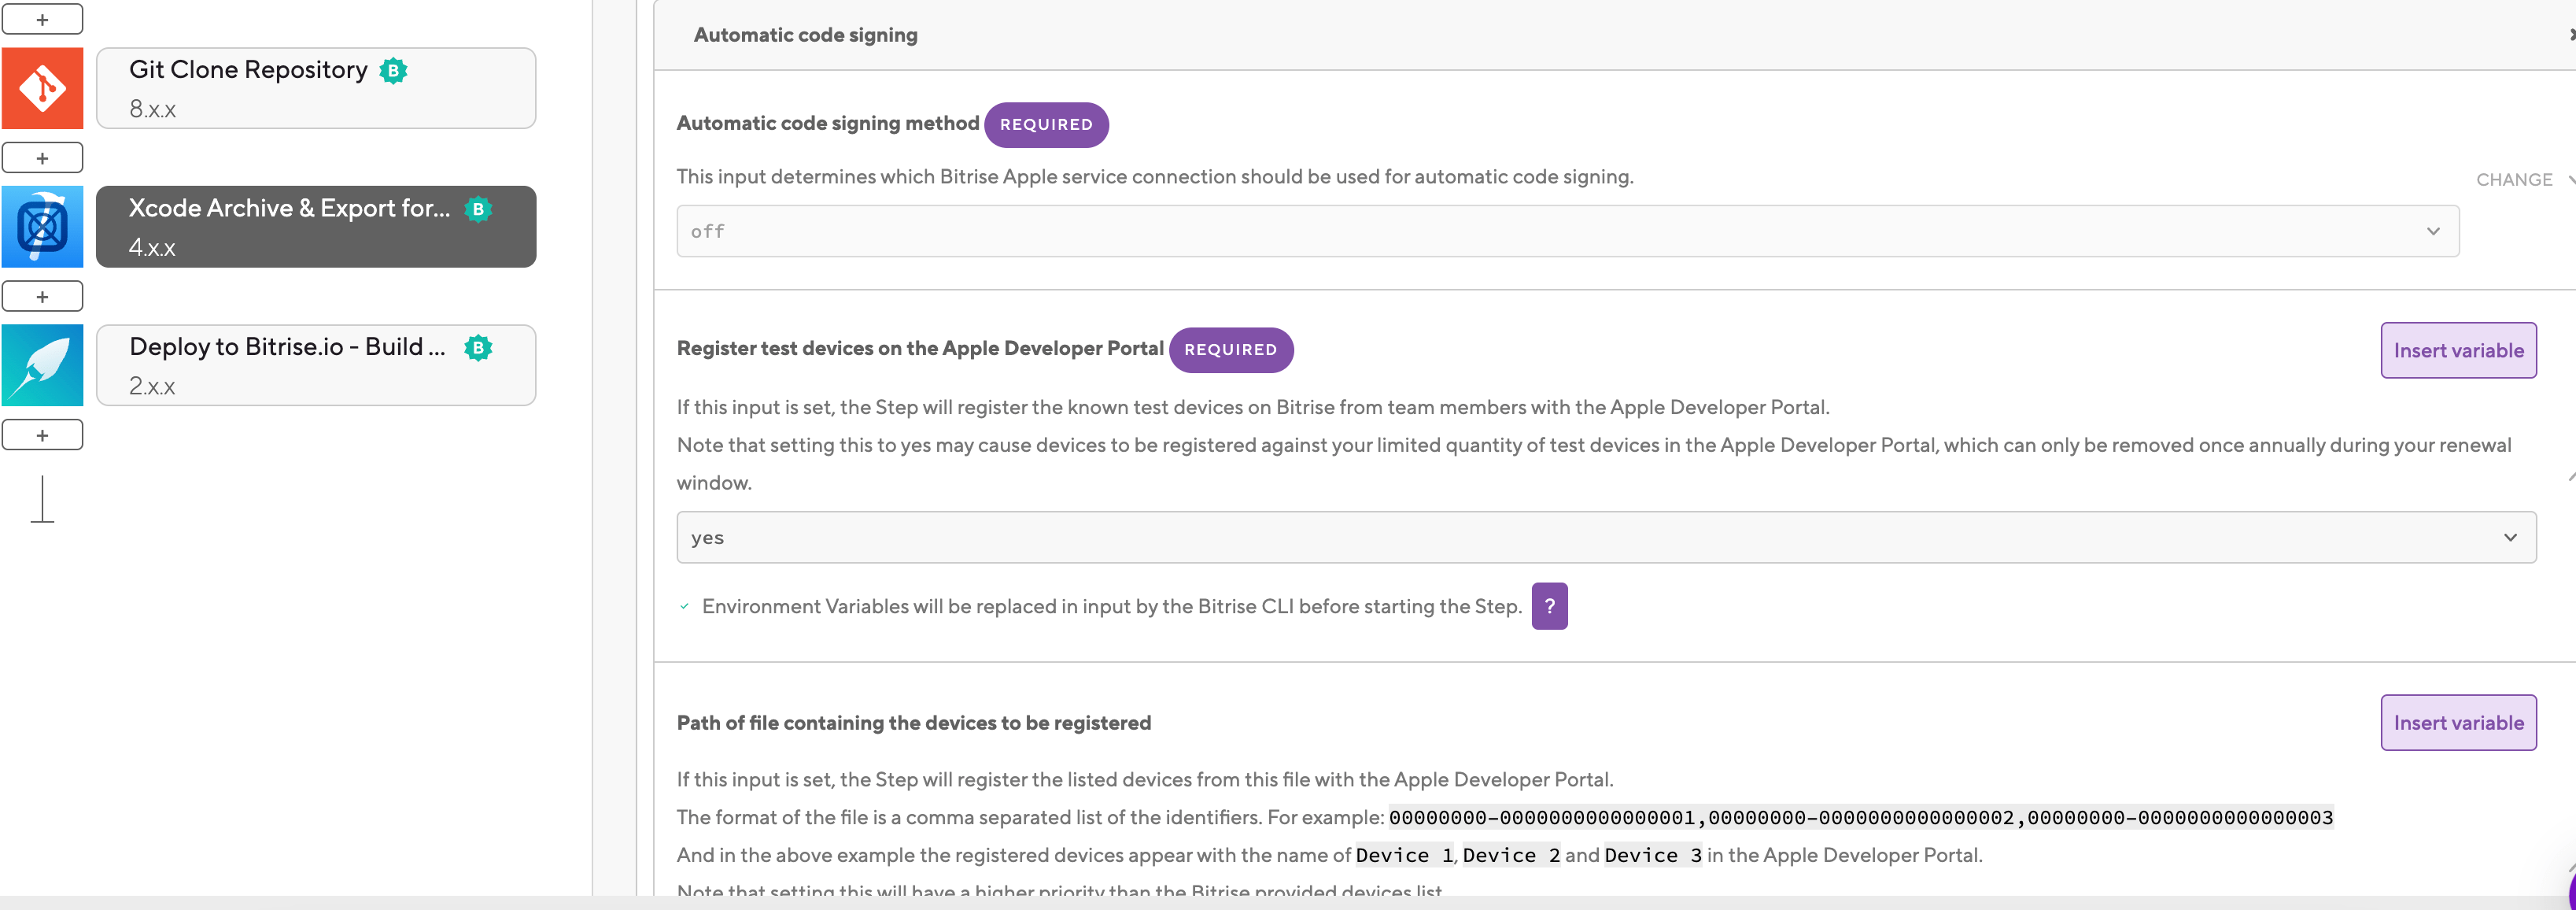
-
Register your devices on Bitrise.
-
In the Configuration YAML file, add the
xcode-archiveStep to your Workflow.your-workflow: steps: - git-clone: {} - xcode-archive: inputs: -
Set the
register_test_devicesinput toyes.your-workflow: steps: - git-clone: {} - xcode-archive: inputs: - register_test_devices: 'yes'
Registering a selection of devices on the Apple Developer Portal
Workflow Editor
Configuration YAML
-
Get the UDID of the devices you want to register: Checking the available test devices for an app.
-
Create a
.txtfile and add the UDIDs of all devices you want to register to the file in a comma-separated list:00000000-0000000000000001,00000000-0000000000000002,00000000-0000000000000003
-
Make sure Bitrise can access the file in a Workflow:
-
You can commit it to your repository.
-
You can upload it to the Generic File Storage and use the File Downloader Step to access it.
-
You can dynamically generate the file during the build.
-
-
Log in to Bitrise and select Bitrise CI on the left, then select your project.
-
Click the button on the main page.
-
Add the Xcode Archive & Export for iOS Step to your Workflow.
-
In the Automatic code signing input group, set the Register test devices on the Apple Developer Portal input to .
-
In the same input group, add the path to the
.txtfile containing the UDIDs to the Path of file containing the devices to be registered input.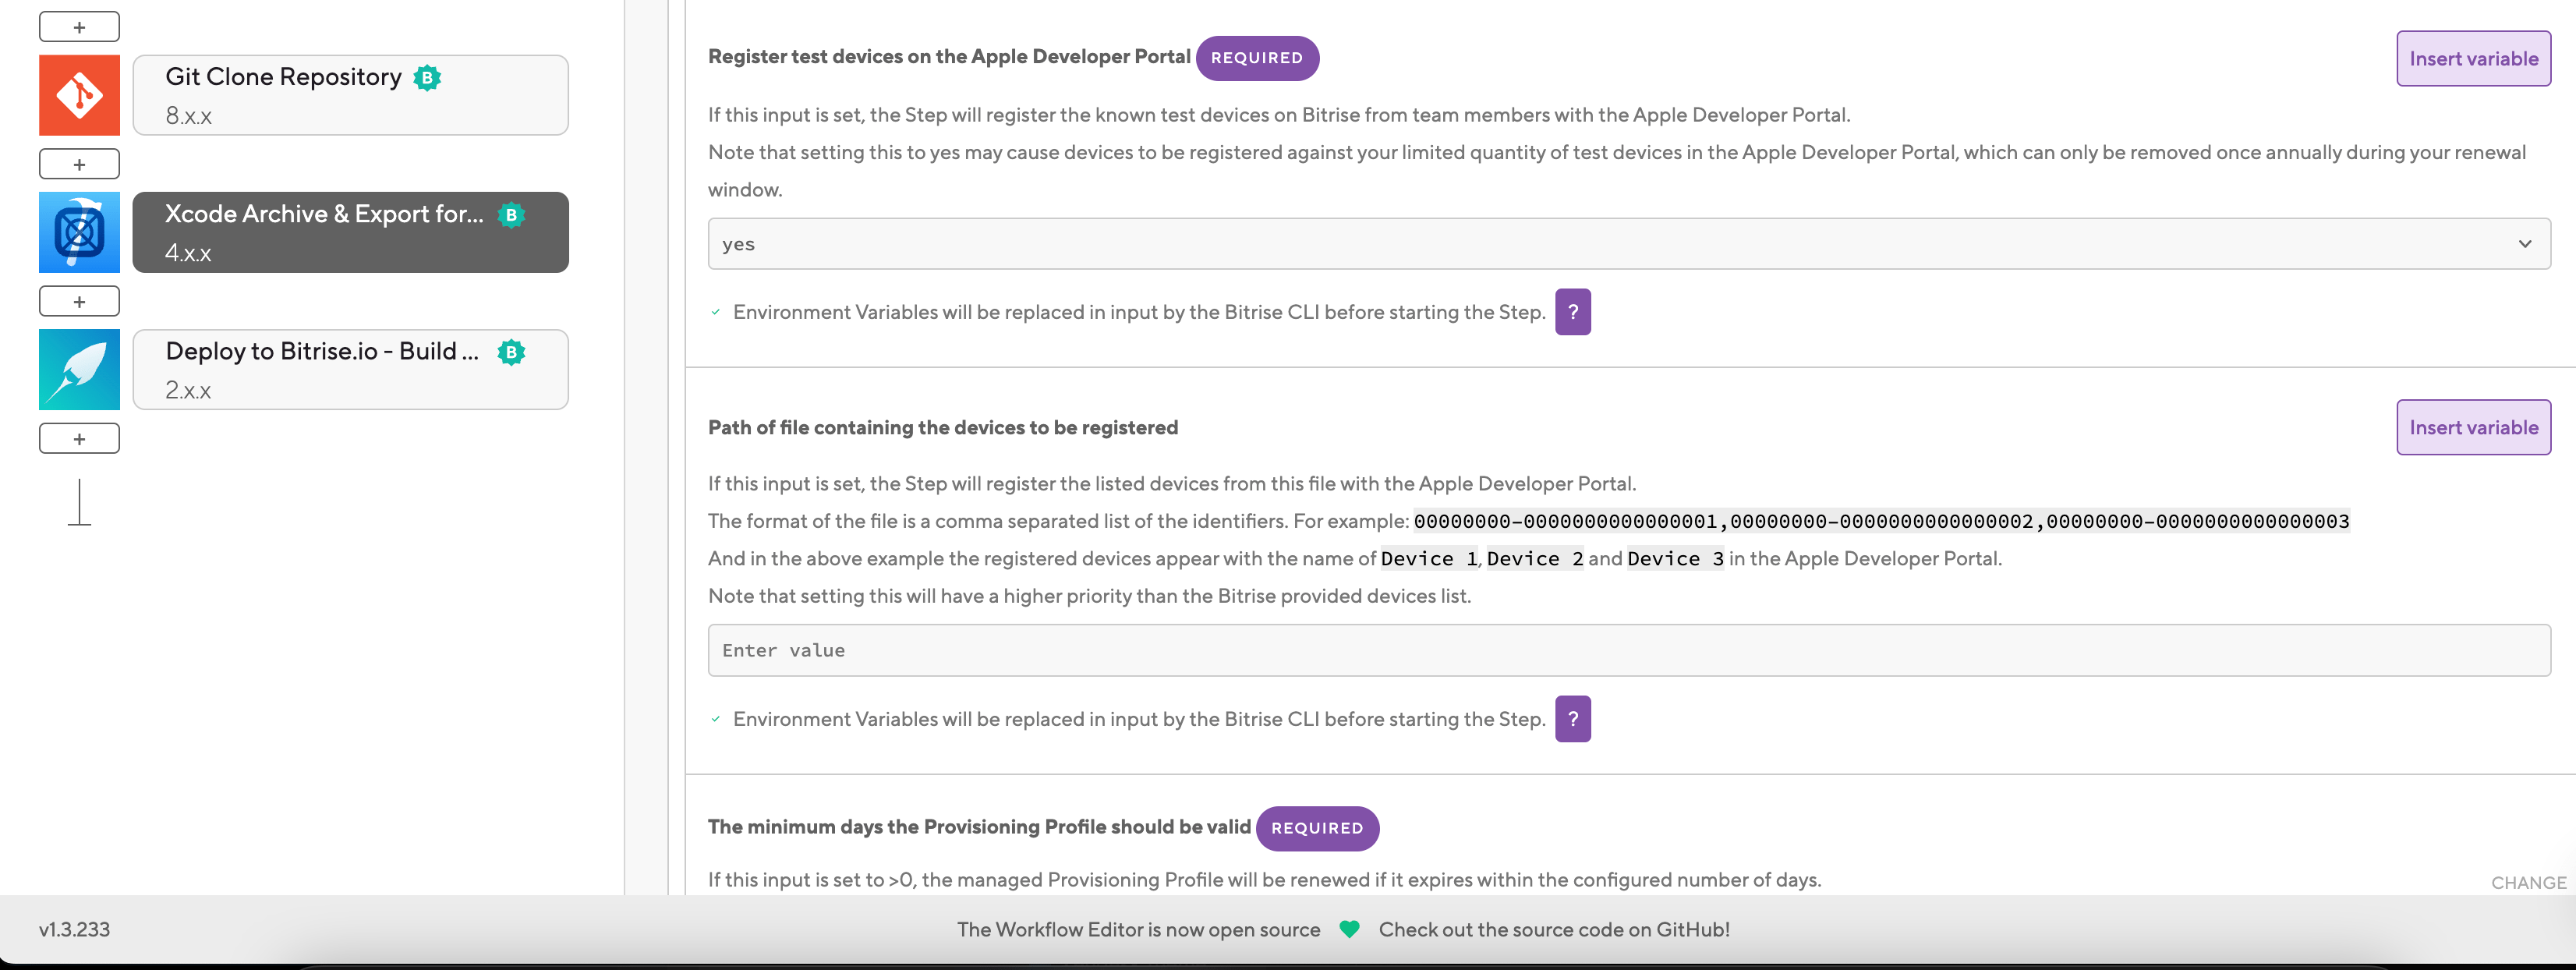
Devices registered on Bitrise
This input takes priority over the devices registered to your Bitrise account.
-
Get the UDID of the devices you want to register: Checking the available test devices for an app.
-
Create a
.txtfile and add the UDIDs of all devices you want to register to the file in a comma-separated list:00000000-0000000000000001,00000000-0000000000000002,00000000-0000000000000003
-
Make sure Bitrise can access the file in a Workflow:
-
You can commit it to your repository.
-
You can upload it to the Generic File Storage and use the File Downloader Step to access it.
-
You can dynamically generate the file during the build.
-
-
In the Configuration YAML file, add the
xcode-archiveStep to your Workflow.your-workflow: steps: - git-clone: {} - xcode-archive: inputs: -
Set the
register_test_devicesinput toyes.your-workflow: steps: - git-clone: {} - xcode-archive: inputs: - register_test_devices: 'yes' -
Set the path to the
.txtfile containing the UDIDs in thetest_device_list_pathinput.Devices registered on Bitrise
This input takes priority over the devices registered to your Bitrise account.
your-workflow: steps: - git-clone: {} - xcode-archive: inputs: - register_test_devices: 'yes' - test_device_list_path: path/to/the/file