Running the Dart analyzer on Bitrise
You can perform static analysis of your Flutter code with the Dart analyzer by using the Flutter Analyze Step on Bitrise. The Step runs the flutter analyze command that makes heavy use of type annotations that you put in your code to help track problems down.
To run the analyzer:
Workflow Editor
bitrise.yml
-
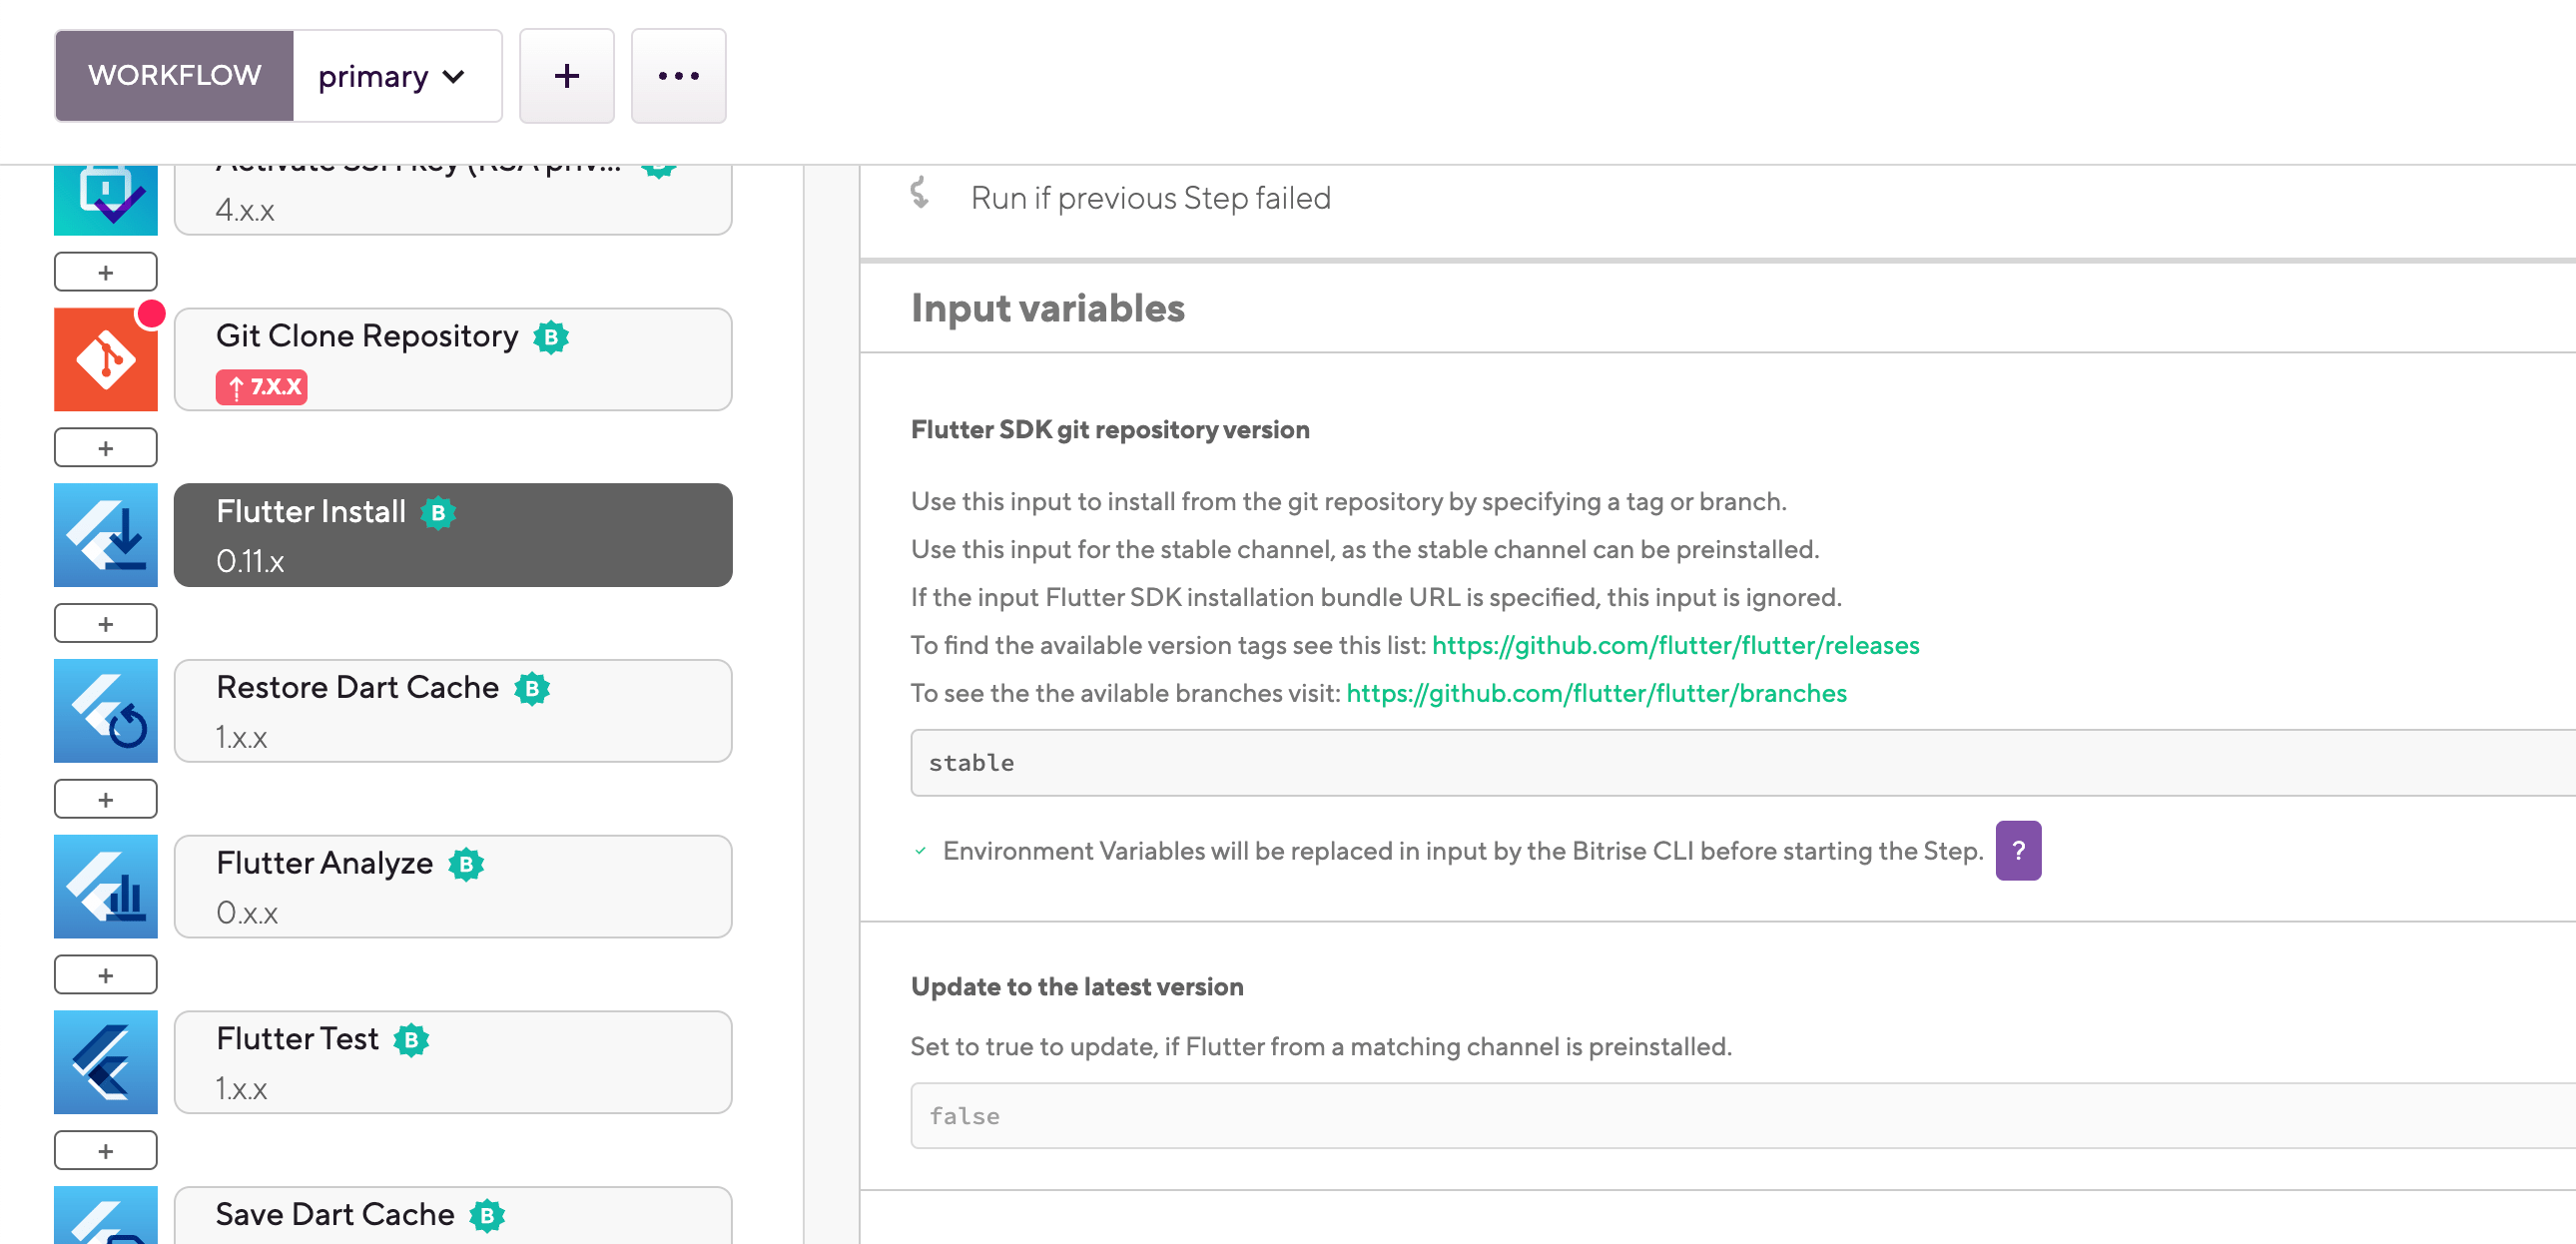
Add the Flutter Install Step to your Workflow.
This Step runs the initial setup of the Flutter SDK and installs any missing components.
-
Make sure that the Flutter Install Step installs the correct version of the Flutter SDK for your app: check the Flutter SDK Git repository version input.
The input's default value is stable, which installs the latest stable version of the SDK. You can, however, set the value to either a specific version tag or a branch label:
-
You can find the available version tags here: Version tags.
-
You can find the available branch labels here: Branch labels.
Installation bundle URL
You can also install the Flutter SDK from an installation bundle URL: you just need to specify the URL in the Flutter SDK installation bundle URL input. Please note that if you do so, the Flutter SDK Git repository version input will be ignored entirely!
-
-
Add the Flutter Analyze Step to your Workflow.
-
Make sure the Project Location input points to the root directory of your Flutter project.
-
If the project scanner automatically detected it as a Flutter project when adding it as an app on Bitrise, you don't have to change the default value.
-
If you configured the app manually, check that the location is correct.
-
-
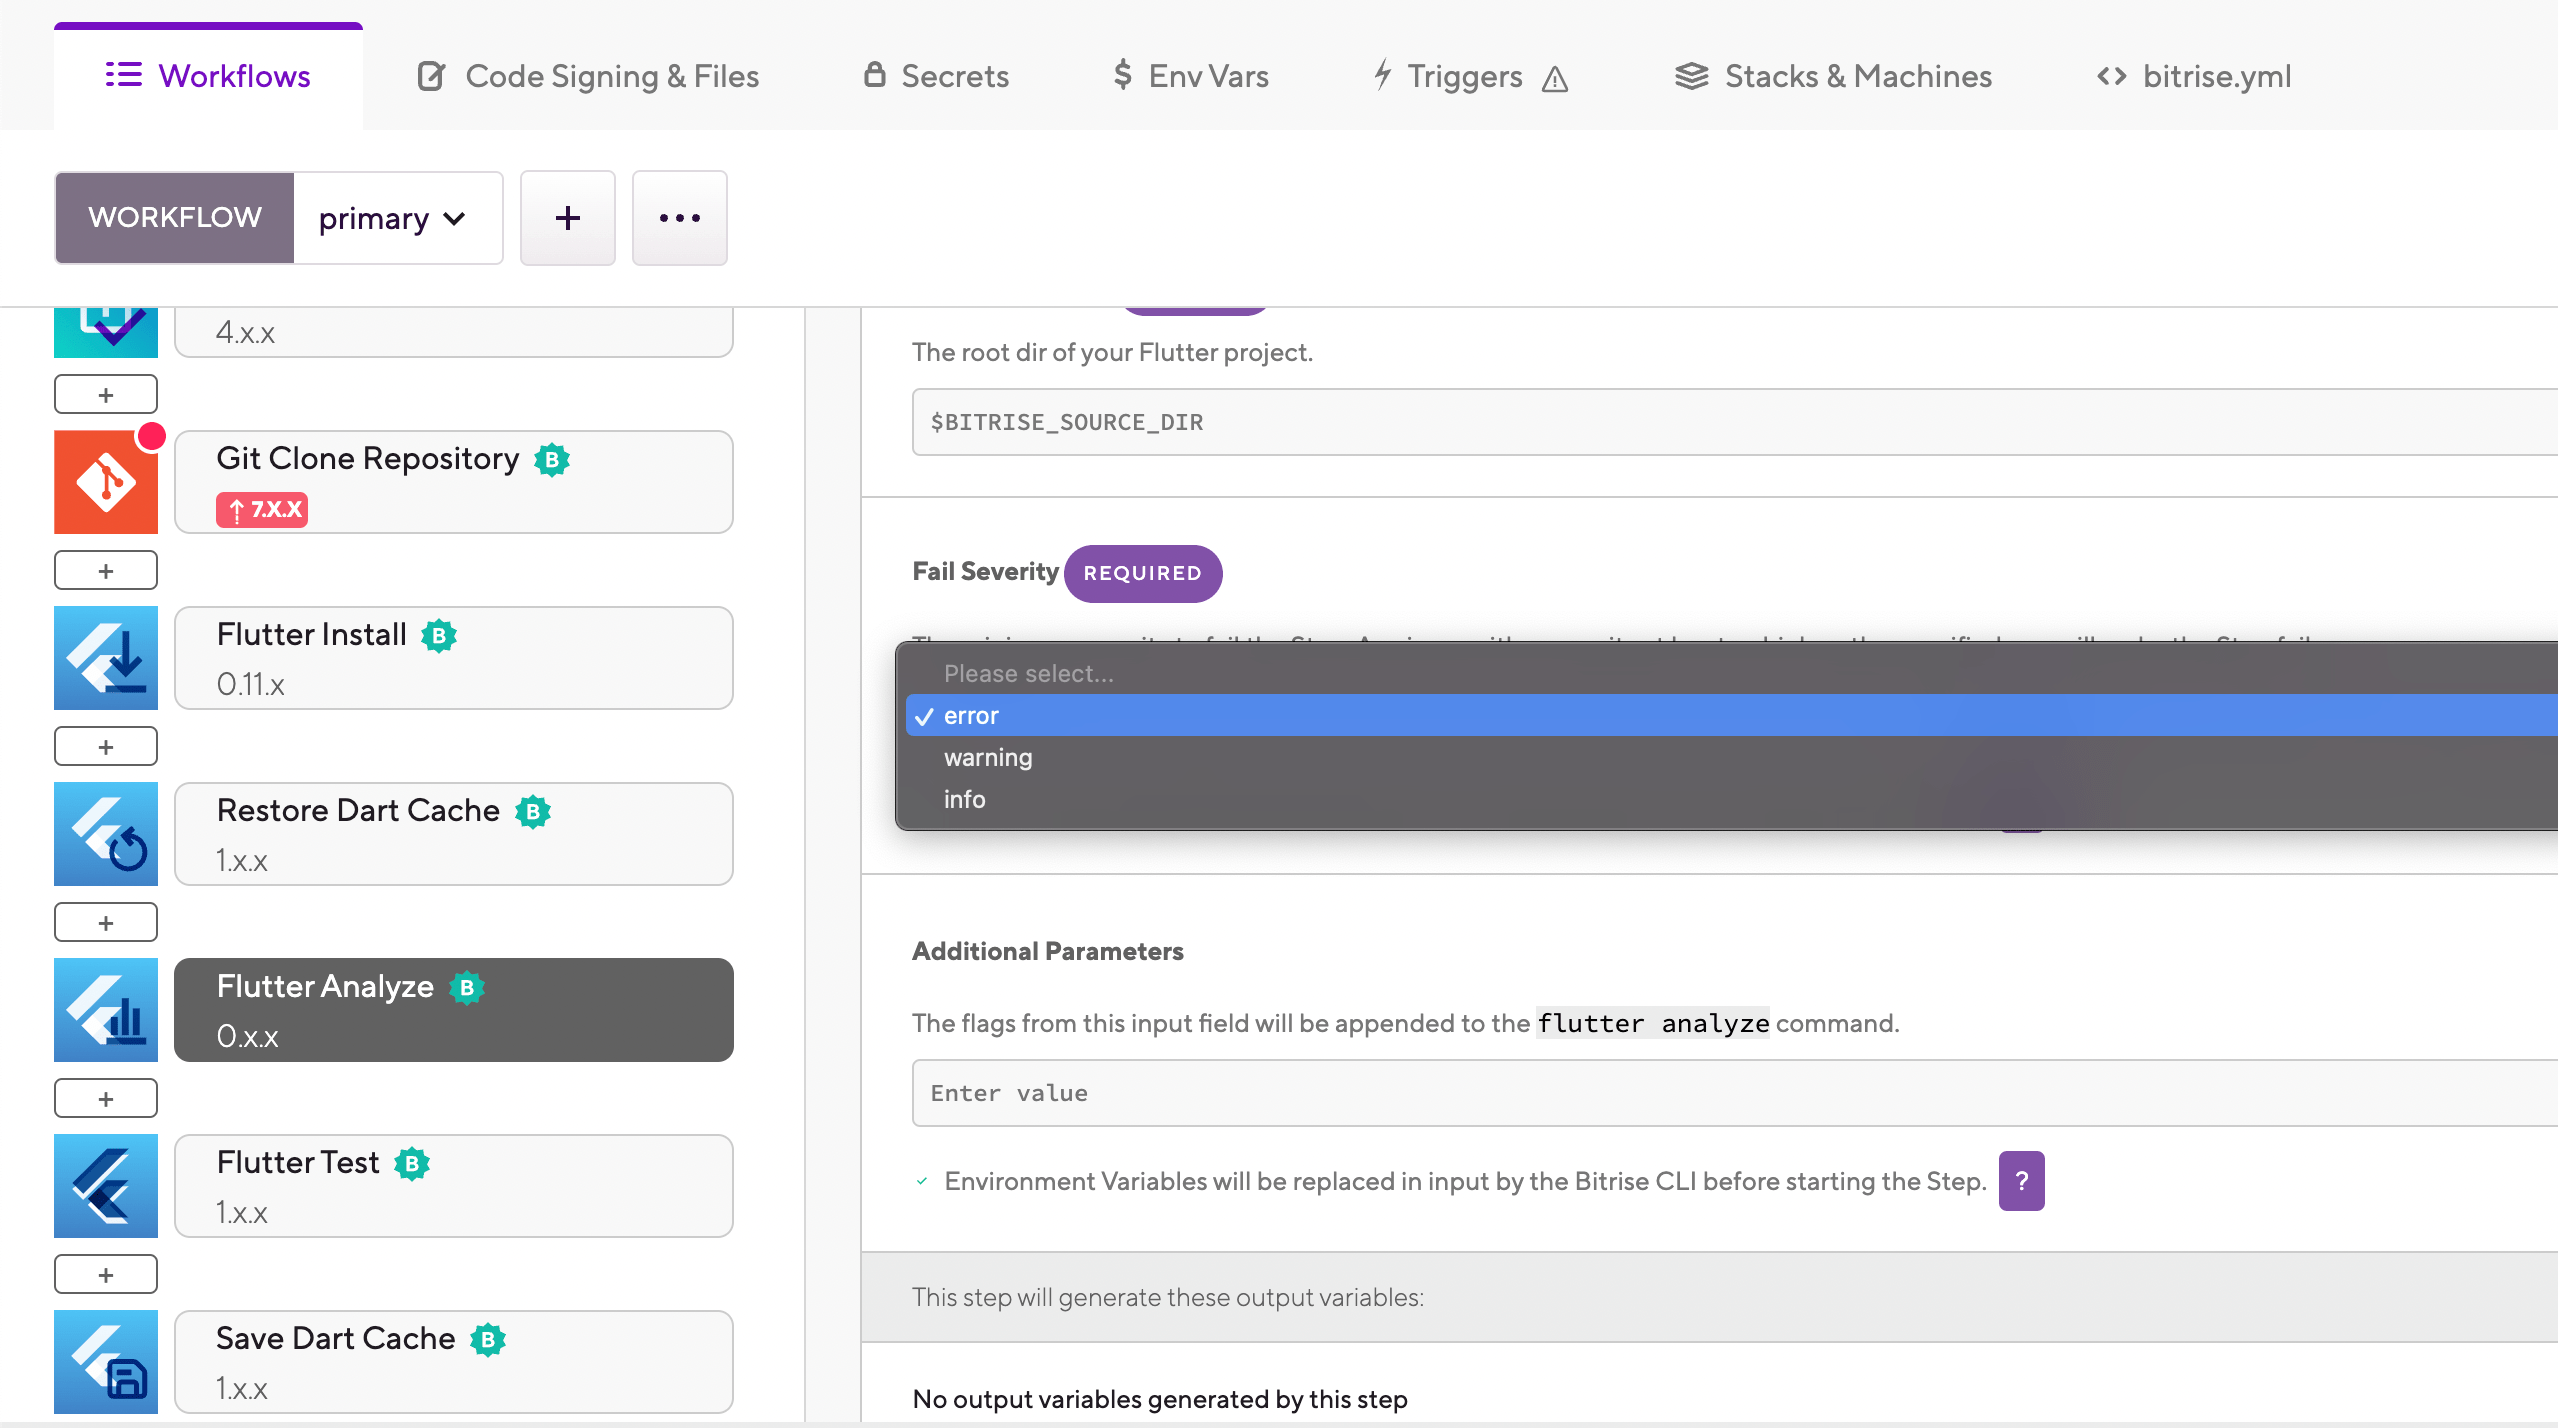
Set the Fail Severity input to the desired level.
The input determines the minimum severity to fail the Step. Any issue with a severity at least as high as the specified fails the Step. It has three possible settings, from minimum to maximum severity:
-
: When this setting is selected, info-, warning-, and error-level issues all fail the Step.
-
: When this setting is selected, only warning- and error-level issues fail the Step.
-
: This is the default value. Only error-level issues fail the Step.
-
-
Optionally, add additional flag to the flutter analyze command in the Additional Parameters input.
For a list of available flags, run flutter help analyze. For example, you can use the
--no-congratulateflag if you don't want to see any output if there are no errors, warnings, hints or lints.
-
Add the
flutter-installerStep to your Workflow.This Step runs the initial setup of the Flutter SDK and installs any missing components.
primary: description: | Builds project and runs tests. steps: - activate-ssh-key: {} - git-clone: {} - flutter-installer: inputs: -
Make sure that the Step installs the correct version of the Flutter SDK for your app: you can specify the version using the
versioninput.The input's default value is
stablewhich installs the latest stable version of the SDK. If you do not see theversioninput in yourbitrise.ymlfile, it is set to the default value. You can, however, set the value to either a specific version tag or a branch label:-
You can find the available version tags here: Version tags.
-
You can find the available branch labels here: Branch labels.
# Installing version 3.7.7 of the Flutter SDK
- flutter-installer:
    inputs:
    - version: 3.7.7
Installation bundle URL
You can also install the Flutter SDK from an installation bundle URL: you just need to specify the URL in the
installation-bundle-urlinput. Please note that if you do so, theversioninput will be ignored entirely!The URL is expected to begin with
https://storage.googleapis.com/flutter_infra. For example:- flutter-installer: inputs: - installation_bundle_url: https://storage.googleapis.com/flutter_infra/releases/beta/macos/flutter_macos_v1.6.3-beta.zip -
-
Add the
flutter-analyzeStep to your Workflow.primary: description: | Builds project and runs tests. steps: - activate-ssh-key: {} - git-clone: {} - flutter-installer: inputs: - version: stable - flutter-analyze: inputs: -
Make sure the
project-locationinput points to the root directory of your Flutter project.- flutter-analyze: inputs: - project_location: "$BITRISE_SOURCE_DIR"-
If the project scanner automatically detected it as a Flutter project when adding it as an app on Bitrise, you don't have to change the default value.
-
If you configured the app manually, check that the location is correct.
-
-
Set the
fail_severityinput to the desired level.The input determines the minimum severity to fail the Step. Any issue with a severity at least as high as the specified fails the Step. It has three possible settings, from minimum to maximum severity:
-
info: When this setting is selected, info-, warning-, and error-level issues all fail the Step. -
warning: When this setting is selected, only warning- and error-level issues fail the Step. -
error: This is the default value. Only error-level issues fail the Step.
- flutter-analyze: inputs: - project_location: "$BITRISE_SOURCE_DIR" - fail_severity: error -
-
Optionally, add additional flag to the flutter analyze command in the
additional_paramsinput.For a list of available flags, run flutter help analyze. For example, you can use the
--no-congratulateflag if you don't want to see any output if there are no errors, warnings, hints or lints.- flutter-analyze: inputs: - project_location: "$BITRISE_SOURCE_DIR" - fail_severity: error - additional_params: --no-congratulate
Once your build has run, you can check the Step's output in the build logs.