Projects with submodules or private repo dependencies
Bitrise needs access to all repositories or submodules for a successful build, so if your project has submodules or private repo dependencies, you must grant Bitrise access to those as well.
GitHub App integration
If your project uses a GitHub App installation to connect to your repository, you can simply link additional repositories. You don't need any of the workarounds described in this document.
If you have a project with one or more submodules or other private repository dependencies (for example, CocoaPods repositories), Bitrise needs access to all repositories or submodules for a successful build.
For private projects with OAuth connections, Bitrise uses SSH to access Git repositories: to grant access, you need to make sure all the repositories can be accessed with the public SSH key generated for your Bitrise project.
There are two ways to achieve this:
-
Register the same SSH key for every repository you have to access during the build.
-
Register the SSH key with a bot user and add that user to all repositories.
Registering the same SSH key for every repository is the best, most secure way - but not all services support it. GitLab and Bitbucket does support it, GitHub, however, doesn’t. If your code is stored on GitHub and you use an OAuth connection, read on!
We’ll go through the other option, using a bot user or machine user - GitHub calls them machine users - in detail. In brief, the concept is simple: you register the Bitrise public SSH key to a user and add that user to all repositories that have to be accessed for your Bitrise build.
Machine user with read only access
It is not required to use a special bot/machine user: you can add the SSH key to your own account on the git hosting service. The best practice, however, is to use a machine user, with read only access, for those repositories you want to access during the build.
GitHub recommends this method for accessing multiple repositories. Let’s quickly go through an example.
We have a Bitrise project we’ll call MultiBit. It has a main repository and it needs to pull additional data from two other, private repositories during a Bitrise build. Our main user is called BitMan and his GitHub account is linked to his Bitrise account. To access the private repositories during the build, BitMan creates another user on GitHub, called BitBot. BitBot will be the machine user.
Now, BitMan accesses the Project settings page of his Bitrise project, and copies the public SSH key. BitMan then adds the SSH key to the BitBot user on GitHub and adds BitBot to the two private repositories as a collaborator. Now BitBot has the Bitrise public key and has access to the private repositories as necessary. It’s time to test if BitMan’s setup works.
BitMan goes to Bitrise and opens the Workflow Editor. He has the Activate SSH Key Step in his repository so the SSH key will work. BitMan adds a Script Step to clone the private repositories - as the Git Clone Step only works with the main repository! Once all that is done, the build should work as expected.
Using a machine user to access private repositories
A machine or bot user is a GitHub user that is not used by humans, instead it is exclusively used for automation. This is the best way to access a private repository: you create a machine user, add a public SSH key to the user, and then provide the user read access to the repository.
Adding the machine user to your repository
-
Create a new GitHub user account, one that will serve as the machine user.
-
Go to your repository on GitHub and select the Settings tab.
-
On the left side menu, select Collaborators & teams.

-
Scroll down to the Collaborators window.
-
In the search input field, search for the username of your newly created account.
-
Click Add Collaborator.
-
Change the user permission to Read.
By default, the invited collaborator’s permission is Write. You can keep it that way, of course, but a Read permission is enough for Bitrise.
Adding the SSH key to the machine user
In order for Bitrise to be able to use the machine user to access your repository, you must add the same SSH key to the machine user and the project on Bitrise.
When adding a new project
-
Start the process of adding your project on Bitrise.
-
When prompted to setup repository access, you can choose from three options:
-
Auto-add a generated SSH key to your repository: Bitrise automatically registers a public SSH key to your GitHub repository.
-
Copy a generated SSH key to your Git provider manually: Bitrise generates an SSH keypair for you, and you have to manually register the public key to your Git repository.
-
Add your own SSH key: You provide your own SSH keypair for authentication, and you have to manually register the public key to your Git repository.
-
-
Finish the process.
-
Add the same SSH key to your machine user that you added to the project.
When your project already exists
-
Open your project on Bitrise with a user that has the Admin role on the project.
-
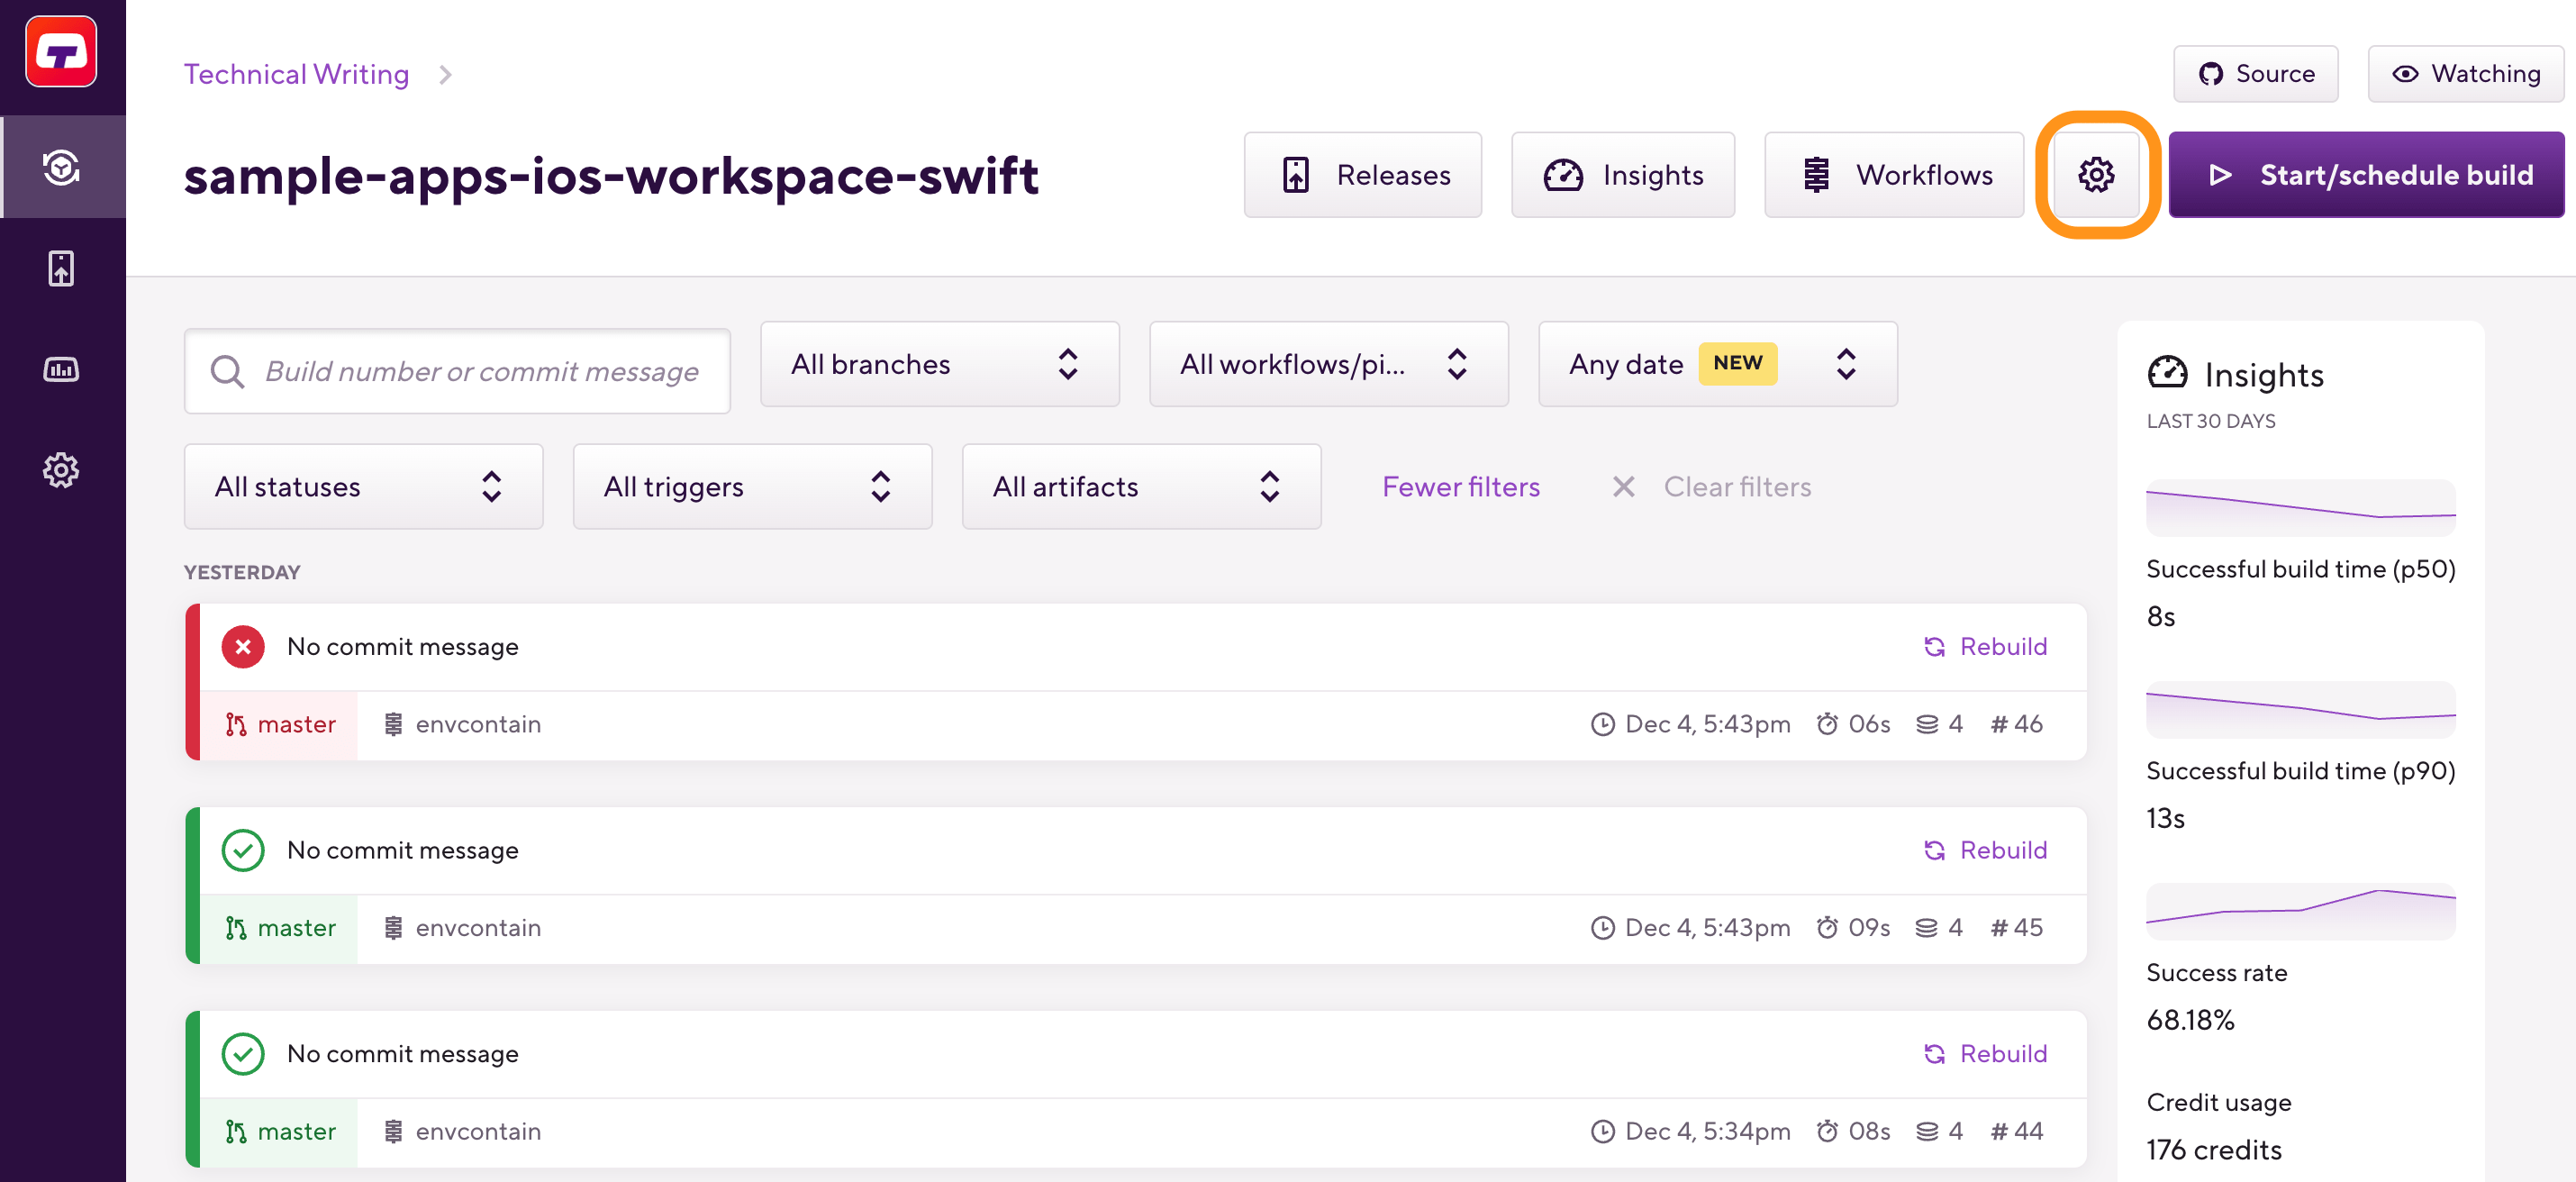
On the main page of the project, click on the Project settings button.

-
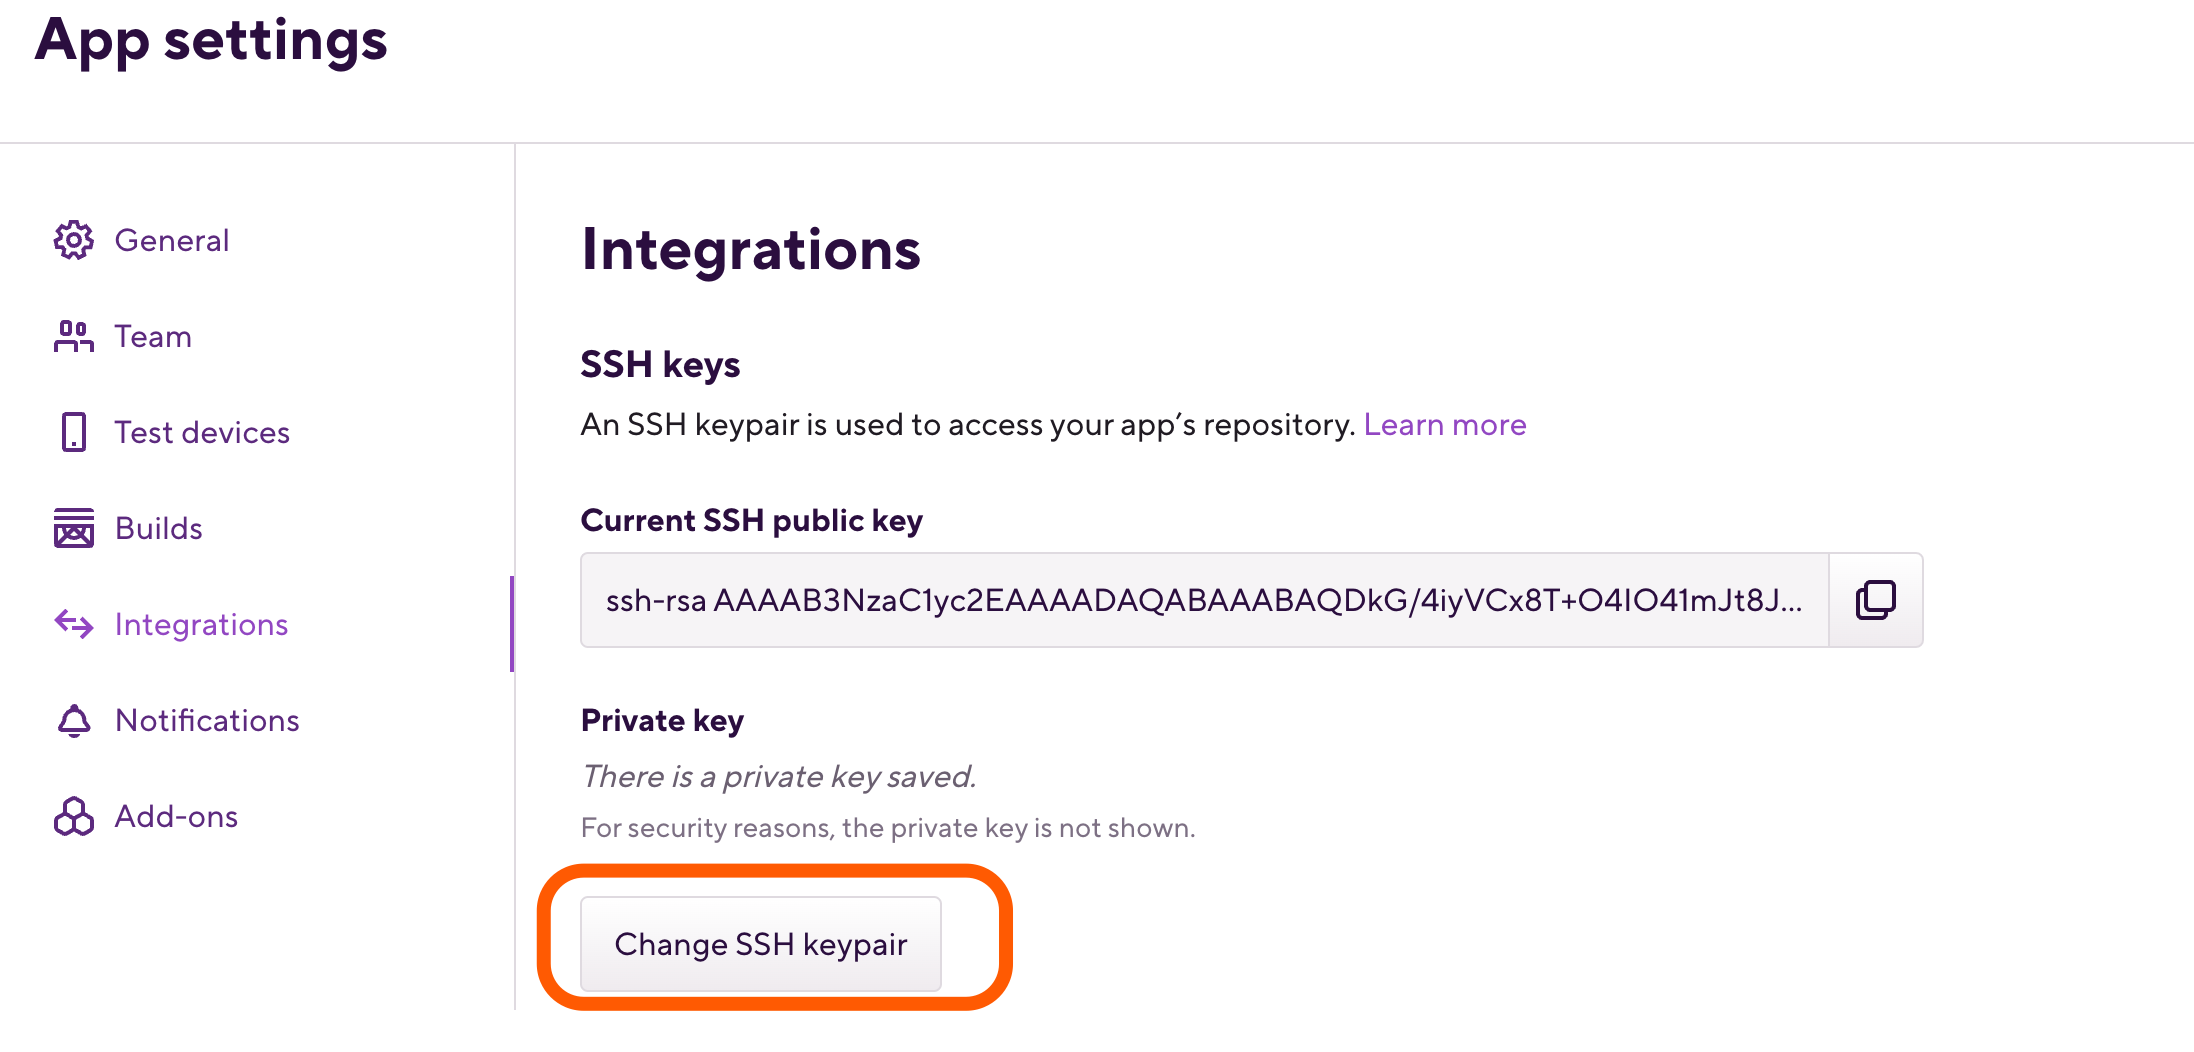
On the left, select Integrations and then the Git provider tab.
-
Click Copy public key.

Git cloning submodules and repository dependencies
You have three options when it comes to accessing multiple repositories during a Bitrise build:
-
Cloning all the repositories on the virtual machine, and accessing them as needed.
-
Adding the additional repositories as submodules to your main repository.
-
Using the GitHub App integration and linking additional repositories.
In the latter case, you do not need to worry about cloning them: if you set up SSH access correctly, the Git Clone Step will take care of everything.
If you don’t want to or can’t add your repository dependencies as submodules, read on: we’ll talk about how to clone them.
The Git Clone Step
The Git Clone Step only works with the main repository. If you need to access multiple private repositories, do not add multiple Git Clone Steps. Use Script Steps to clone those repositories on the Bitrise virtual machine.
To clone additional private repositories during the build:
-
Make sure you added a user with the Bitrise public SSH key to all the repositories.
-
Make sure you have the Activate SSH Key Step and the Git Clone Step at the start of your Workflow.
-
Add one or more Script Steps to clone the additional private repositories to the build.

-
Run a build.
Cloning issues
If you encounter issues with git cloning - for example, not all submodules are cloned - try the following command after cloning:
git submodule update –recursive –remote –merge –force
Public vs private projects
There is one important detail to keep in mind when you want to give access to all submodules or private repository dependencies for a Bitrise project: the project’s privacy settings determine what git URL should you use.
-
If you have a private project: use SSH URLs everywhere! Most services support SSH key based authentication only for SSH URLs (for example,
[email protected]:bitrise-io/bitrise.git). Therefore every private repository you want to use have to be addressed with the SSH URL. If you have direct private git repo references in your CocoaPods Podfile, you’ll have to use the SSH URL there as well. The same applies for submodules and every other private git repository URL you want to use with the SSH key you register on bitrise.io. -
If you have a public project: use HTTPS URLs everywhere! SSH URLs require SSH keys even if the repository is public. For security reasons, public projects CANNOT have SSH keys. As HTTPS git clone URLs do not require any authentication in the case of public repositories, they should be used for public Bitrise projects.