Setting up OneLogin SSO for Bitrise
Add SAML SSO to your Bitrise Workspace using OneLogin.
This guide provides step-by-step instructions on setting up Bitrise as a SAML application on OneLogin.
SAML SSO restrictions
SAML SSO is only available for a Workspace with our paid plans.
Since the SAML SSO feature is tied to the above plans, if you decide to downgrade to a Hobby plan or remove the add-on, you will lose this feature. All Workspace members will receive an email about the downgrade and you’ll have two weeks to re-upgrade if you wish to use SAML SSO in your Workspace again.
Before connecting SAML SSO to your Workspace:
-
Make sure the administrator to OneLogin is at hand while setting up SAML SSO connection on Bitrise.
-
Be aware that only the Workspace owner can set up SAML SSO to a Bitrise Workspace.
-
Your account on Bitrise has a Workspace with the Velocity or Enterprise plan.
To configure Bitrise on OneLogin:
-
Log into OneLogin as an Administrator.
-
Click Administration on the top bar.

-
Select Applications and click Add App. This will take you to the Find Applications page.

-
Type
Bitrisein the search bar and select the SAML2.0 type from the search results.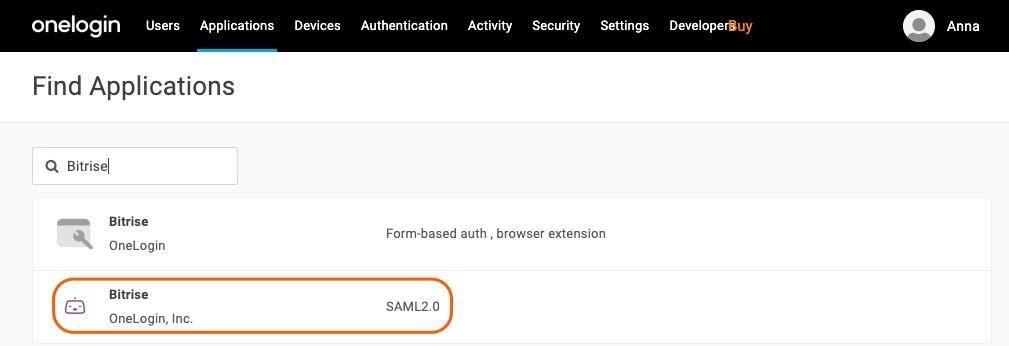
-
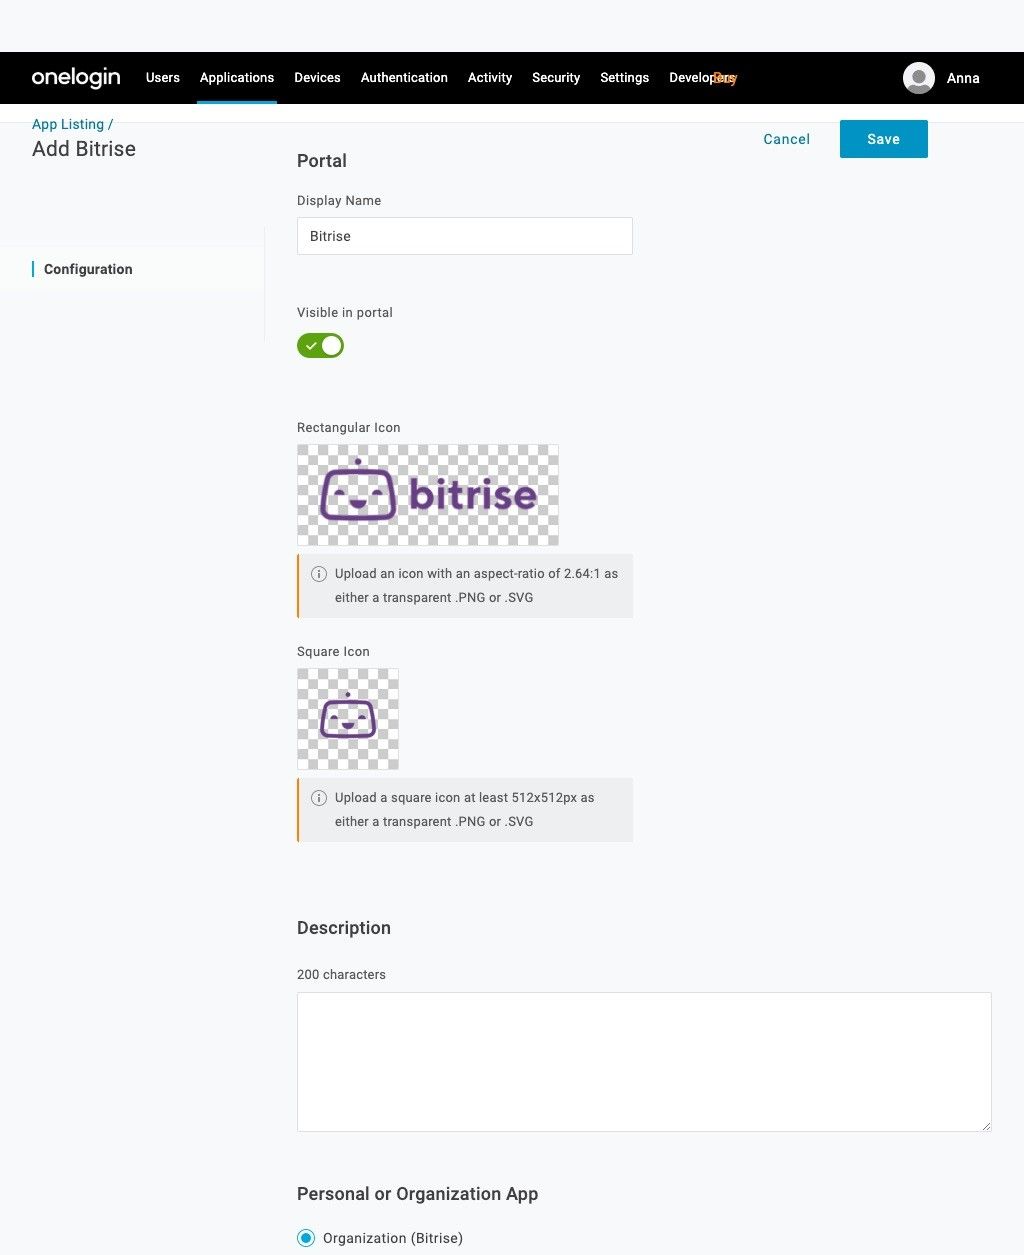
Click the Configuration tab on the left sidebar. You can change the icon and add descriptions if you wish. Make sure Organization (Bitrise) is ticked. Hit Save.
-
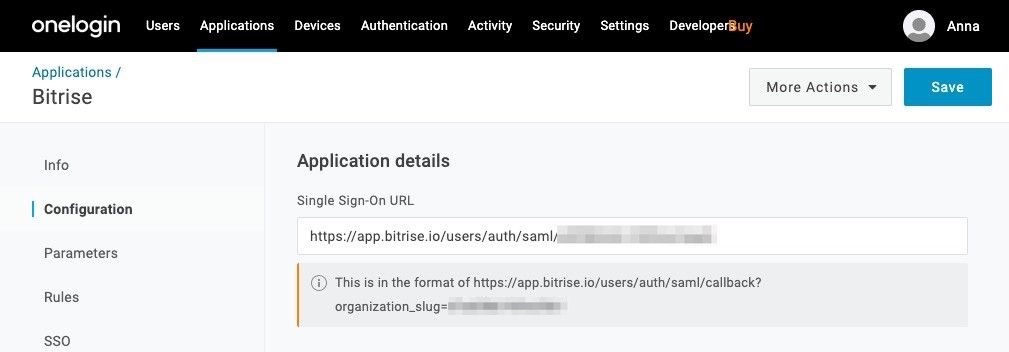
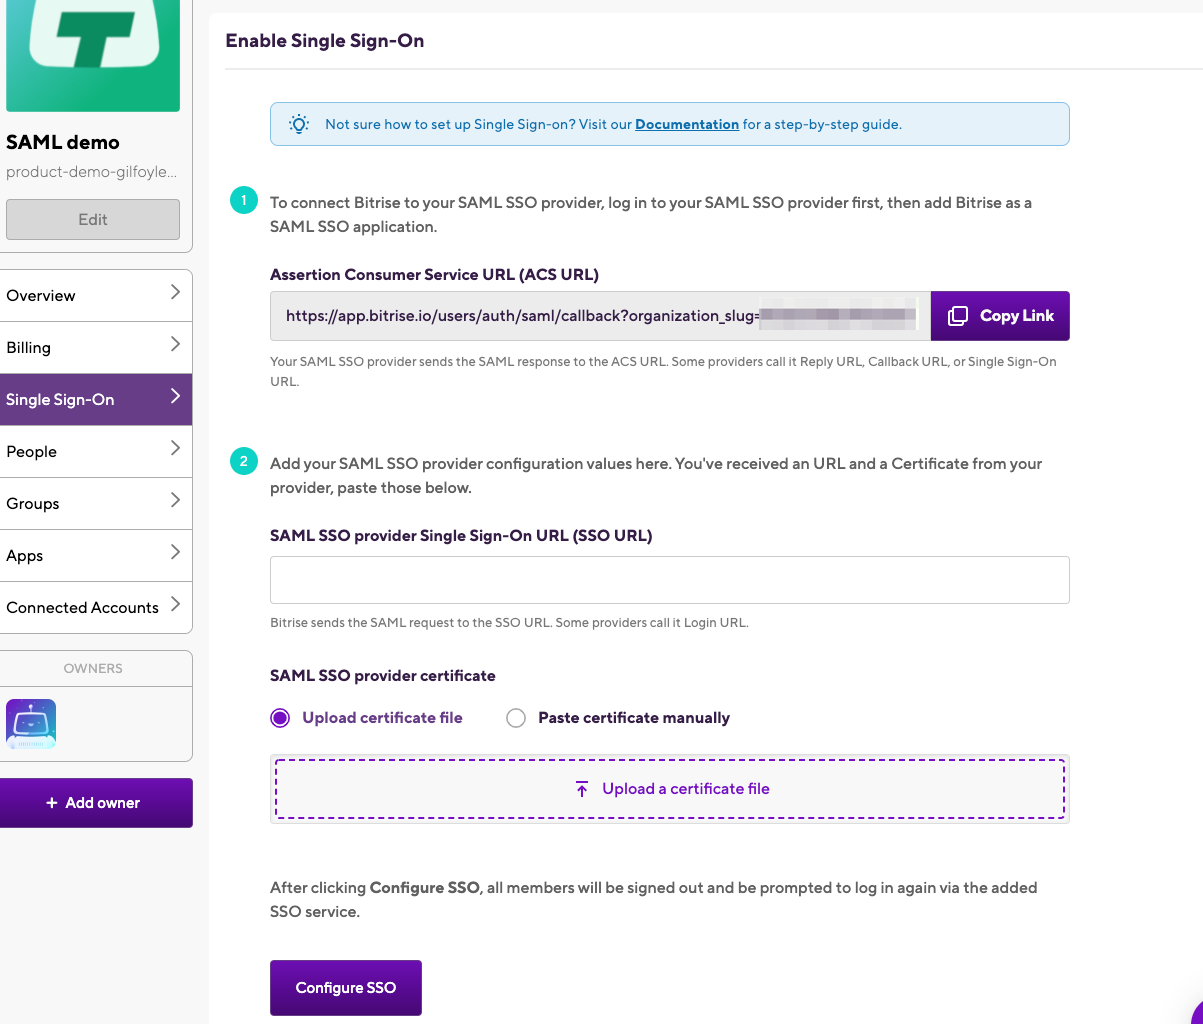
Click the Configuration tab again and paste the Assertion Consumer Service URL (ACS URL) from your Bitrise Workspace’s Single Sign-On tab to the Single Sign-On URL field on OneLogin. Hit Save in OneLogin.
-
Select SSO on the left sidebar.
-
Click the View details for the X.509 Certificate. Copy the content of the X.509 Certificate and paste it to the SAML SSO provider certificate field on the Enable Single Sign-On page of Bitrise.
-
Go back to the SSO page on OneLogin and copy the SAML 2.0 Endpoint (HTTP) link. Paste it in the SAML SSO provider Single Sign-On URL (SSO URL) field on Bitrise.
-
Go back to Bitrise and click Configure SSO.
Users on OneLogin and Bitrise
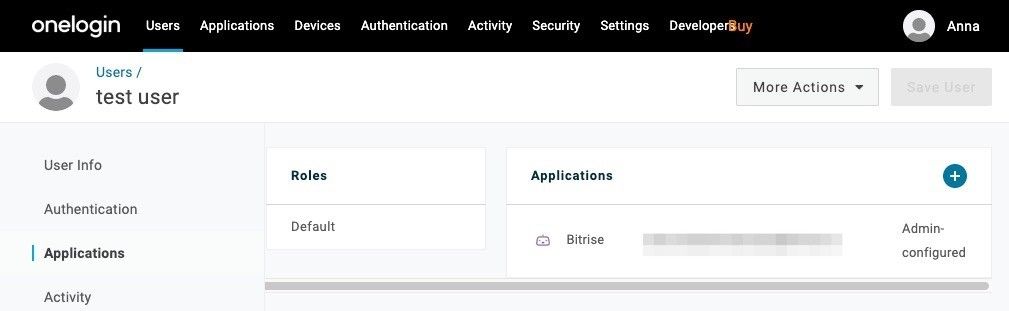
Make sure the users in your Bitrise Workspace are all added to the Users page on OneLogin. If not, go to Users, then New User and add the new user. Don’t forget to send out an invite (More actions drop-down menu, Send Invitation) to a new user so that the user can activate their account on OneLogin. Users must be added to the newly created Bitrise app by clicking Applications under User Info and clicking the + sign. Make sure the added users are all Workspace members on Bitrise.
If you’ve completed setting up Bitrise on OneLogin and connected it with your Bitrise Workspace, then all Workspace members will get an email from Bitrise which contains a link to activate their SSO connection to the Bitrise Workspace.