Configuring a machine pool
After you created an AWS controller, you can configure a machine pool. The pool is a group of instances that share the same configuration and can run Bitrise builds. The Controller ensures that the necessary amounts of matching resources are started on AWS.
After you created an AWS controller, you can configure a machine pool. The pool is a group of instances that share the same configuration and can run Bitrise builds. The Controller ensures that the necessary amounts of matching resources are started on AWS.
Creating a new pool
Creating a new pool is happening through a multi-stage wizard, where you need to provide details about the pool:
-
Open your Workspace settings page.
-
Select Self-hosted infrastructure and go to the Bitrise on AWS tab, then click .
-
On the first screen, configure your agent pool settings:
-
Pool name (required): The pool name will appear on the Stacks & Machines tab of the Workflow Editor to allow you to select the pool to run builds. The name must be unique within the Workspace, across other pools and Bitrise agent pools. If the name is not unique, the pool cannot be created.
-
Number of machines (required): The number of machines created. The higher the number, the more builds can run parallel within the available concurrency.
-
Rolling update percentage (required): Rolling update percentage configures the expected system availability during machine restarts. The lower the number, the more machines will be available during a change rollout, but the overall time required for the rollout could be significantly higher. The provided values should be between 1% and 100% inclusive. The system rounds up the percentage-based values. If you have five machines with a 95% rolling update percentage, all five machines will be attempted to restart simultaneously. We recommend keeping this number high in case a breaking or blocking change is released (like SSH key rotation) and could be lower for smaller changes (like decreased disk size).
-
-
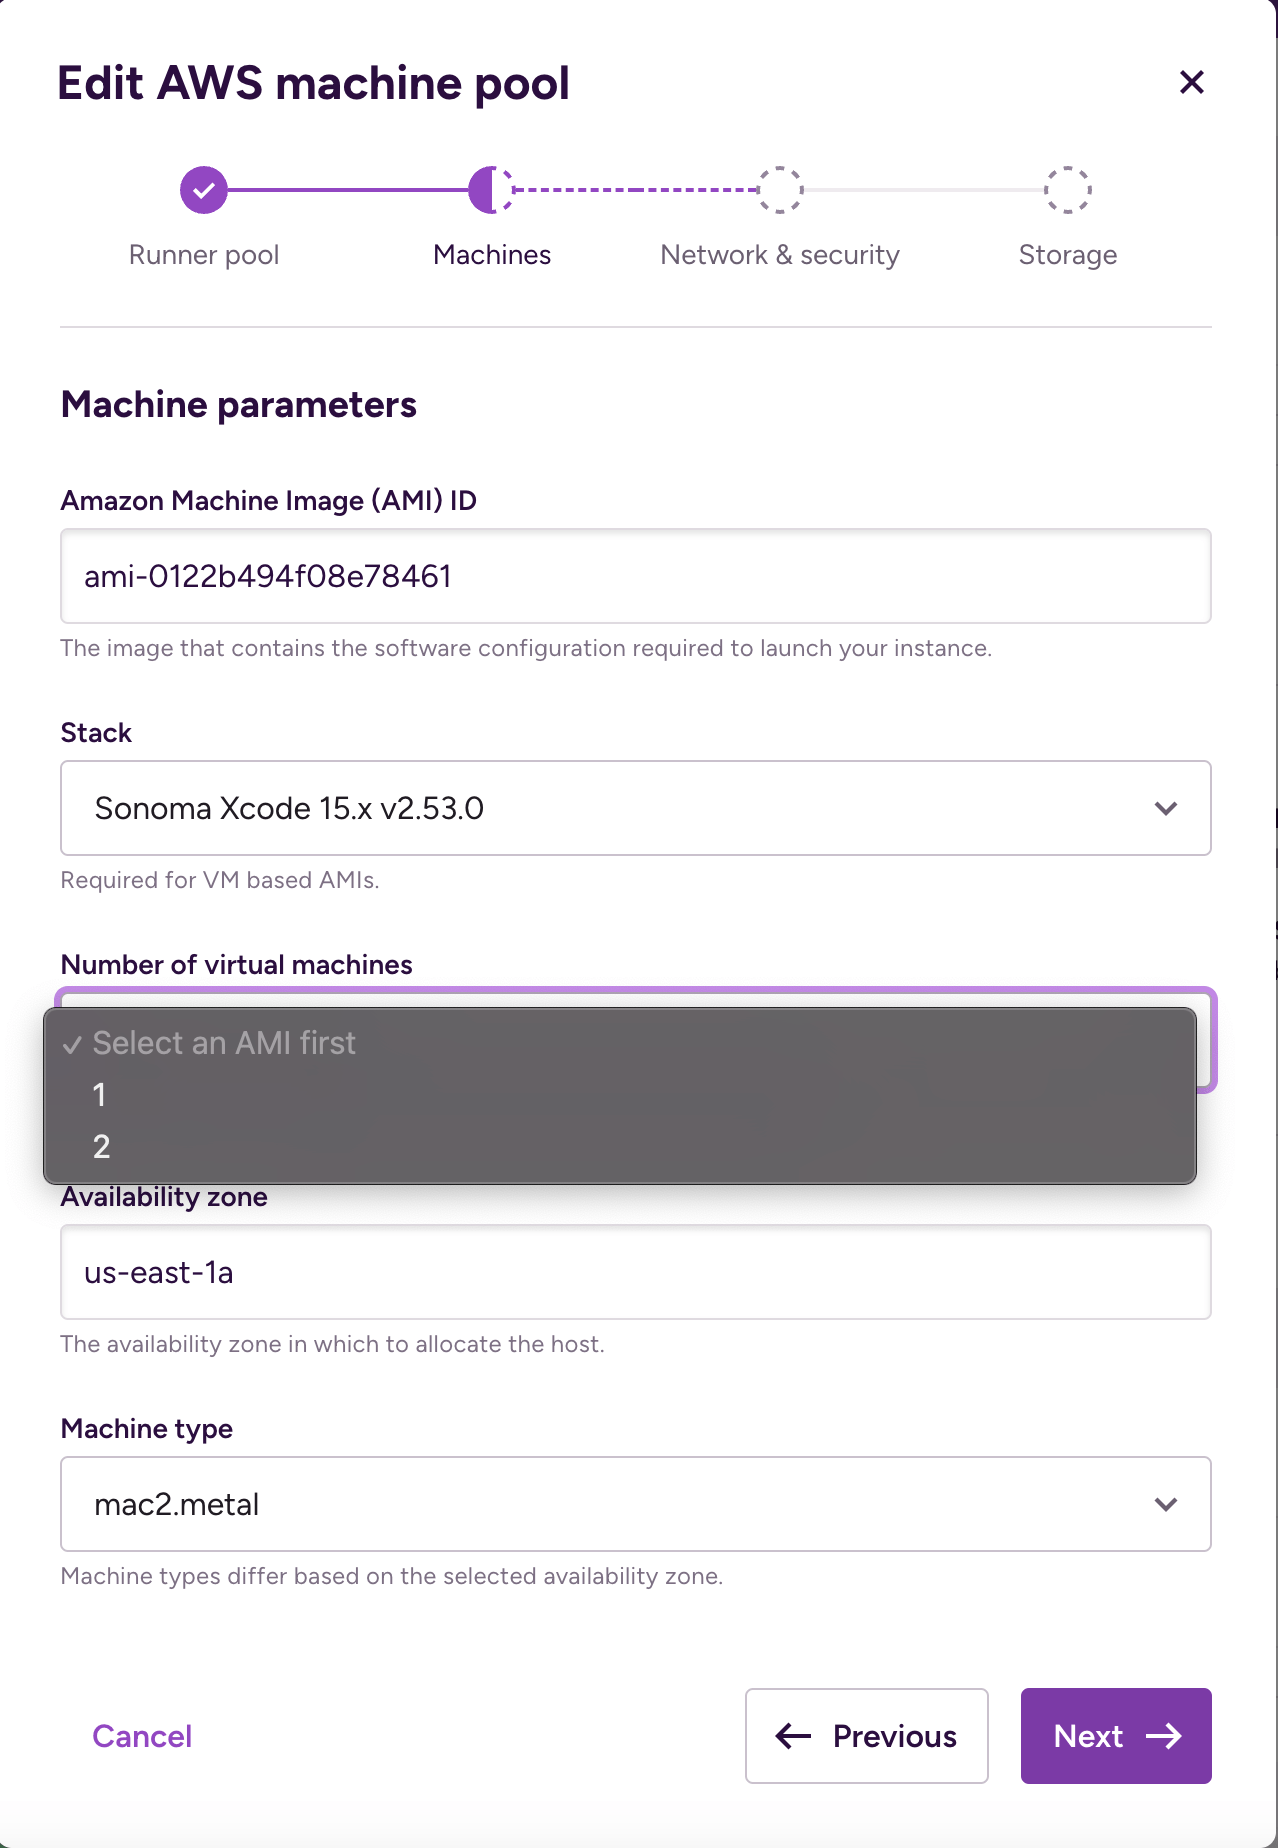
After clicking , provide the machine parameters on the next screen:
-
Amazon Machine Image (AMI) ID (required): AMI is the Bitrise-built environment with all required tools preinstalled to run mobile builds. The provided ID of the AMI you subscribed to must be configured here. Only the Bitrise-managed AMIs are accepted in the current version.
-
Stack (required for VM-based AMIs): Stack selector becomes available only if the selected AMI is a VM-based MacOS AMI. In this case, the user must select one stack from the dropdown.
-
Number of virtual machines: Number of VM selector becomes available only if the selected AMI is a VM-based MacOS AMI. In this case, the user must select how many VM should run on the build machines (1 or 2).
-
Availability zone (required): The availability zone will define where the resources will be reserved. The Controller is going to start resources with the mac2.metal or mac2-m2.metal or mac2-m2pro.metal instance families, which are not available in every AWS availability zone. Make sure to select a valid availability zone from the list.
-
Machine type (required): Machine type selector becomes available only after the Availability zone is provided. The Controller will start the build machines according to the selected machine type.
Select the right region
The Controller is able to start resources only in the same region where it is located. If the selected availability zone is not in the same region, the machines are not going to start.
-
-
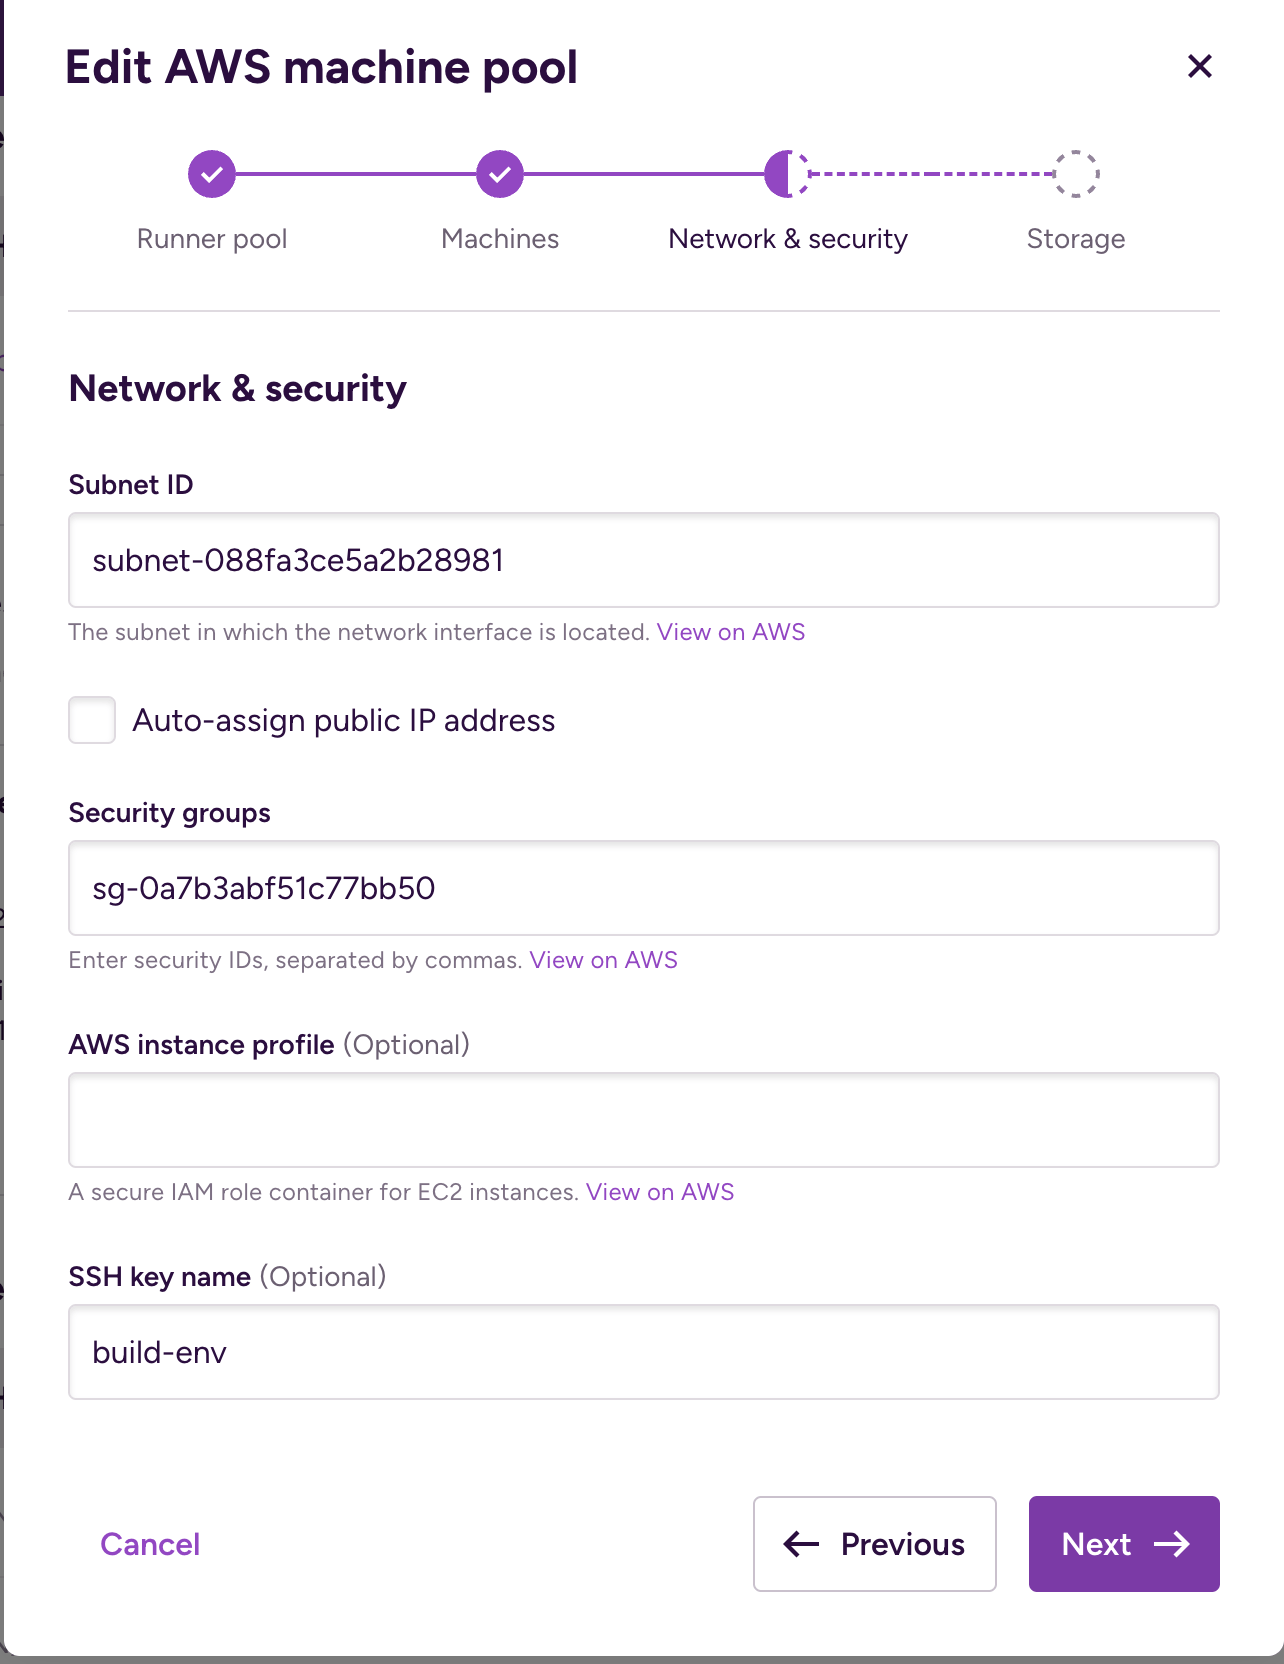
On the next screen, under Network & security settings, you can specify further details about the machines:
-
Subnet ID (required): Specify the subnet ID you want to use for your machines from the availability zone configured before. All created machines will run under the same subnet. The machines must be able to reach Bitrise services from the subnet, but it doesn’t need to be a public subnet as Bitrise is not going to initiate communication. Make sure that your instance can access the following endpoints:
-
https://exec.bitrise.io -
https://build-log.services.bitrise.io
Without accessing these endpoints, you won't be able to run builds even after connecting the instance. This means the subnet must be able to access the internet, either via a NAT Gateway or an Internet Gateway. For more details about subnets, check the official AWS documentation.
-
-
Auto-assign public IP address: Enabling the this field will ensure that a public IPv4 address is created for the EC2 instances. Enable it only when the configured subnet is public: that is, it has an internet gateway to directly communicate to the internet. If the subnet can't access the internet, disable this option.
-
Security groups (required): You can specify one or more security group IDs. With the security groups, you can control traffic to your AWS resources.
At a minimum, an
empty-defaultsecurity group is required, which is empty from the incoming side and allows 0.0.0.0/0 for the outgoing side. If you want to use SSH to access your instances, the security groups must have an incoming port 22 open. If SSH access capability is not required, we recommend removing the related security group.For more details about security groups, check the official AWS documentation.
Network configuration
Make sure that the selected subnet and security group belongs to the same network, otherwise the machines will not start.
-
Instance profile (optional): You can configure extra IAM roles for your machines with the instance profile. This is necessary if you wish to access any other resources in AWS. For example, if you want to use your S3 bucket as an artifact store. If such capabilities are not needed, leave the profile empty.
This option can be used to include permissions for streaming Bitrise agent logs directly to CloudWatch, offering a centralized solution for log management and monitoring. If the AWS CloudFormation parameters have been set correctly, an instance profile called
bitrise-agent-log-instance-profilehas been generated. On AWS, you can get the generated ARN of that profile to use here. -
SSH key (optional): Facilitates debugging of the instances. You can access the created instances via SSH if an SSH key is provided and the correct security group settings are configured. If debugging is not required, we recommend leaving this field empty.
-
-
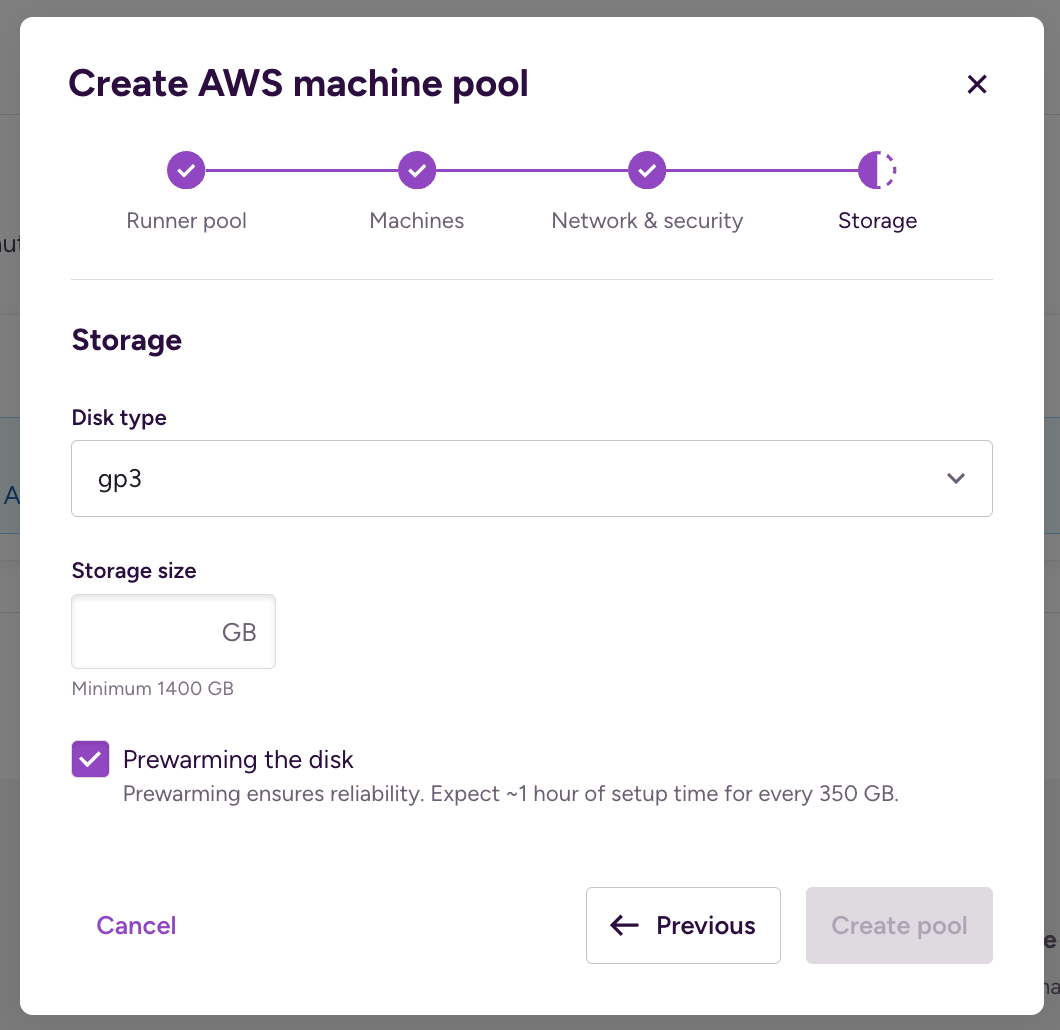
After clicking , configure storage requirements:
-
Disk type (required): You can select from different root volume types. We recommend going with at least the gp3 setting. For details, check out the AWS documentation.
-
Storage size (required): Specify the root volume size in GB. Different images are created with different disk sizes that are the required minimum disk size. For the virtualized AMI with 1 VM per host, we recommend 700GB. For the virtualized AMI with 2 VMs per host, we recommend 1000GB. For bare metal, we recommend setting the disk size at least 50GB more than the minimum.
-
Prewarming the disk: Disk prewarming is suggested for every EBS device in order to work reliably. This prewarming could take significant time, up to multiple hours in the case of a bigger storage size configuration. The prewarming can be disabled but then the first few builds running on the build machine will fail.
-
-
When done, click
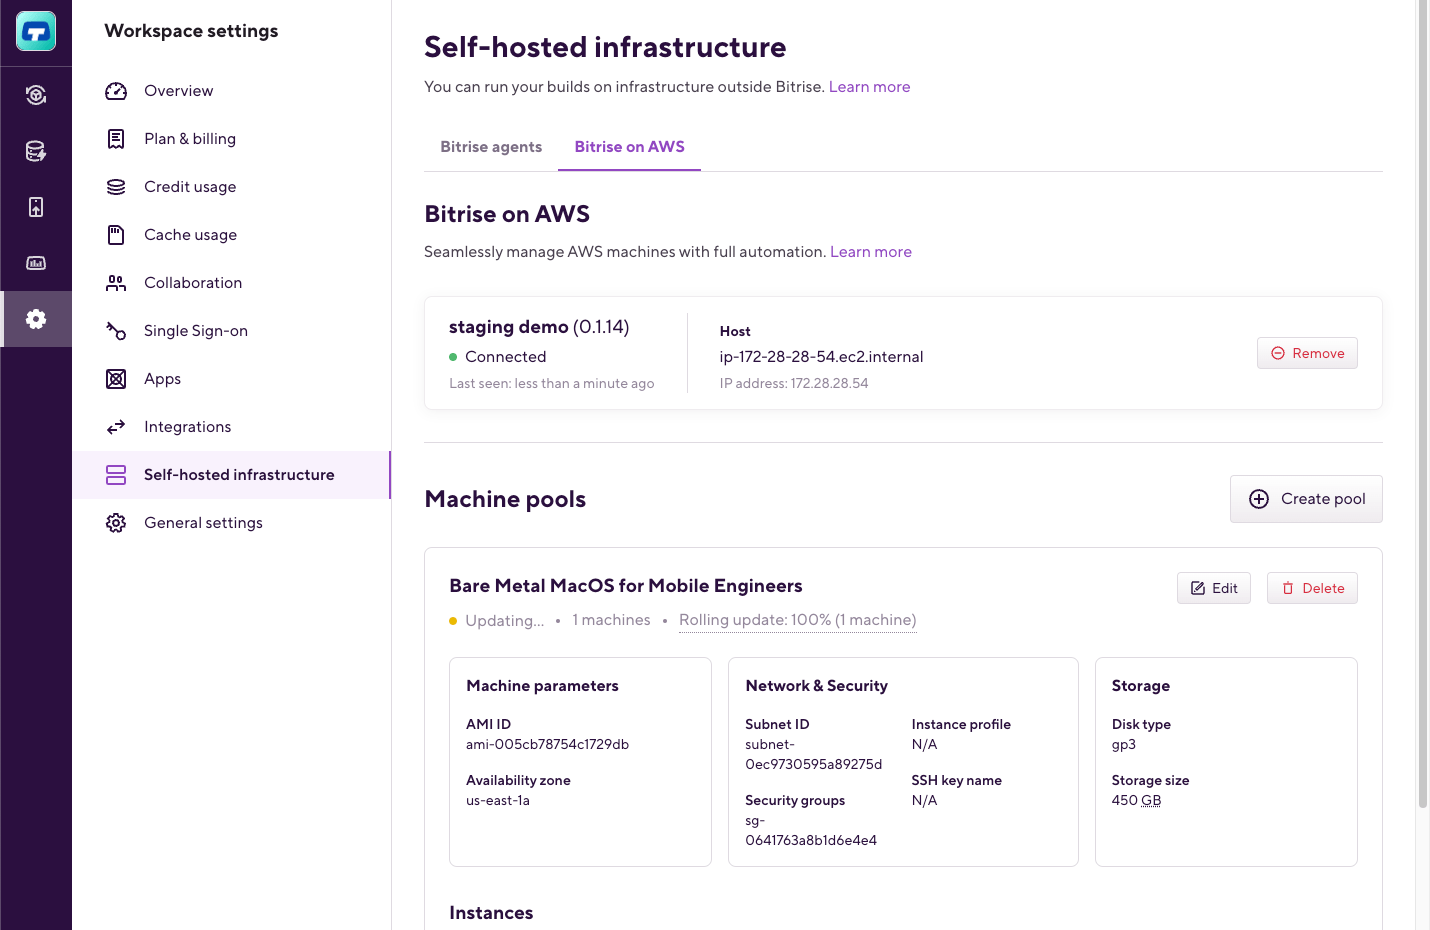
Once a pool is created, the pool details appear on the screen:
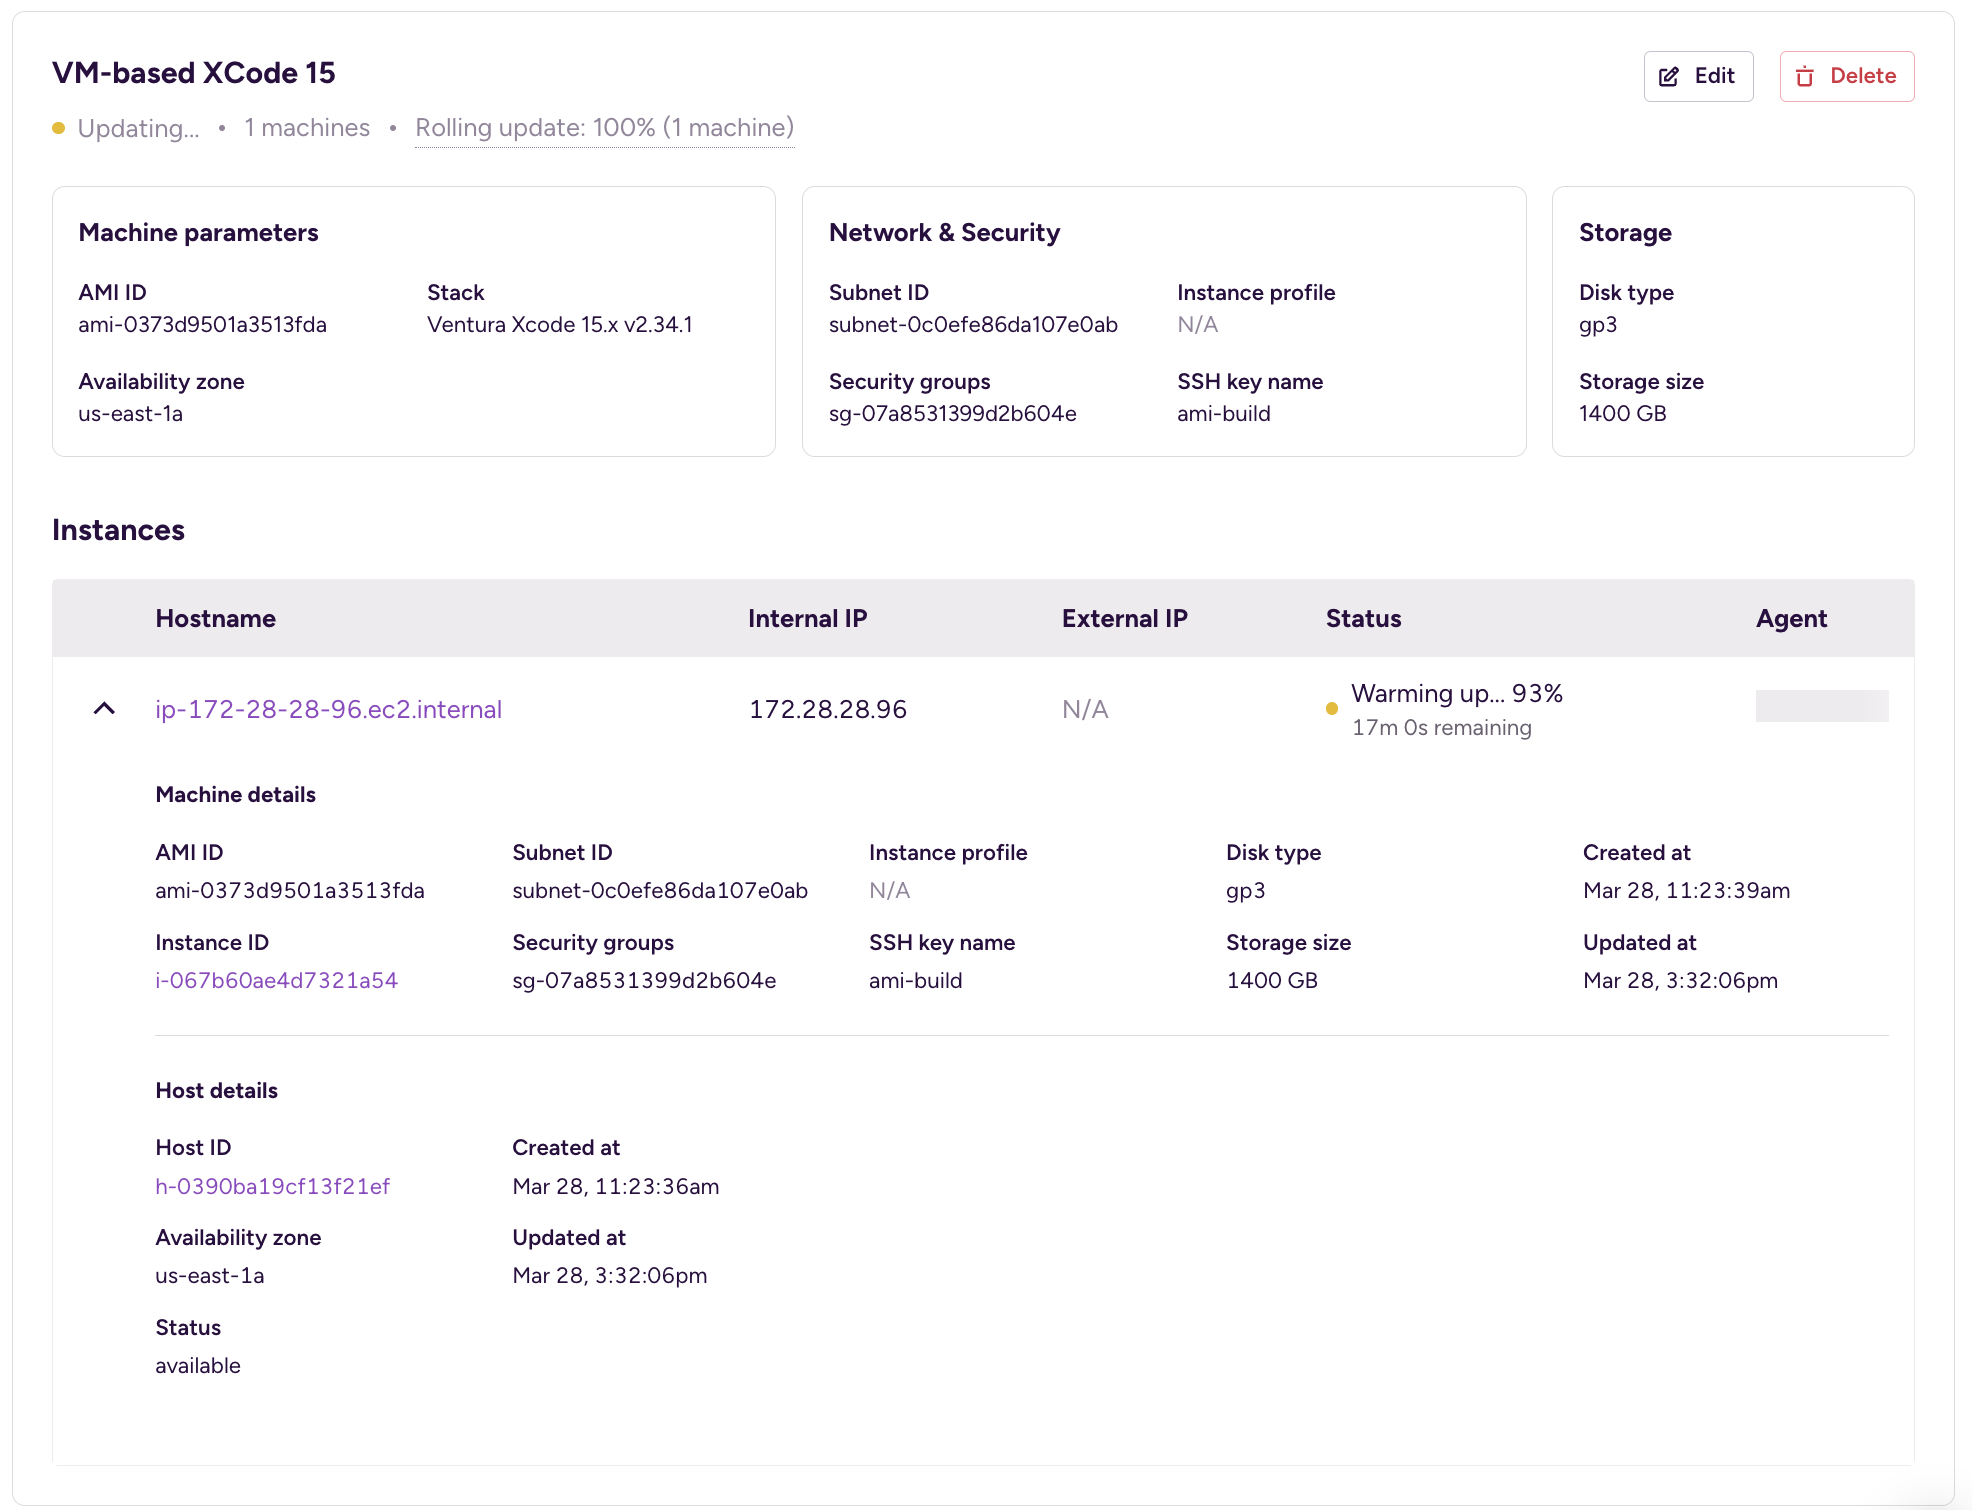
In the header, you can see the name of the pool and its state. If the desired state of the pool has not been reached yet, then the state is Updating. A fully working pool’s status is Up-to-date.
You can also see a section about the pool configuration, followed by the individual machines. Each machine also has a state, indicating if and what build is running on it.
Reconfiguring a pool
If the pool configuration is incorrect (for example, you need to investigate something that needs a different SSH key and a different subnet), hit the button for any configured pools and reconfigure the pool.
When a reconfiguration is requested, the Controller will terminate some running and incorrectly configured resources. When such termination is completed, a new resource will be created instead. This approach aims to reduce your costs as much as possible.
We recommend reviewing the Rolling update percentage setting during the configuration, as it can create reduced availability if the setting is high. However, it can also slow rollout if the setting is low.
When a reconfiguration starts, the pool status becomes Updating, which stays in this status until all the resources are running according to the new configuration. At that time, the pool status becomes Up-to-date again.
Using AWS AMI role-based authentication from the VM
You can use our proxy for AWS role-based authentication from a VM. The proxy runs on the host and forwards AWS CLI queries to the AWS metadata server, enabling seamless use of role-based authentication.
Set up the HTTP_PROXY environment variable specifically for the AWS CLI command you wish to execute. This ensures that only the AWS CLI uses the proxy, preventing other applications from inadvertently using it.
For example, this is how you can copy a file from an S3 bucket to your VM:
HTTP_PROXY=<http://192.168.64.1:42769> aws s3 cp s3://test-bucket/test_file.txt /tmp/test_file.txt
Variable scope
Use the HTTP_PROXY variable within the scope of your command to avoid affecting other applications. Setting it globally might cause other applications to use the proxy unintentionally.