Setting up Ping Identity SSO for Bitrise
Add SAML SSO to your Bitrise Workspace using Ping Identity.
This guide provides step-by-step instructions on setting up Bitrise as a SAML SSO application in Ping Identity.
SAML SSO restrictions
SAML SSO is only available for a Workspace with our paid plans.
Since the SAML SSO feature is tied to the above plans, if you decide to downgrade to a Hobby plan or remove the add-on, you will lose this feature. All Workspace members will receive an email about the downgrade and you’ll have two weeks to re-upgrade if you wish to use SAML SSO in your Workspace again.
Before connecting SAML SSO to your Workspace:
-
A PingOne administrator who is logged into PingOne.
-
Be aware that only the Workspace owner can set up SAML SSO to a Bitrise Workspace.
-
Your account on Bitrise has a Workspace with the Velocity or Enterprise plan.
To add Bitrise to Ping Identity:
-
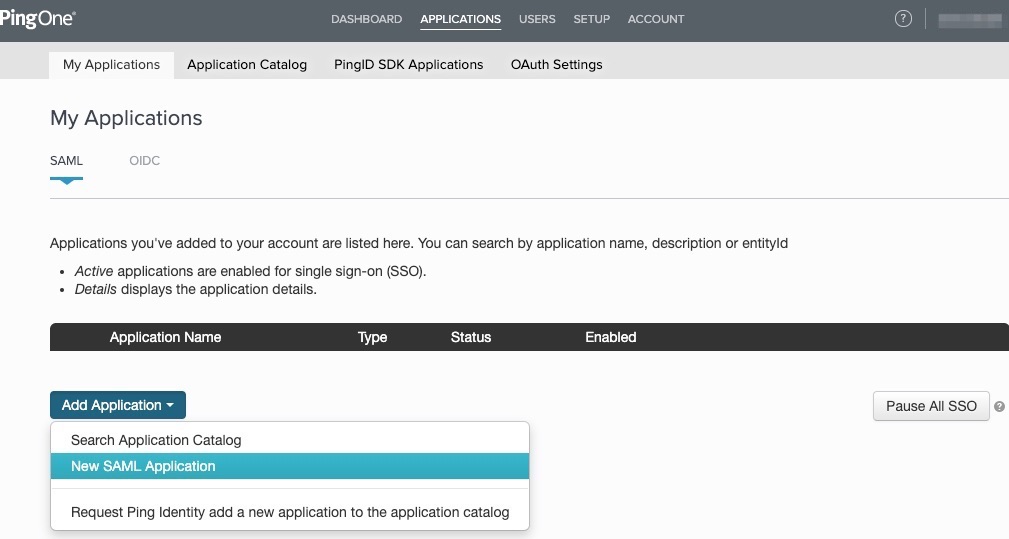
Click APPLICATIONS on the top bar of PingOne.
-
On My Applications tab, make sure SAML is selected. Click the Add Application drop-down and select New SAML Application.
-
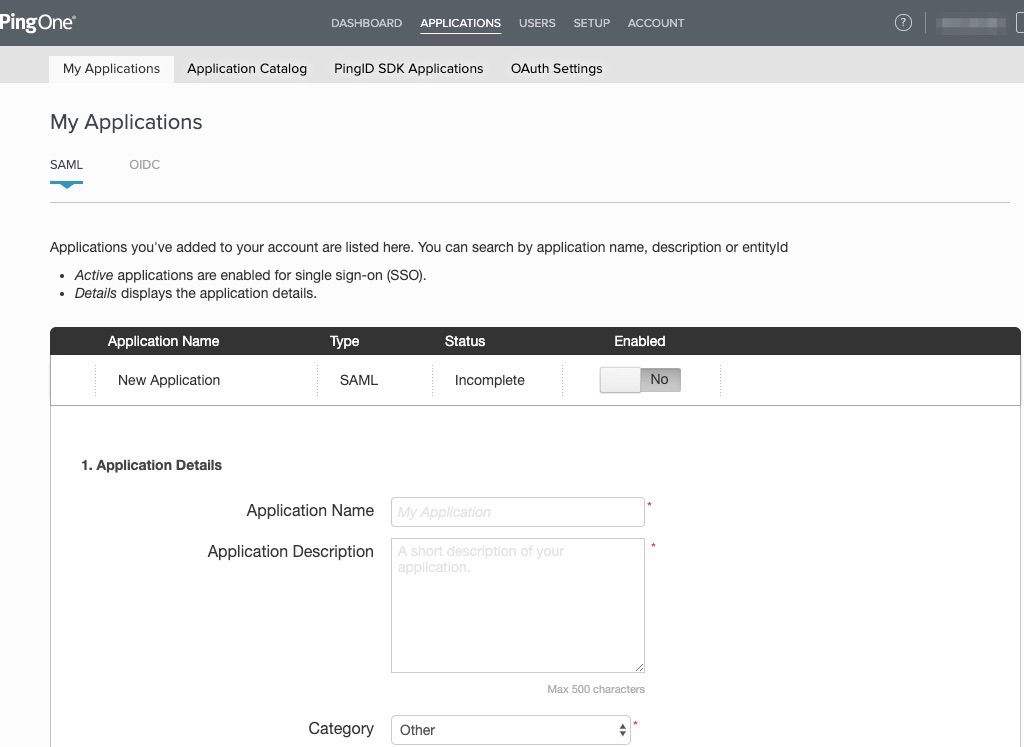
At Application Details, fill out the required fields and click Continue to Next Step.
-
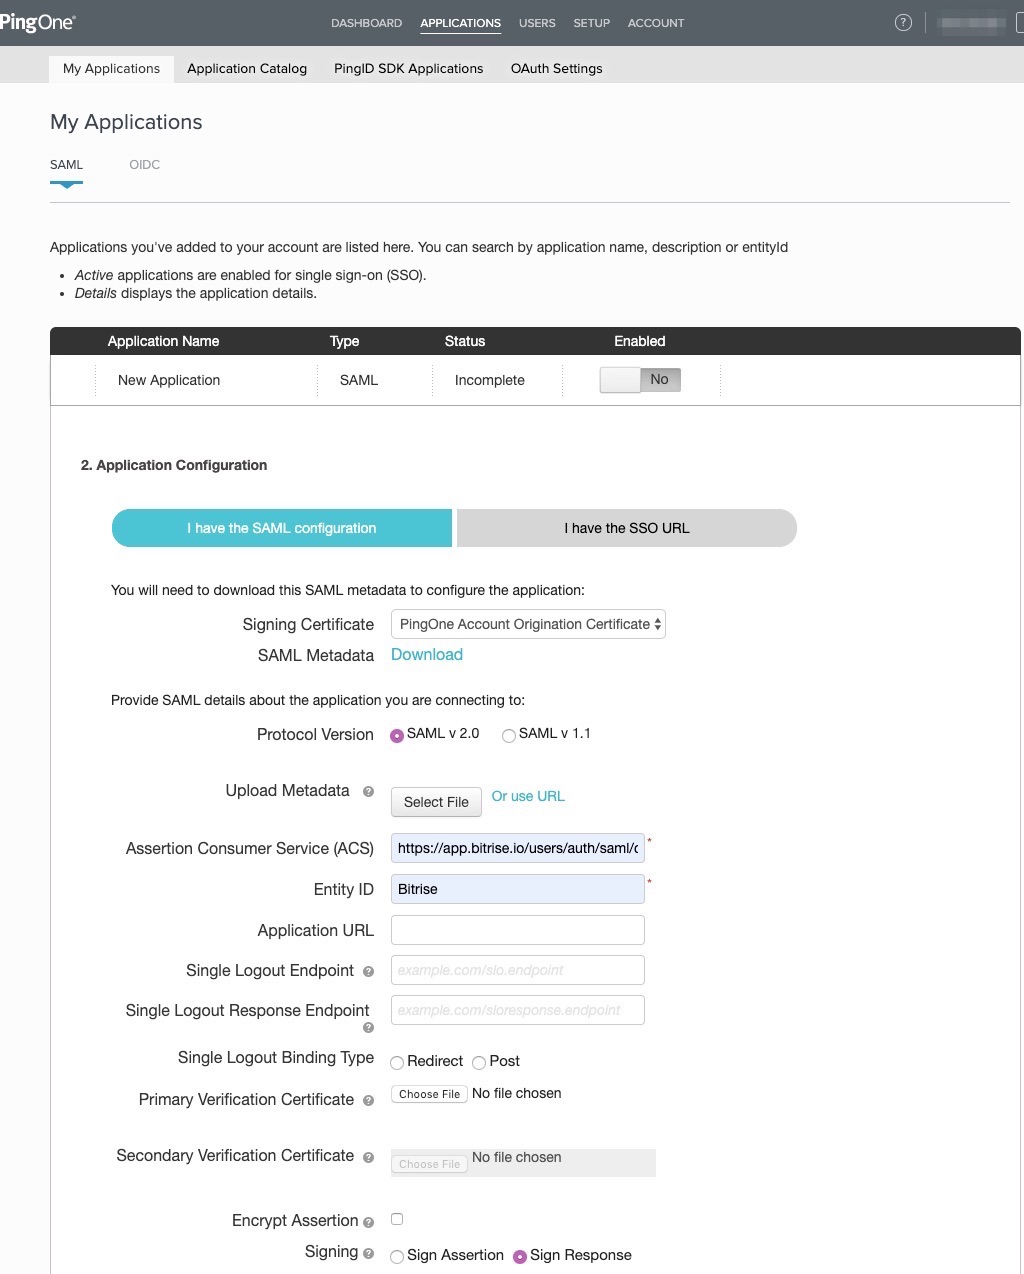
At Application Configuration, leave the I have the SAML configuration selected. Fill out the following:
-
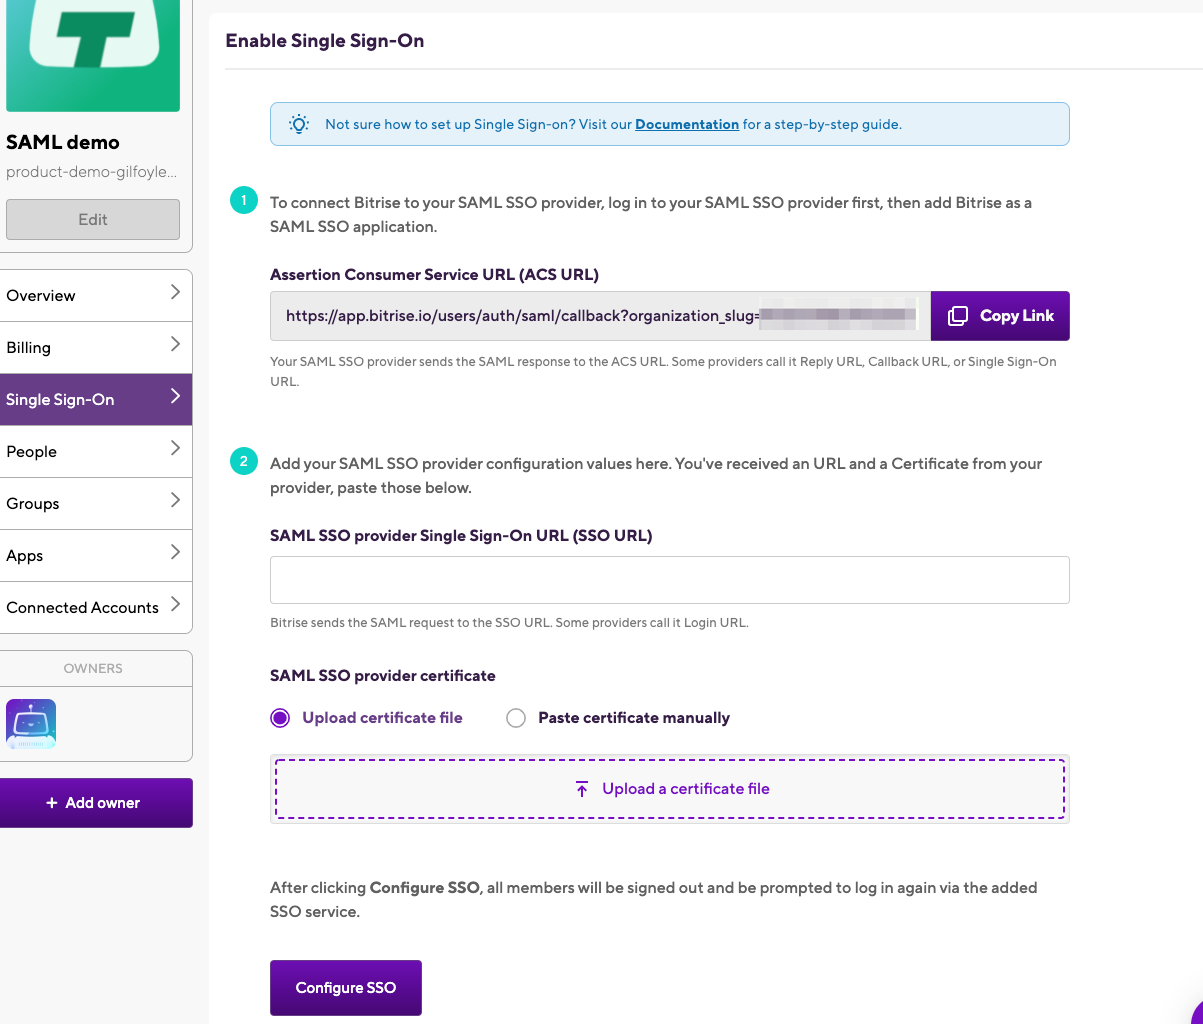
Assertion Consumer Service (ACS) field: Insert the Assertion Consumer Service URL (ACS URL) link here from your Bitrise Workspace’s Single Sign-On tab.
-
Entity ID field: Type
Bitrise. -
Signing: Click the Sign Response option.
Here is an overview of the above settings:
-
-
Continue to the next step.
-
At SSO Attribute Mapping, you don’t have to change anything, proceed to the next step.
-
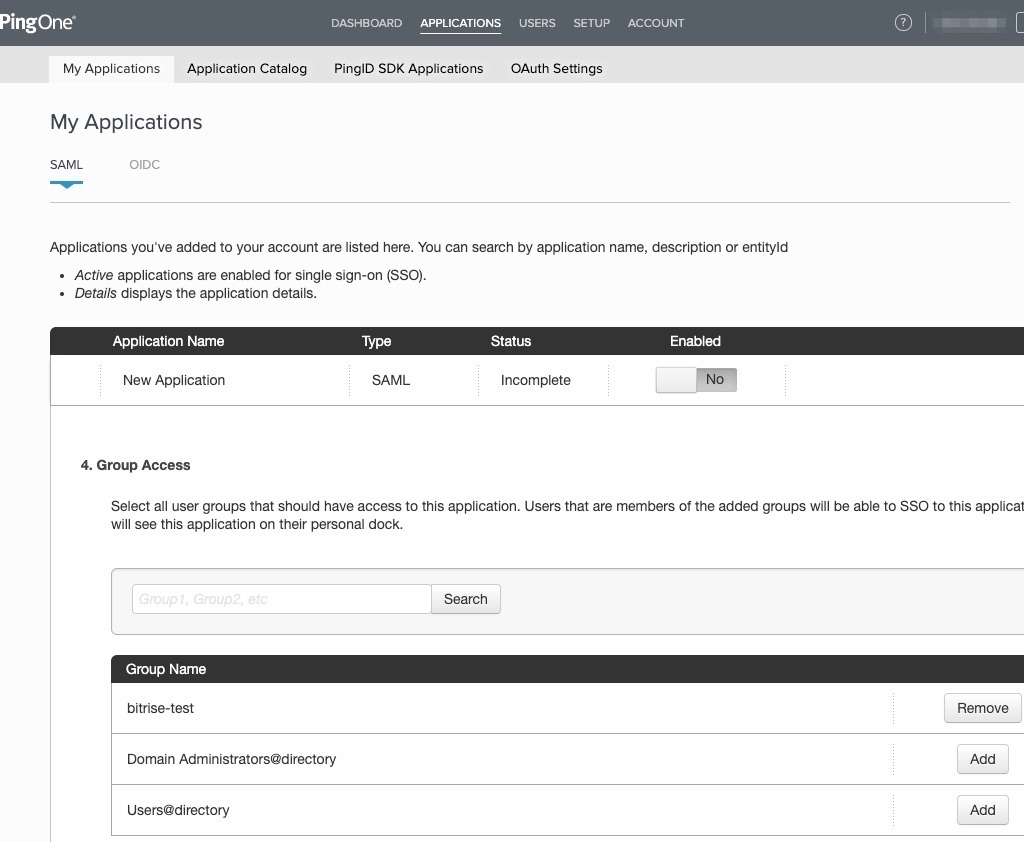
At Group Access, add the group(s) to your application. These groups will be able to access Bitrise through SAML SSO. Continue to the next step.
-
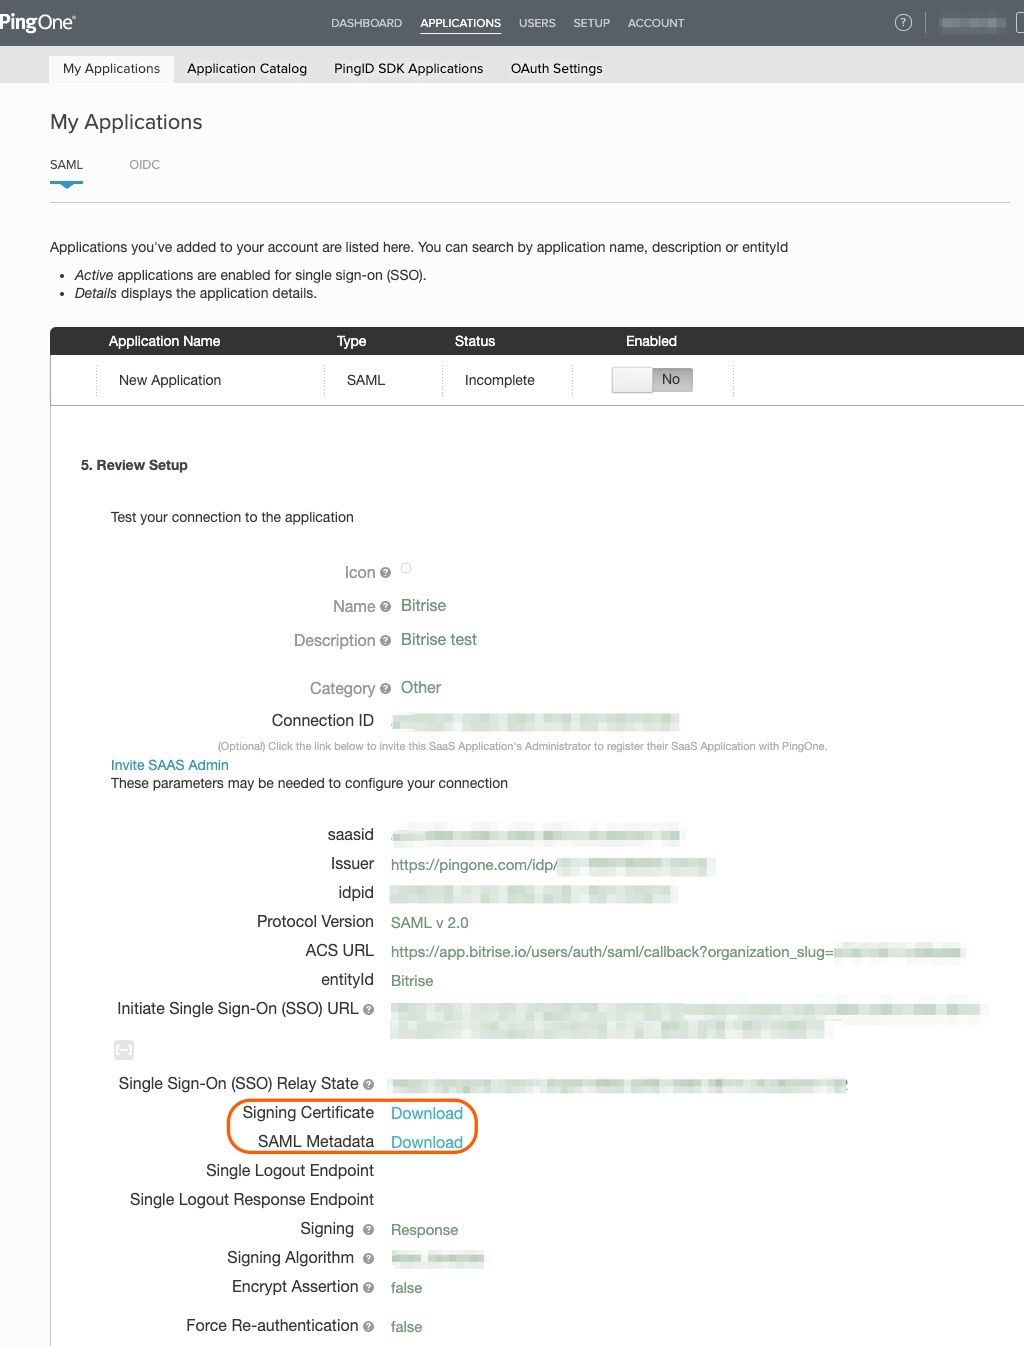
At the Review Setup page, you can doublecheck the details you provided in the previous steps. Make sure you download the following files from this review page:
-
Click Download to get the Signing Certificate and SAML Metadata files.
-
-
Click Finish.
-
Let’s open the two files.
-
Copy the entire content of the SAML Metadata file and paste it in the SAML SSO provider certificate field of your Bitrise Single Sign-On page.
-
Open the Signing Certificate file and copy the
HTTP-POSTSingleSignOnService Locationlink and paste it in the SAML SSO provider Single Sign-On URL (SSO URL) field on Bitrise.
-
-
Click Configure SSO on Bitrise.
Now you have set up SAML SSO on your Bitrise Workspace.