- Home
- Builds
- Starting builds
- Starting parallel builds with a single trigger
Starting parallel builds with a single trigger
You can start multiple parallel builds by using the Bitrise Start for Build and the Bitrise Wait for Build Steps.
Using Build Pipelines to start parallel builds with a single trigger
If you have a credit-based account and you are planning on running multiple tasks parallel with a single trigger, we recommend using Build Pipelines. For more information, check out Build Pipelines.
If you have more than one concurrency or you have a credit-based account, you can run more than one build simultaneously. And since we want to make life as easy for you as possible, these builds can be started automatically, with a single trigger. Let’s go through how it works!
In the example, we have three Workflows of a single app set up to run at the same time. Let’s call these Workflows Trigger, Building and Testing. The workflow called Trigger will be triggered by a pull request, and then the workflow will trigger Building and Testing which will run simultaneously.
All workflows run on separate, clean Virtual Machines. They can also run on different types of stacks: to choose the stack for any Workflow, go to the Workflow Editor of the app and select the Stack tab.
If any of the builds fail, the build will be considered a failed build. If the build is triggered by a webhook, Bitrise will send a summarized build result to your Git provider. If any of the parallel builds fail, a failed status will be reported.
No reports for "child" builds
Bitrise will send a Git status report only for the original "parent" build, the one that triggered all the other builds. The "child" builds will not send back status reports to your Git provider!
For example, if build A triggers builds B and C, a status report will be sent once A is finished. There will be no separate status reports for builds B and C, however.
What you need:
-
A Personal Access Token.
-
A Secret Environment Variable storing the token.
-
The Bitrise Start Build Step.
-
The Bitrise Wait for Build Step.
Bitrise Start Build Step on the CI
Since the Bitrise Build Start Step heavily relies on the parameters of the currently running build (for example, the app slug, build slug and the build number) to call the API, you cannot use the Bitrise Build Start Step locally.
bitrise.yml example
You can edit your bitrise.yml file on the bitrise.yml tab of the Workflow Editor, or you can edit the file locally. The example below focuses on the Bitrise UI, but if you prefer to use YAML format, check out our example!
-
Create a Personal Access Token for your user.
Go to Profile Settings and select the Security option on the left side. Click the Generate new button.

Copying the token
Make sure the copy the token once it's generated: you won't be able to see it again!
-
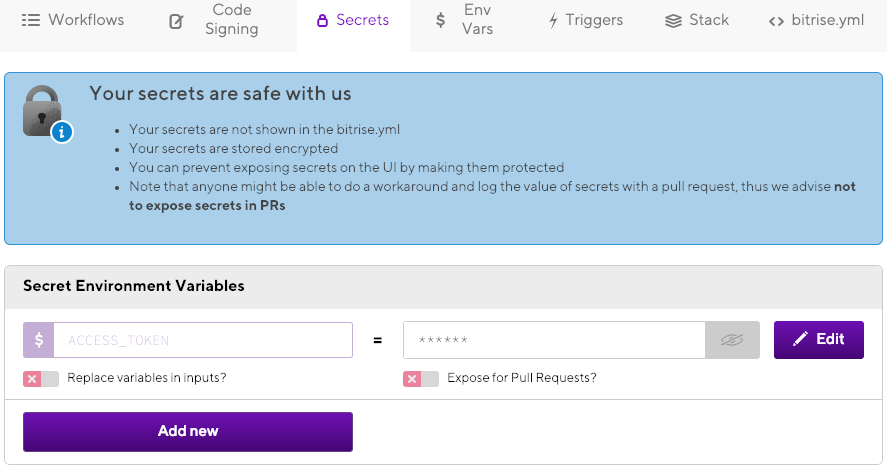
Create a Secret Environment Variable on the Secrets tab of the app’s Workflow Editor and add the token as its value.

Feel free to use any key you wish for the secret. We recommend something simple like
$ACCESS_TOKEN. -
Add the Bitrise Start Build Step to the Trigger Workflow.
Note that the Bitrise Start Build Step will set an Environment Variable to all builds it starts:
$SOURCE_BITRISE_BUILD_NUMBER. Each build triggered by the Step will have their own build numbers but the source build number will be the same for all of them. -
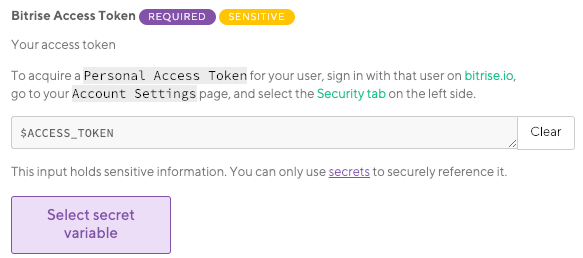
Add the secret env storing your personal access token to the Bitrise Access Token input of the Step: click the Select secret variable button and choose the key you created.

-
Find the Workflows input of the Step, and add
BuildingandTestingto it.
-
Add the Bitrise Wait for Build Step as the last Step of the Trigger Workflow.
Checking build statuses
The Step checks statuses of the builds defined in the Step. The builds are defined in the Build slugs input: the slugs are the output of the Bitrise Start Build Step. As long as the builds defined by the slugs are running, the Step will hold the build it is running in. The build will fail if any of the builds included in the Step fail.
-
Add the secret env storing your personal access token to the Bitrise Access Token input of the Step: click the Select secret variable button and choose the key you created.

And you are done! Once you trigger the Trigger workflow, the Bitrise Start Build Step of the Workflow will trigger two more builds running simultaneously. If those two builds are successful, the Bitrise Wait for Build Step lets the first build finish. A single status report is sent to the git hosting provider, regardless whether the build is successful or not.
bitrise.yml example
Trigger:
  steps:
  - build-router-start@0:
      inputs:
      - workflows: |-
          Building
          Testing
      - access_token: "$BITRISE_API_KEY"
  - build-router-wait@0:
      inputs:
      - access_token: "$BITRISE_API_KEY"