Configuring runner pools for self-hosted builds
Running Bitrise on self-hosted infrastructure requires setting up agent pools in your Bitrise Workspace. This reserves build agents for use in your self-hosted builds, and provides a token to authenticate the agent to Bitrise.
You can run Bitrise builds on hardware you control. We offer two different options:
-
Using our on-premise runner to run builds on your own machines, or at other cloud providers.
Both options require setting up runner pools in your Bitrise Workspace. This reserves build runners for use in your self-hosted builds. Each reserved pool comes with a unique token: this token is required for both an AWS EC2 instance and the on-premise runner to be able to connect to your Bitrise Workspace and run builds of the apps owned by the Workspace. You can configure and run these builds from the Workflow Editor, as any other build.
To do so:
-
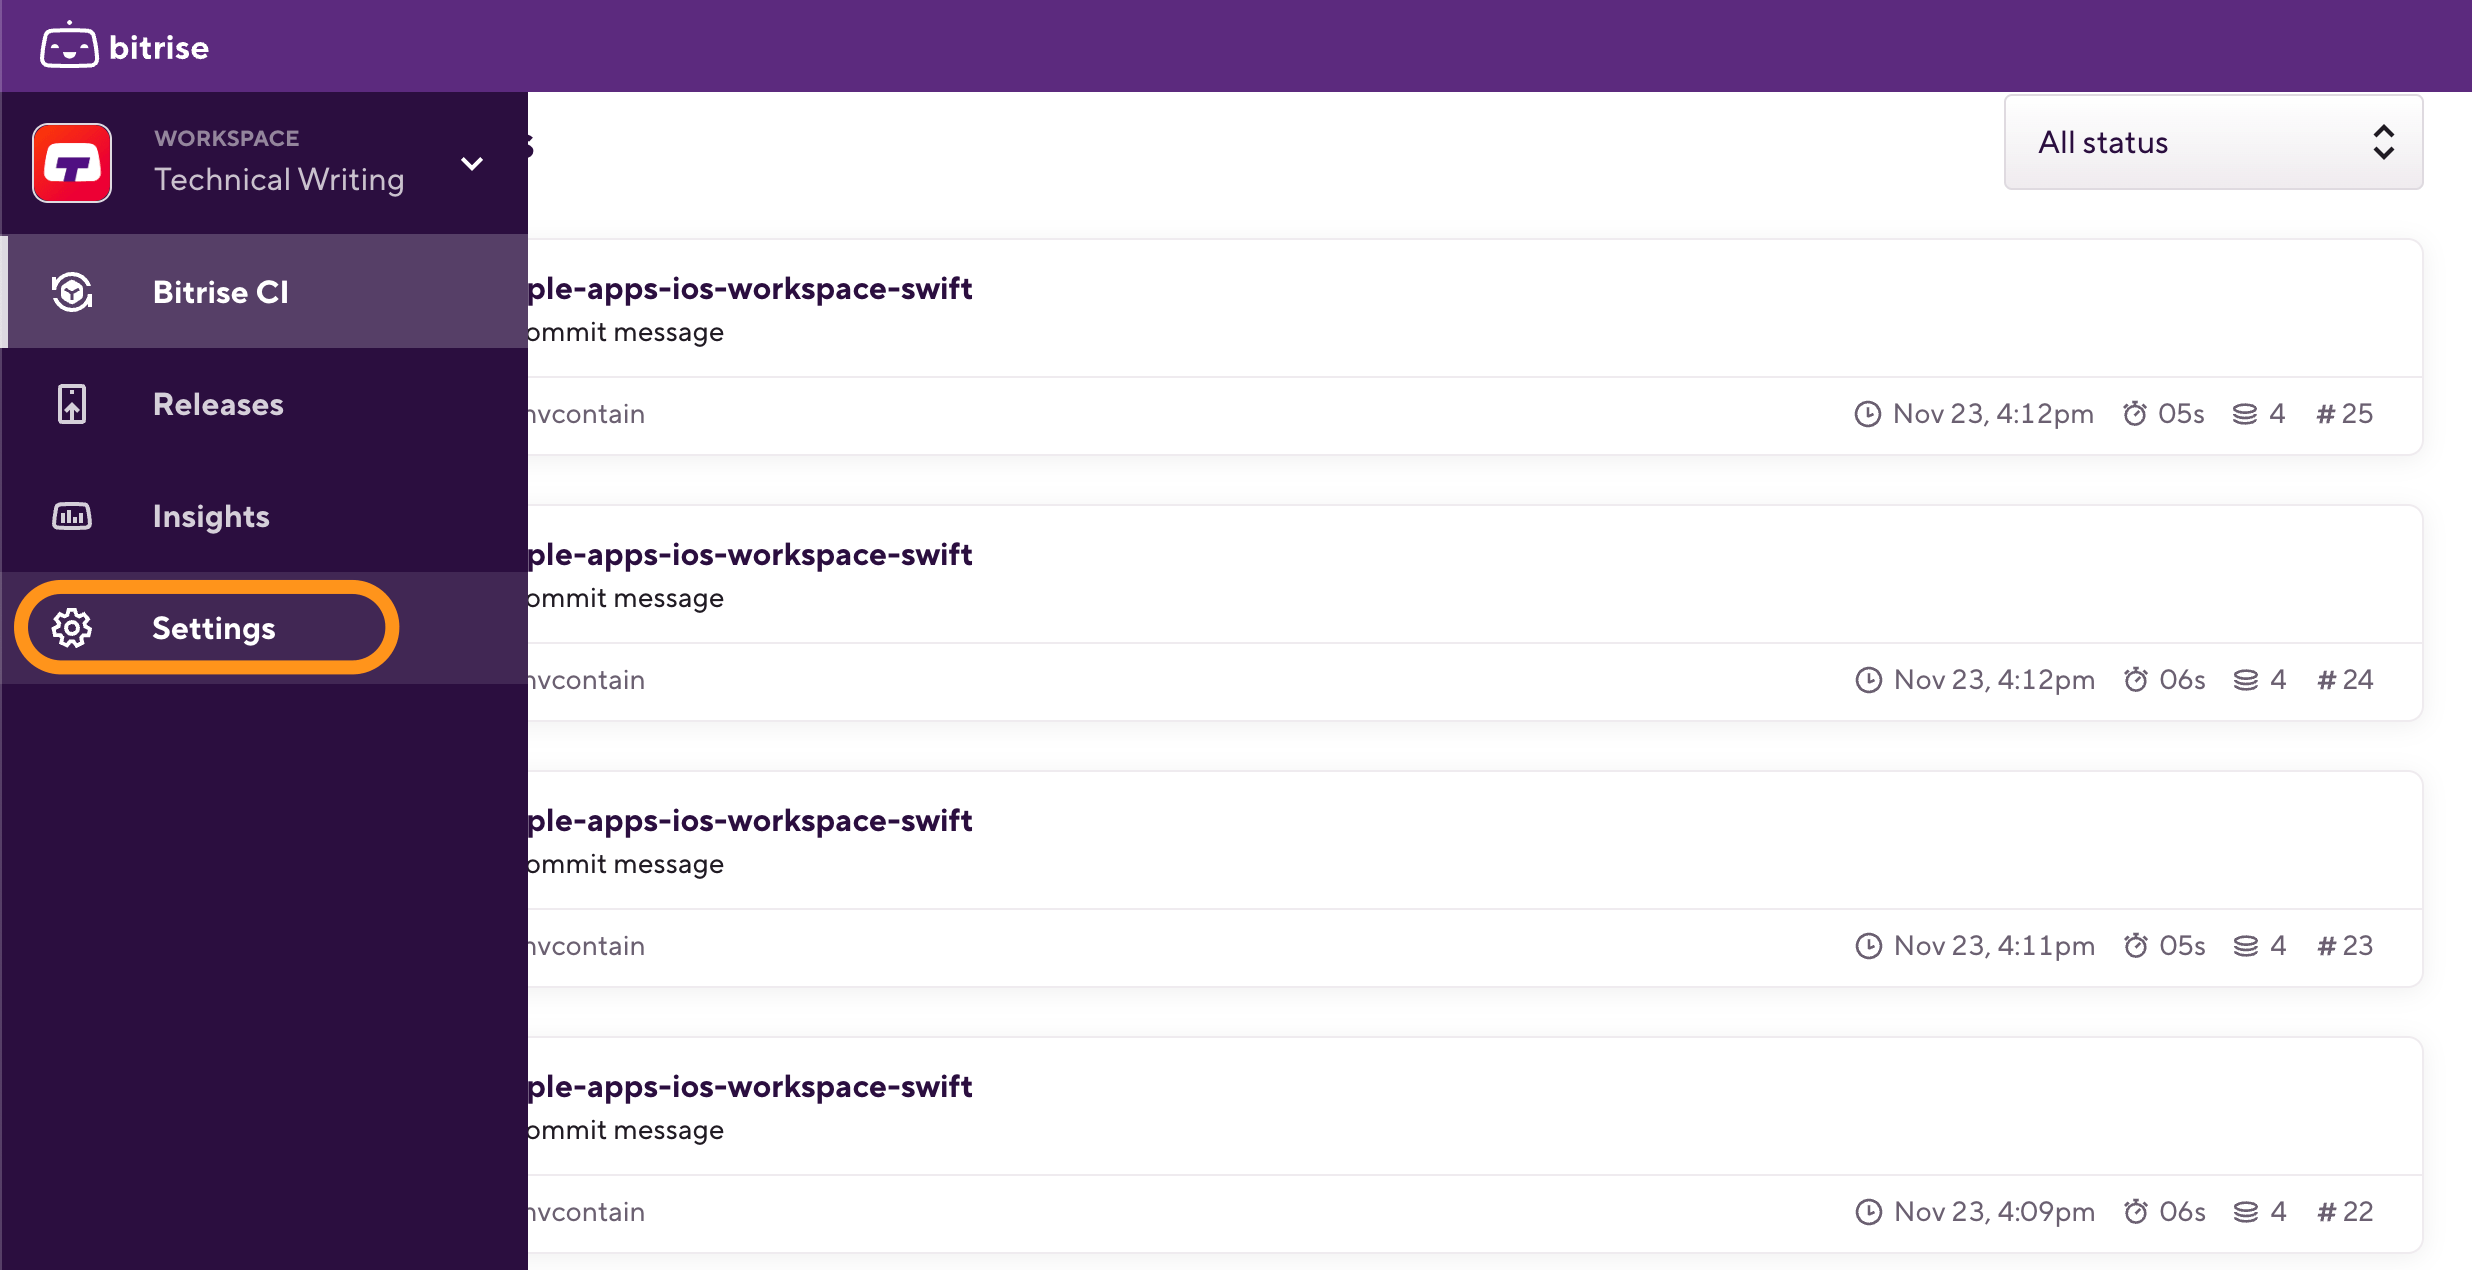
Log in to Bitrise and hover over the left navigation bar.
-
Make sure you have the right workspace selected in the Workspace menu.
-
Select Settings.
-
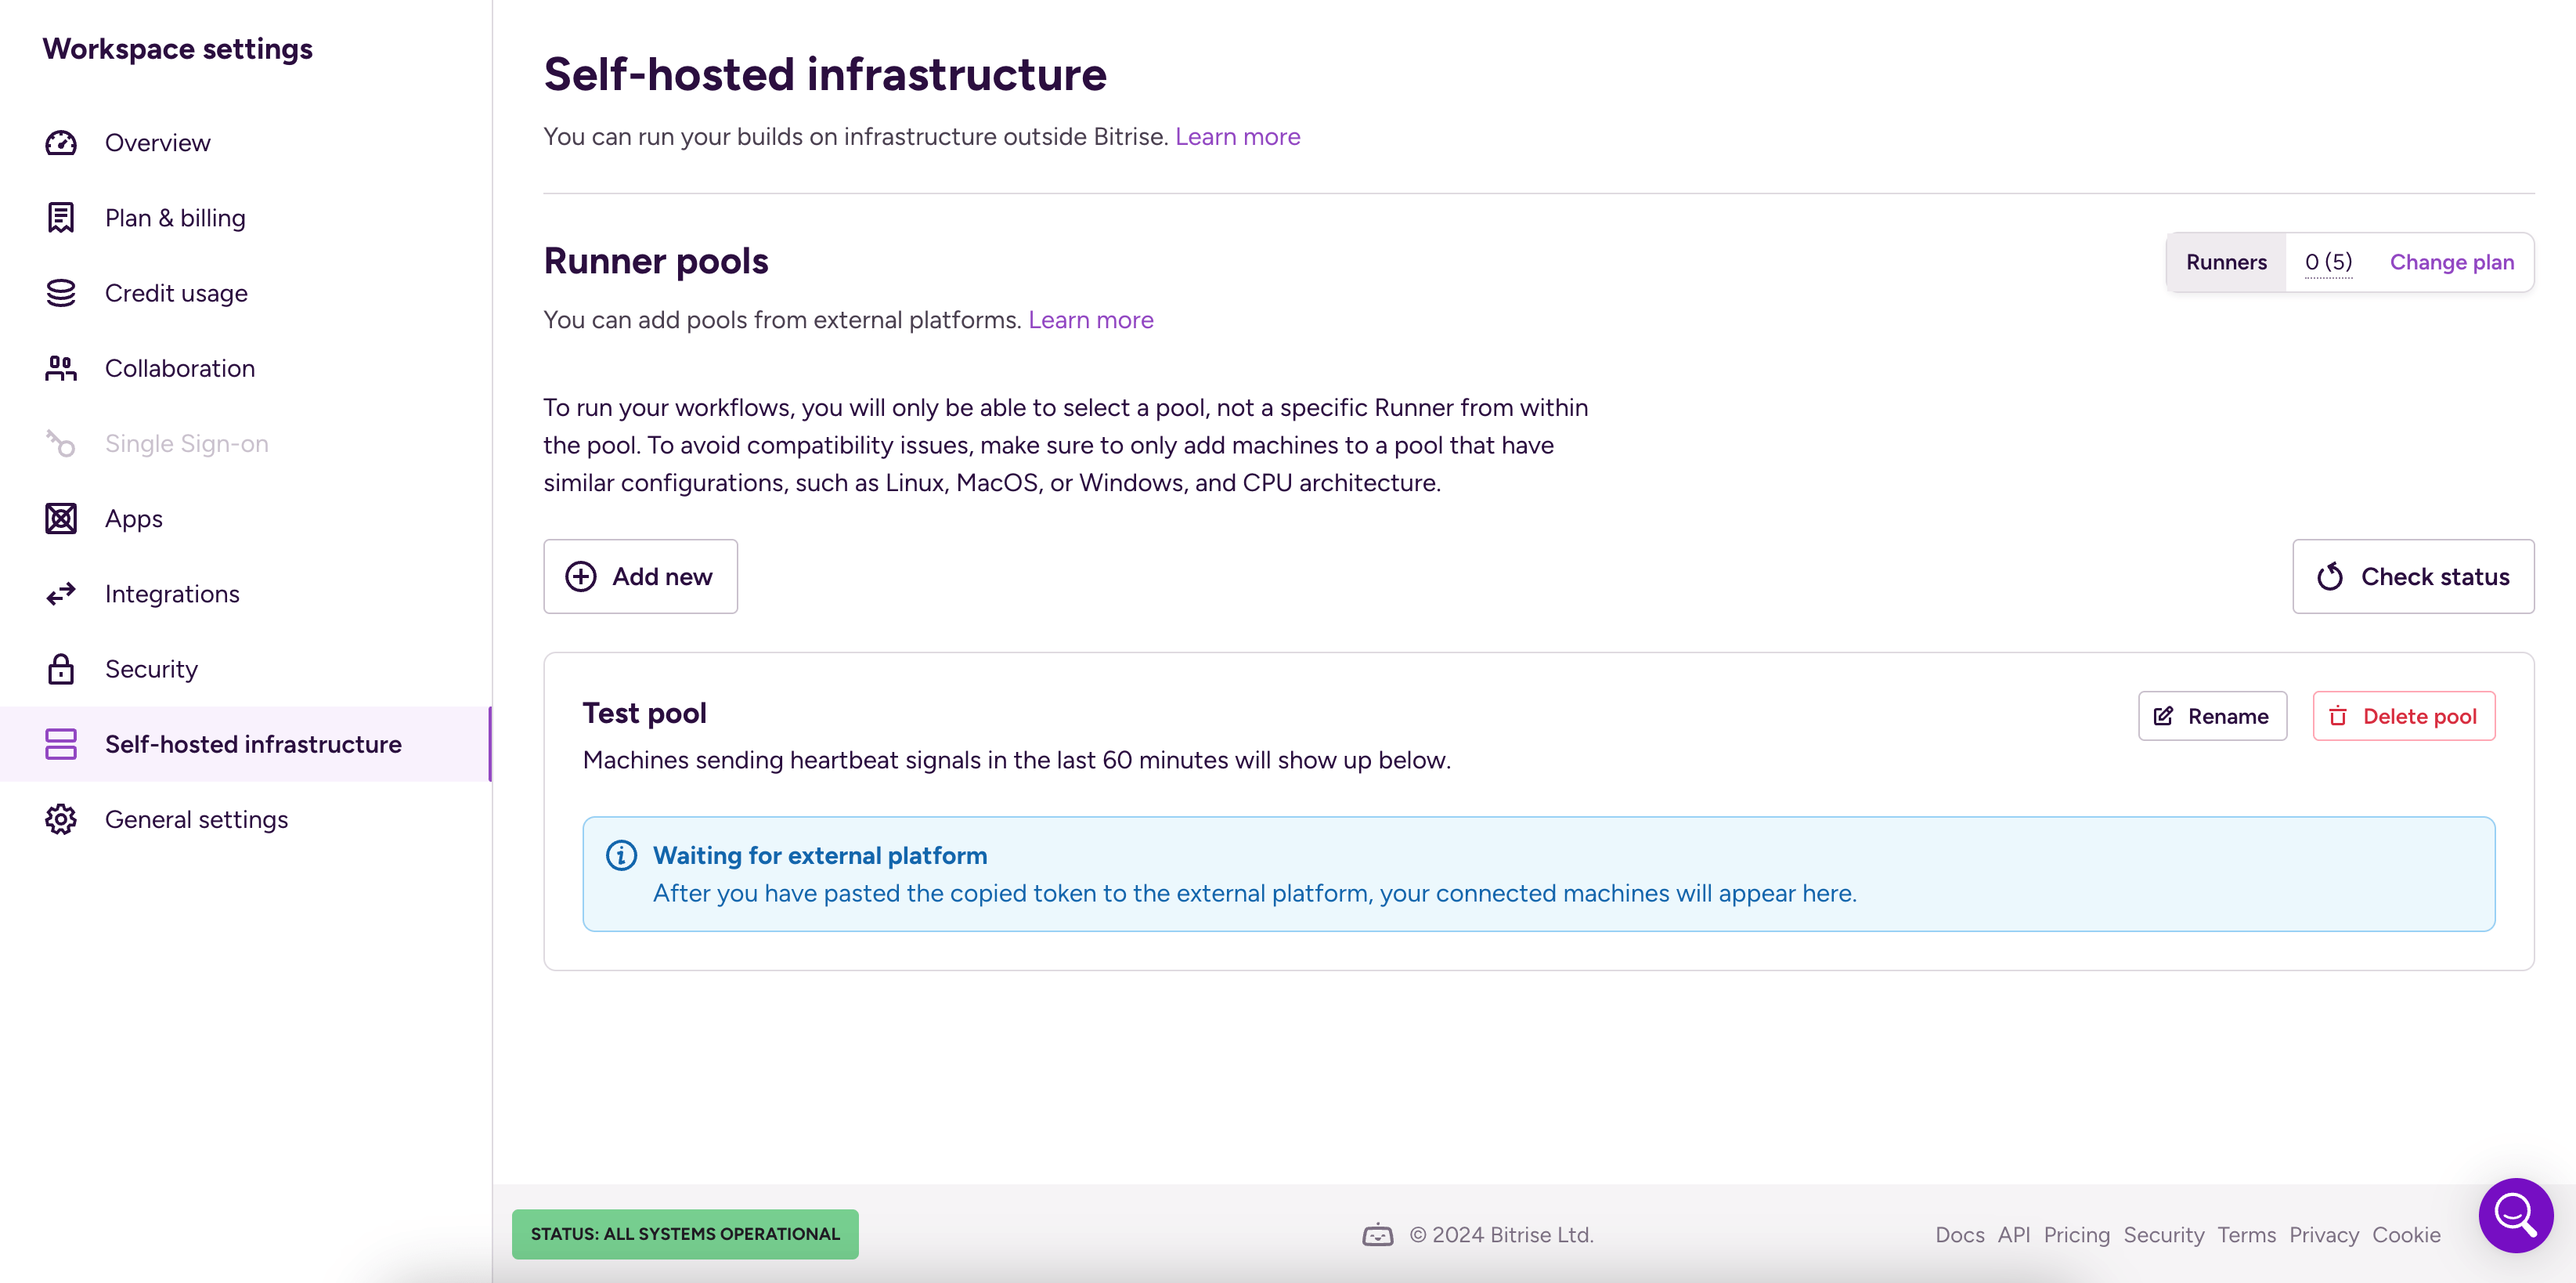
On the left, select Self-hosted infrastructure.
-
In the Runner pools section, click .
-
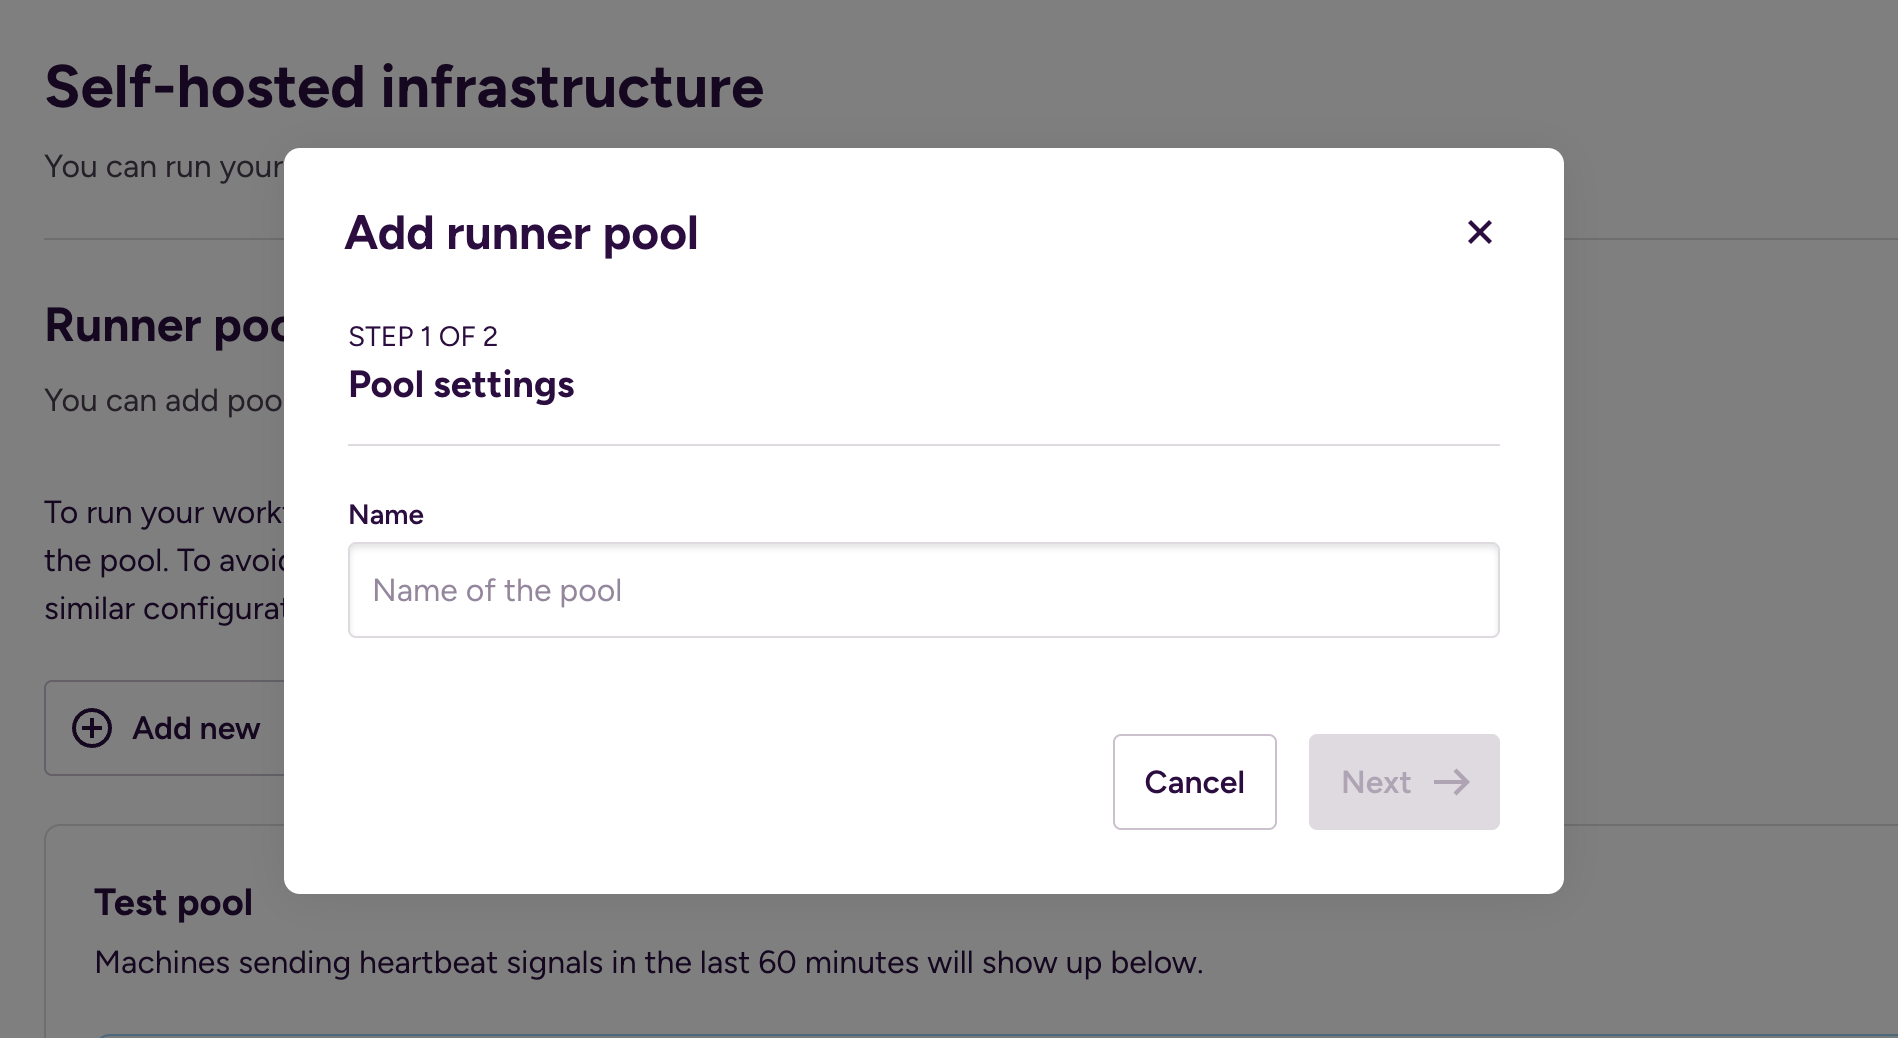
Type a name into the Name field then click .
-
You will receive a token. Copy this token: you will need it for authentication.
-
Open the app you need on Bitrise and click .
-
Click to go the Workflow Editor, and select Stacks & Machines on the left navigation menu.
-
Find your own stack in the stack selection dropdown menus: it will be called Self-hosted Runner: <Pool name>.
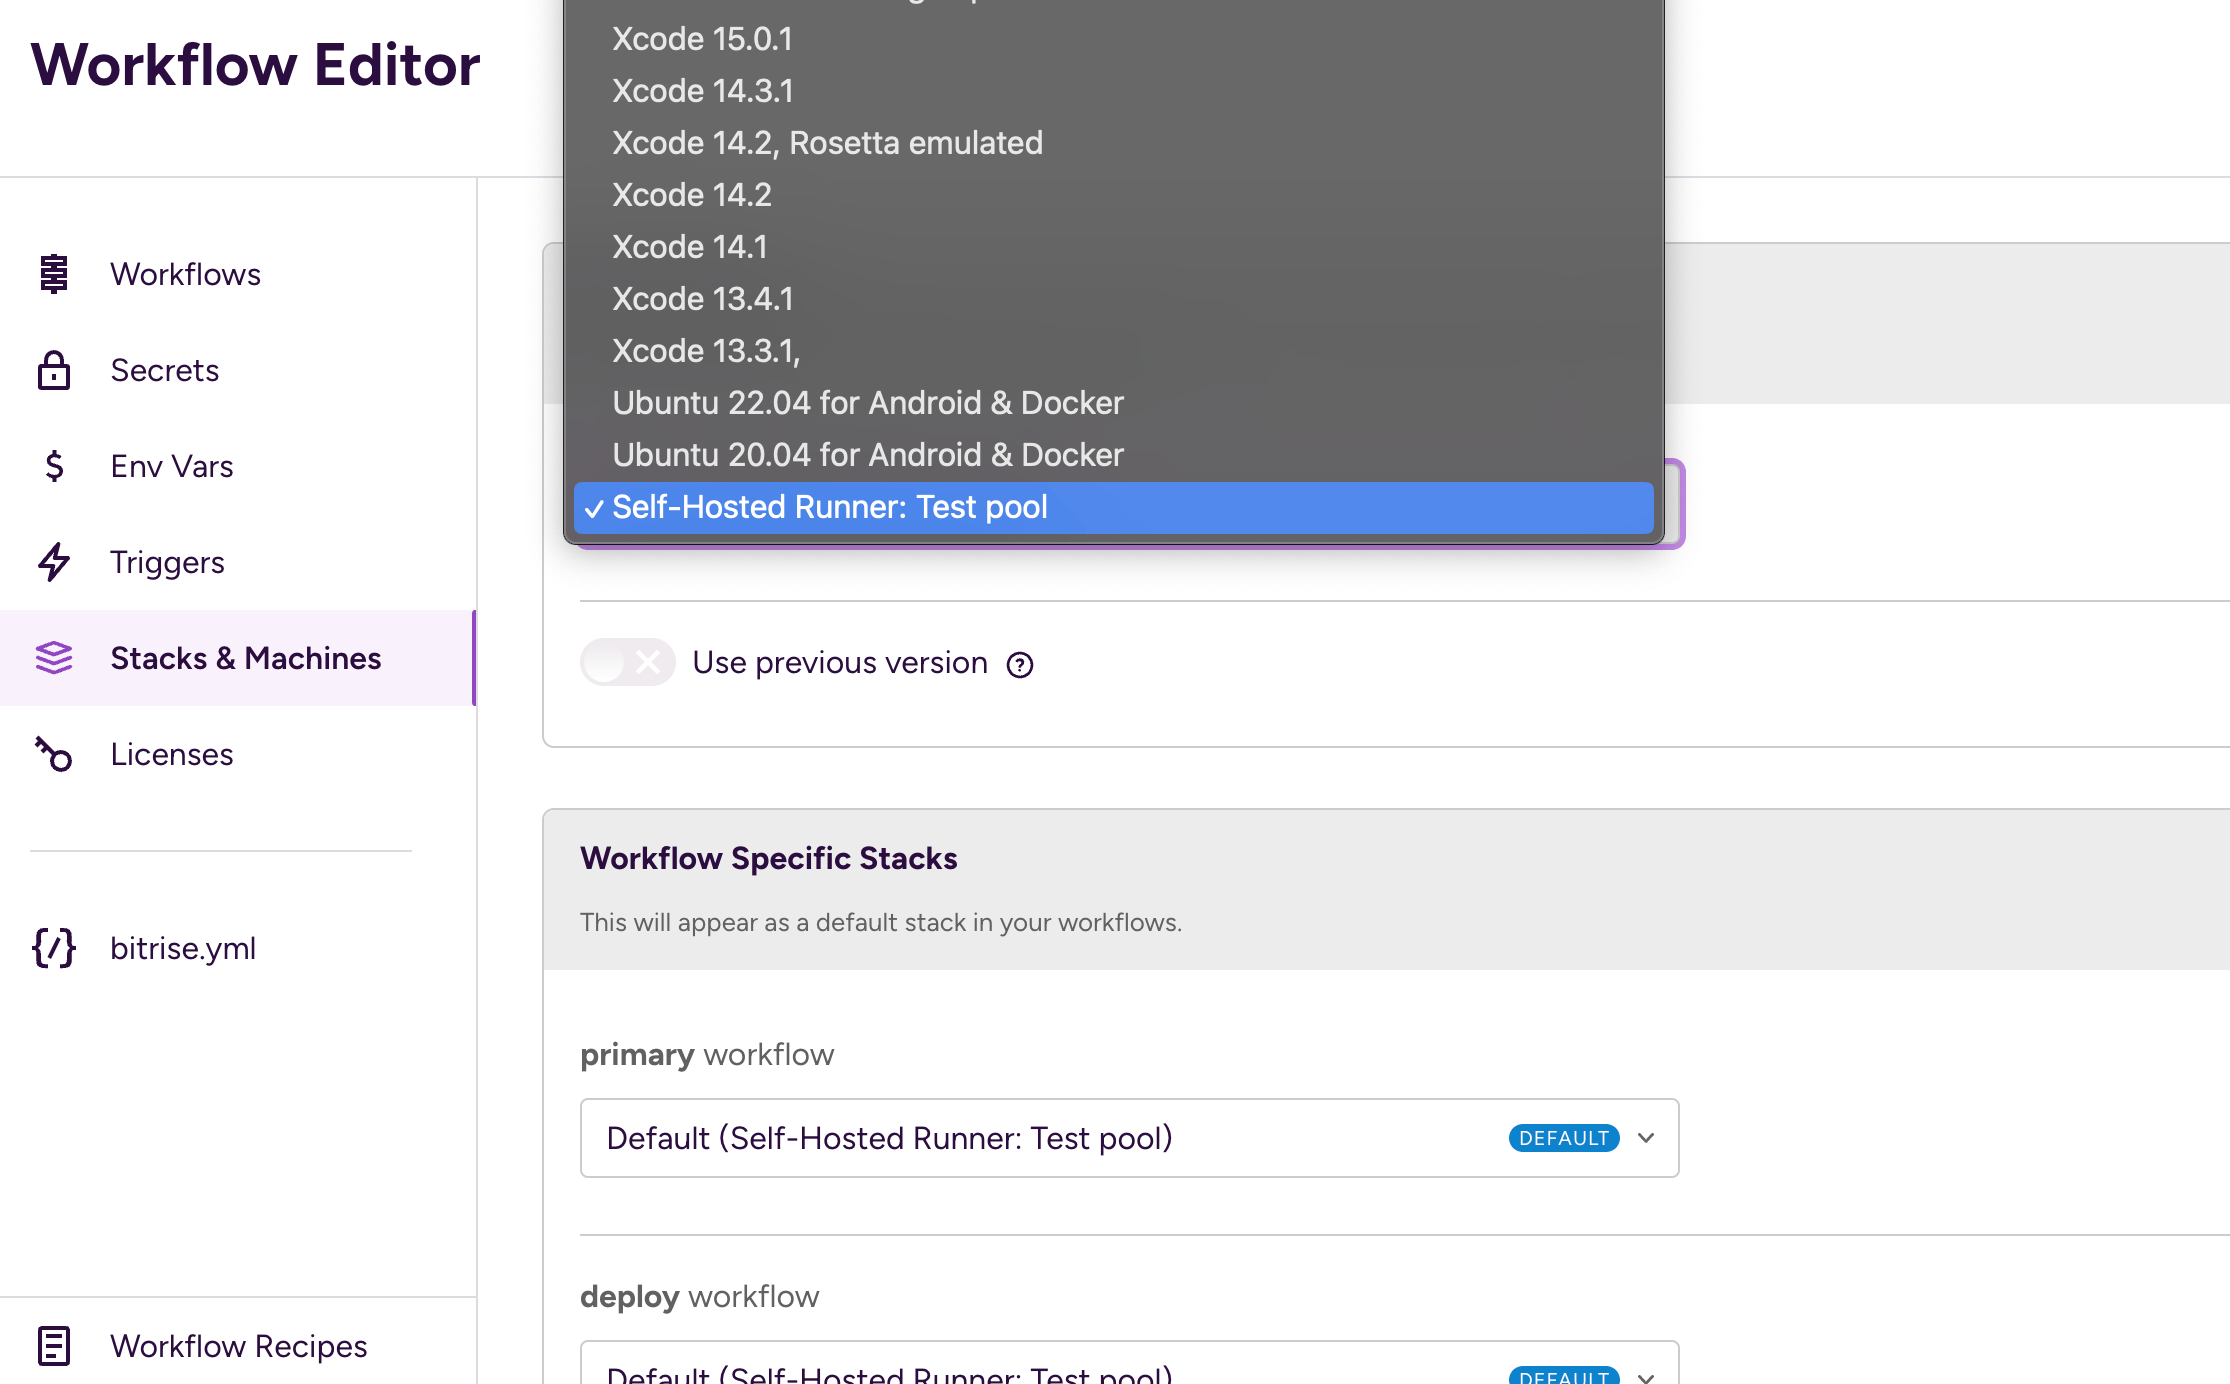
For example, if you named your pool
my-pool, the stack will be called Self-hosted Runner: my-pool. -
Click Save in the top right corner.
Now your builds will run using the reserved runner pools. You can run builds either on your own hardware or on AWS EC2 instances.