Running unit and UI tests on Flutter apps
The Flutter Test Step allows you to run unit tests, widget tests, and integration (also referred to as end-to-end or UI testing) tests on your Flutter app on Bitrise. The Step runs the flutter test command and saves the json file that is generated by the command. You can then view the test results in the Test Reports add-on at any time.
Code coverage
The Flutter Test Step can also generate code coverage reports.
To run tests using Flutter Test:
Workflow Editor
Configuration YAML
-
Include tests in your Flutter project.
For more information on how to write tests and include them in your Flutter project, check the official Flutter documentation: Testing Flutter apps.
-
Add the Flutter Install Step to your Workflow.
This Step runs the initial setup of the Flutter SDK and installs any missing components.
-
Make sure that the Flutter Install Step installs the correct version of the Flutter SDK for your app: check the Flutter SDK Git repository version input.
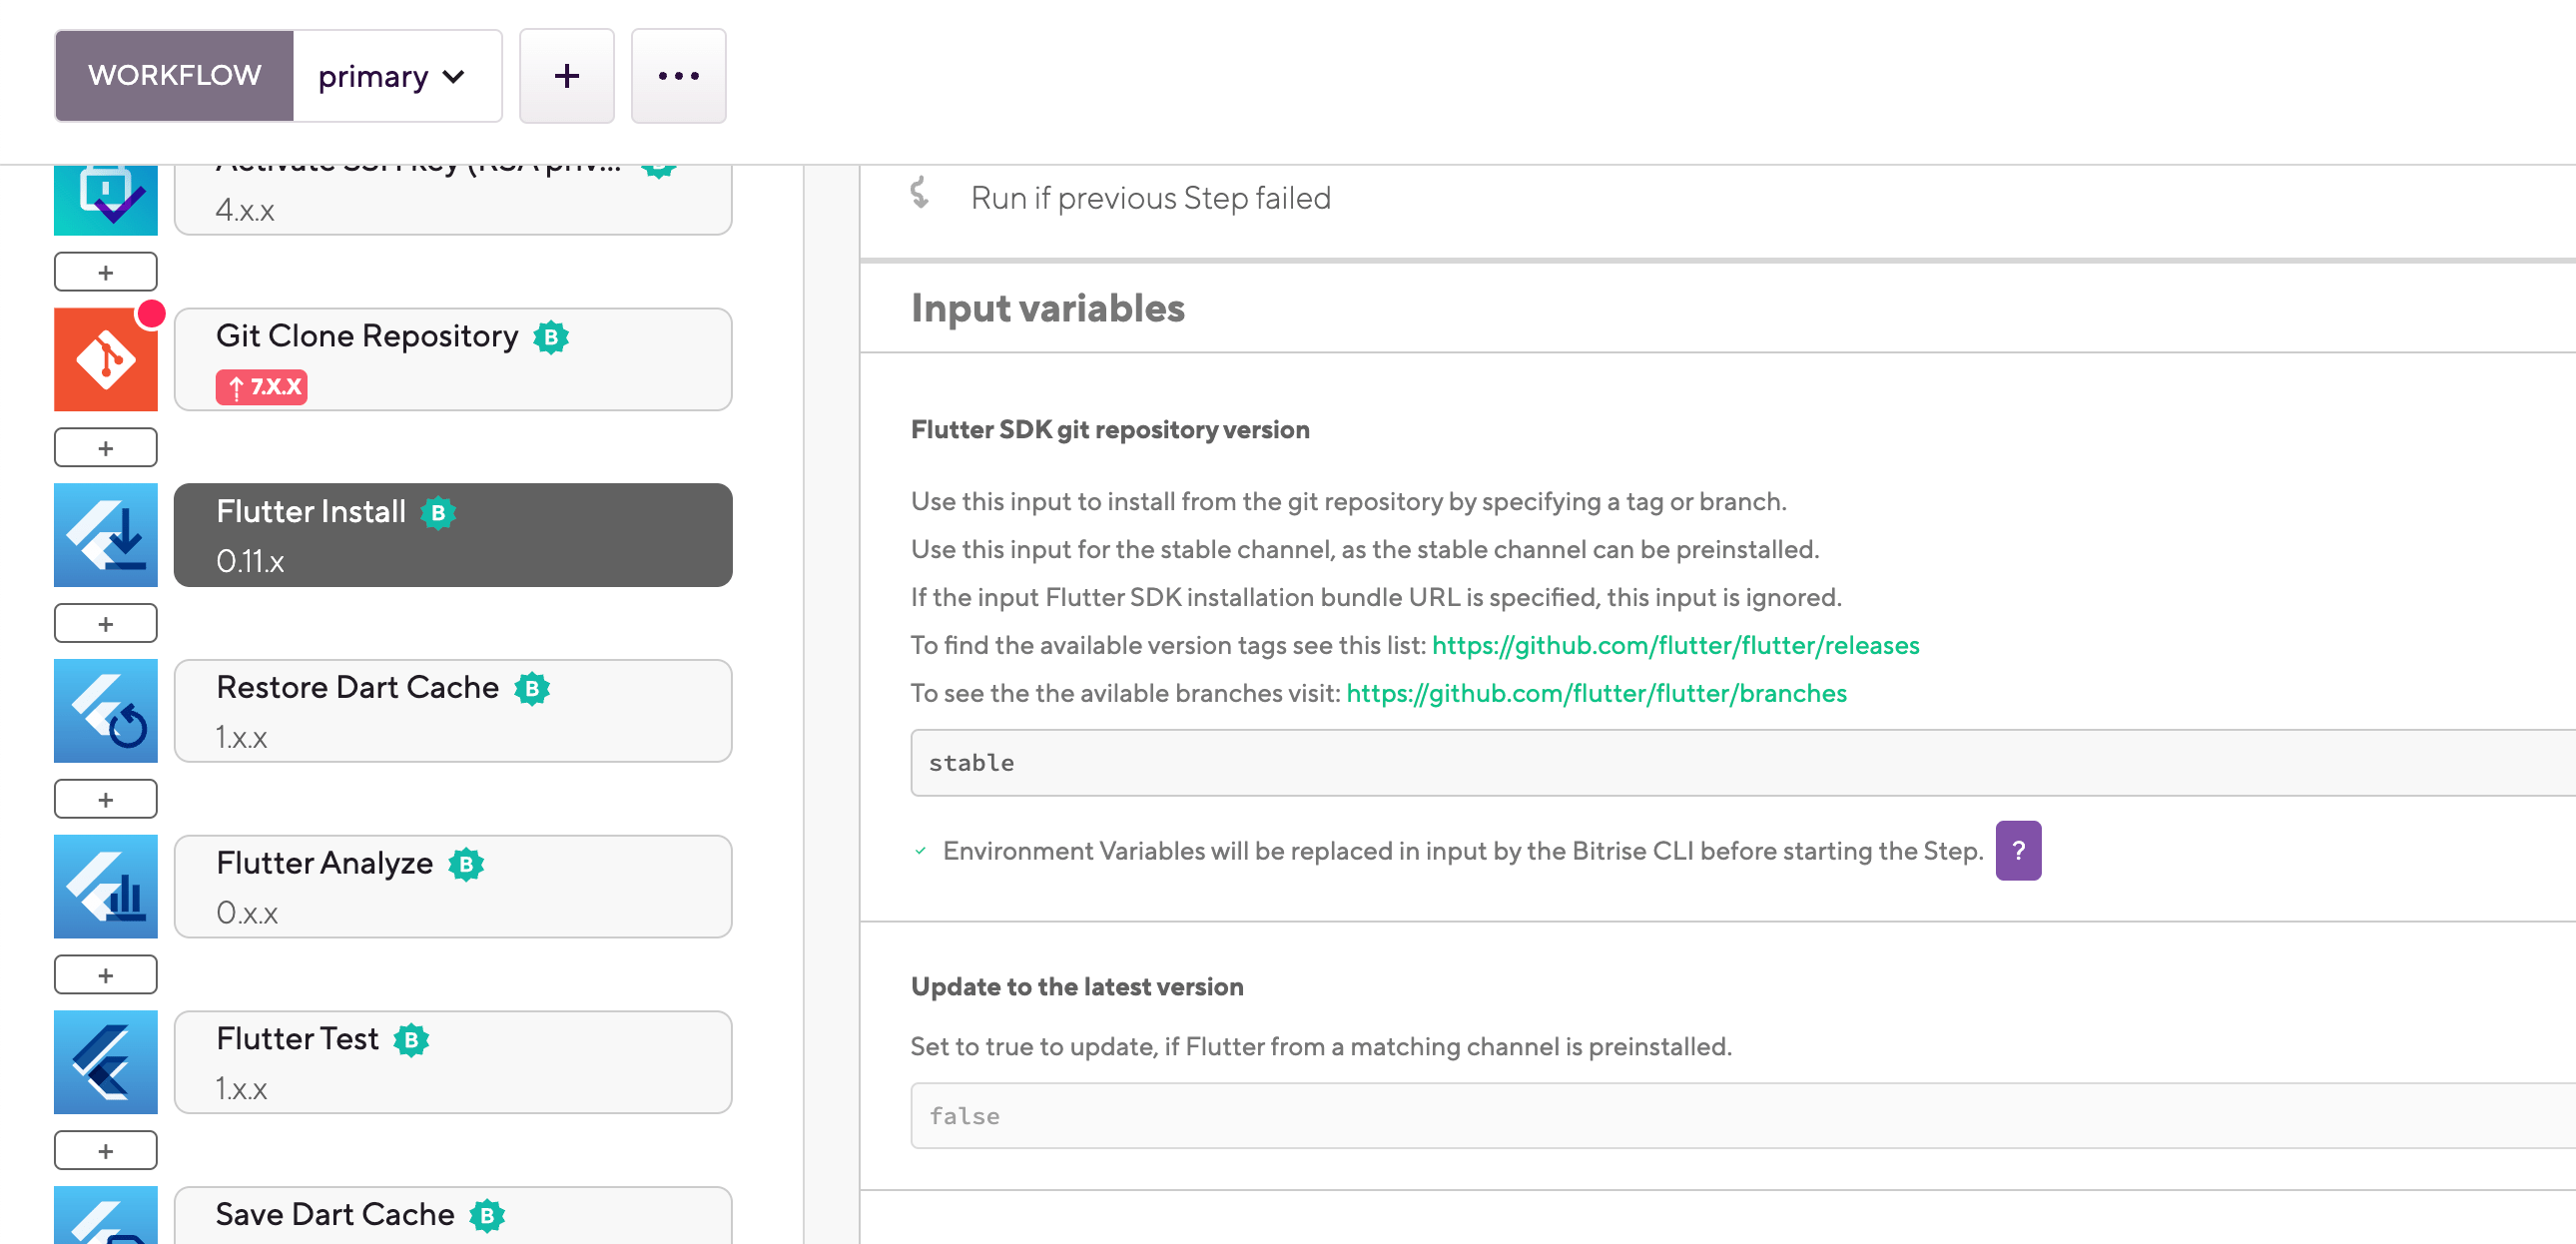
The input's default value is stable, which installs the latest stable version of the SDK. You can, however, set the value to either a specific version tag or a branch label:
-
You can find the available version tags here: Version tags.
-
You can find the available branch labels here: Branch labels.
Installation bundle URL
You can also install the Flutter SDK from an installation bundle URL: you just need to specify the URL in the Flutter SDK installation bundle URL input. Please note that if you do so, the Flutter SDK Git repository version input will be ignored entirely!
-
-
Add the Flutter Test Step to your Workflow. It should be after the Flutter Install Step.
The Step runs the flutter test command with optional flags. It can also check code coverage.
-
Make sure the Project Location input points to the root directory of your Flutter project.
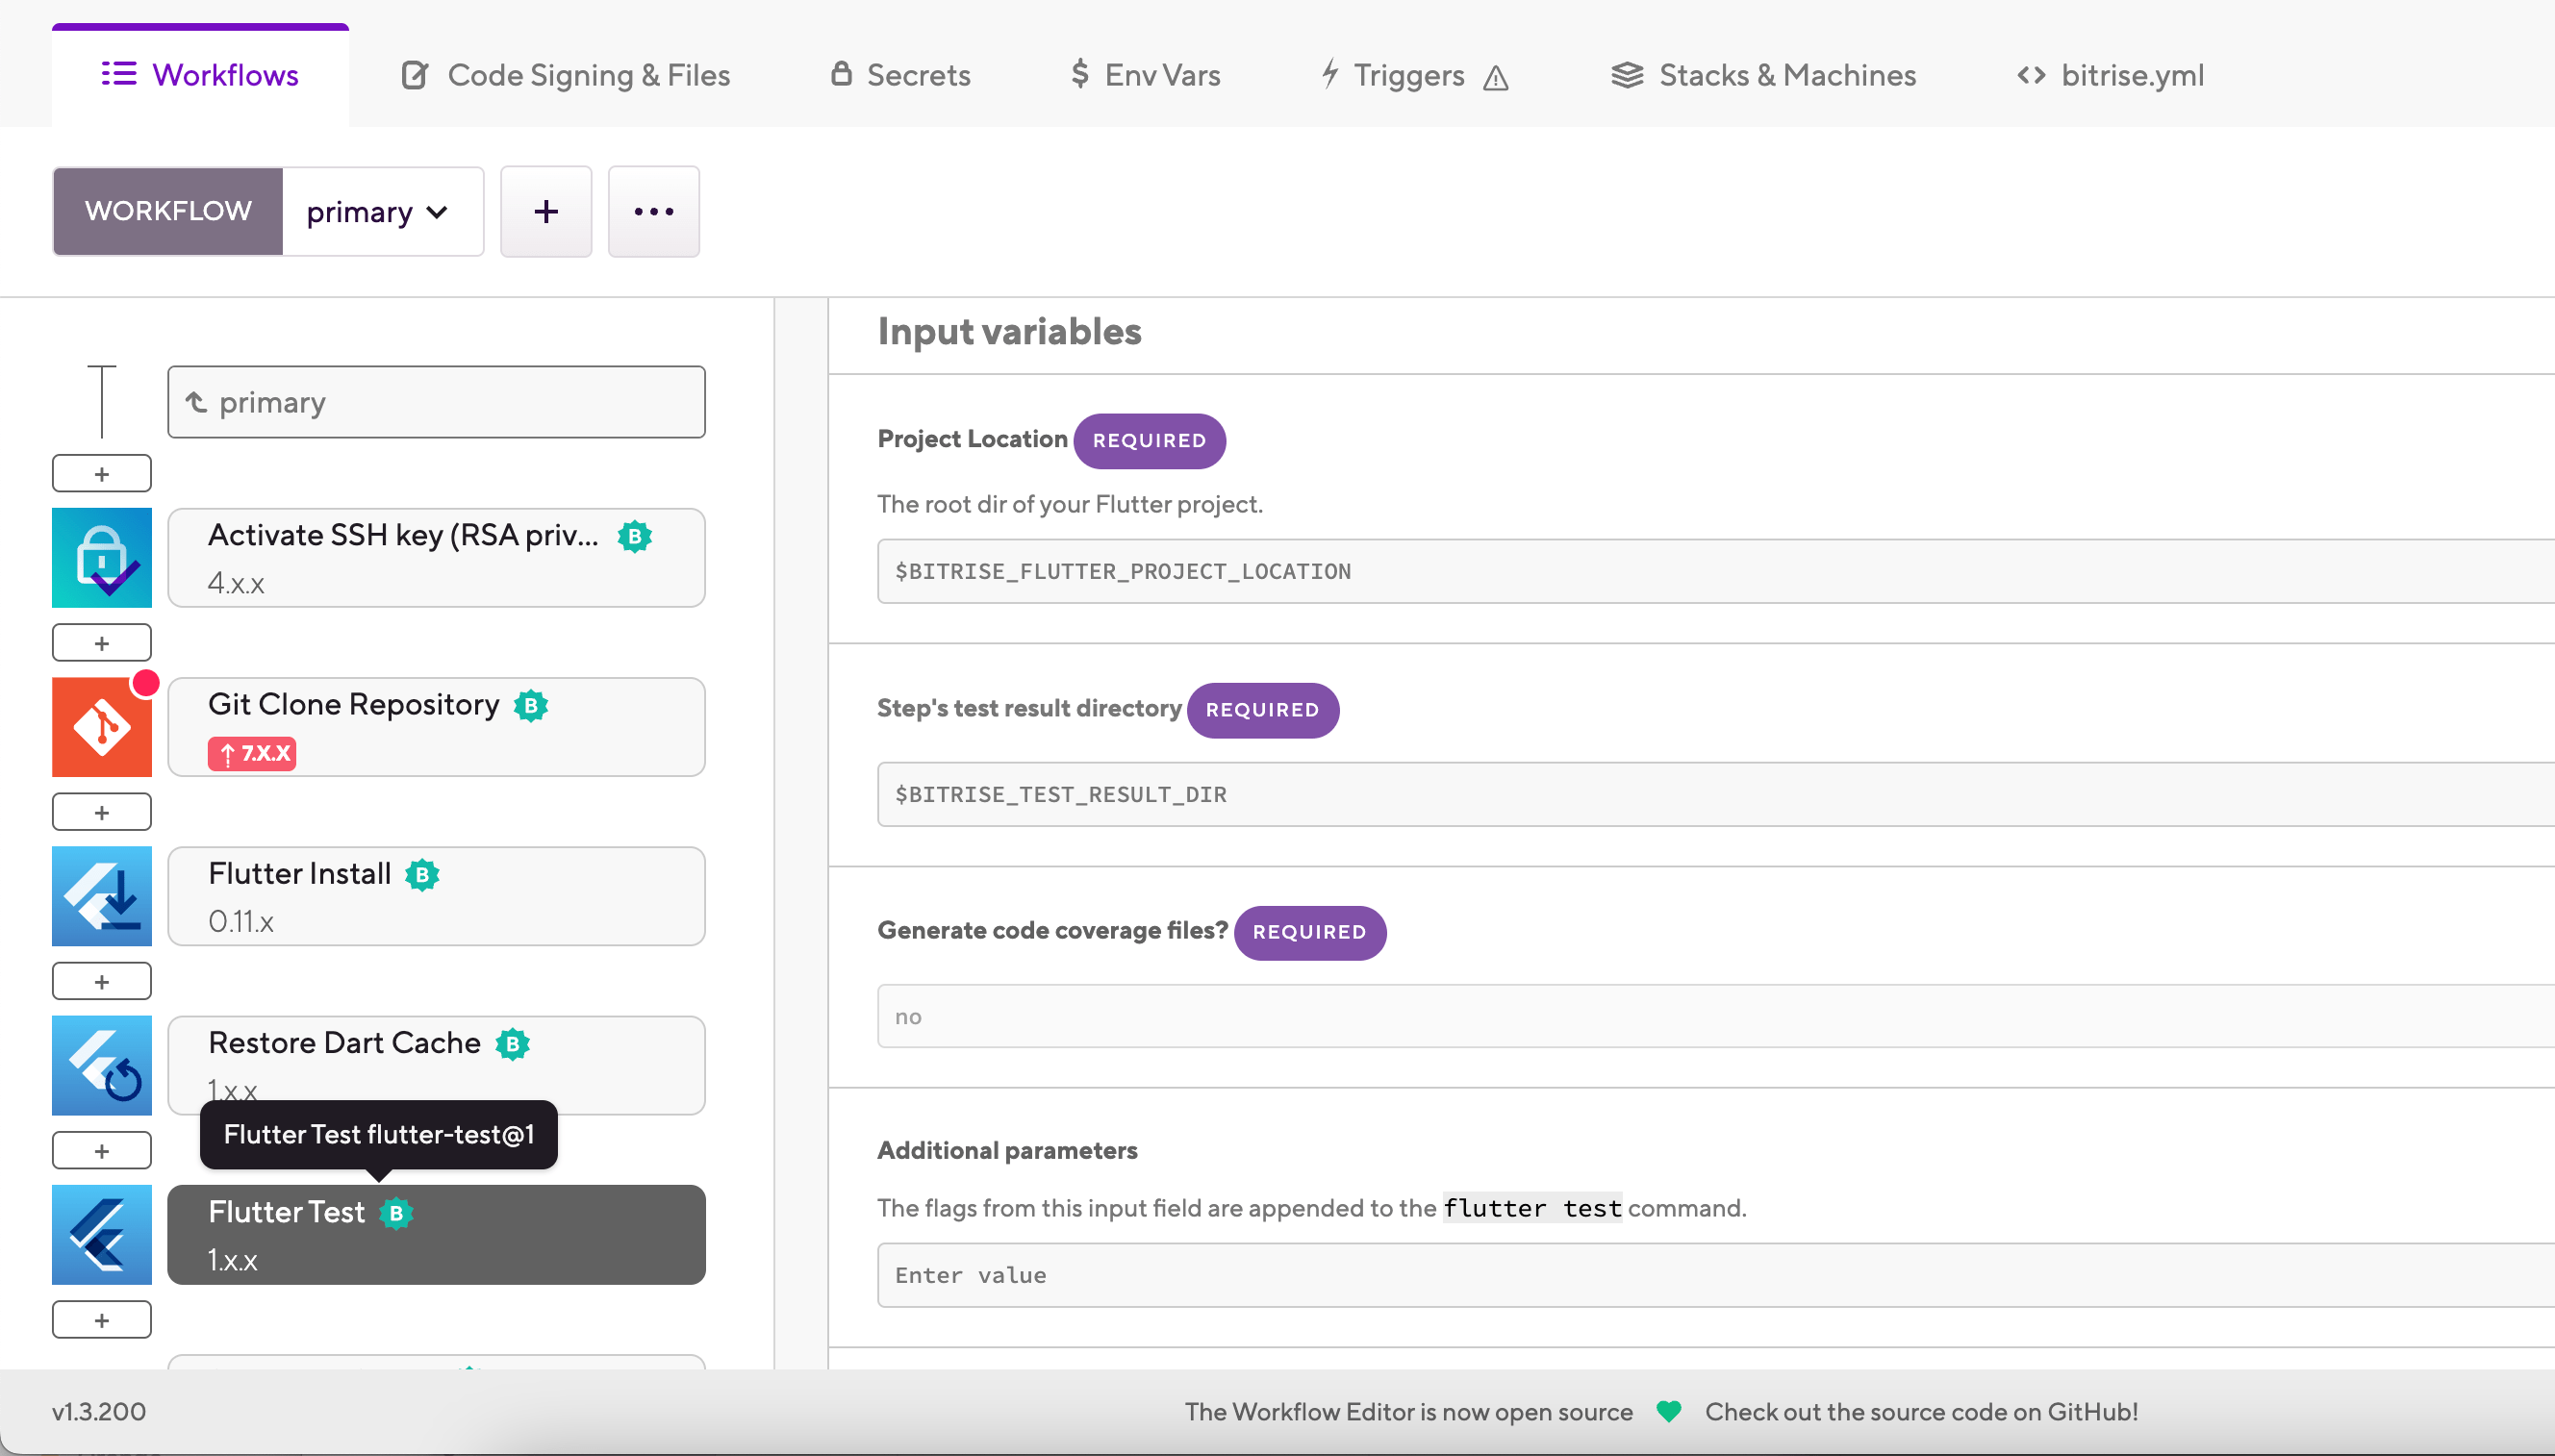
-
If the project scanner automatically detected it as a Flutter project when adding it as an app on Bitrise, you don't have to change the default value.
-
If you configured the app manually, check that the location is correct. You can do so by going to the Env Vars tab on the Workflow Editor, and checking the
BITRISE_FLUTTER_PROJECT_LOCATIONEnvironment Variable.
-
-
By default, the Step will find and run all tests. But you can configure it to run only selected tests: use the Test files pattern input to tell the Step which tests to run.
The input accepts both * and ** glob formats. For example,
lib/**/*_test.dartis a valid input.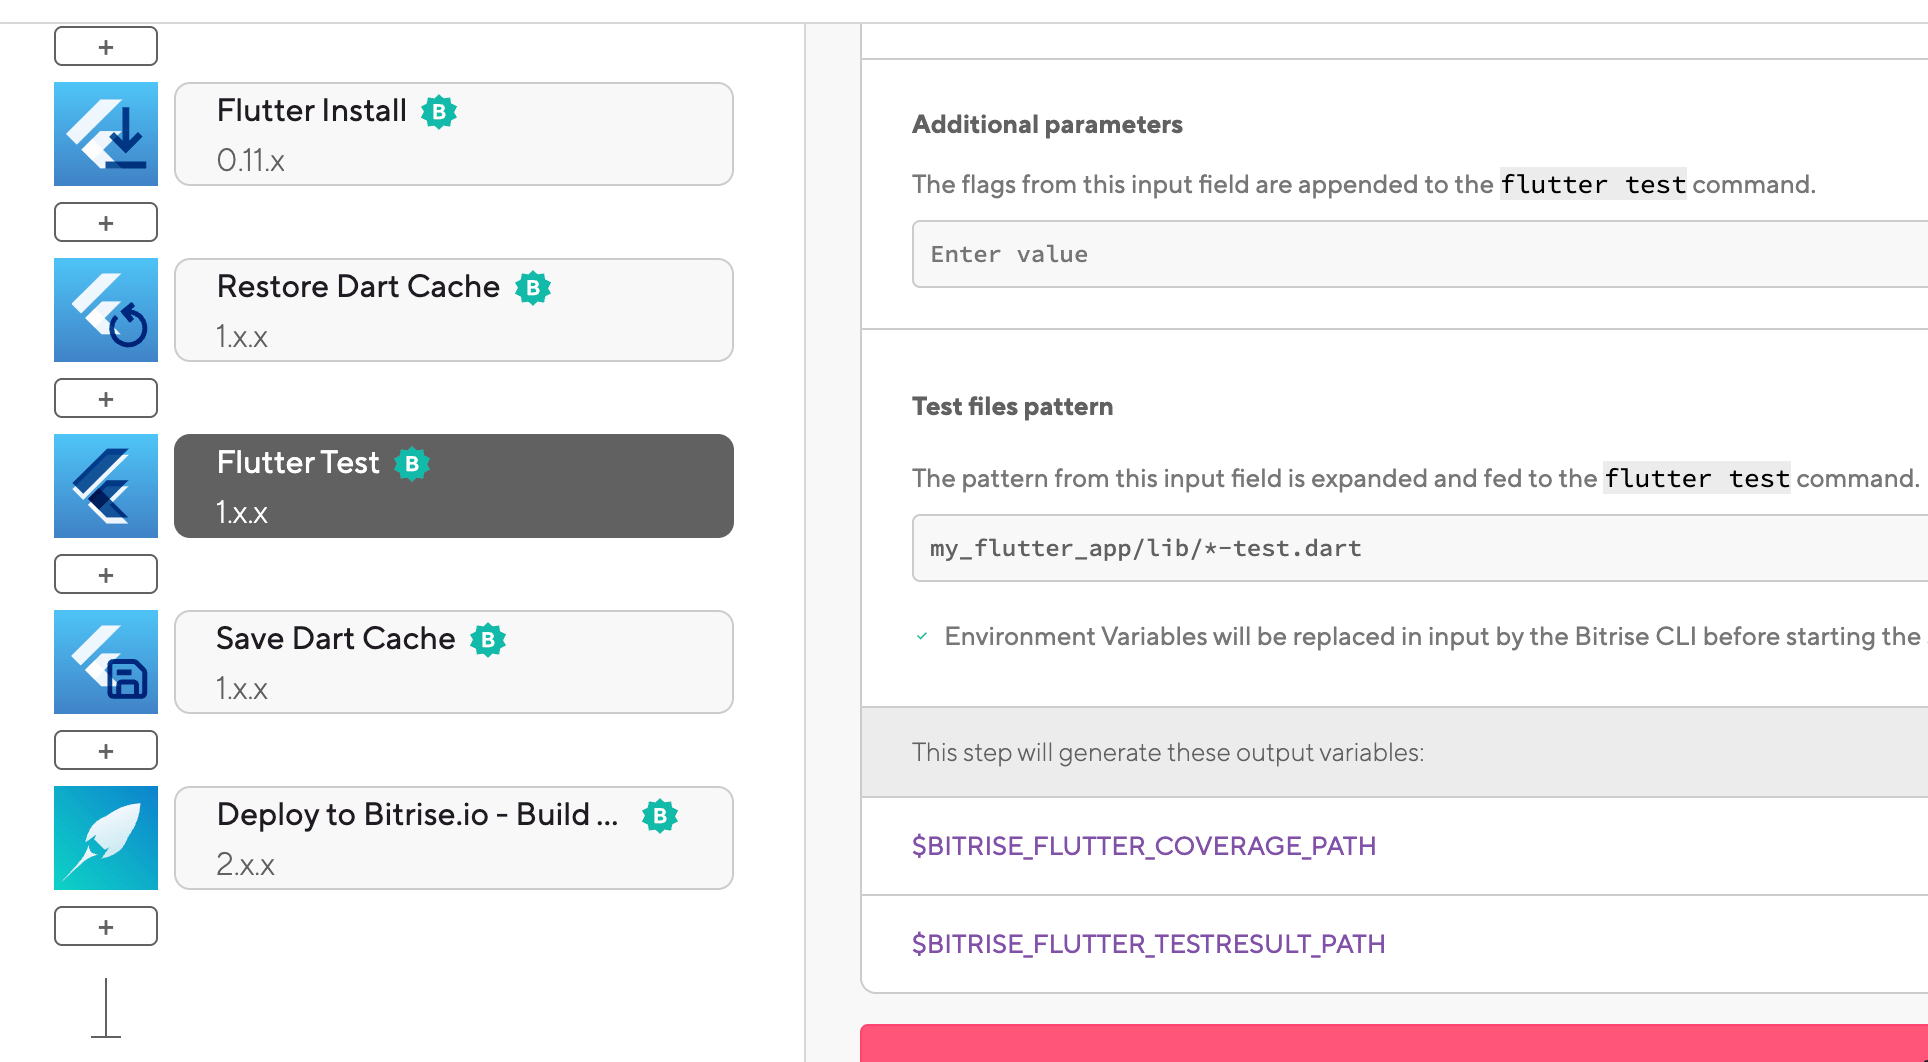
-
Optionally, use the Additional parameters input to append flags to the flutter test command.
To see the available options, run the flutter help test command. You can do so on your own device or in a Script Step on Bitrise.
-
Optionally, set the Generate code coverage files? input to to generate code coverage files.
With this input turned on, the
--coverageflag is appended to the flutter test command. -
Optionally, you can access the generated json test report and the code coverage file (
lcov.info) in subsequent Steps by using theBITRISE_FLUTTER_TESTRESULT_PATHand theBITRISE_FLUTTER_COVERAGE_PATHEnvironment Variables. -
To export the test results to Test Reports, add the Deploy to Bitrise.io Step to the Workflow.
-
Include tests in your Flutter project.
For more information on how to write tests and include them in your Flutter project, check the official Flutter documentation: Testing Flutter apps.
-
Add the
flutter-installerStep to your Workflow.This Step runs the initial setup of the Flutter SDK and installs any missing components.
primary: description: | Builds project and runs tests. steps: - activate-ssh-key: {} - git-clone: {} - flutter-installer: inputs: -
Make sure that the Step installs the correct version of the Flutter SDK for your app: you can specify the version using the
versioninput.The input's default value is
stable, which installs the latest stable version of the SDK. If you do not see theversioninput in your Configuration YAML file, it is set to the default value. You can, however, set the value to either a specific version tag or a branch label:-
You can find the available version tags here: Version tags.
-
You can find the available branch labels here: Branch labels.
# Installing version 3.7.7 of the Flutter SDK
- flutter-installer:
    inputs:
    - version: 3.7.7
Installation bundle URL
You can also install the Flutter SDK from an installation bundle URL: you just need to specify the URL in the
installation-bundle-urlinput. Please note that if you do so, theversioninput will be ignored entirely!The URL is expected to begin with
https://storage.googleapis.com/flutter_infra. For example:- flutter-installer: inputs: - installation_bundle_url: https://storage.googleapis.com/flutter_infra/releases/beta/macos/flutter_macos_v1.6.3-beta.zip -
-
Add the
flutter-testStep to your Workflow. It should be after theflutter-installerStep.The Step runs the flutter test command with optional flags. It can also check code coverage.
primary: description: | Builds project and runs tests. steps: - activate-ssh-key: {} - git-clone: {} - flutter-installer: inputs: - version: stable - is_update: false - restore-dart-cache: {} - flutter-test: inputs: -
Make sure the
project_locationinput points to the root directory of your Flutter project.- flutter-test: inputs: - project_location: "$BITRISE_FLUTTER_PROJECT_LOCATION"-
If the project scanner automatically detected it as a Flutter project when adding it as an app on Bitrise, you don't have to change the default value, which is
BITRISE_FLUTTER_PROJECT_LOCATION. -
If you configured the app manually, check that the location is correct. You can check where
BITRISE_FLUTTER_PROJECT_LOCATIONpoints in theenvsproperty of theapp:# Pointing to the root directory app: envs: - opts: is_expand: false BITRISE_FLUTTER_PROJECT_LOCATION: .
-
-
By default, the Step will find and run all tests. But you can configure it to run only selected tests: use the
tests_path_patterninput to tell the Step which tests to run.The input accepts both * and ** glob formats. For example,
lib/**/*_test.dartis a valid input.- flutter-test: inputs: - tests_path_pattern: /lib/*_test.dart -
Optionally, use the
additional_paramsinput to append flags to the flutter test command.To see the available options, run the flutter help test command. You can do so on your own device or in a Script Step on Bitrise.
- flutter-test: inputs: # setting a test timeout of 60 seconds - additional_params: --timeout 60s -
Optionally, set the
generate_code_coverage_filesinput to'yes'to generate code coverage files.With this input turned on, the
--coverageflag is appended to the flutter test command.- flutter-test: inputs: - generate_code_coverage_files: 'yes' -
Optionally, you can access the generated json test report and the code coverage file (
lcov.info) in subsequent Steps by using theBITRISE_FLUTTER_TESTRESULT_PATHand theBITRISE_FLUTTER_COVERAGE_PATHEnvironment Variables. -
To export the test results to Test Reports, add the
deploy-to-bitrise-ioStep to the Workflow.primary: description: | Builds project and runs tests. steps: - activate-ssh-key: {} - git-clone: {} - flutter-installer: inputs: - version: stable - is_update: false - restore-dart-cache: {} - flutter-test: inputs: - project_location: "$BITRISE_FLUTTER_PROJECT_LOCATION" - generate_code_coverage_files: 'yes' - tests_path_pattern: /lib/*_test.dart - save-dart-cache: {} - deploy-to-bitrise-io: {}