Remote access
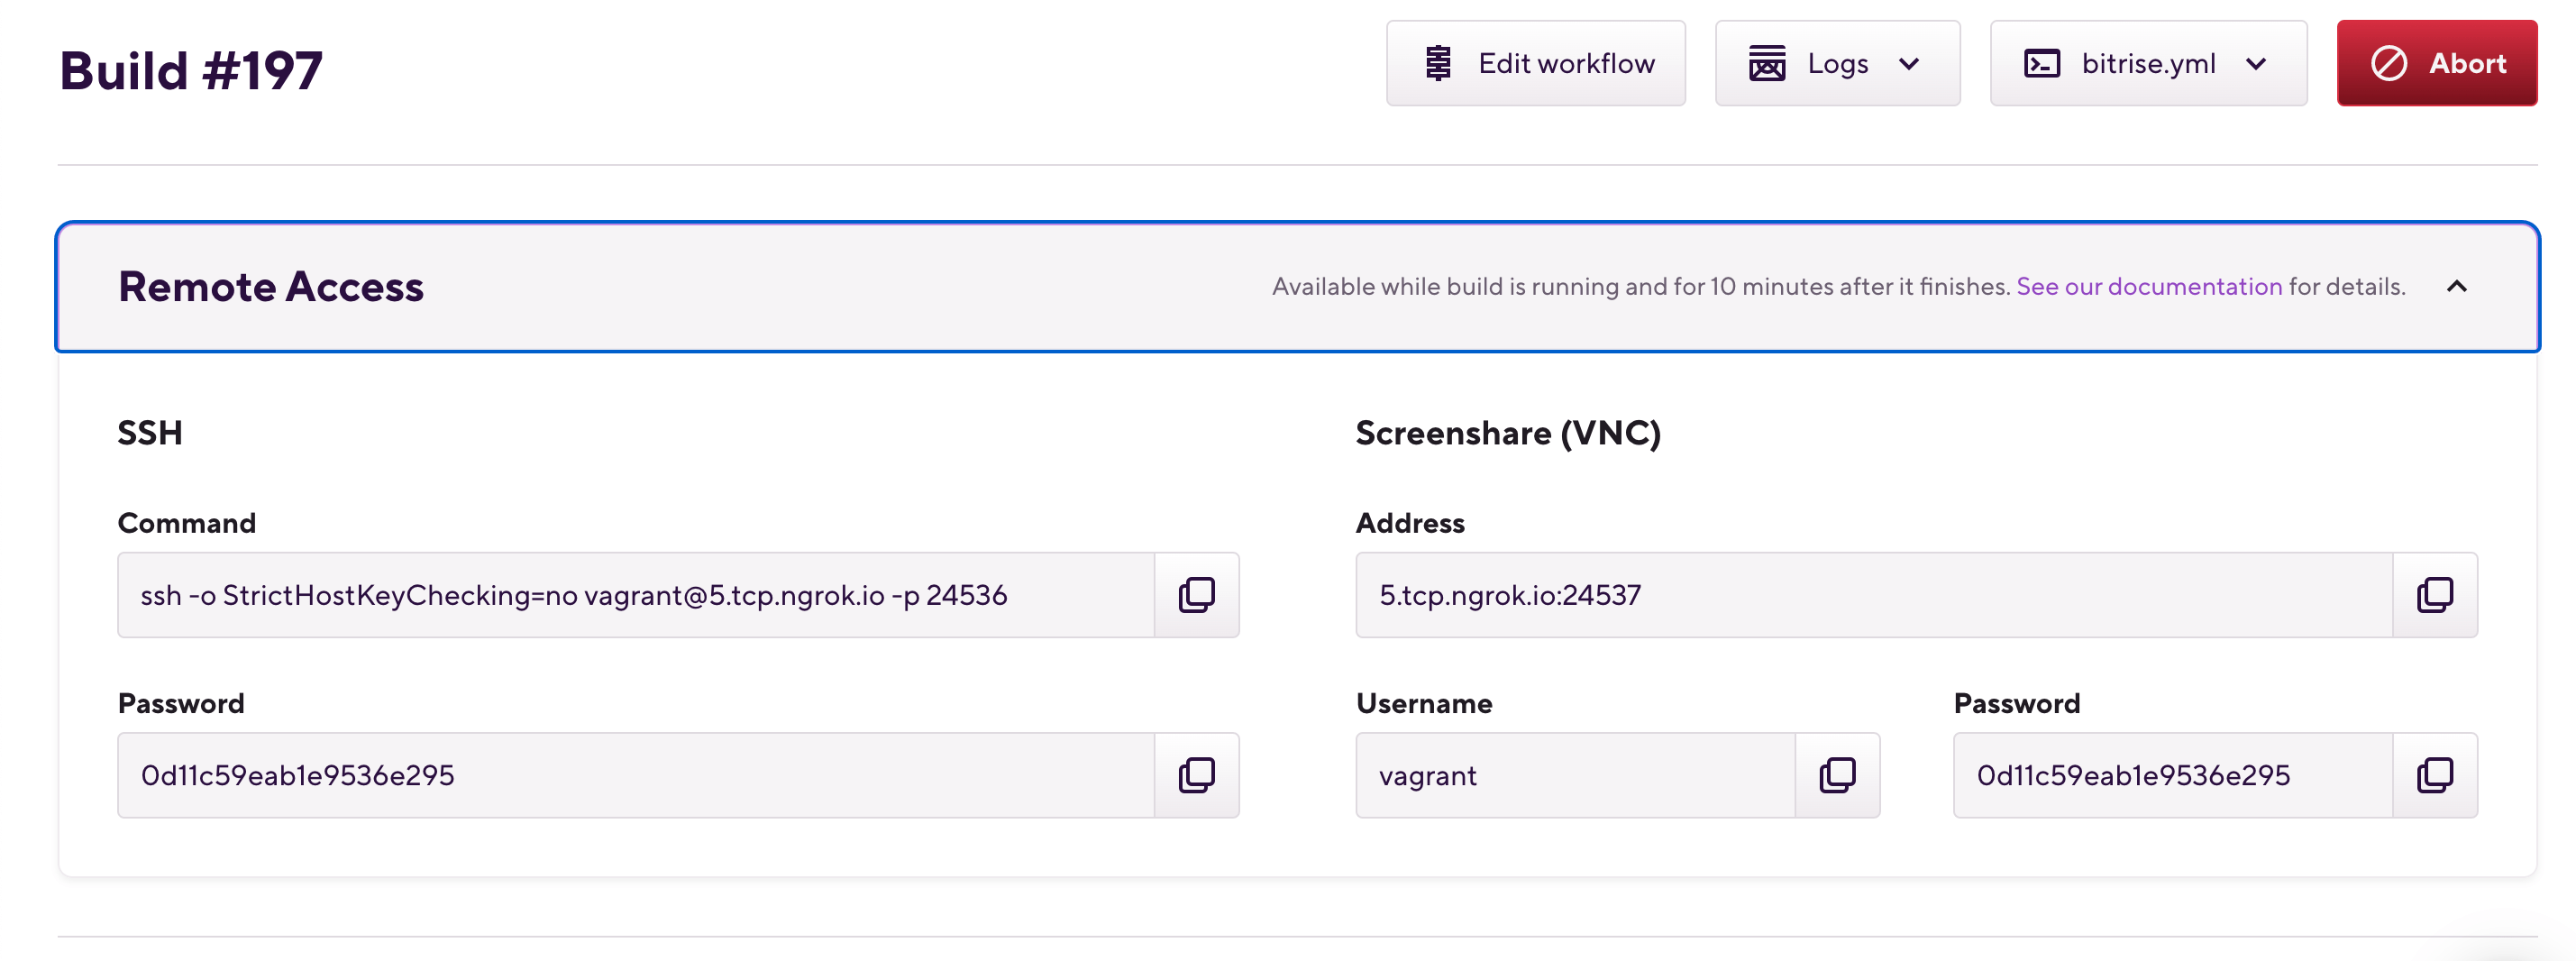
Remote access allows users to connect to their build’s virtual machines via SSH or a screenshare app, which you can access from your build's Build details page.
Remote access allows users to connect to a running build machine for easier debugging. A failed build can be rebuilt with remote access enabled to make troubleshooting a lot easier - for example, if the build logs don’t provide enough information about the error.
You can rebuild both standalone builds and pipeline builds with remote access.
Authorization
Users who have the Testers/QA roles on the app CANNOT use remote access.
There are three ways to use remote access:
-
Visual Studio Code: connect the Bitrise build to your local VSCode app as a remote repository.
-
SSH: classic remote shell connection from your terminal.
-
Screenshare: remote screen sharing withour VNC client of choice. Works with macOS builds only.
With either method, you can access the build machine remotely during the build and for 10 minutes after the build is finished. If you would like to extend the availability of remote access, you can do so by adding a simple custom Script Step after the failed Step. Check out Extending the availability of remote access for more information.
Build time
When using remote access, 10 minutes will be added to your overall build time.
Remote access with Visual Studio Code
This remote access mechanism allows your local Visual Studio Code app to connect to the Bitrise build machine as a remote repository.
You can browse and edit files in real time, use the built-in terminal to execute commands, and even install a subset of VSCode extensions.
-
Open the app on Bitrise.
-
On the main page of the app, find the build you want to re-run with remote access and click it.
-
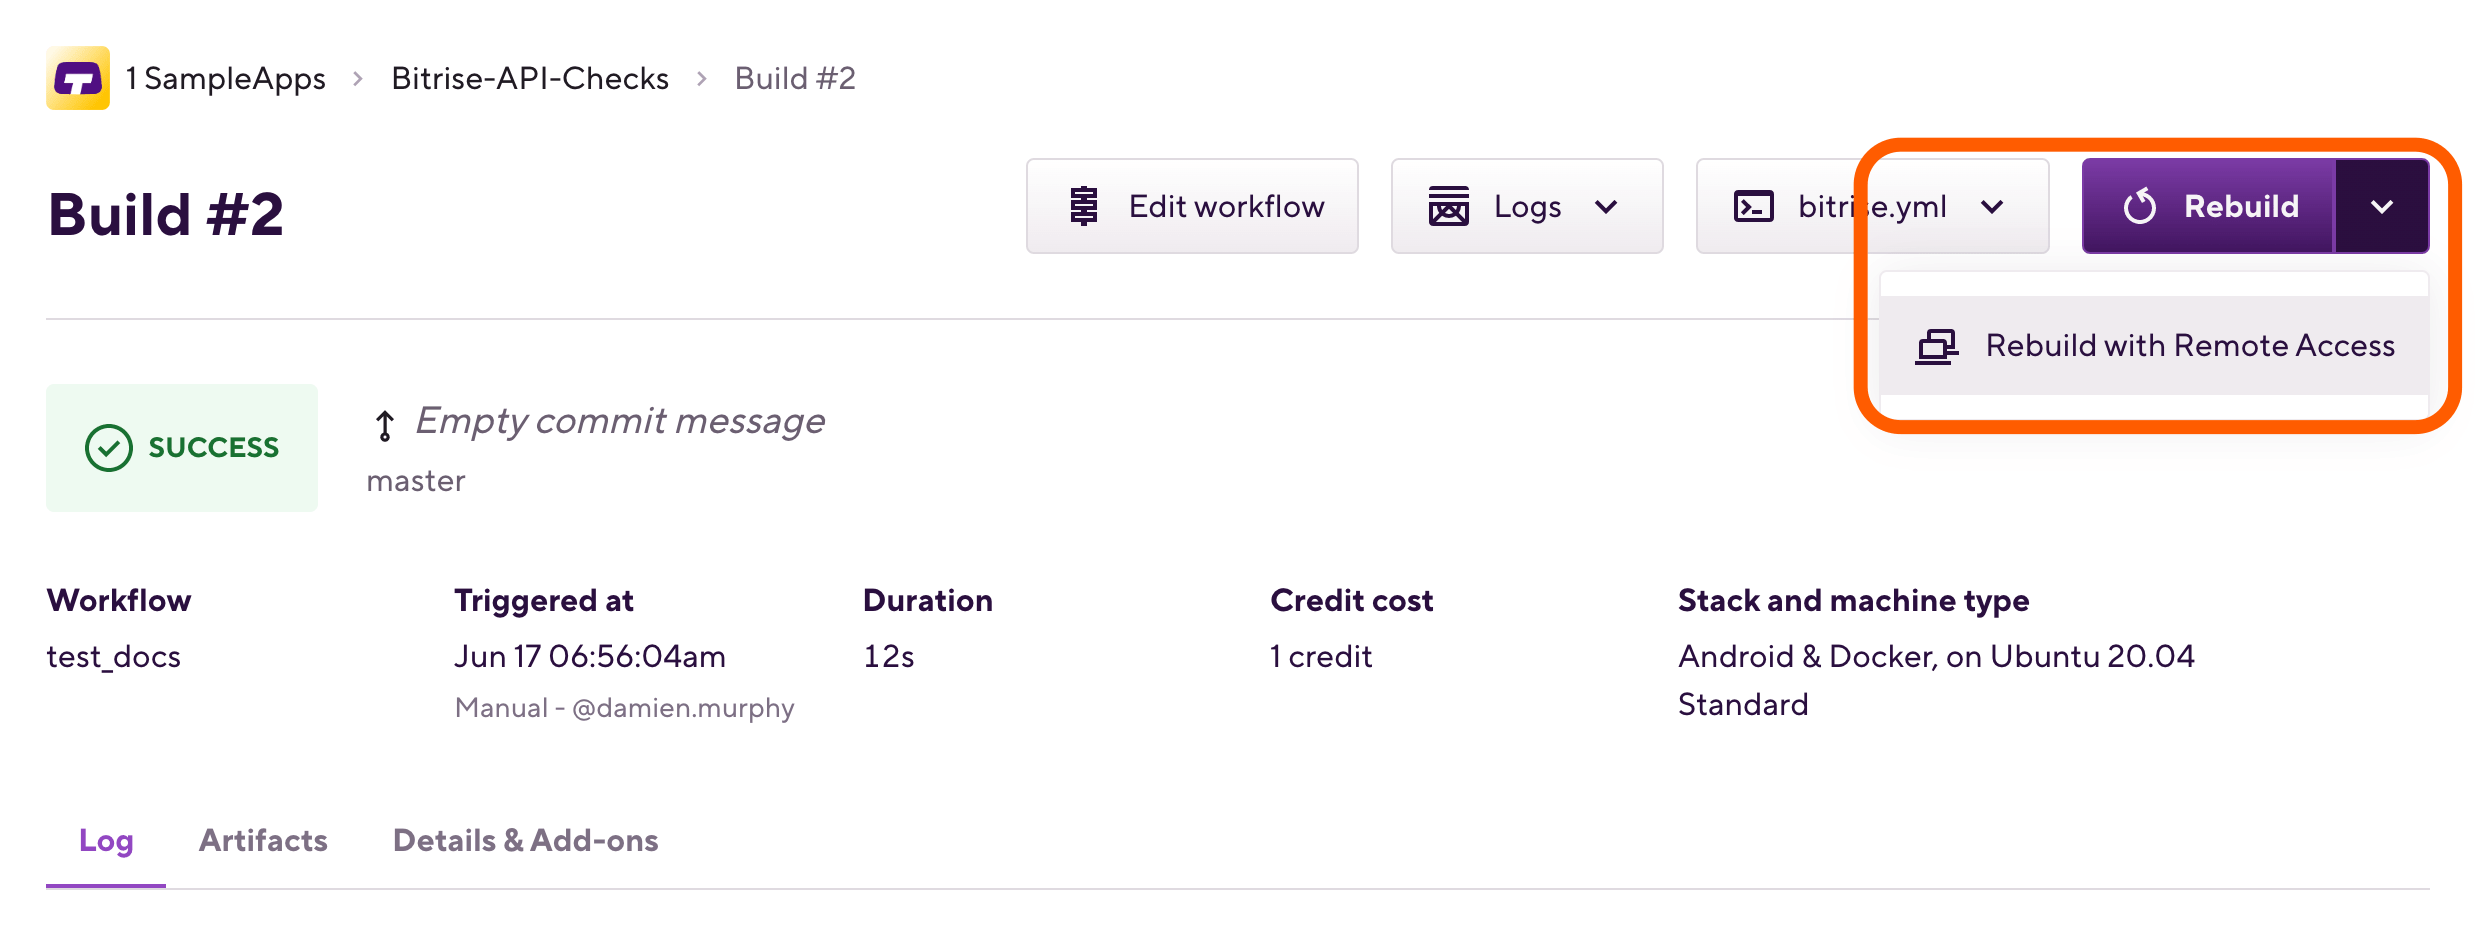
On the button, click the downward arrow to open the dropdown menu.
-
Select . This starts a new build that you can access remotely.
-
Follow the on-screen instructions to install the Bitrise CLI, its remote access extension and the connection command.

Remote access with SSH
To access a Bitrise build machine with SSH, you will need a command line interface and the correct command and password:
-
Open the app on Bitrise.
-
On the main page of the app, find the build you want to re-run with remote access and click it.
-
On the button, click the downward arrow to open the dropdown menu.
-
Select . This starts a new build that you can access remotely.

-
In the SSH section, find the Command and run it in a command line interface.

And done! You should be able to access the virtual machine where your build is running.
Finding your files on the VM
Once you successfully logged in to the Bitrise virtual machine that ran your build, you can dive into the files themselves to see what’s happening in real time. After Bitrise finished cloning your app on to the VM, you can always access it at the following location:
/Users/Vagrant/git
Extending the availability of remote access
Remote access is available while the build is running and for 10 minutes after the build is finished. If this is not enough, there’s a simple workaround to make sure remote access is available for a longer time.
-
Add a Script Step after the Step that causes the build to fail.
-
Toggle the Run if previous Step failed option on to ensure the Script Step always runs.
-
Add a command to let the build “sleep” for a time specified in seconds:
sleep 5400This example lets the build run for 90 minutes. It should be no more than your build time limit, of course.
That’s it. While the build is still running, you can look around on the virtual machine for the possible issues that caused it to fail.