Device testing for iOS
With Bitrise’s iOS device testing solution, you can run iOS tests on physical devices without having to set up and register your own devices.
With Bitrise’s iOS device testing solution, you can run UI tests for iOS apps on physical devices without having to set up and register your own devices: you just need to use our dedicated Steps and set the device type(s) on which you want to test your app. There are no limits to using the Step, other than your overall build time limit. It also works for iOS apps developed using other frameworks, such as Flutter or React Native.
Our device testing solution is based on Firebase Test Lab: it uses real, production devices running in a Google data center to test your app. The devices are flashed with updated APIs and have customizable locale settings. You can find the resulting logs, videos and screenshots on Bitrise.
For iOS apps, Firebase Test Lab runs XCTest tests. Find the list of the available devices here.
Limitations
You might be limited by your overall build time. Also note that a single build can contain only one iOS Device Testing Step, performing one type of test. This is because Bitrise sends the build slug to Firebase Test Lab. Sending the same build slug results in
a Build already existserror.
Running device tests with Firebase for iOS apps
To run device tests for iOS apps with the Firebase Test Lab solution, you will need to add two Steps to your Workflow:
-
Xcode Build for testing for iOS.
-
iOS Device Testing.
Multiplatform apps
The Step can run device tests for iOS apps built with other frameworks, such as Flutter or React Native. You just need to make sure the Xcode Build for testing for iOS Step can access your app's .xcodeproj or .xcworkspace
file.
The Xcode Build for testing for iOS Step performs the xcodebuild command’s build-for-testing action: it builds
the tests defined in your iOS app’s Xcode scheme. The Step exports a .zip file that contains your test directory (by default, it’s Debug-iphoneos)
and the xctestrun file.
To use this Step, you will need code signing files for the test app. You can choose between using automatic provisioning and manual provisioning.
The iOS Device Testing Step takes the path to this .zip file - exported as an Environment Variable - as input to run your tests and export the test results to Bitrise.
Automatic vs manual code signing asset management
The Xcode Build for testing for iOS Step can manage your code signing assets without you having to manually manage your provisioning profiles. This only requires you to select the relevant inputs in the Step (see below) and upload the right certificates to the Code Signing tab. This is the automatic code signing asset management method.
If you decide to chose the manual code signing asset management, then add the Certificate and Profile
Installer Step before the Xcode Build for testing for iOS Step. The former will take care of the code signing asset management while the latter builds your project. Make sure the Automatic code signing method input of the
Xcode Build for testing for iOS Step is set to off.
The instructions below detail the steps of setting up automatic code signing asset management on Bitrise with the Xcode Build for testing for iOS Step.
Workflow Editor
Configuration YAML
-
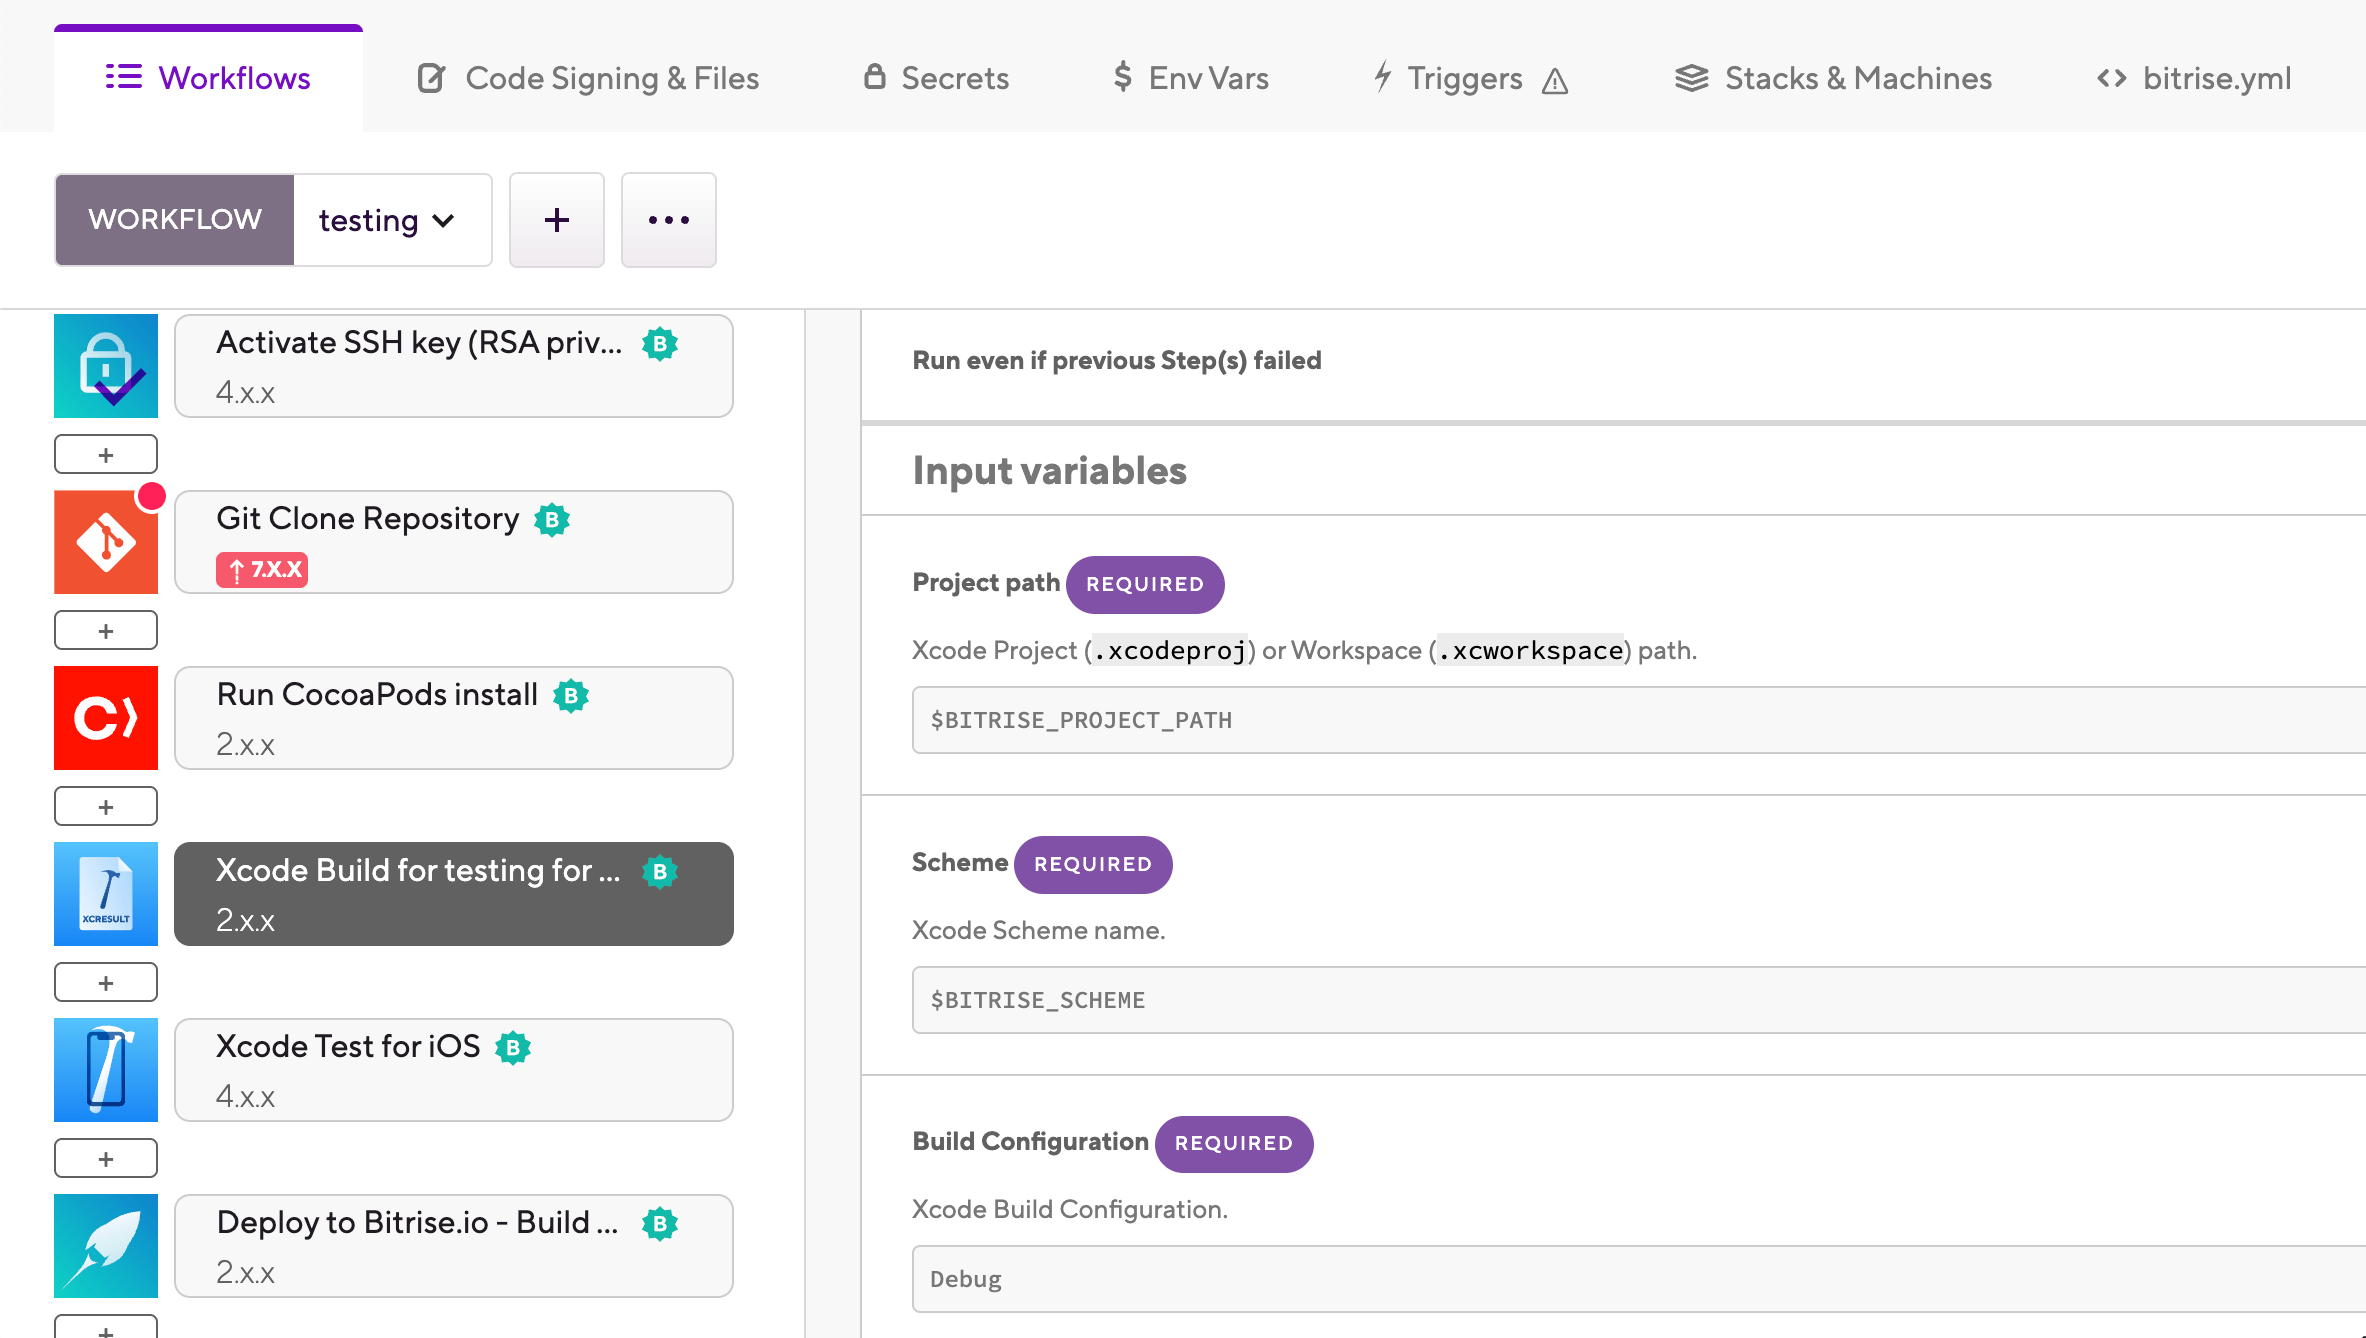
Add the Xcode Build for testing for iOS Step to your Workflow.
Build for testing
This guide only mentions the most important inputs for setting up an app for device testing. For more information about the Step, see Xcode Build for testing for iOS.
-
In the Scheme name input, set the Xcode Scheme you want to use. By default, the value of the input is the
$BITRISE_SCHEMEEnvironment Variable which is stored when your app is created. -
In the Build Configuration input, add the name of the Xcode build configuration you want to use.
If no configuration is specified, the Xcode project's default build configuration will be used.
-
Set a destination option for
xcodebuildin the Device destination specifier input of the Step.The default value is
generic/platform=ios: this means the tests can be run on any iOS device. -
Set the Automatic code signing method input to the Apple service connection you want to use for code signing. The available options are:
-
offif you don’t do automatic code signing. -
api-keyif you use API key authorization. -
apple-idif you use Apple ID authorization.
-
-
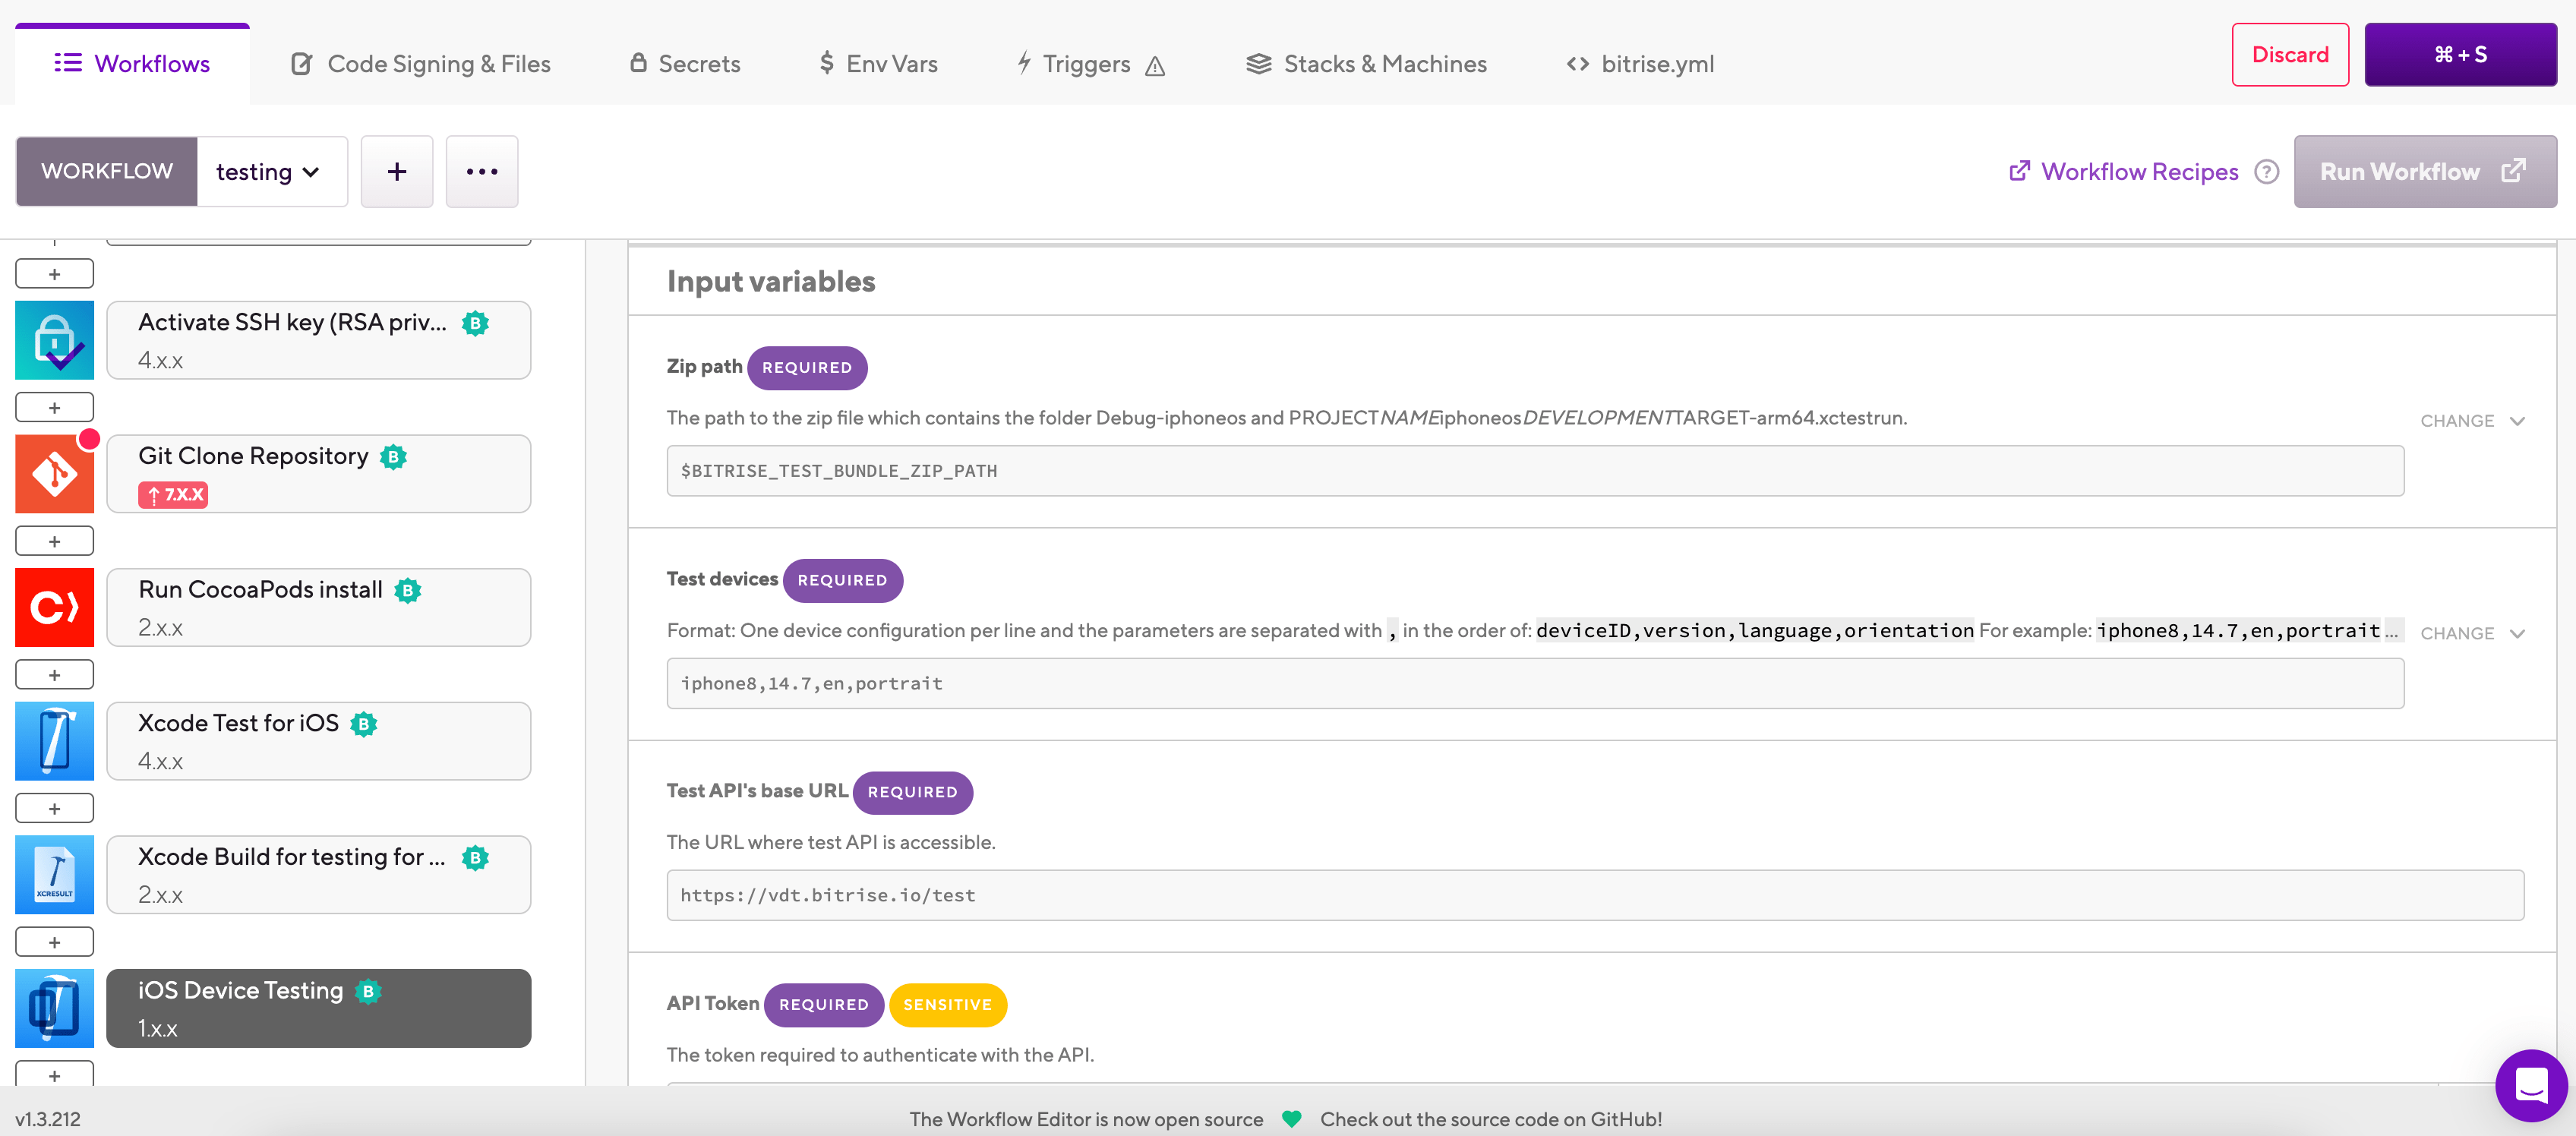
Add the iOS Device Testing Step to the Workflow.The Step has to come after the Xcode Build for testing for iOS Step.
API setting inputs
The inputs related to the Test API (Test API's base URL and API token cannot be changed on the graphical UI. You should not attempt to modify their values.
-
In the Test devices input field, specify the devices on which you want to test the app.
Find the list of the available devices here. You can add multiple devices to the input, in the following format:
deviceID,version,language,orientation -
Make sure you have the Deploy to Bitrise.io Step in your Workflow, with version 1.4.1 or newer. With the older versions of the Step, you won’t be able to check your results on the Test Reports page!
-
Add the
xcode-build-for-testStep to your Workflow.Build for testing
This guide only mentions the most important inputs for setting up an app for device testing. For more information about the Step, see Xcode Build for testing for iOS.
my-workflow: steps: - git-clone: {} - xcode-build-for-test: inputs: -
In the
schemeinput, set the Xcode Scheme you want to use. By default, the value of the input is the$BITRISE_SCHEMEEnvironment Variable which is stored when your app is created.my-workflow: steps: - git-clone: {} - xcode-build-for-test: inputs: - scheme: $BITRISE_SCHEME -
In the
configurationinput, add the name of the Xcode build configuration you want to use.If no configuration is specified, the Xcode project's default build configuration will be used.
my-workflow: steps: - git-clone: {} - xcode-build-for-test: inputs: - scheme: $BITRISE_SCHEME - configuration: Debug -
Set a destination option for
xcodebuildin thedestinationinput of the Step.The default value is
generic/platform=ios: this means the tests can be run on any iOS device.my-workflow: steps: - git-clone: {} - xcode-build-for-test: inputs: - scheme: $BITRISE_SCHEME - configuration: Debug - destination: generic/platform=iOS -
Set the
automatic_code_signinginput to the Apple service connection you want to use for code signing. The available options are:-
offif you don’t do automatic code signing. -
api-keyif you use API key authorization. -
apple-idif you use Apple ID authorization.
my-workflow: steps: - git-clone: {} - xcode-build-for-test: inputs: - scheme: $BITRISE_SCHEME - configuration: Debug - destination: generic/platform=iOS - automatic_code_signing: api-key -
-
Add the
virtual-device-testing-for-iosStep to the Workflow. The Step has to come after thexcode-build-for-testStep.my-workflow: steps: - git-clone: {} - xcode-build-for-test: inputs: - scheme: $BITRISE_SCHEME - configuration: Debug - destination: generic/platform=iOS - automatic_code_signing: api-key - virtual-device-testing-for-ios: inputs: -
In the
test_devicesinput field, specify the devices on which you want to test the app.Find the list of the available devices here. You can add multiple devices to the input, in the following format:
deviceID,version,language,orientationmy-workflow: steps: - git-clone: {} - xcode-build-for-test: inputs: - scheme: $BITRISE_SCHEME - configuration: Debug - destination: generic/platform=iOS - automatic_code_signing: api-key - virtual-device-testing-for-ios: inputs: - test_devices: 'iphone8,14.7,en,portrait -
Make sure you have the
deploy-to-bitrise-ioStep in your Workflow, with version 1.4.1 or newer. With the older versions of the Step, you won’t be able to check your results on the Test Reports page!fmy-workflow: steps: - git-clone: {} - xcode-build-for-test: inputs: - scheme: $BITRISE_SCHEME - configuration: Debug - destination: generic/platform=iOS - test_plan: test - automatic_code_signing: api-key - project_path: $BITRISE_PROJECT_PATH - virtual-device-testing-for-ios: inputs: - test_devices: 'iphone8,14.7,en,portrait' - deploy-to-bitrise-io: {}
If all goes well, you should be able to view your results among the build artifacts or in the Test Reports add-on.
Checking test results
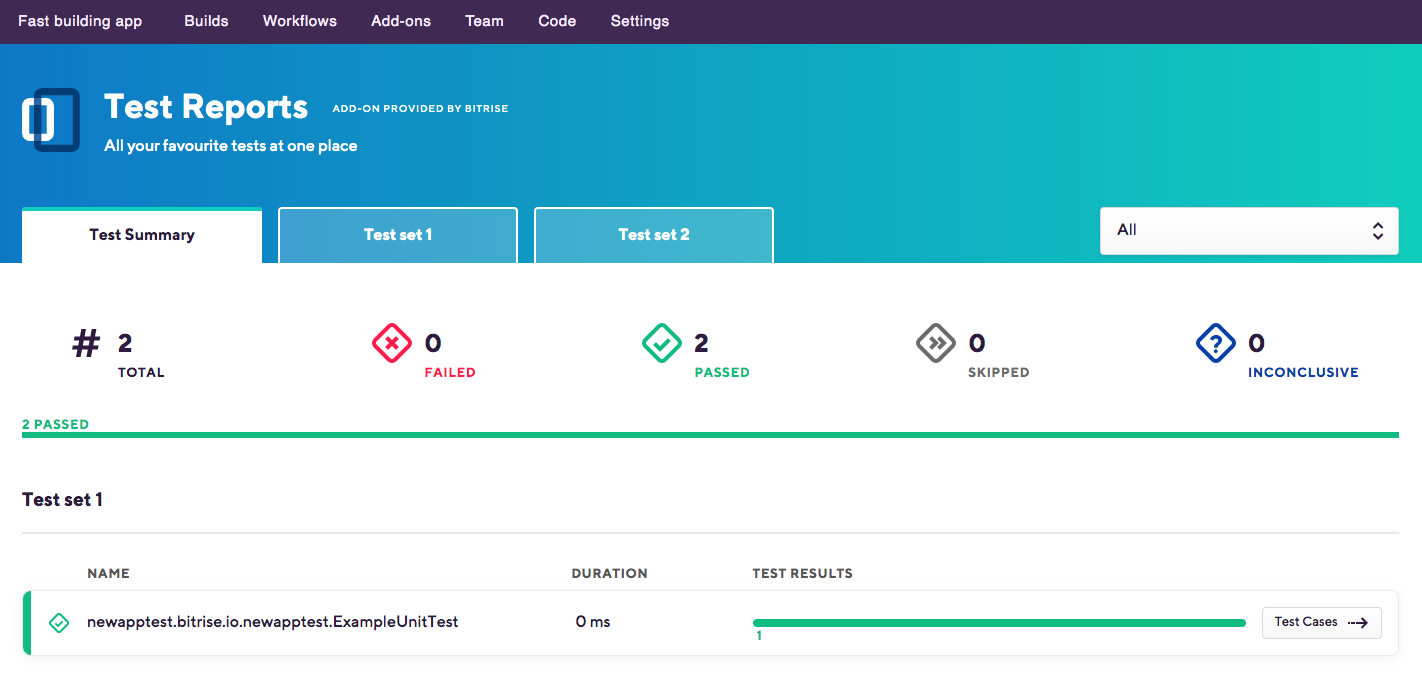
Test Reports display the most important information about all the tests you ran on the Test Summary tab. You will see all the tests you ran, their duration, and their results. You can also click on the tabs of the individual tests to see their details.
To access the result of a particular test:
-
Open the Bitrise CI page and select your project from the project list.
-
Select the build you want to check out.
-
Go to the Tests tab.
-
You can see failed tests on the Tests tab itself. If you had no failed tests, click the button.
-
On the Test Summary tab, find the test you want to check. Alternatively, on the top bar, click the tab of the test set you want to check out.To filter tests based on their results, open the menu on the top right, which is set to All by default.
-
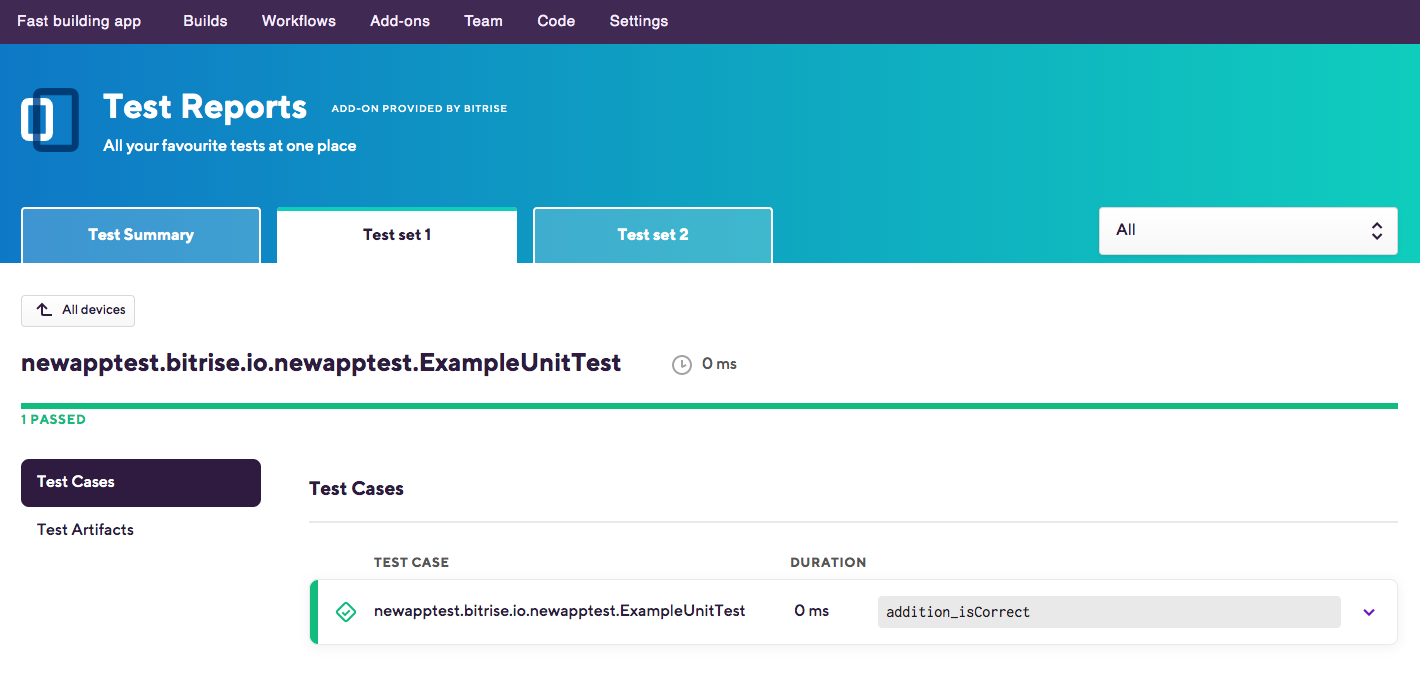
Click Test cases to see the details.
UI tests are grouped according to device while unit tests are grouped according to test cases.
You will find:
-
The total number of tests you ran, as well as the ratio of successful and failed tests.
-
The duration of each individual test (both unit tests and UI tests).
-
In the case of UI tests, the orientation and the locale of the device.
You can check, depending on the test type:
-
Individual test cases
-
Performance data
-
Videos
-
Screenshots
-
Test artifacts
-
Logs
As noted above, this depends on test type, too: for unit tests, you won’t see screenshots or videos, of course.