Running unit and UI tests for iOS apps
You need two Steps to run Xcode tests and view their results: Xcode Test for iOS, and Deploy to Bitrise.io.
You can run both unit and UI tests for iOS apps on Bitrise with our dedicated Step. The Step runs the test targets you defined in your Xcode project and exports the results either for direct download or to the Test Reports add-on.
To run Xcode tests on Bitrise, you need two Steps to run Xcode tests and view their results:
Xcode Test for iOS.
Deploy to Bitrise.io.
Code signing files
Running Xcode tests and deploying their results to Bitrise do not require any code signing files. So don’t worry about them just yet!
The Xcode Test for iOS Step runs your tests, exports your test results, the .xcresult file, all test attachments, and the log of the xcodebuild test command.
Xcode test results in HTML
You can also view your Xcode test results in a rich HTML format, using the Generate Xcode test report html Step: Viewing Xcode test results in rich HTML format.
To run tests using the Step:
Workflow Editor
bitrise.yml
-
Make sure you install all of the app's dependencies in your Workflow.
-
Add the Xcode Test for iOS Step to the Workflow.
-
Make sure the Project path input points to the correct location.
The input asks for the path to your
.xcodeproj,.xcworkspace, orPackage.swiftfile. In most cases, you don't need to change this input: when adding a new app, the project scanner automatically finds the relevant file and stores its location in the Environment Variable that is the default value of the input.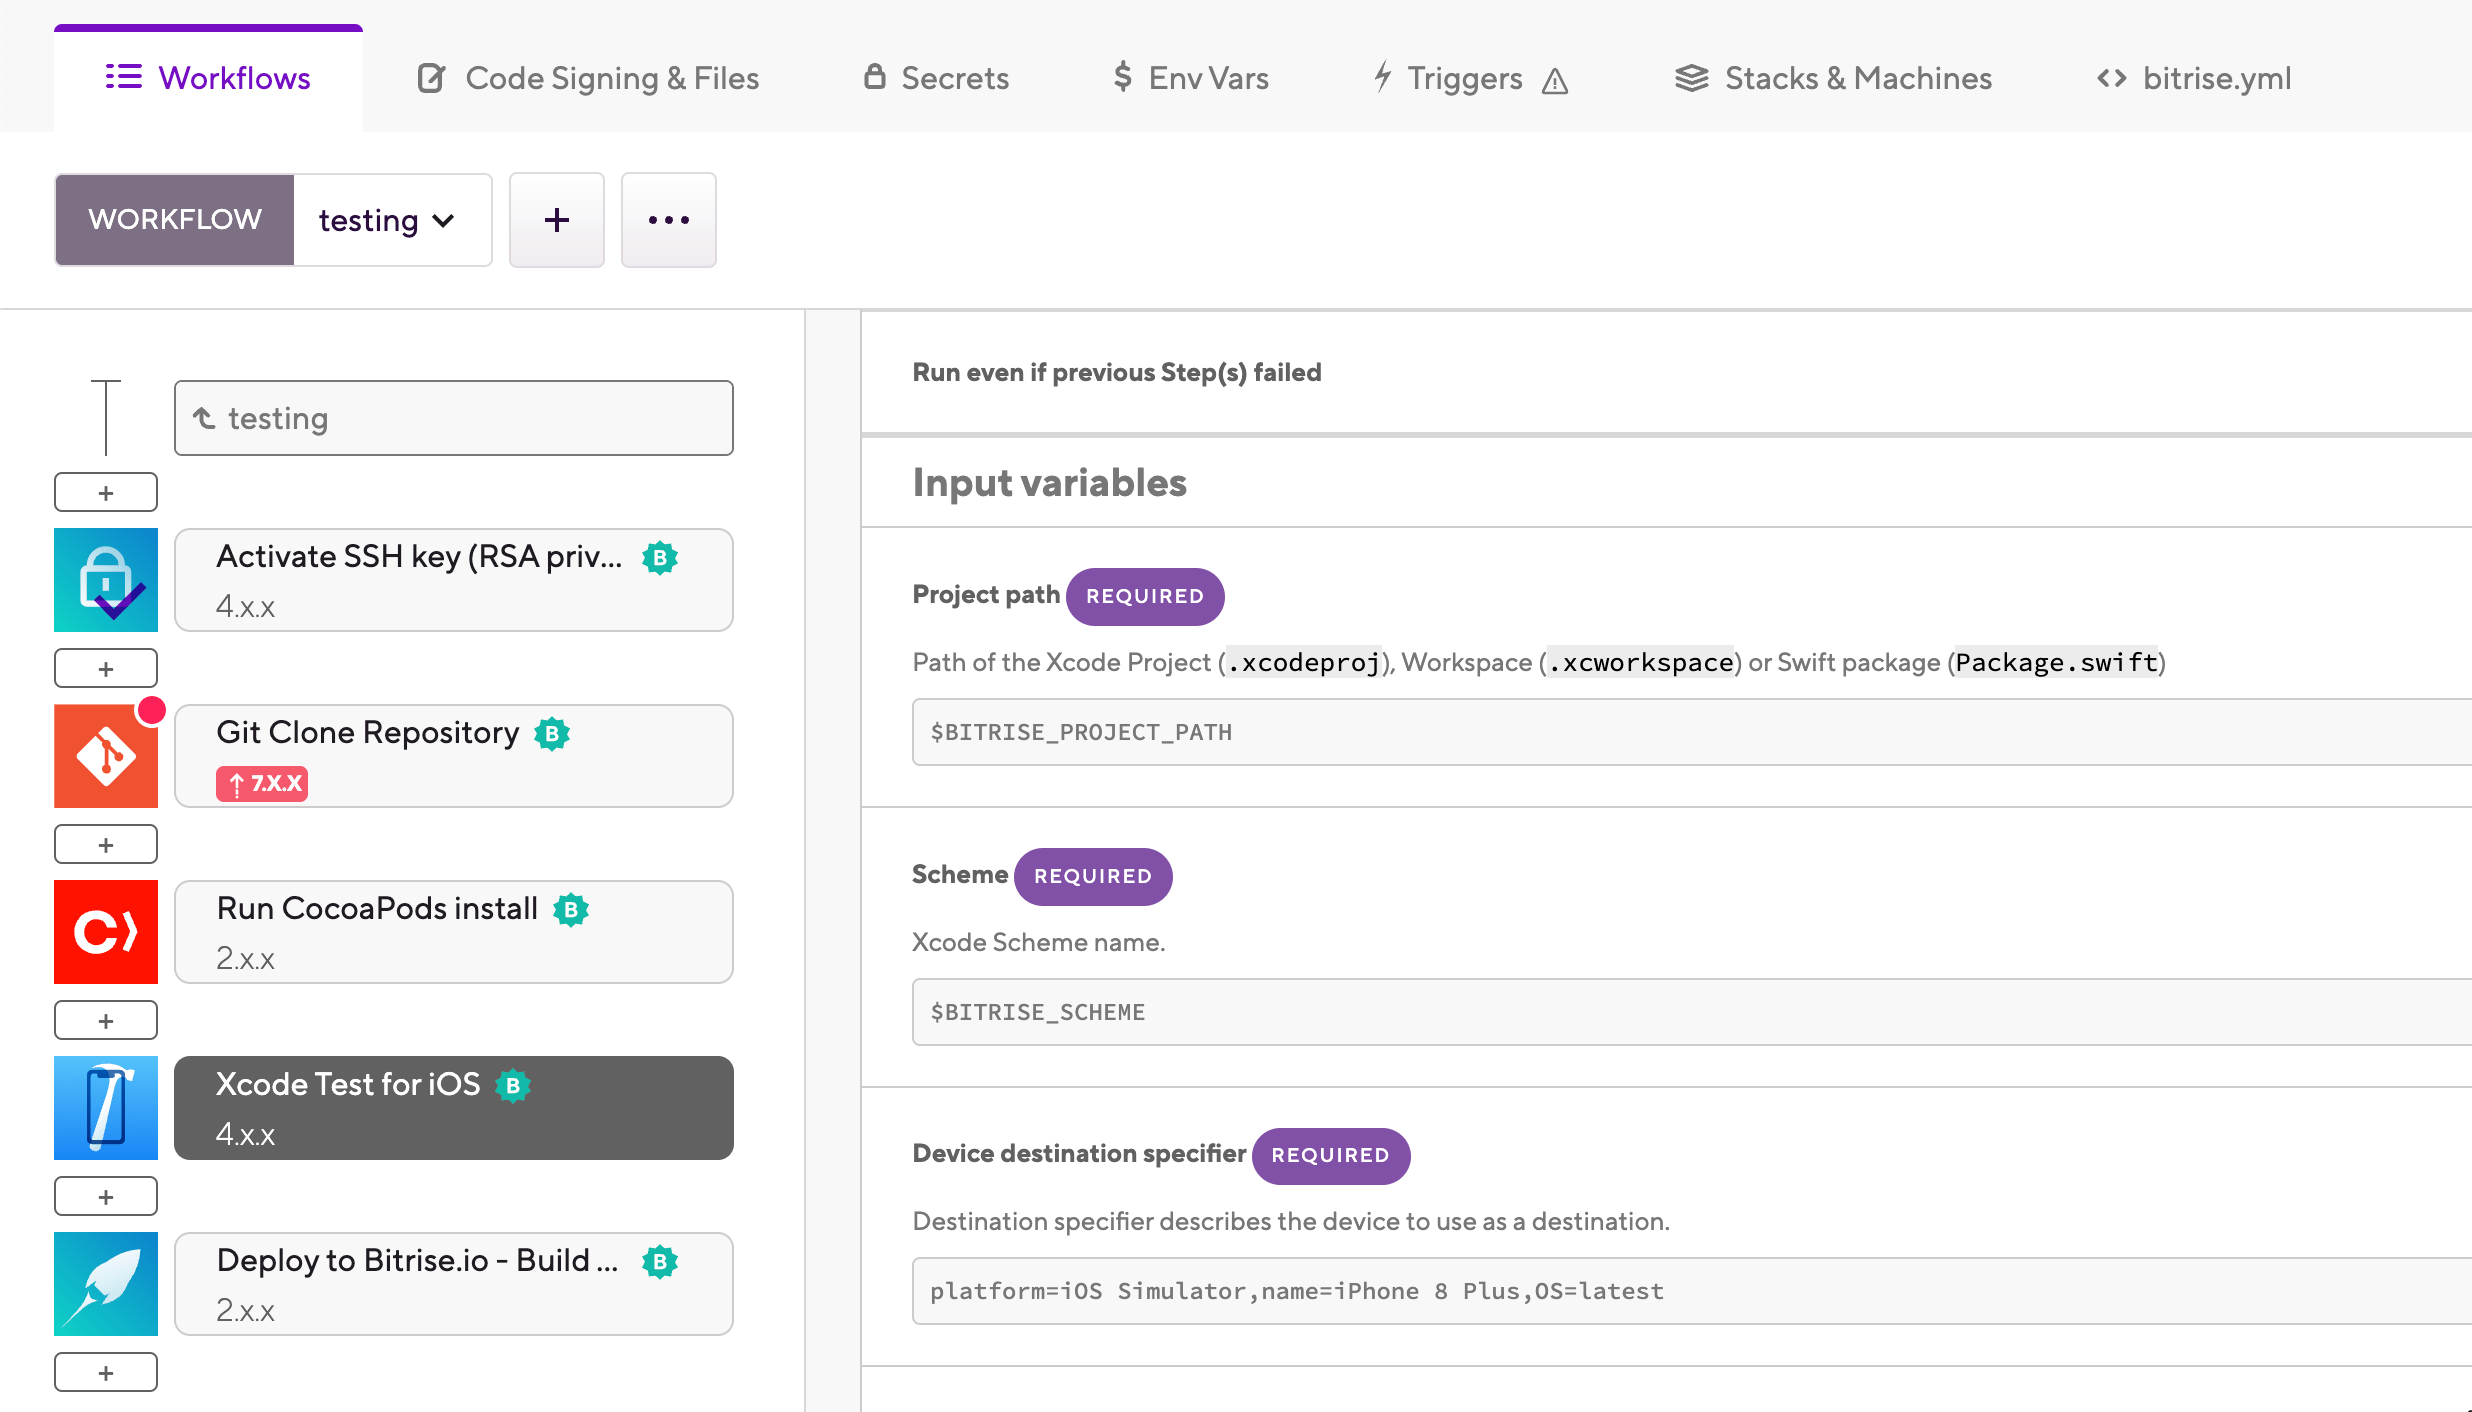
-
Make sure the Scheme input points to the scheme you want to use to build the app.
The default value is the Environment Variable that stores the scheme you set during the initial configuration of the app. If you wish to use a different scheme, type its name to the input field.
Shared scheme only
The scheme must be a shared Xcode scheme!
-
Configure the device destination in the Device destination specifier input: the input takes comma-separated key-value pairs. For example, if you wish to build an app to test on an iPhone 14 with the latest available OS:
platform=iOS,name=iPhone 14 Plus,OS=latest
The input sets the
-destinationoption of xcodebuild. Read more about the possible options: How do I run unit tests from the command line? -
Optionally, set a specific test plan in the Test plan input.
The input sets the
-testPlanoption of thetestaction of xcodebuild. If you leave this empty, the test plan specified in the Xcode scheme will be used. -
Add the Deploy to Bitrise.io Step to the end of your Workflow to be able to access the test results and other outputs either on the Artifacts tab or in the Test Reports add-on.
-
Make sure you install all of the app's dependencies in your Workflow.
-
Add the
xcode-testStep to the Workflow.your-workflow: steps: - activate-ssh-key: {} - git-clone: {} - xcode-test: inputs: -
Make sure the
project_pathinput points to the correct location.The input asks for the path to your
.xcodeproj,.xcworkspace, orPackage.swiftfile. In most cases, you don't need to change this input: when adding a new app, the project scanner automatically finds the relevant file and stores its location in the Environment Variable that is the default value of the input.your-workflow: steps: - activate-ssh-key: {} - git-clone: {} - xcode-test: inputs: - project_path: "$BITRISE_PROJECT_PATH" -
Make sure the
schemeinput points to the scheme you want to use to build the app.The default value is the Environment Variable that stores the scheme you set during the initial configuration of the app. If you wish to use a different scheme, type its name to the input field.
your-workflow: steps: - activate-ssh-key: {} - git-clone: {} - xcode-test: inputs: - project_path: "$BITRISE_PROJECT_PATH" - scheme: testShared scheme only
The scheme must be a shared Xcode scheme!
-
Configure the device destination in the
destinationinput: the input takes comma-separated key-value pairs. For example, if you wish to build an app to test on an iPhone 14 with the latest available OS:your-workflow: steps: - activate-ssh-key: {} - git-clone: {} - xcode-test: inputs: - project_path: "$BITRISE_PROJECT_PATH" - scheme: test - destination: platform=iOS Simulator,name=iPhone 14 Plus,OS=latestThe input sets the
-destinationoption of xcodebuild. Read more about the possible options: How do I run unit tests from the command line? -
Optionally, set a specific test plan in the
test_planinput.The input sets the
-testPlanoption of thetestaction of xcodebuild. If you leave this empty, the test plan specified in the Xcode scheme will be used.your-workflow: steps: - activate-ssh-key: {} - git-clone: {} - xcode-test: inputs: - project_path: "$BITRISE_PROJECT_PATH" - scheme: test - destination: platform=iOS Simulator,name=iPhone 11 Plus,OS=latest - test_plan: my_plan -
Add the
deploy-to-bitrise-ioStep to the end of your Workflow to be able to access the test results and other outputs either on the Artifacts tab or in the Test Reports add-on.your-workflow: steps: - activate-ssh-key: {} - git-clone: {} - xcode-test: inputs: - project_path: "$BITRISE_PROJECT_PATH" - scheme: test - destination: platform=iOS Simulator,name=iPhone 11 Plus,OS=latest - test_plan: my_plan - deploy-to-bitrise-io:
Headless mode
From Xcode 9 onwards, tests are run in headless mode by default: this means that the simulator will run in the background only. To change it, go to the Step’s Debug input group and set the Run the simulator in headless mode input’s value to no. However,
with this option, tests will take more time.
- xcode-test:
    inputs:
      - headless_mode: 'no'
Using xcpretty
The xcpretty output tool does not support parallel tests. If parallel tests are enabled in your project, go to the Step’s xcodebuild log formatting input group and set the Log formatter input’s value to xcodebuild or xcbeautify.
- xcode-test:
    inputs:
      - log_formatter: xcbeautify
Rerunning failed tests (Not available in Xcode 13)
The Should retry test on failure? (Not available in Xcode 13+) input in the Test repetition section of the Xcode Test for iOS Step allows you to automatically rerun ALL your tests, not just the
failed ones. If you set this input to yes, the Step will run xcodebuild one more time in the case of test failure.
From Xcode 13 and above, the feature is not available anymore. Use the Test Repetitions Mode (Available in Xcode 13+) input with the retry_on_failure option selected. This allows you to rerun only the failed test/s instead of running all your tests. You can
find this test repetition feature with our Xcode Test for iOS Step from version 3.0.0 and above.
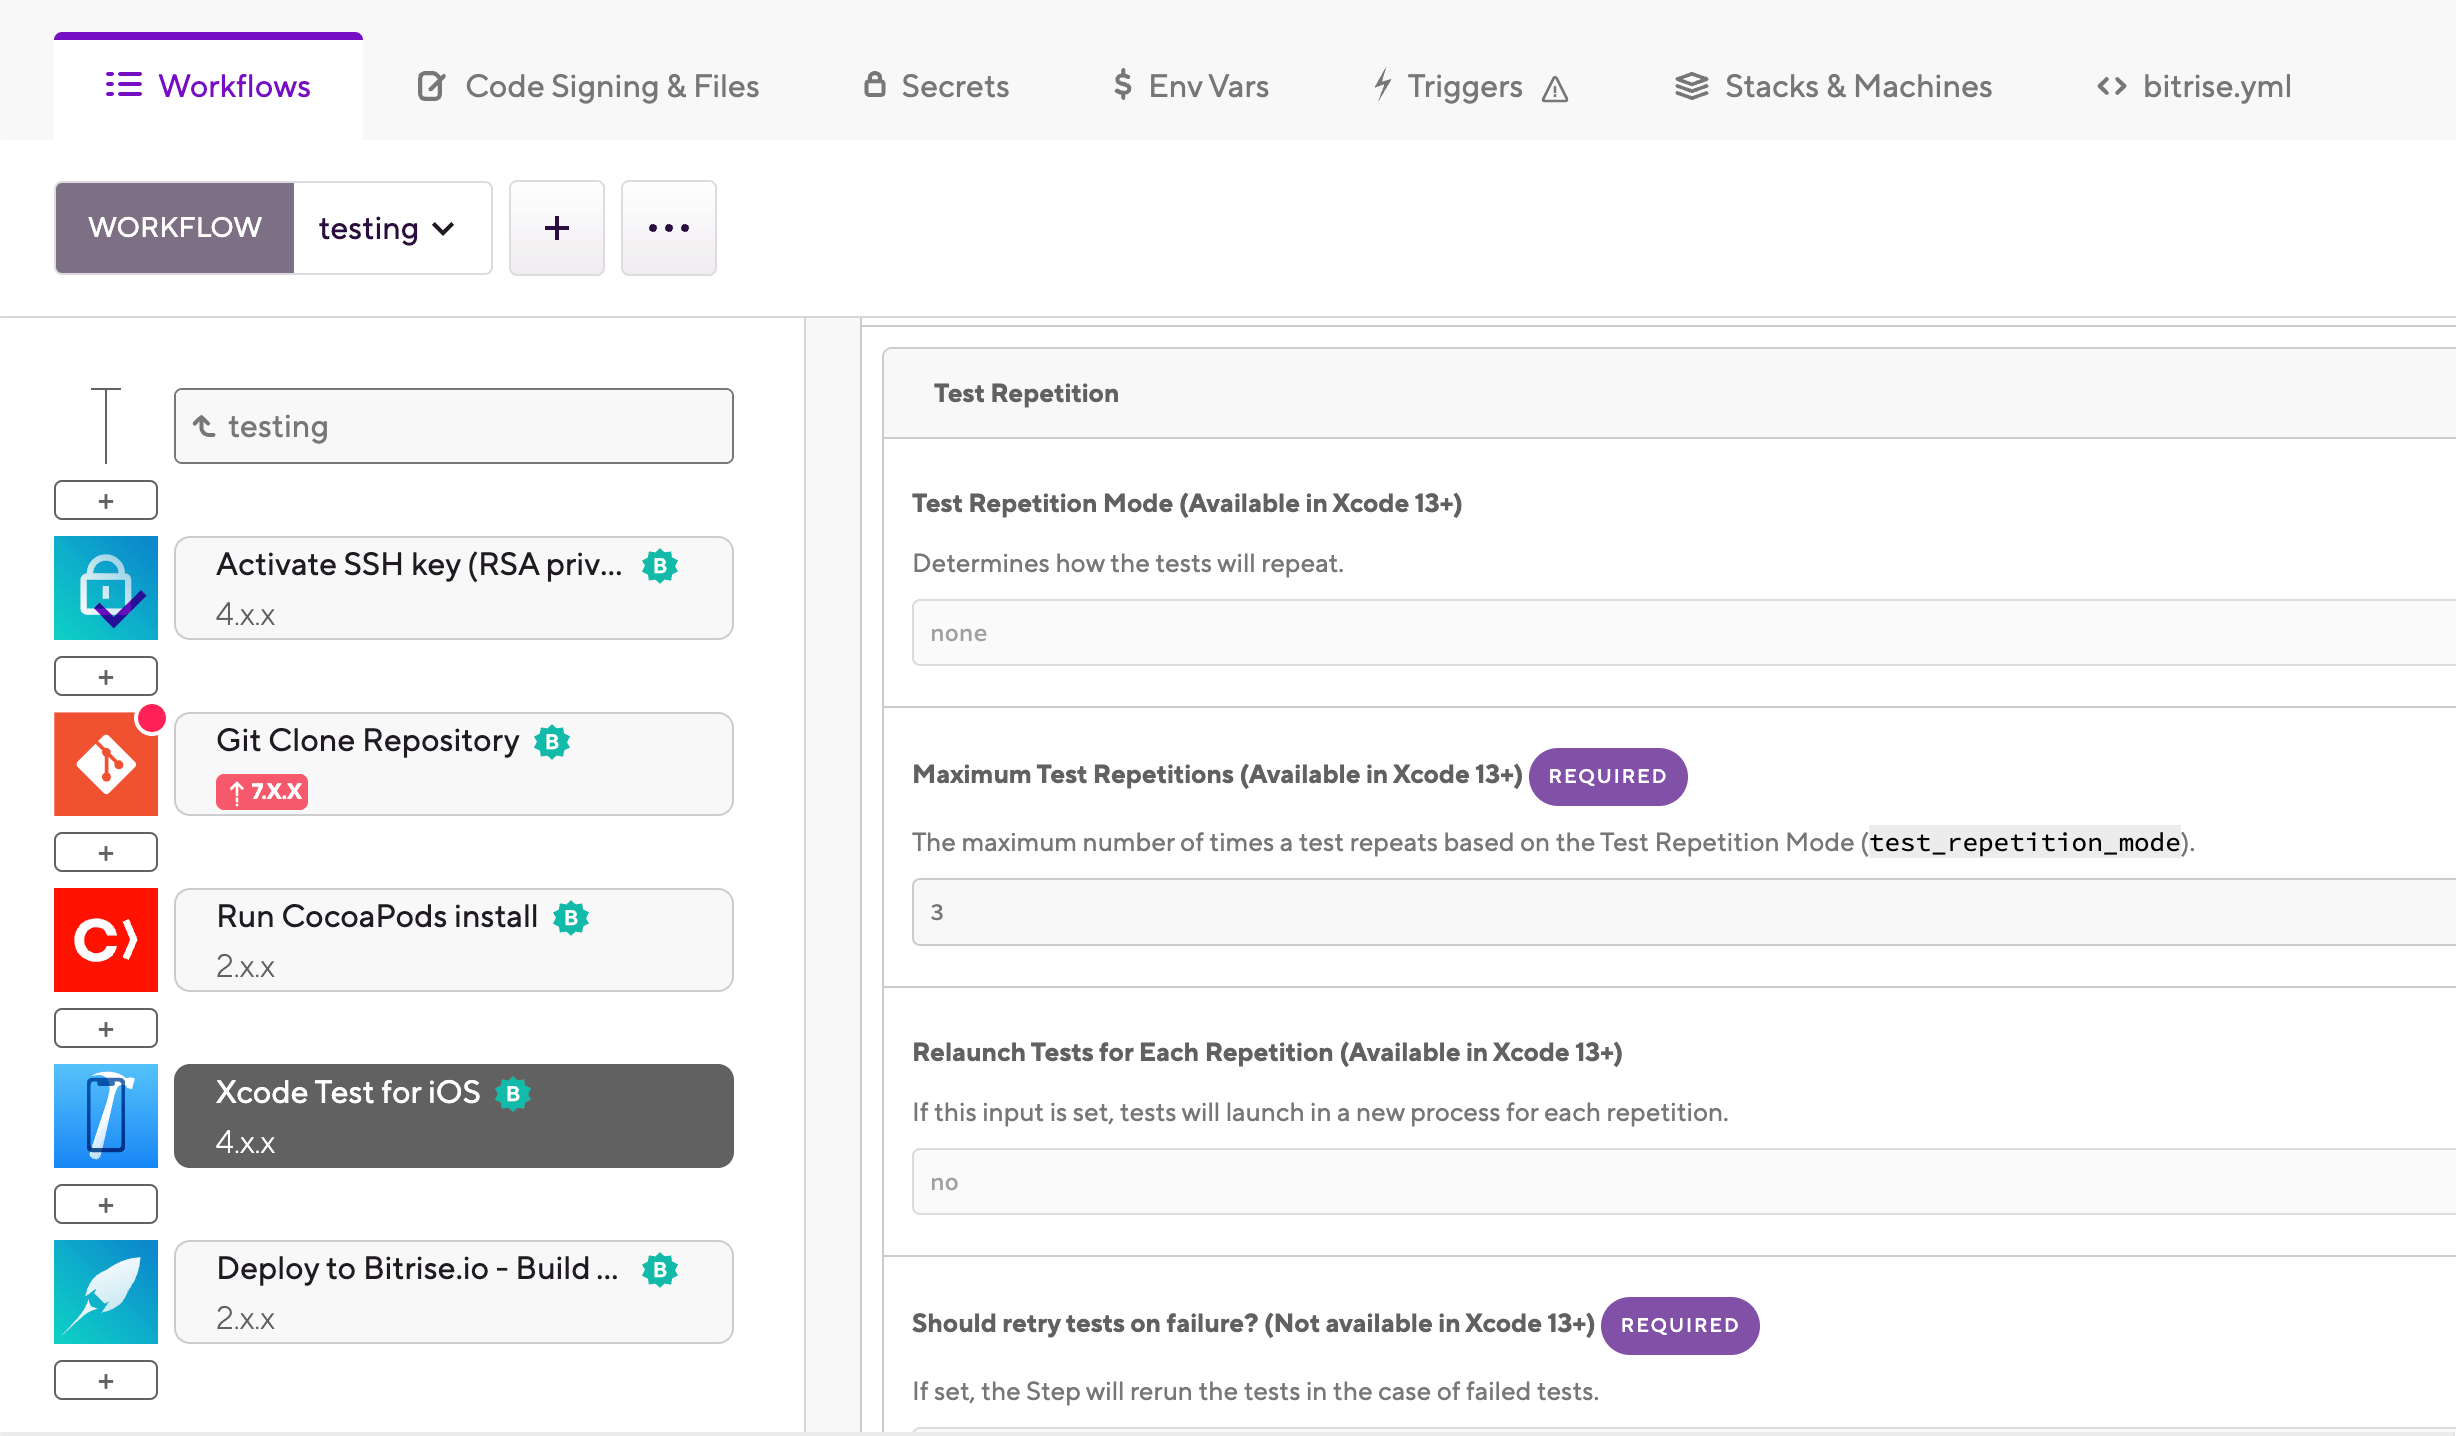
Test Repetitions
Xcode’s test repetition modes are available with the Xcode Test for iOS Step on stacks running Xcode 13 and above on Bitrise. With test repetitions, you can run any type of tests multiple times in various ways such as retry on failure, until failure and until max repetitions.
The Xcode Test for iOS Step’s Test Repetitions Mode (Available in Xcode 13+) input offers the following options:
-
none: The tests won’t repeat. -
until_failure: Repeats a test until the test fails or until the maximum repetition. The default number of test runs is three. -
retry_on_failure: Failed tests run until they succeed or until the repetition number you specify. The default number of test repetitions is three. -
up_until_maximum_repetitions: Reruns all tests until maximum test repetition is reached regardless of the test outcomes.
Please note that these options are only available from Xcode Test for iOS version 3.0.0 and above.
With the Maximum Test Repetitions (Available in Xcode 13+) input you can specify the maximum number of test repetitions. Please note that you have to add a greater number than one if the Test Repetition Mode (Available in Xcode 13+) input
is set to other than none.
Enable the Relaunch Tests for Each Repetition (Available in Xcode 13+) input to launch tests in a completely new process for each repetition.